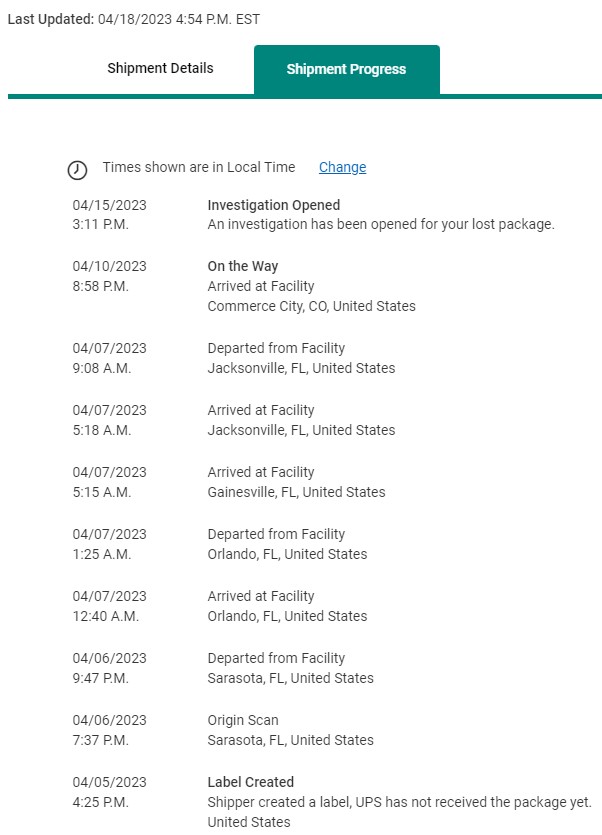
If you’re just joining me for the second art of my report, I ordered 20 Baltic Birch plywood sheets for laser cutting. This was going to create a highly detailed, high quality wood bathymetric map of Lake Vermillion, Minnesota. Unfortunately, UPS lost my wood in their Commerce City, Colorado sorting facility. I was able to get a refund of my $156, but that left me without a project or project material. I substituted carboard in for wood. This was a cheap and readily available material that would stand in for high quality wood. The production of my Bathymetric map was similar to my original plan, but at a lower quality and detail level.
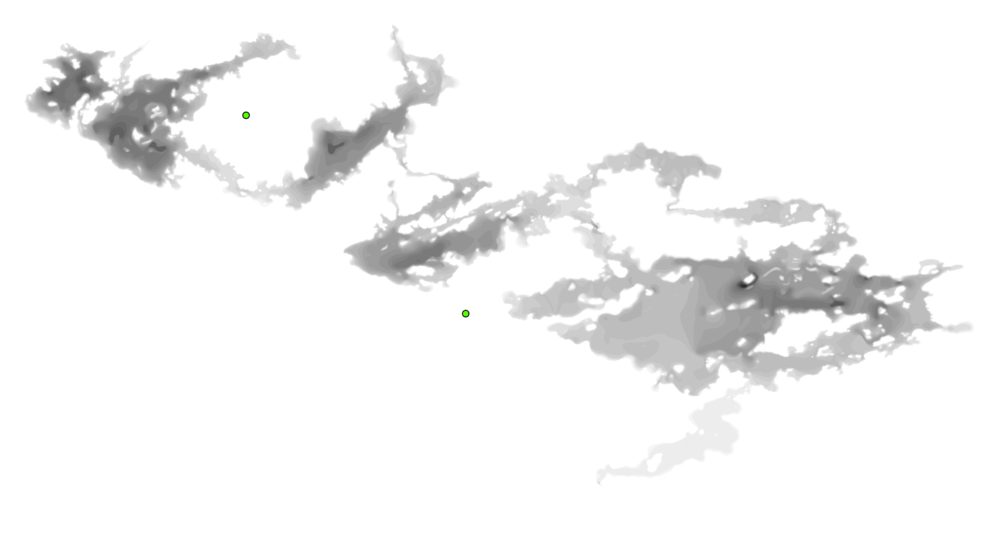
To start the process, I used open-source data from the Minnesota Department of National Resources to pull depth data. I used ARGIS to open the Digital Elevation Model of all lake depths in the state of Minnesota. I trimmed the excess 10,000 lakes to focus on my target. I was able to highlight one depth layer at a time. I chose 2.5’ increments. This means I have a layer for the surface (0’), 2.5’ deep, 5’ deep, and so on. The maximum depth of the lake is 76’, but beyond 60’, it is just one deep hole. I added 2 index points to the map, so when outputting, I can use a fastener to index the layers to align with each other. I took a screenshot of every layer. I used Microsoft paint to refine any details too small for laser cutting. Then I used an online conversion software to make DFX files from the images. DFX is a laser cutting vector file of just lines.
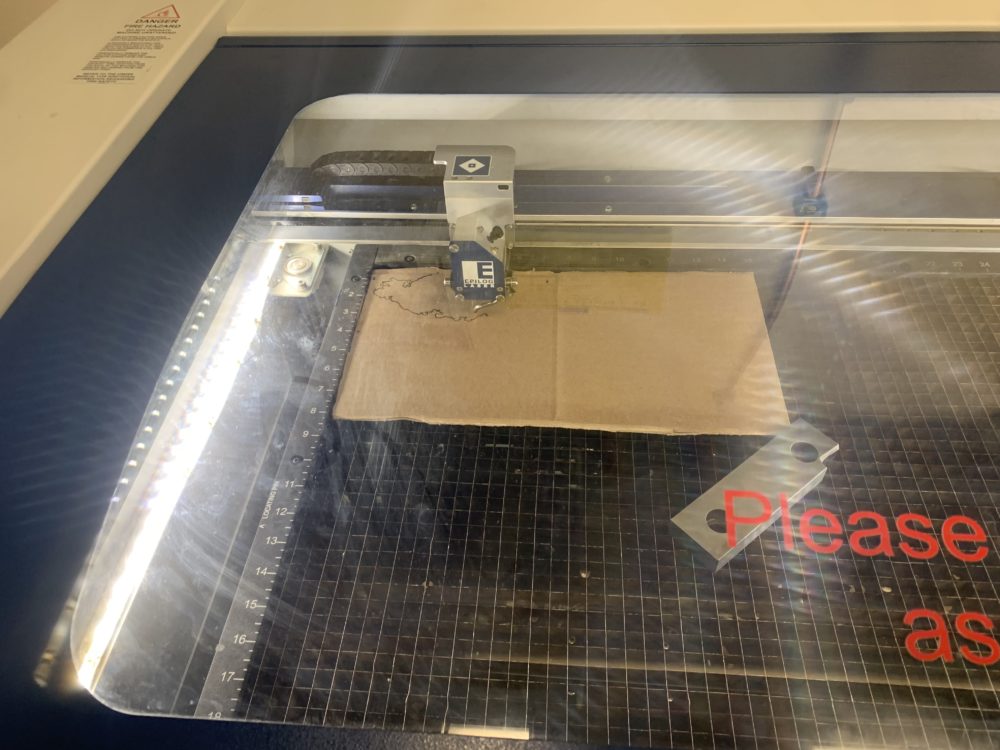
Entering the laser cutting room of the idea forge. I had an Idea Forge worker help me scale and import the files to the laser cutter. I was then able to cut each layer of the lake depth. Instead of using wood, which was unfortunately lost, I used cardboard. This doesn’t fulfill the aesthetic but comes as close as I could in my quick turnaround time. Unfortunately, cardboard has multiple layers within it, ruining the clean edges that wood would have. Cardboard also starts on fire a lot easier than wood. The laser would cause the bottom of layer of the cardboard to smolder. This lessened the quality and precision of the cardboard.
My resulting product has the lake being 7”x14”x0.75”. This is smaller than my original plan, scaled down to fit cardboard. After laser cutting the 0’, 10’, 20’, 30’, and 40’ contours, I glue them together to form the bathymetric map. I reduced the layer count to simplify the production. I knew this wasn’t going to be the heirloom piece I set out to create, so I used this as a protype instead. This gave me lots of information for if/when I implement the design into wood. I realized my detail was too fine. Many islands disappeared into small dots. Even with wood, I fear that much detail would be lost, even if scaled up. The detail at the scale does help remove the very fine details from the Digital Elevation Model. I was afraid that the detail would be too small to notice or break off when handling. The scaling did remove these very fine details, which is beneficial to the look and aesthetic of the project. It makes it look much cleaner.

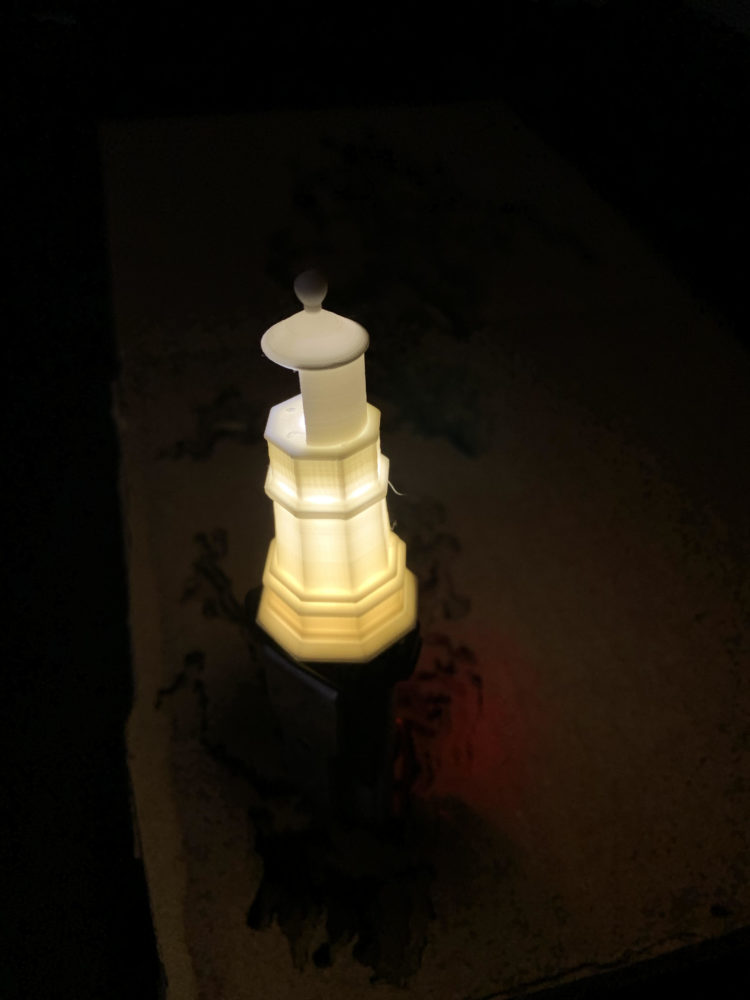
To create my dynamic component, a LED lighthouse, I used SOLIDWORKS to create a small-scale lighthouse. I disassembled a bike light to illuminate the lighthouse body. The smaller scale and fewer layers of cardboard did not let me mount the light system to the side of the project, like I had hoped, so they will remain separate for now.
![]()