
For as long as I can remember, wood joinery has fascinated me. As a child I loved taking things apart to find out how they worked, but joined furniture always escaped my understanding because it could not be taken apart. You can see that a beam comes flush against a post, but the inner workings are not immediately obvious. It can’t be pried apart or disassembled with a screwdriver. It was once two pieces, but they have since been joined into one.
I’ve been woodworking for a long time, but when I started out I mostly nailed or screwed things together. Glue sometimes made an appearance, too, but it was generally just one piece against another. Perhaps a lap joint, rabbet, or dado here and there. It wasn’t until 2021 that I first tried my hand at joinery, but ever since then I’ve been wanting more. This nightstand was my second foray into the mysterious but measured, challenging but immensely rewarding, time-tested art of joinery.
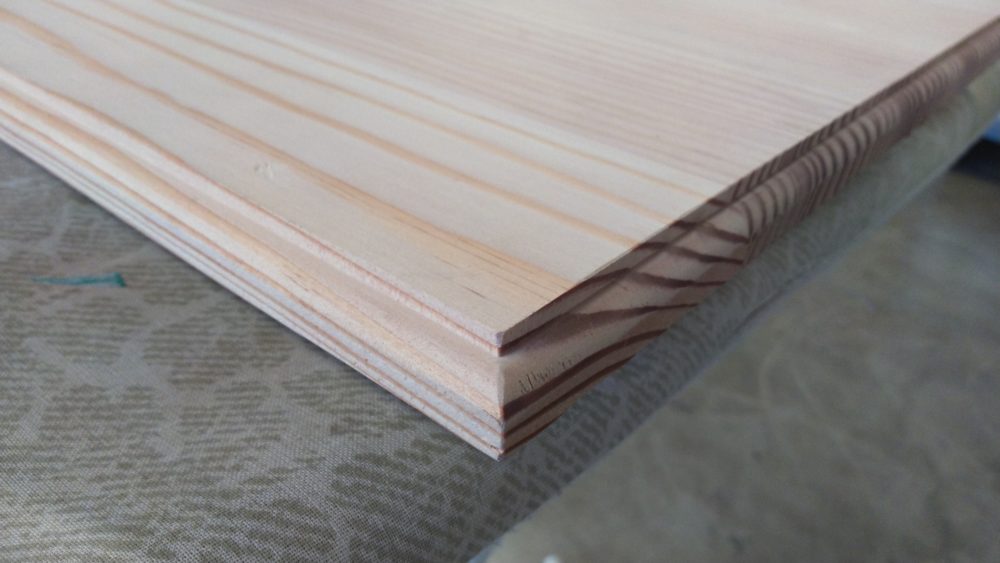
Lumber Selection and Processing
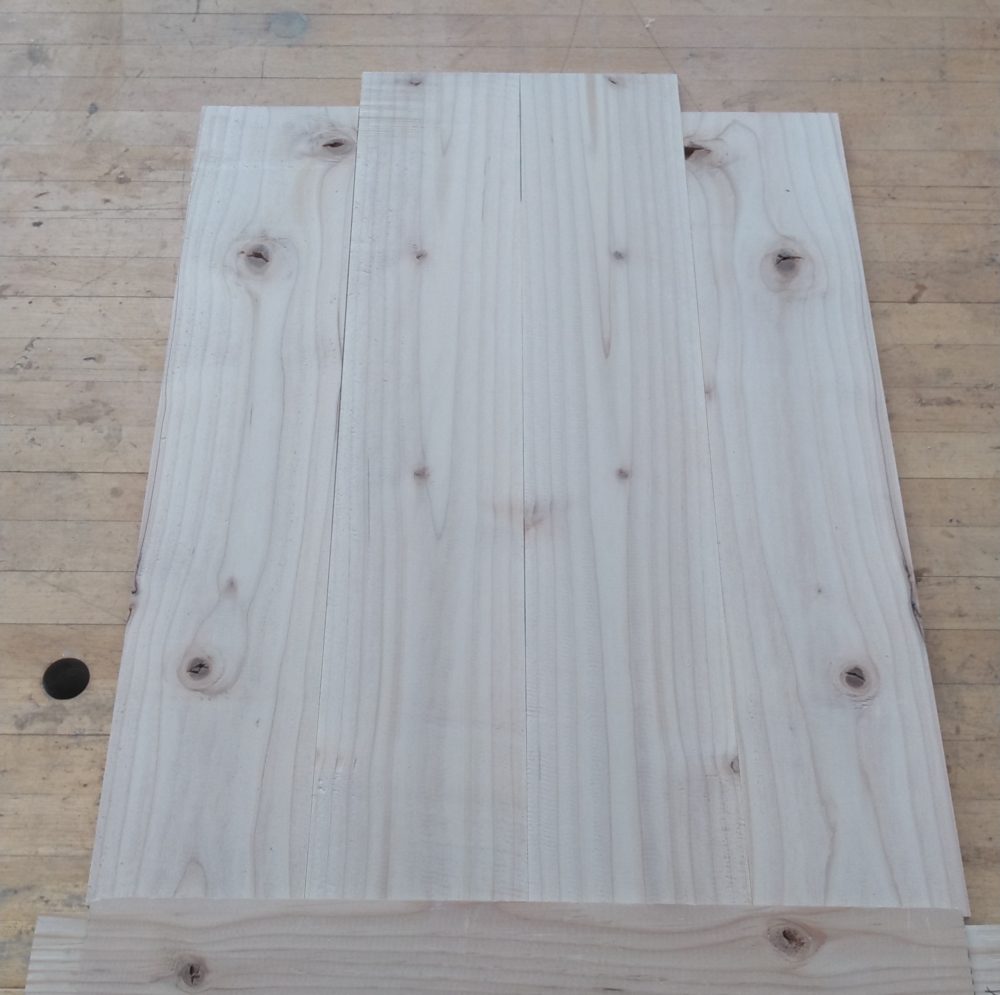
I made this nightstand from some of the worst wood available. Some of it was scavenged from a construction site reject pile. Some came from off cuts around the Idea Forge wood shop. These boards had bows, cups, crooks, twists, checks, nail holes, screw holes and other defects. Some pieces had even been used as sacrificial surfaces to drill into. This was some seriously bad wood. As such, the initial processing was arguably the most important step. I had to get good boards out of bad stock. If I couldn’t make that happen, I wouldn’t be able to make the nightstand.
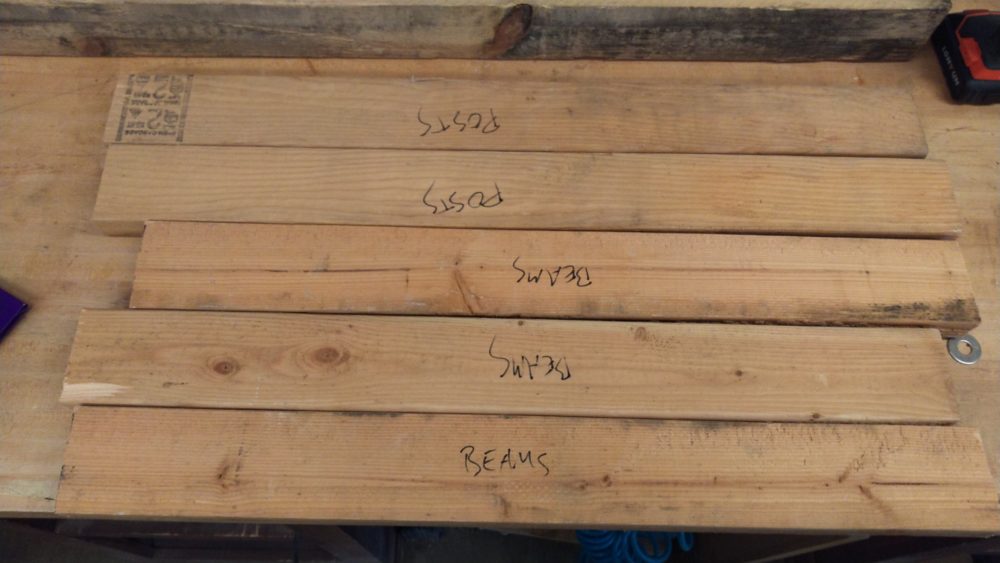

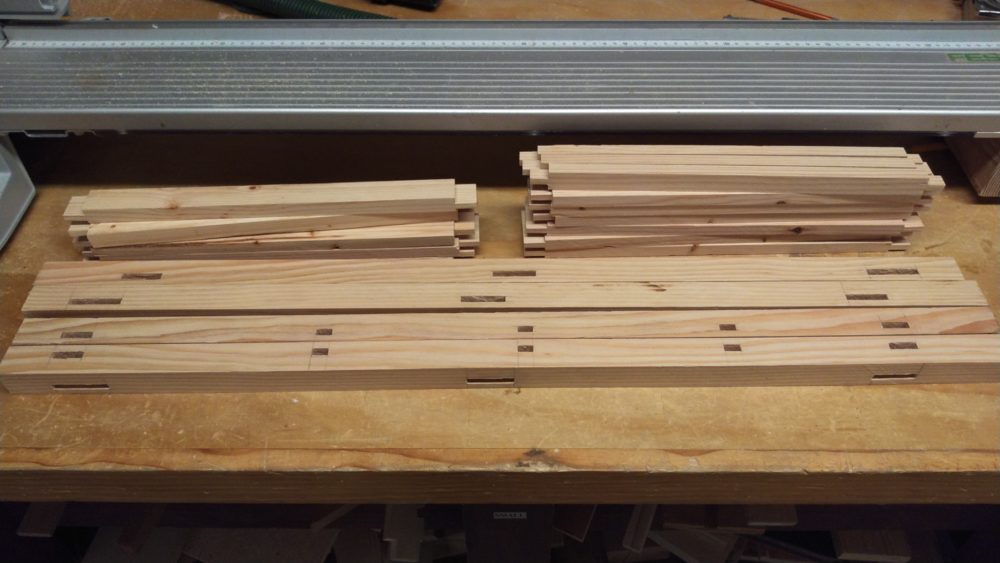
2x4s sawn roughly sawn to length (Left) and pieces cut to final cross-section (Right)
Though all my wood was bad, there was still a relative range of badness. So I chose the best wood for the structural members and show faces. The very best wood was reserved for the posts. The posts hold everything together. They needed to be long, straight, strong, and relatively free of knots. The worst wood went on the back side and on the drawer boxes. These places did not require as much strength and would not be seen as frequently.
Once I had selected a piece for a given location, the process was mostly the same for each component. I first cut the piece a bit long. Then I flattened one side on a jointer, planed the opposite side flat, jointed a third side, and then sawed the fourth side on the table saw. This gave me a “square” piece with a rectangular cross-section. Following this, I could plane or saw the piece to its final cross-section, leaving me with a “blank.” In certain cases, I also resawed boards (cut them down the middle) to make multiple thinner pieces.
Mortising
Next I cut mortises in the blanks I cut for the posts. Mortises are deep rectangular holes. They allow another piece of wood to be slotted into the mortised piece, creating a very strong joint. I used a knife and combination square to mark out each mortise location and went over the marks with pencil to make them easier to see. Then I carefully chopped a small amount of material away from each inside edge. Once this was complete for each mortise, I could chop them out.
I used a chisel the same width as the mortise and a mallet. The process more or less consisted of many controlled whacks followed by fishing out waste material. Throughout the process I also kept checking by eye to make sure my mortises were straight and square. When I was getting close to finishing, I used a pair of calipers to check the depth and kept going until I’d reached the right depth in all places. There were 28 mortises on the posts. The first took me a long time and a lot of concerted effort, but by the end I was flying through them and barely thinking about what I was doing. I’d become a mortising machine!
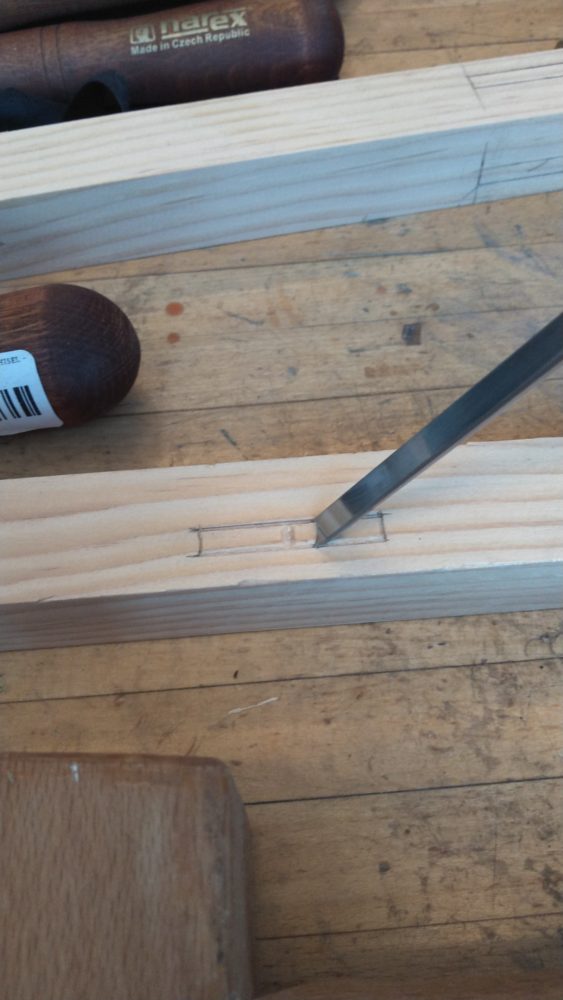
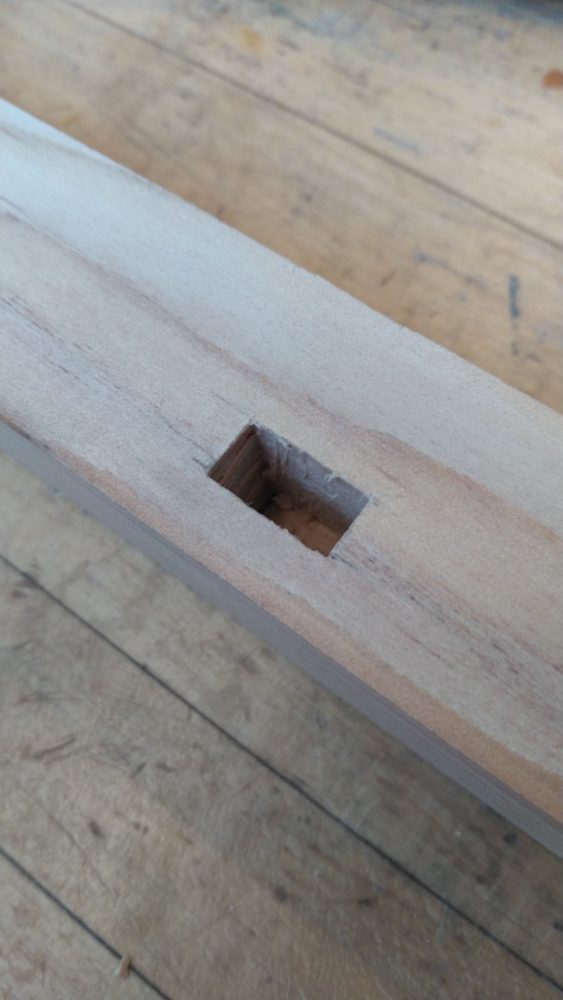
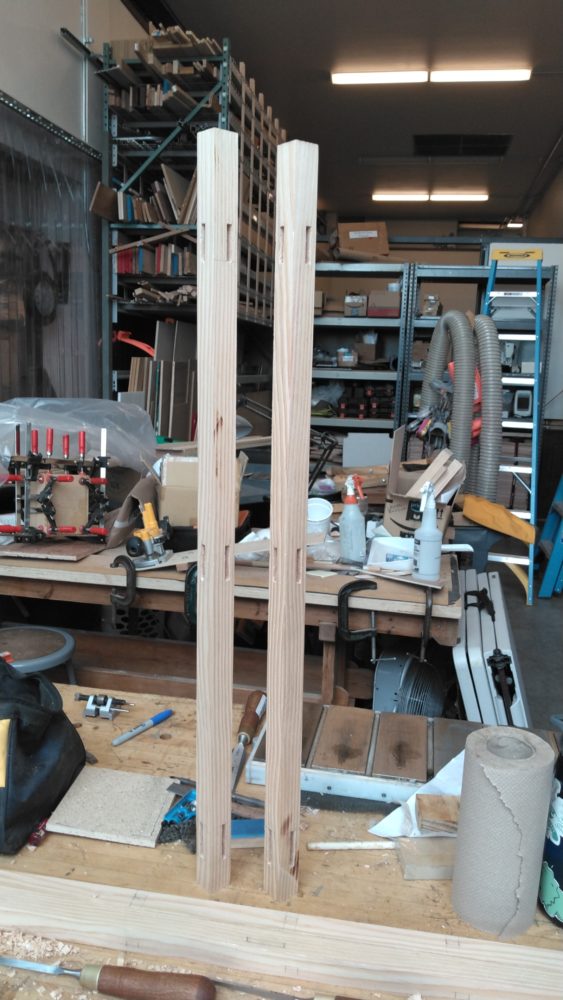
Chopping a mortise (Left), a finished mortise (Center), and 2 mortised posts (Right)
Tenoning
Tenons are rectangular features on the end of a piece of wood that allow it to fit into a mortise. In theory, you could just stick a piece of wood in that was already the cross-section of the mortise, but cutting the end down smaller allows the pieces to butt up against each other, creating an even stronger joint. I cut my tenons on the table saw. This made them fast and consistent. I cut them on the large side and where necessary, used a chisel to thin them down. Once all the mortises and tenons were cut, I did my first dry fit of the frame. Even without glue, it was already quite strong.
Mortised posts and tenoned beams (Left) and initial dry fit (Right)
Panels
To fill the voids in the frame, I made thin wood panels. Any sane person would have used ¼” plywood. It’s almost purpose built for an application like this. Plywood is strong, dimensionally stable, and most importantly, already comes in sheet form. You wouldn’t even see the edges because they’d be hidden by the frame. All one would need to do is cut a sheet to size and install it. You could even run a bead of glue around the edge to make it extra strong.
I did not use plywood.
To make my panels I resawed 2x4s, planed each sawn face, resawed each piece again, and finally planed each sawn face a final time. That is to say, I took one piece of wood and turned it into 4 thinner pieces of wood. Then I glued up 6 panels made from 4 pieces each. Since I’d already gone to the trouble of resawing the pieces, I used a technique called book matching. This meant I placed adjacent pieces next to each other, creating a mirrored wood pattern. I glued each piece against a thick, flat piece of plywood. Then I scraped off the excess glue once it was cured and trimmed each piece to size.
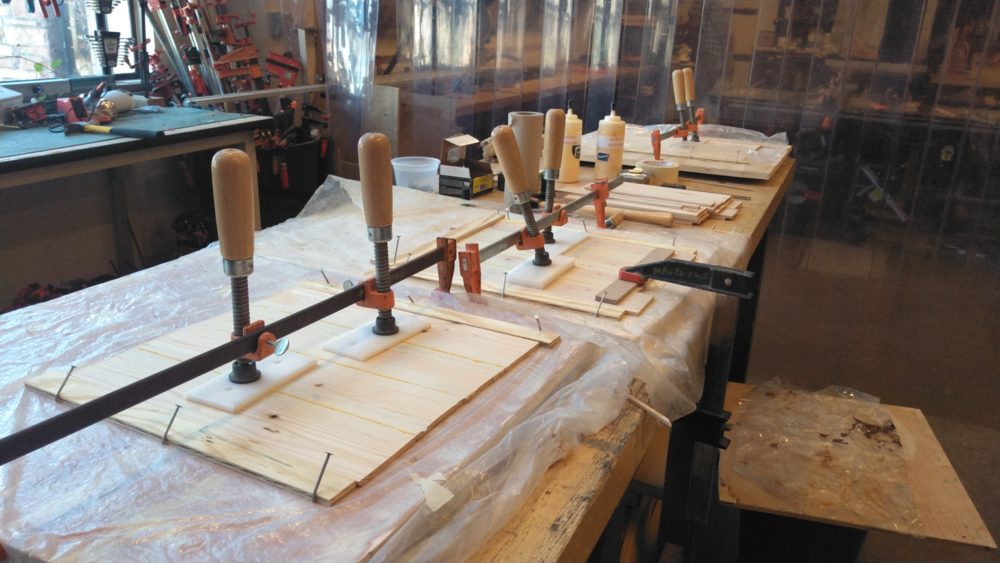
Gluing up the panels (Left) and book matching the boards (Right)
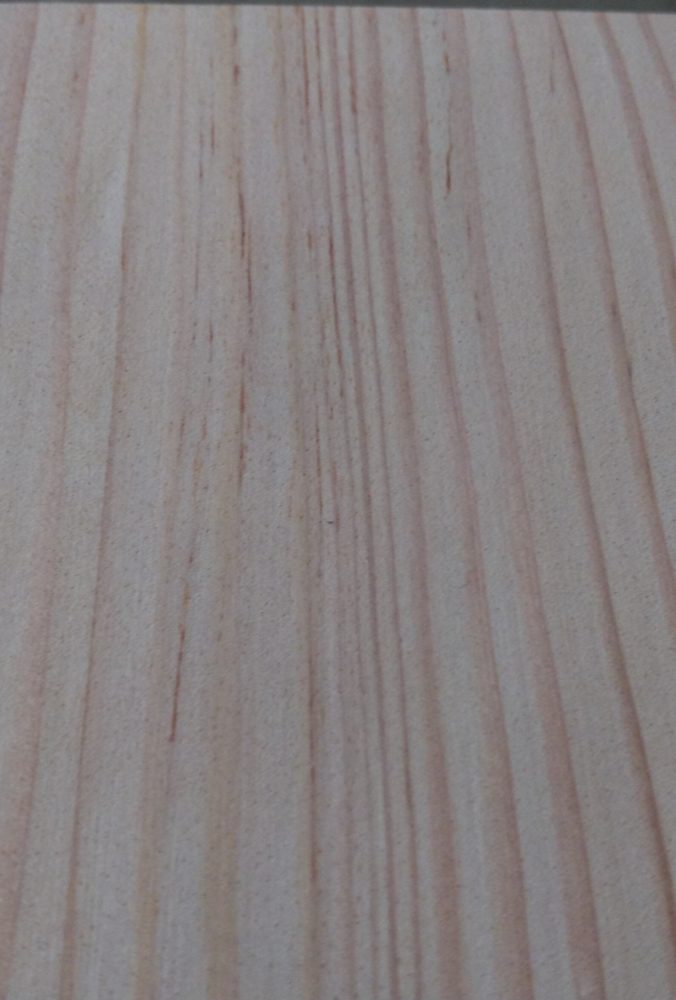
Plywood is dimensionally stable. Glued up panels of wood, on the other hand, are not. This meant I needed to accommodate for seasonal expansion and contraction of the wood. Without getting too caught in the weeds (entire books have been written about this) wood absorbs moisture when it’s humid, causing it to expand, and lets go of moisture when it’s dry, causing it to contract. This isn’t an issue for long, thin pieces of wood, because wood doesn’t change much in the long direction. However, with a wide panel, this is a huge issue. The panels I made may change by as much as ⅛” depending on the humidity. Glue is not an option.
Instead, I cut a shallow groove around the intended location of each panel. Grooves in the mortised posts and grooves in the tenoned beams. I made them just deep enough to house the panels at their largest and just shallow enough so they can’t come out at their smallest. They’re held captive, but are still free to move.
Why, you ask, would I go to so much trouble for something so inconsequential? It’s a great question that really doesn’t have a good answer. I suppose I just liked it better that way.
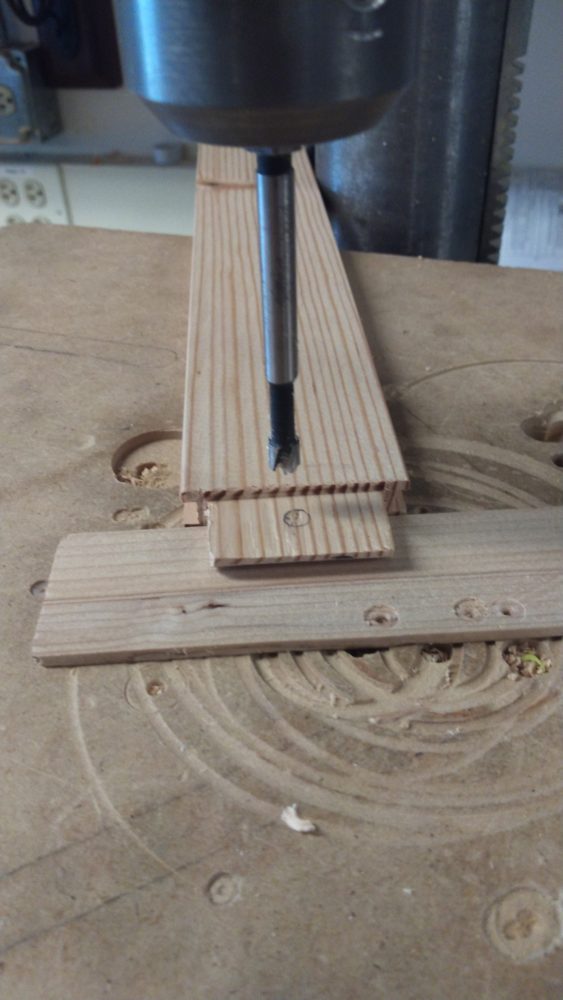
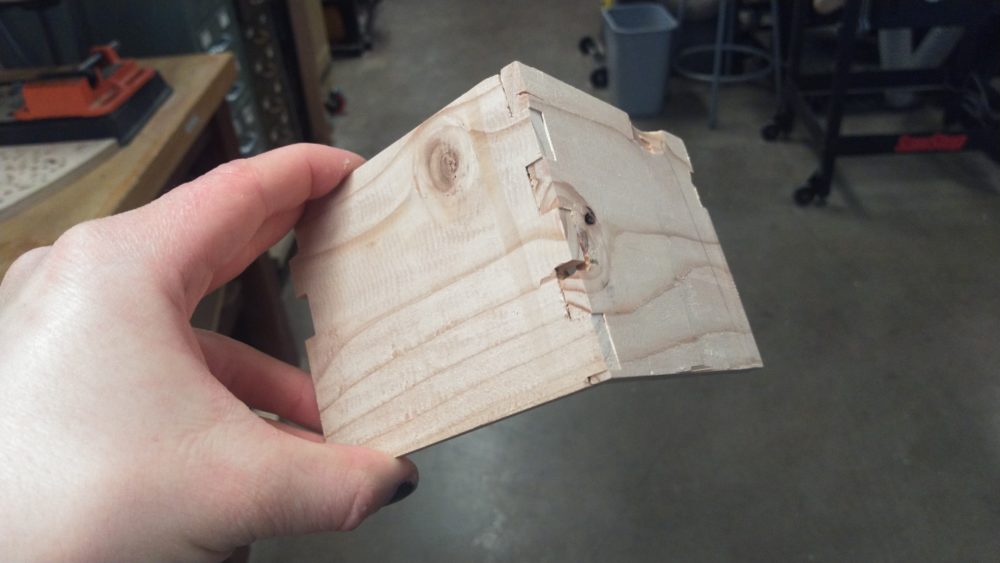
Drawbore Assembly
With the posts, beams, and panels cut I could finally move onto assembling the frame. I used a technique called drawboring. The basic idea is that you drill a hole in the mortised piece and an offset hole in the tenoned piece. When you assemble the pieces and drive a peg through these holes, they align, “drawing” the pieces together. This creates an incredibly strong joint that doesn’t really require any glue to stay together. I used glue nonetheless to further reinforce the joints and create the strongest frame possible.
This was probably the most stressful part of the entire project because I had to get things together fast before the glue dried. I started by making the two sides, letting them dry, then repeating the process to bring the entire frame together.
![]()
Drilling a hole in the tenon (Left) and the assembled sides (Right)
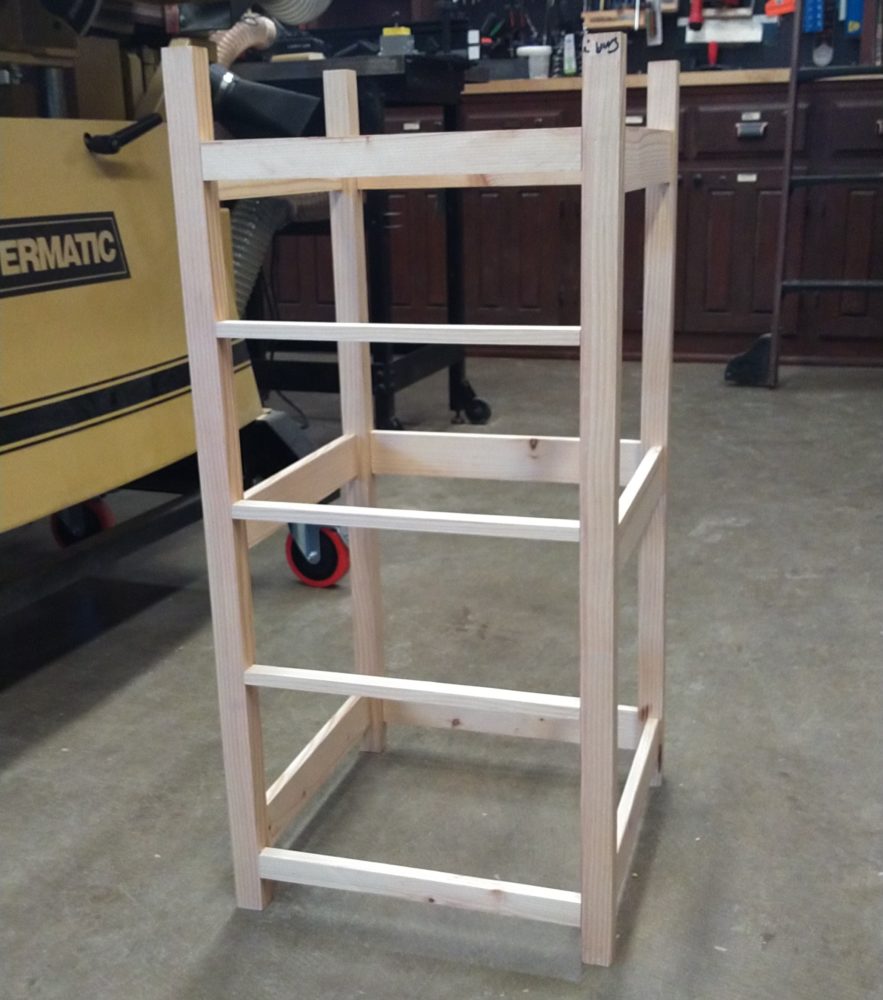
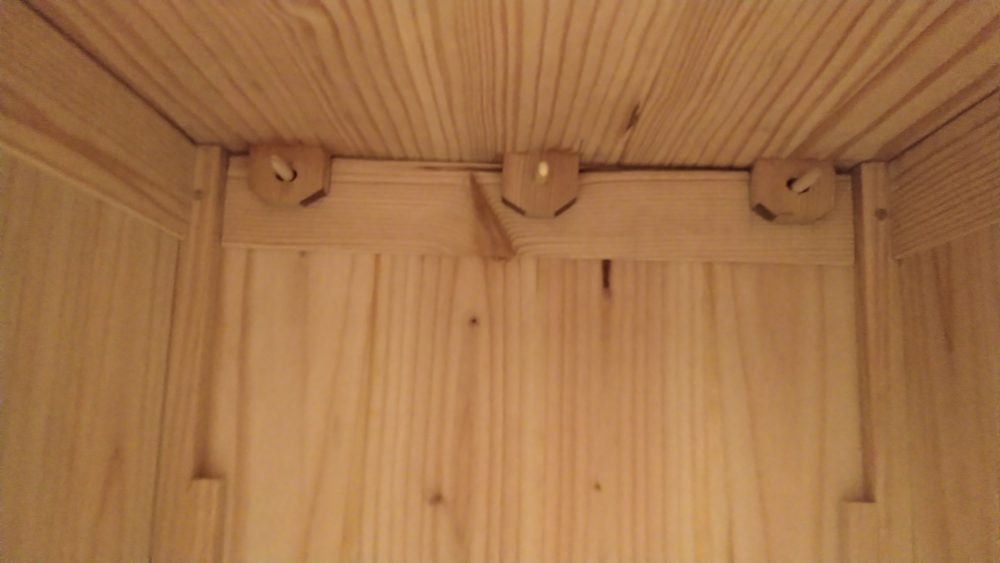
Drawer Supports
The drawer supports are U-shaped rails that run from the front to the back of the frame. The side panels of the drawers run inside them, allowing the drawers to slide in and out. They must be very well aligned to make sure things move smoothly.
The front end of each rail is glued into a notch cut into the front beams. The back end is glued to the post and a small reinforcing piece which is also glued to the post.
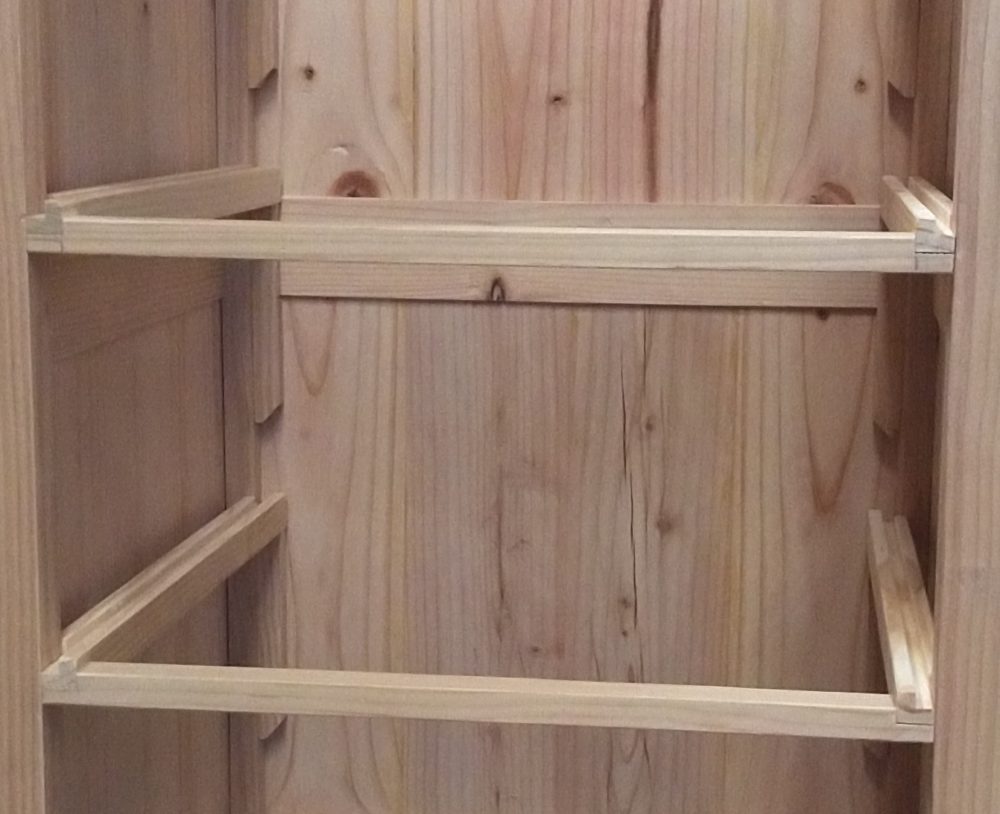
The drawer supports
Top
The top was a 5-piece glue up. It seemed like a fairly straightforward piece to make but gave me all kinds of trouble. The first issue arose when I tried to plane the piece after glue-up. It tore out, creating huge gouges in the wood. No matter what depth of pass I took, how I ran it through, or anything else I did, the gouges were there and kept getting worse. Eventually I abandoned the power planer and planed the entire surface by hand. Since I had to plane the gouges out this was an incredibly time-consuming process.
Once I had a good, flat top, I routed a profile around the edge. This was actually fairly straightforward. I set up a router bit and ran the piece through with little issue.
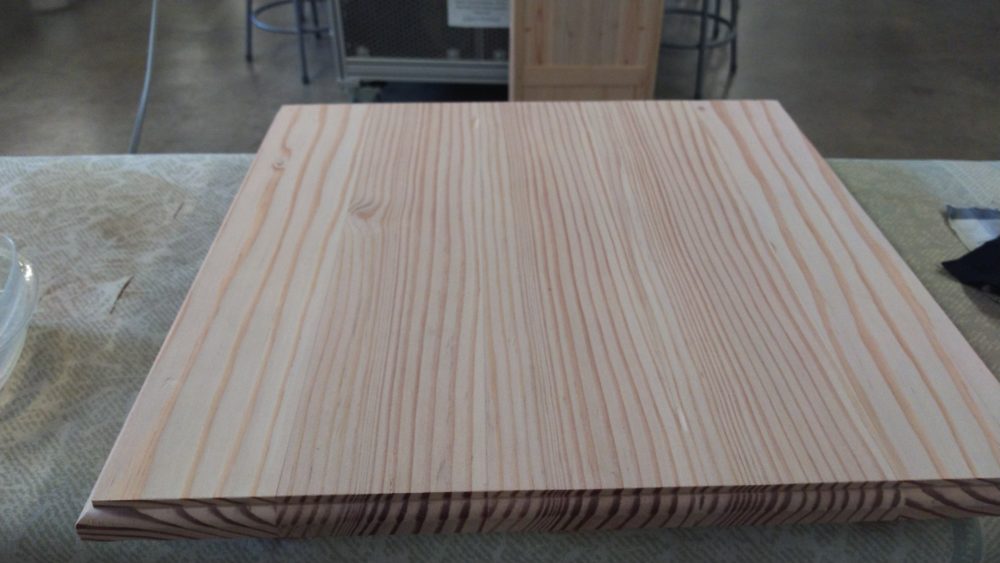
The top (Left) and the routed profile (Right)
Then I chopped mortises in the bottom. These mortises hold small tab pieces which attach the top to the frame. While I was cutting them the bottom surface sustained some damage that I was able to hide, but the true horror came when I flipped it over. I dented my beautiful, flat top surface I’d worked so hard to make. Hours before the shop closed for Spring break, I decided to press on for the time being and glue the tabs in place.
When I returned, I decided to try a trick I’d seen before on Youtube. I spooned a little water into each dent, covered it in a damp cloth, and pressed an iron to it for about 10 seconds. Like magic, the dents came out! It’s a great trick and I’ll certainly be using it again.

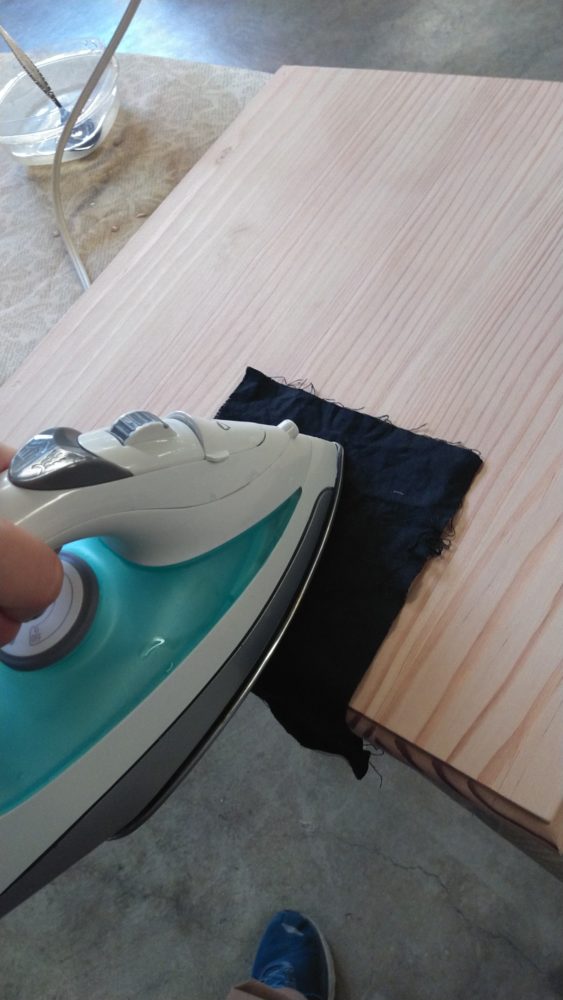
Spooning water into the dent (Left), ironing (Center), and the fixed dent (Right)
With the top complete, I attached it to the frame. I drilled 6 holes through the frame and the tabs. I widened the holes into slots on the outer 4 tabs. This was to allow room for wood movement. I then drove pegs in, gluing only the center 2 and leaving the other 4 floating. I did actually place a small amount of glue at one end of the pegs to keep them from coming out, but only enough to glue them to the frame. The idea is that as the top expands and contracts, the peg will slide inside the groove. This way the top is held down but is still free to move.
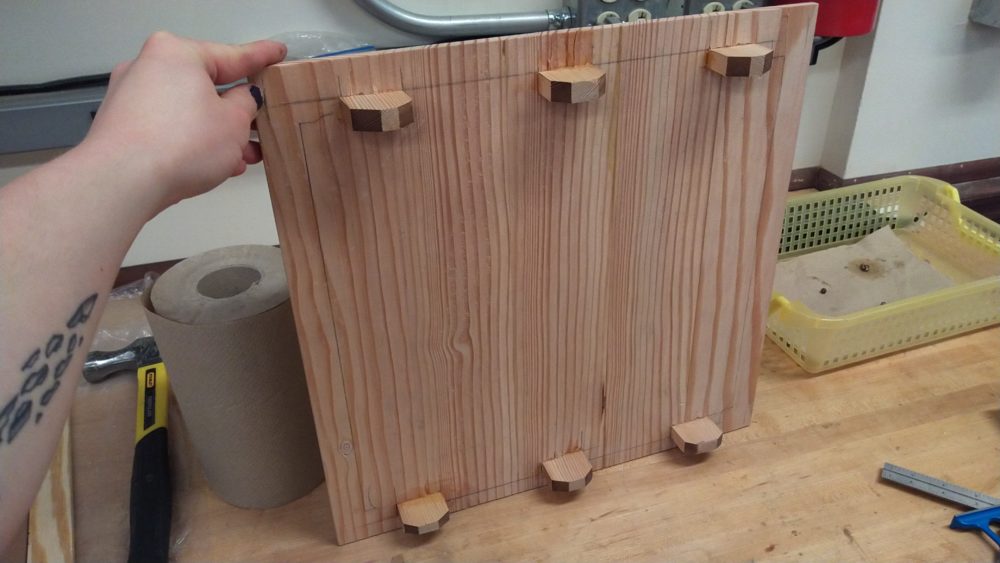
The tabs (Left) and the installed top seen from below (Right)
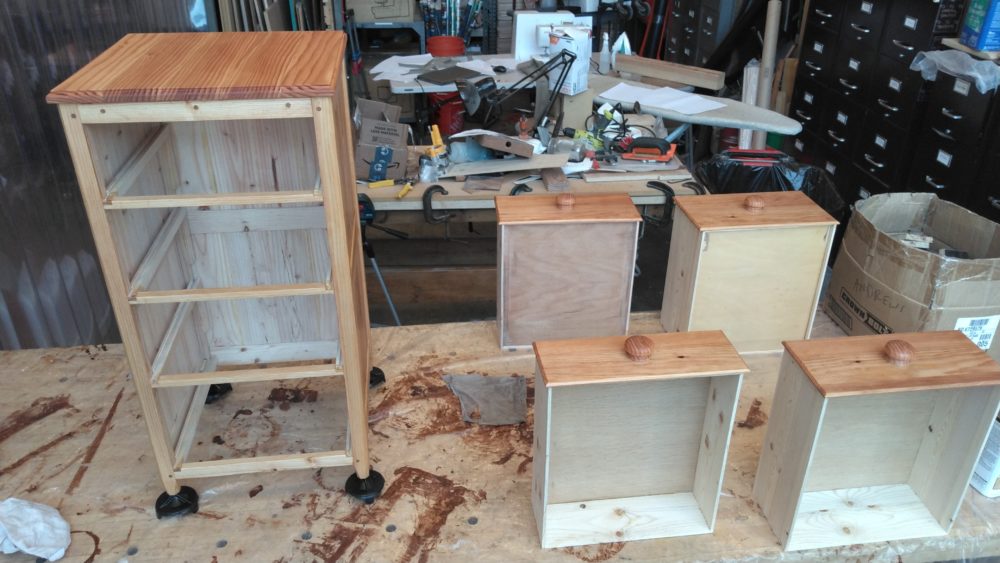
Drawer Boxes
Next I made the drawer boxes. That’s the term I’ve chosen to use for the 4 side panels and bottom panel of the drawer. On their own, they kind of look like boxes.
The side panels were made the same way as the panels in the frame. I attached the side panels with finger joints which I cut on the table saw. I had to be sure they were accurate so the drawers would fit in the slides. I actually wasn’t quite accurate enough and had to shave down some parts afterwards. I also cut a small groove near the bottom to hold the bottom panel. The bottom panels were the only plywood components in the entire project. Using plywood allowed me to glue the panels in, strengthening the drawers substantially.
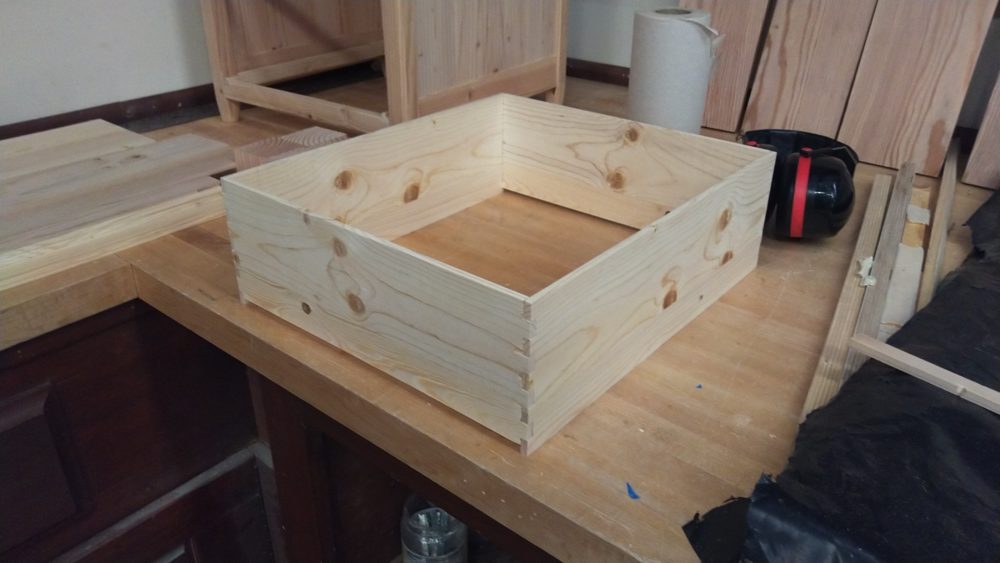
A test finger joint (Left) and the dry-fit drawer sides (Right)
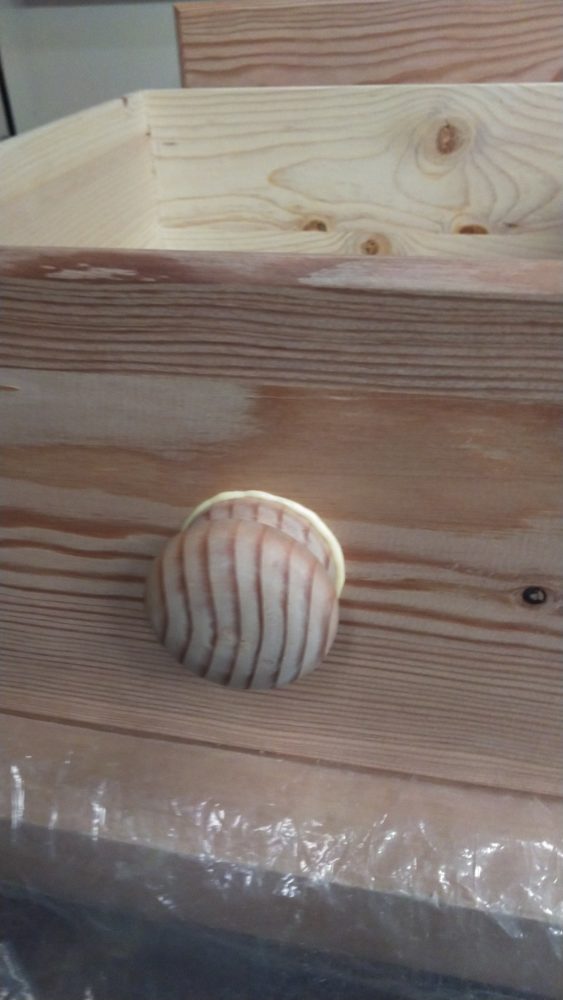
Drawer Pulls
Wanting a break from the rest of the project, I shifted gears to make the drawer pulls, which I turned on a lathe. I started from rectangular stock. I first hogged out a square peg using a milling machine. This was useful for work holding and would later be turned down into a rod. I first turned the piece into a cylinder, then marked out the rough location of features with a pencil.
I mostly did these by eye. They’re not identical, but close enough that they look right on the final piece. Once they were turned to size, I sanded them smooth.
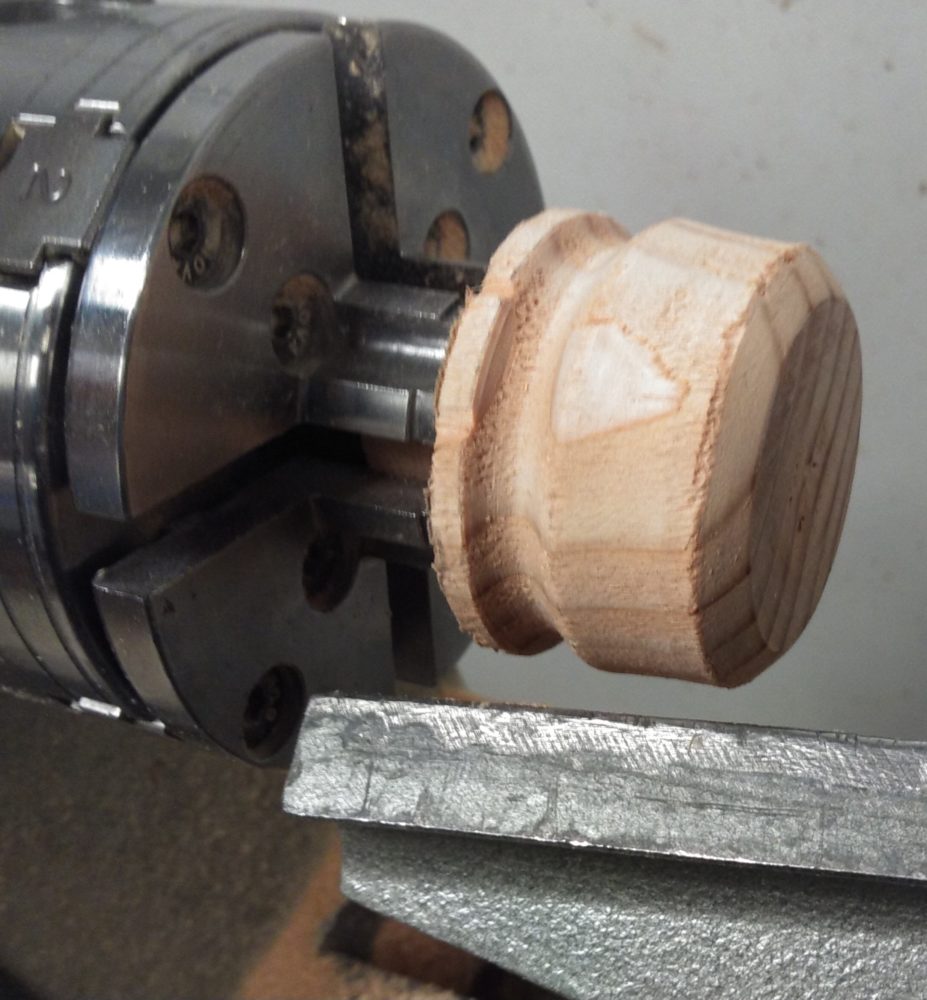
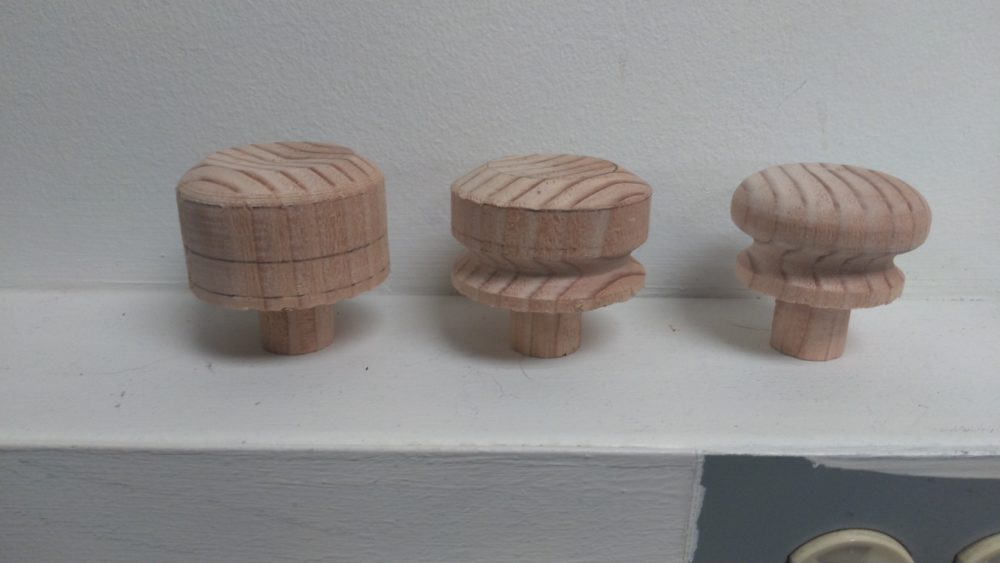
Turning a pull (Left) and pulls in various stages of completion (Right)
Drawer Fronts
The drawer fronts were another set of components that gave me more trouble than expected. They were initially supposed to be thicker, but when I cut my blanks and left them overnight they cupped badly. I ended up having to re-plane them, leaving me with thinner but flatter boards. It was too close to the deadline to worry about it. I like the way they came out, too.

Drawer Pulls
I drilled a hole through the drawer fronts and drawer box for the pulls, then glued everything together. To make the pulls extra strong, I wedged them in place.
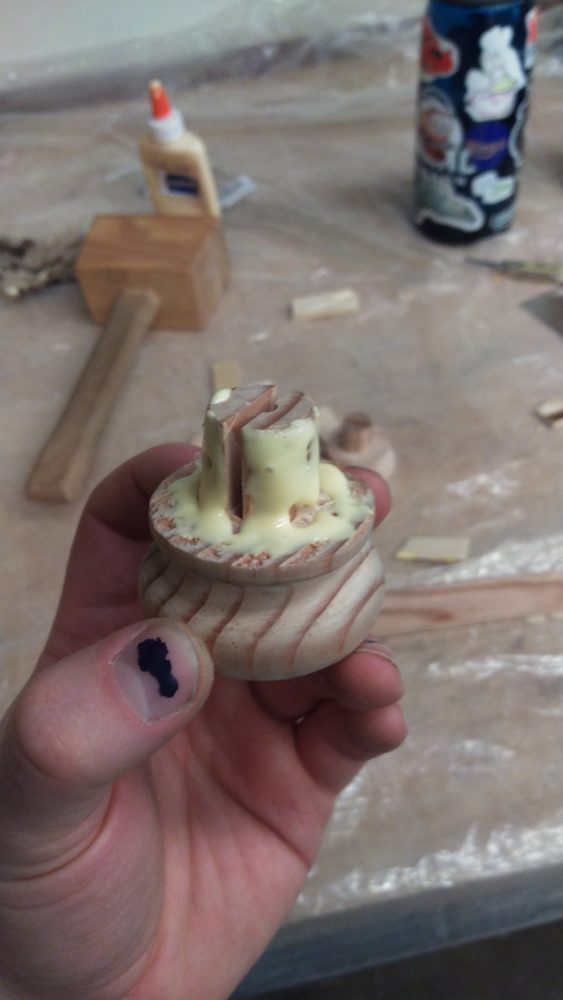
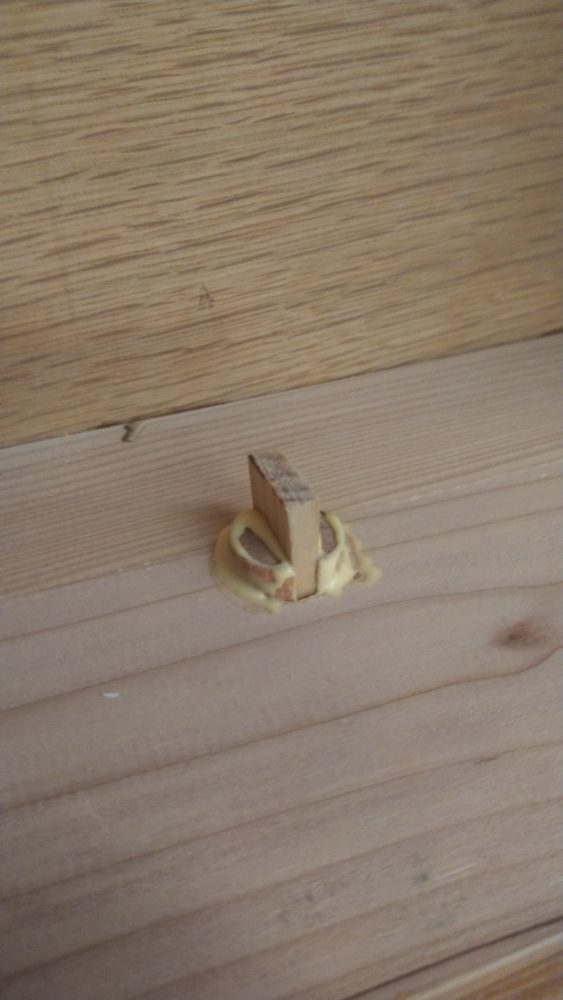
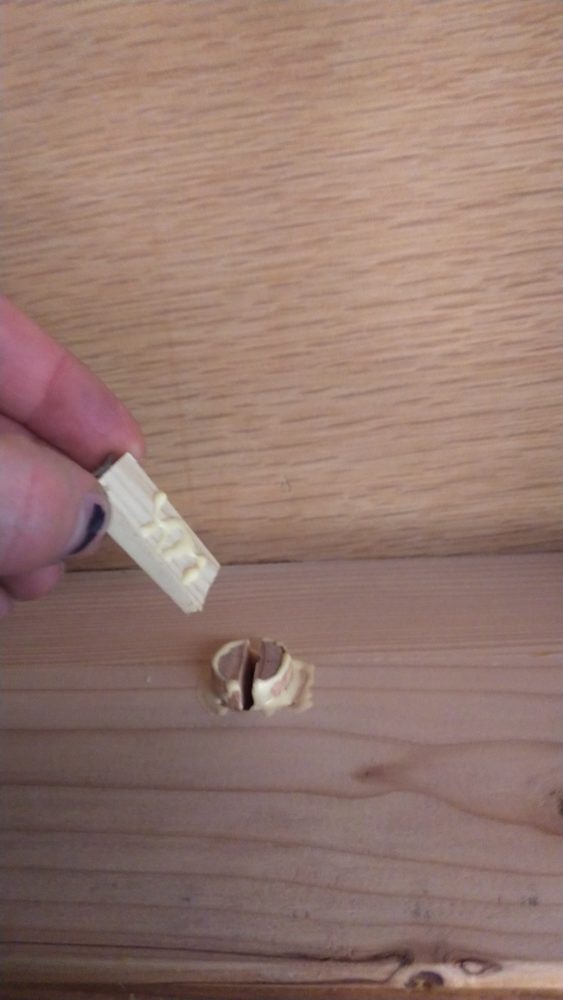
Gluing and wedging the drawer pull
Finish
To prep the surface of the nightstand for finish, I scraped everything down with a card scraper. In places that were especially rough I sanded first, then scraped. The issue with sanding is that it clogs the pores of the wood. This isn’t an issue when stains or other heavy finishes are being applied, but I wanted a relatively clear finish that highlighted the natural beauty of the wood. Scraping removes material without clogging the wood’s pores and results in a clearer, more featured surface. Who will notice this? Probably only me.
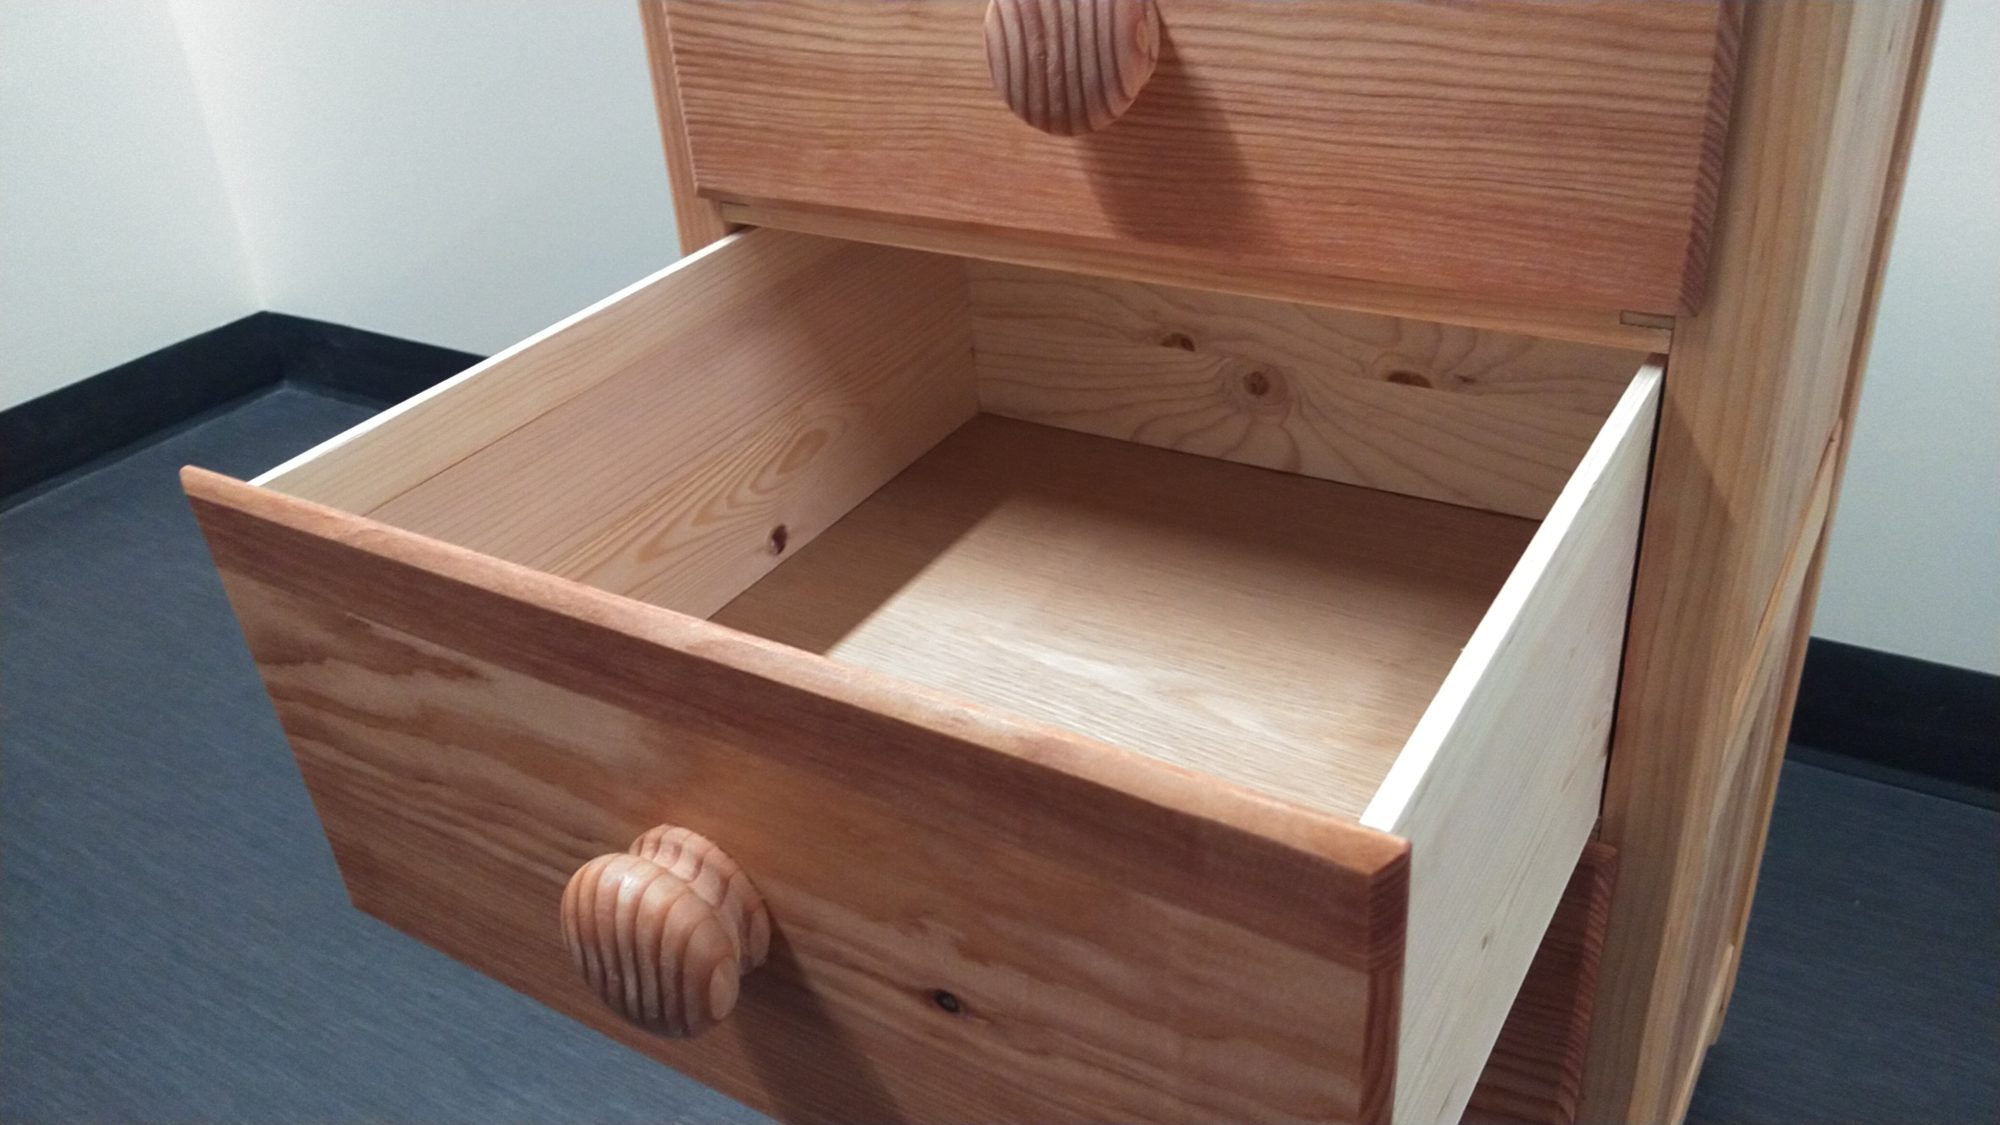
I used Danish oil to finish the wood. I applied several coats in short succession, allowed them to cure for 15 minutes, then wiped off the excess. I applied a second coat, but it was after my final photoshoot. It looks nicer up close but about the same from a distance. I really like the way the finished wood on the outside contrasts with the unfinished wood on the inside.
Applying Danish oil to the nightstand
Final Thoughts
If I’d had any clue how long this project would take at the beginning of the semester or how many hiccups I’d run into along the way, I probably never would have even started it. It kind of kicked my butt, but now that it’s finally done with me, I feel like I’ve grown immensely as a woodworker. I’ve been making things from wood for about 17 years so that doesn’t happen a whole lot. But it’s really special when it does.
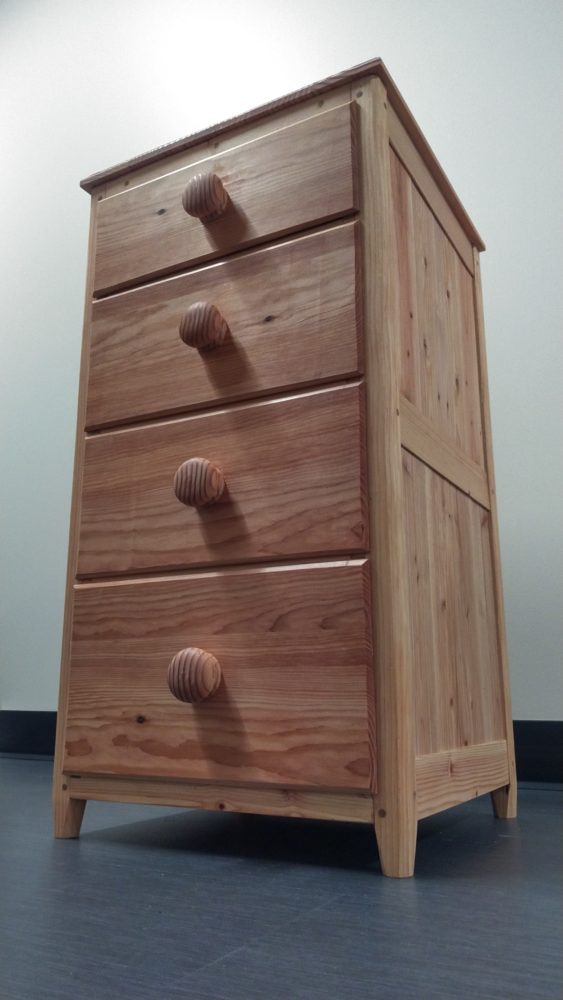
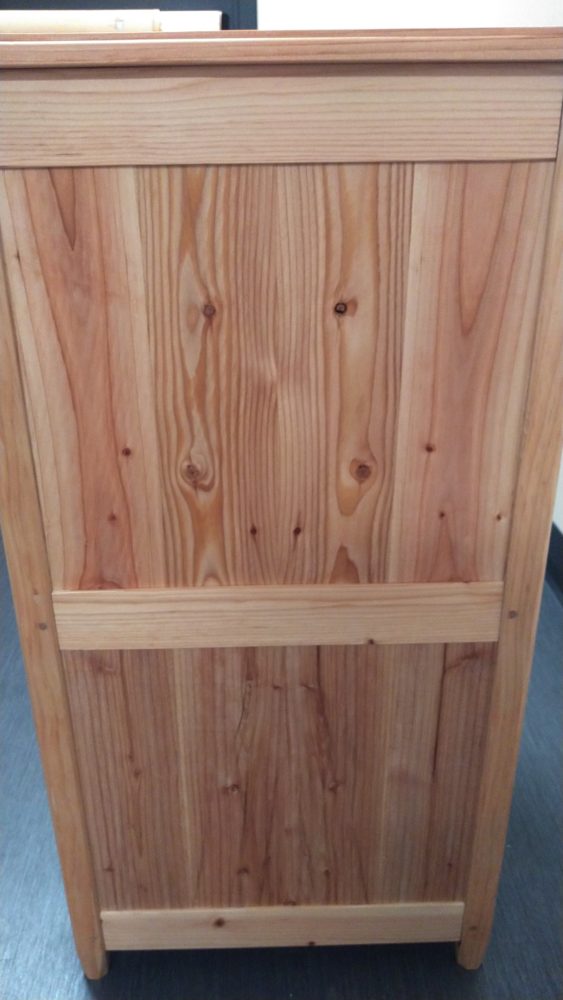
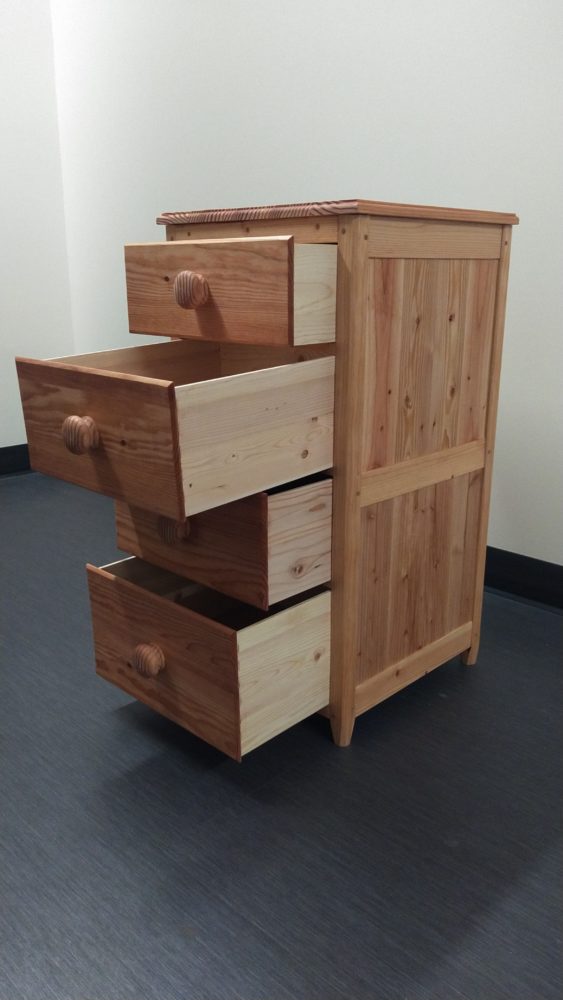
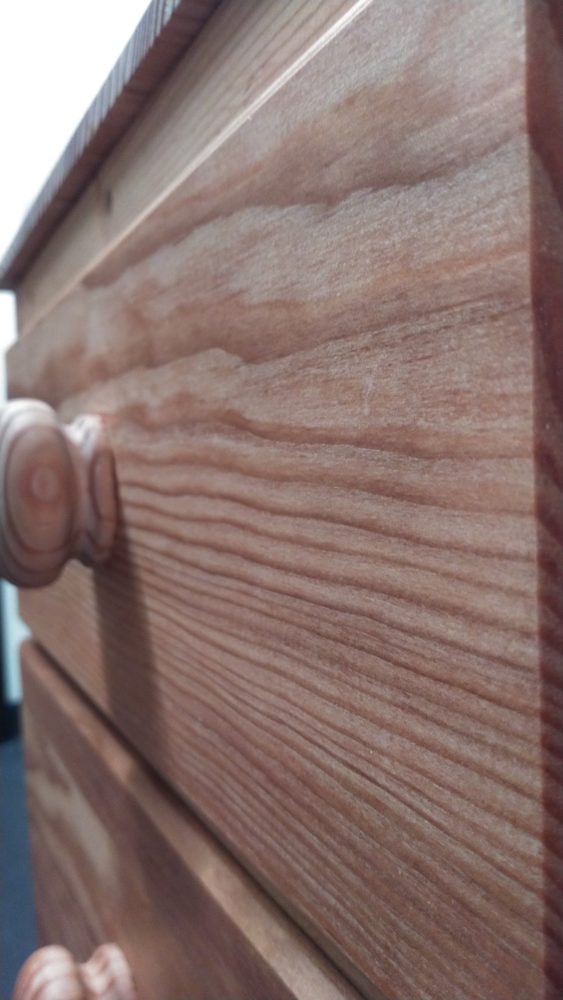
Nightstand Photoshoot!