

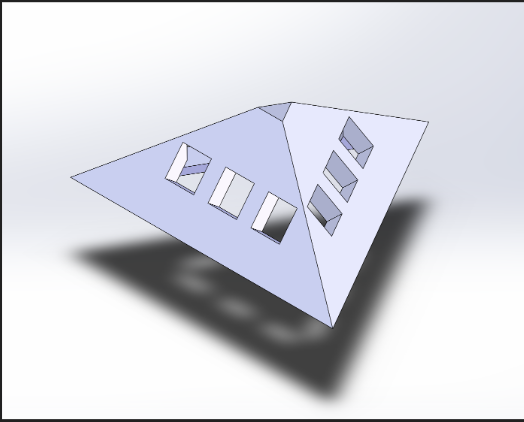
Above is a rough outline of the different steps i had to do to get to my final result. I started doing a lot of different research on how to build a herschel enneheadron and the angles i needed to make it come to life. I also did research on what kind of plants would thrive in an enclosed terrarium. I went to different plant nurseries and asked question about the plants and what kind of plants are easy to take care. Once i felt i had the necessary information i began to build my project on SolidWorks and designed the overall box, LED Holders, and the cap covers.
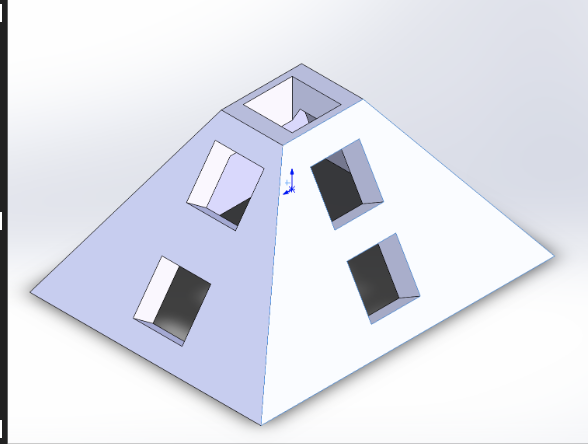

The images above are the final iterations of the parts, but i had to go through many different iterations to make it work. Once the CAD was done i was ready to go buy materials. The only materials i had to buy for the project where acrylic sheets, two-way film, addressable LED’s, and a terrarium kit that came with soil, pebbles, fossilized moss, and some plastic dinosaurs. I had a lot of the materials i already need like filament, solder, wires, an arduino to power the LED’s, glue, and electrical tape. With all the materials bought i first cut the acrylic using the laser cutters at the ITLL and and prototyped the box.
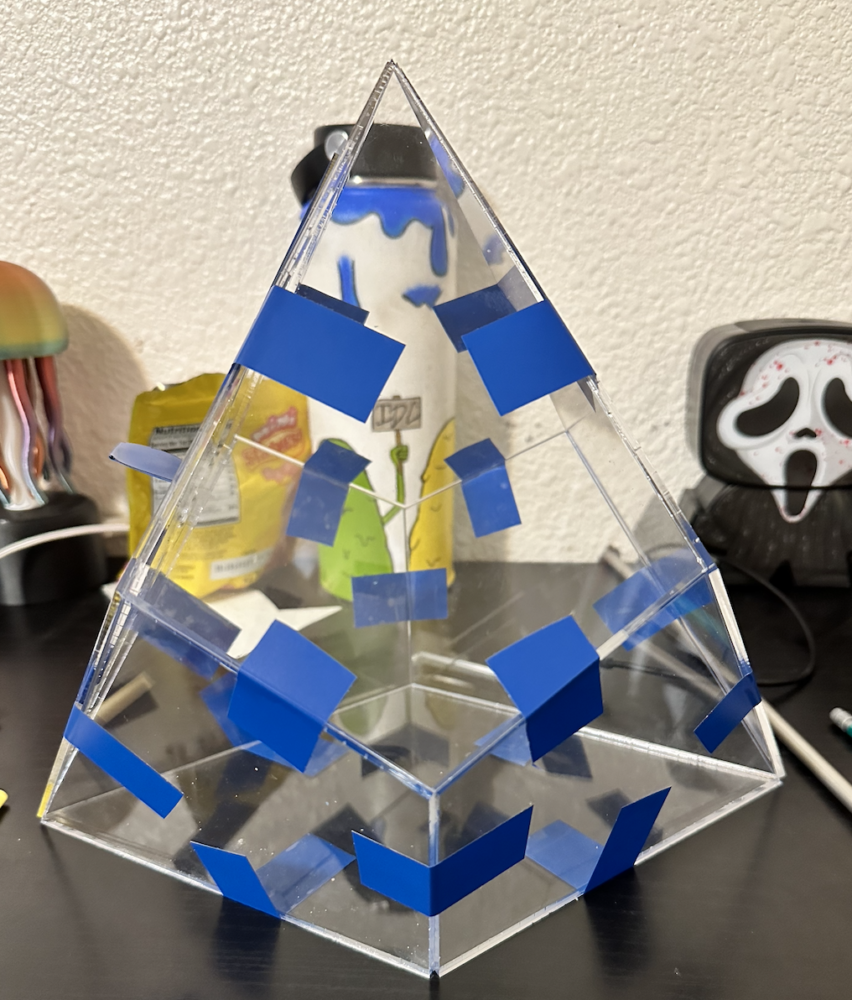
Once i liked how each piece sat on each other i applied the two-way film and glued it all together at the ITLL using Weld-On 4 Acrylic Adhesive and super glue for extra strength. with the box ready i started to 3D print every corner piece for the LED’s and caps. This is what took the most time because the shape of them was really weird. this process probably took me over a week to get to the final phase. I was not able to get a picture of the final parts before assembly.
Now with everything in place i began to solder the LED’s and this was a very tedious process because i had to solder every LED individually and prep the wires and cut them to the perfect length to make sure they would be able to bend far enough
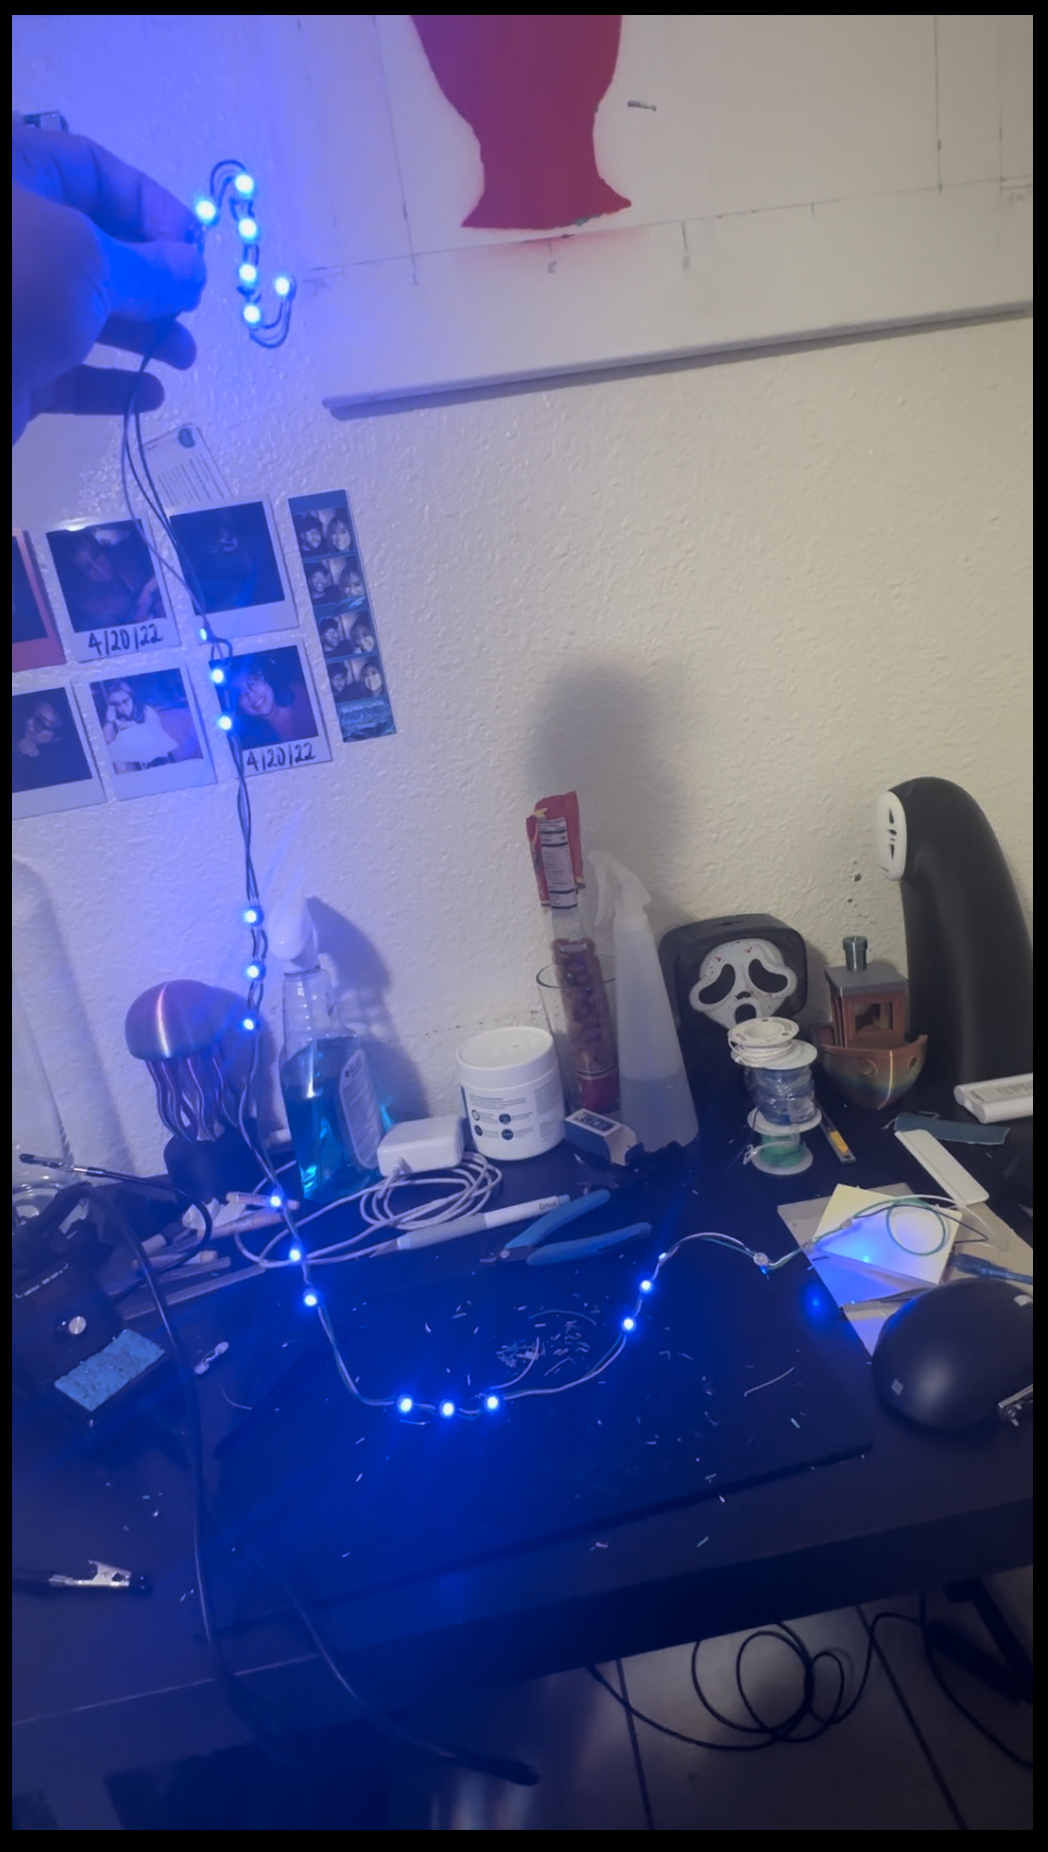
After the LED’s i sourced the code with help from Lauren, an engineer at the ITLL, and i had to change a line or two to make sure the LED’s displayed true white. With the code, LED’s and the plastic parts i assembled everything using a hot glue gun and super glue to make sure nothing moved. Once everything was assembled and working i bought the plants and put everything to keep the terrarium alive within the box
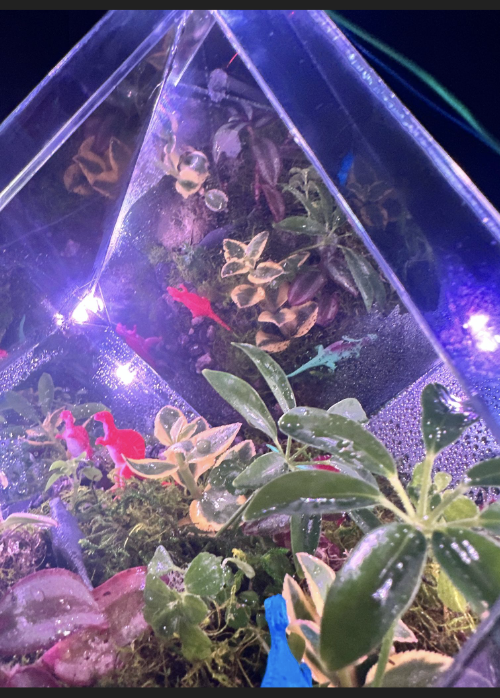
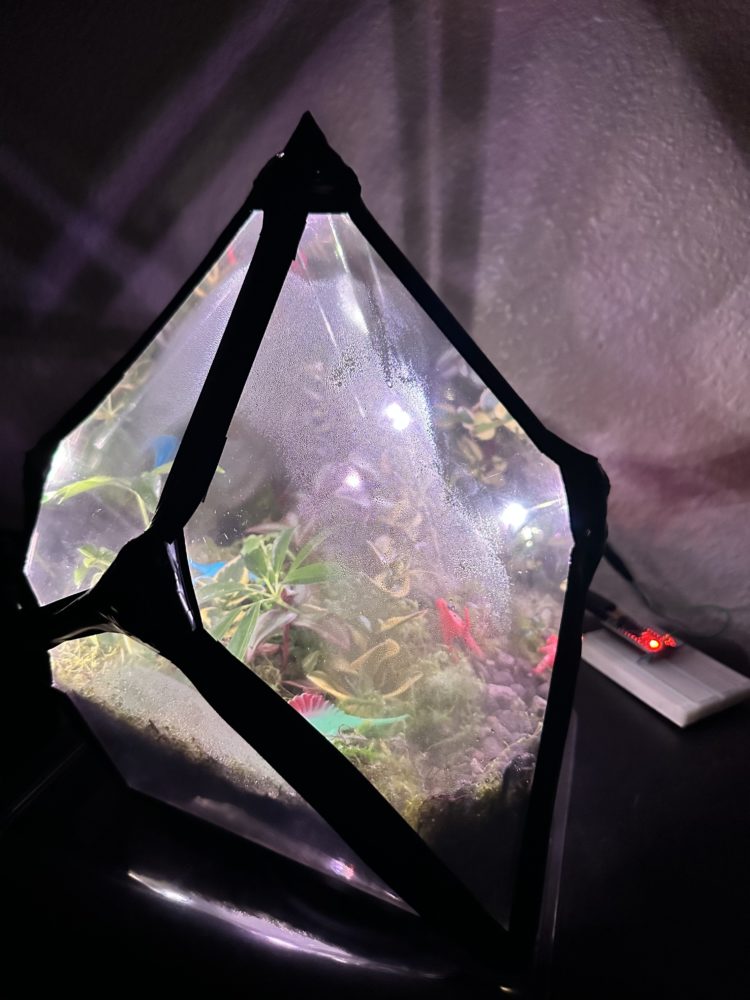
I think the final product captured the aesthetic i set out to do. I believe it feels cozy/comfortable when looking at it snd through it to see the infinite terrarium. But it also captured the simple aesthetic as nothing around the box takes away any attentions from the contents inside. Once i finished the project the only thing i wished for was for it to be a bit bigger in its dimensions. Now that the class is over i will keep this project next to my desk and try to keep the plants alive for as long as possible. But i do think i will try this project again and make it bigger to have more area to look through.