
I have always been into watches and creating a timepiece from scratch has been my plan since a long time. I decided to build a wristwatch with a heavy inspiration from Art Nouveau and Clockpunk aesthetics which could be worn casually as well as on special occasion. After researching watchmaking tutorials and identifying the ST3600k hand-wound mechanical watch movement by Seagull, which I finalized as the mechanism I would use, I realized I would need to search a lot for the specific components of the watch to suit my vision or design them from scratch to embody the Art Nouveau aesthetic.
According to the timeline, I completed a major portion of my research initially and finalized my design vision exactly. I then ordered the parts side by side while researching and received most of the parts by April 9th. However, there were a lot of delays for the ordered brass PVD watch case and hence I had to order another simple black watch case as a backup, and its embossed leather band as well. However, I received both of the watch cases before starting my assembly. The next step was to check if all the received parts are compatible with each other and assemble the watch after that. The extra time I reserved was used so that I could learn how to use CorelDraw and vinyl cutting machine to design and make my own dial for the watch.

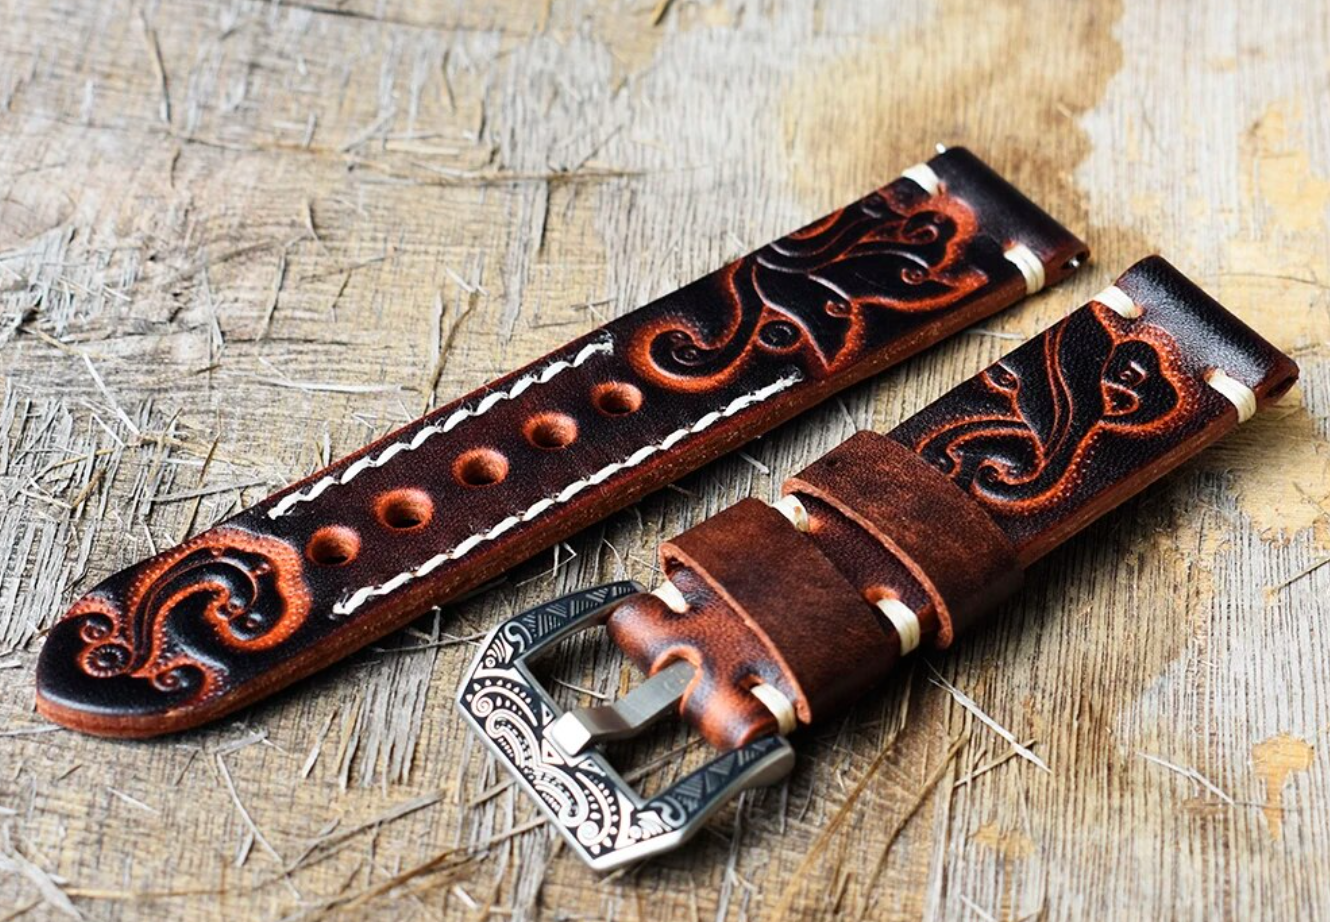
The parts I ordered for the watch were the ST3600k movement, a brass PVD designed watch case, embossed leather band, and designer watch hands.
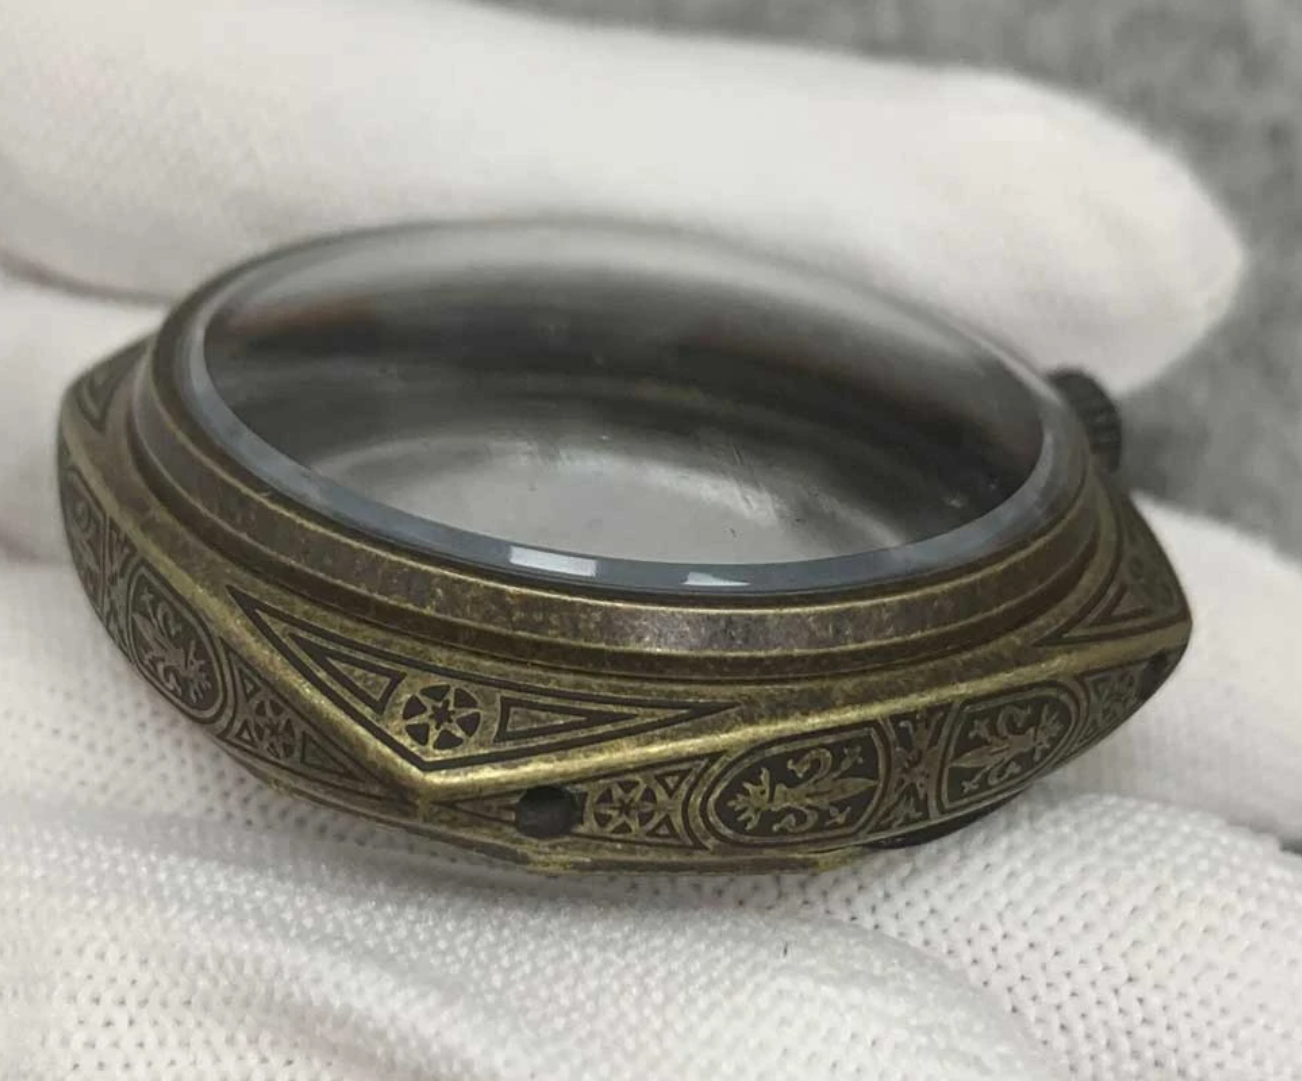
Case
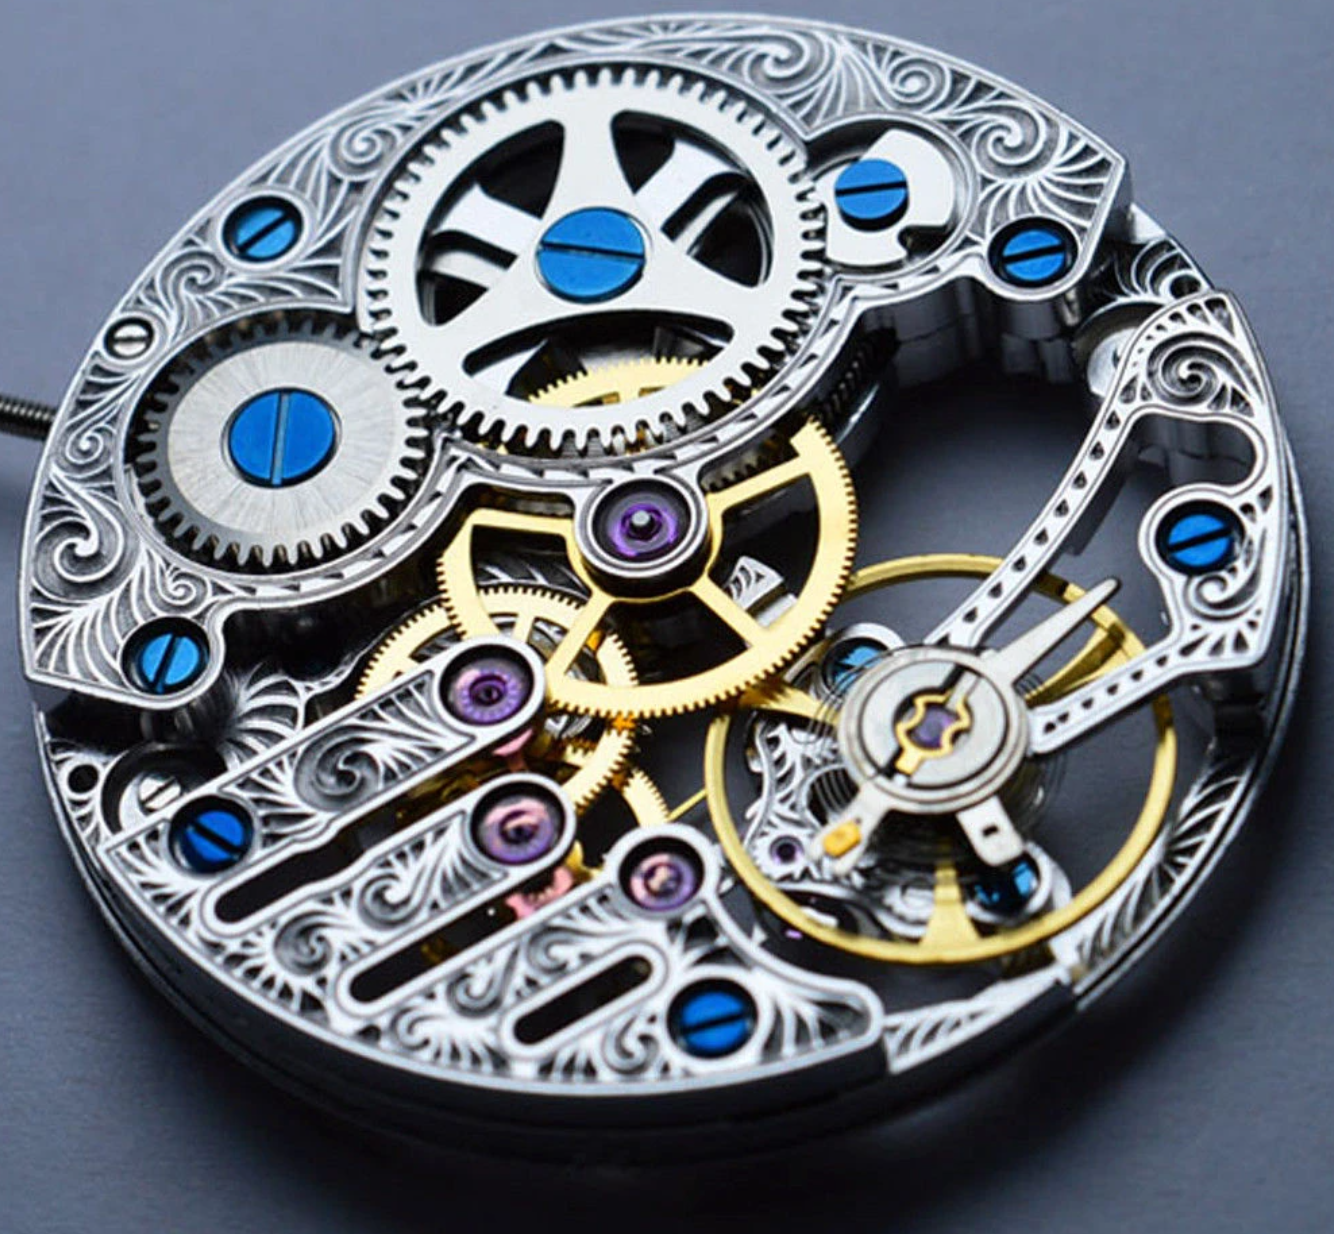
Movement
Strap
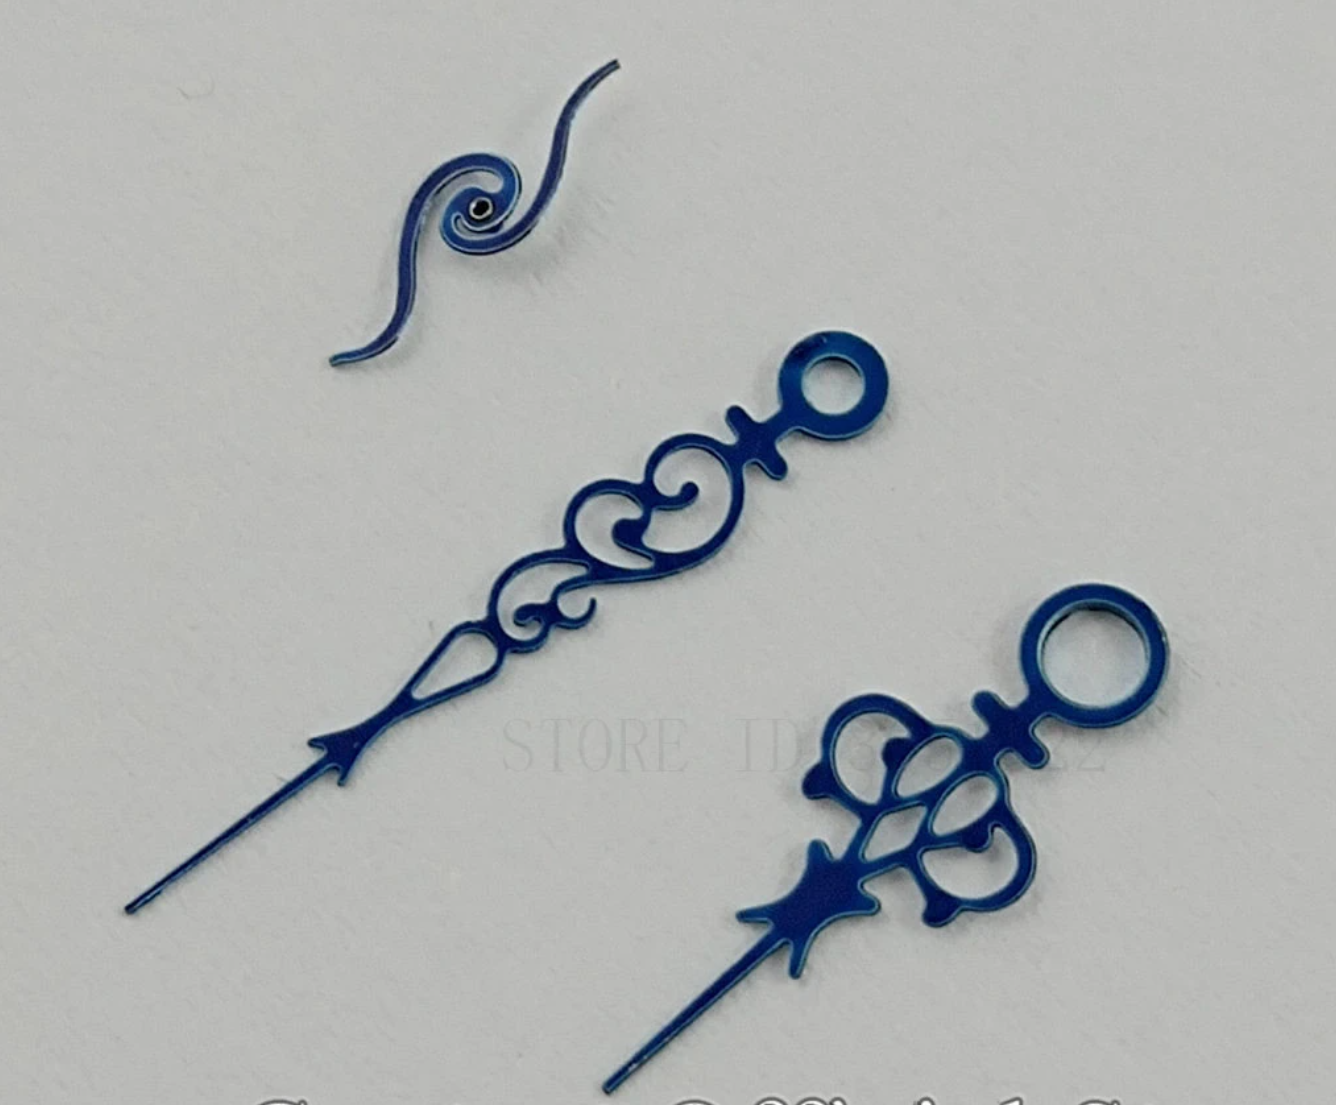
Hands
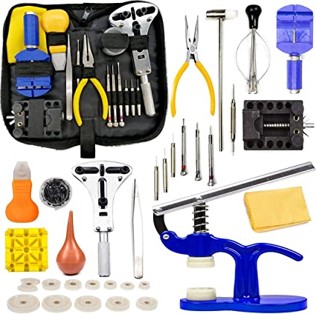
One thing to note is that I also needed special equipment and tools for the watch building. They are found as kits on websites like AliExpress and Amazon. I have searched a lot for them and finalized on this one as it also has the hand removal tool, while many others do not.
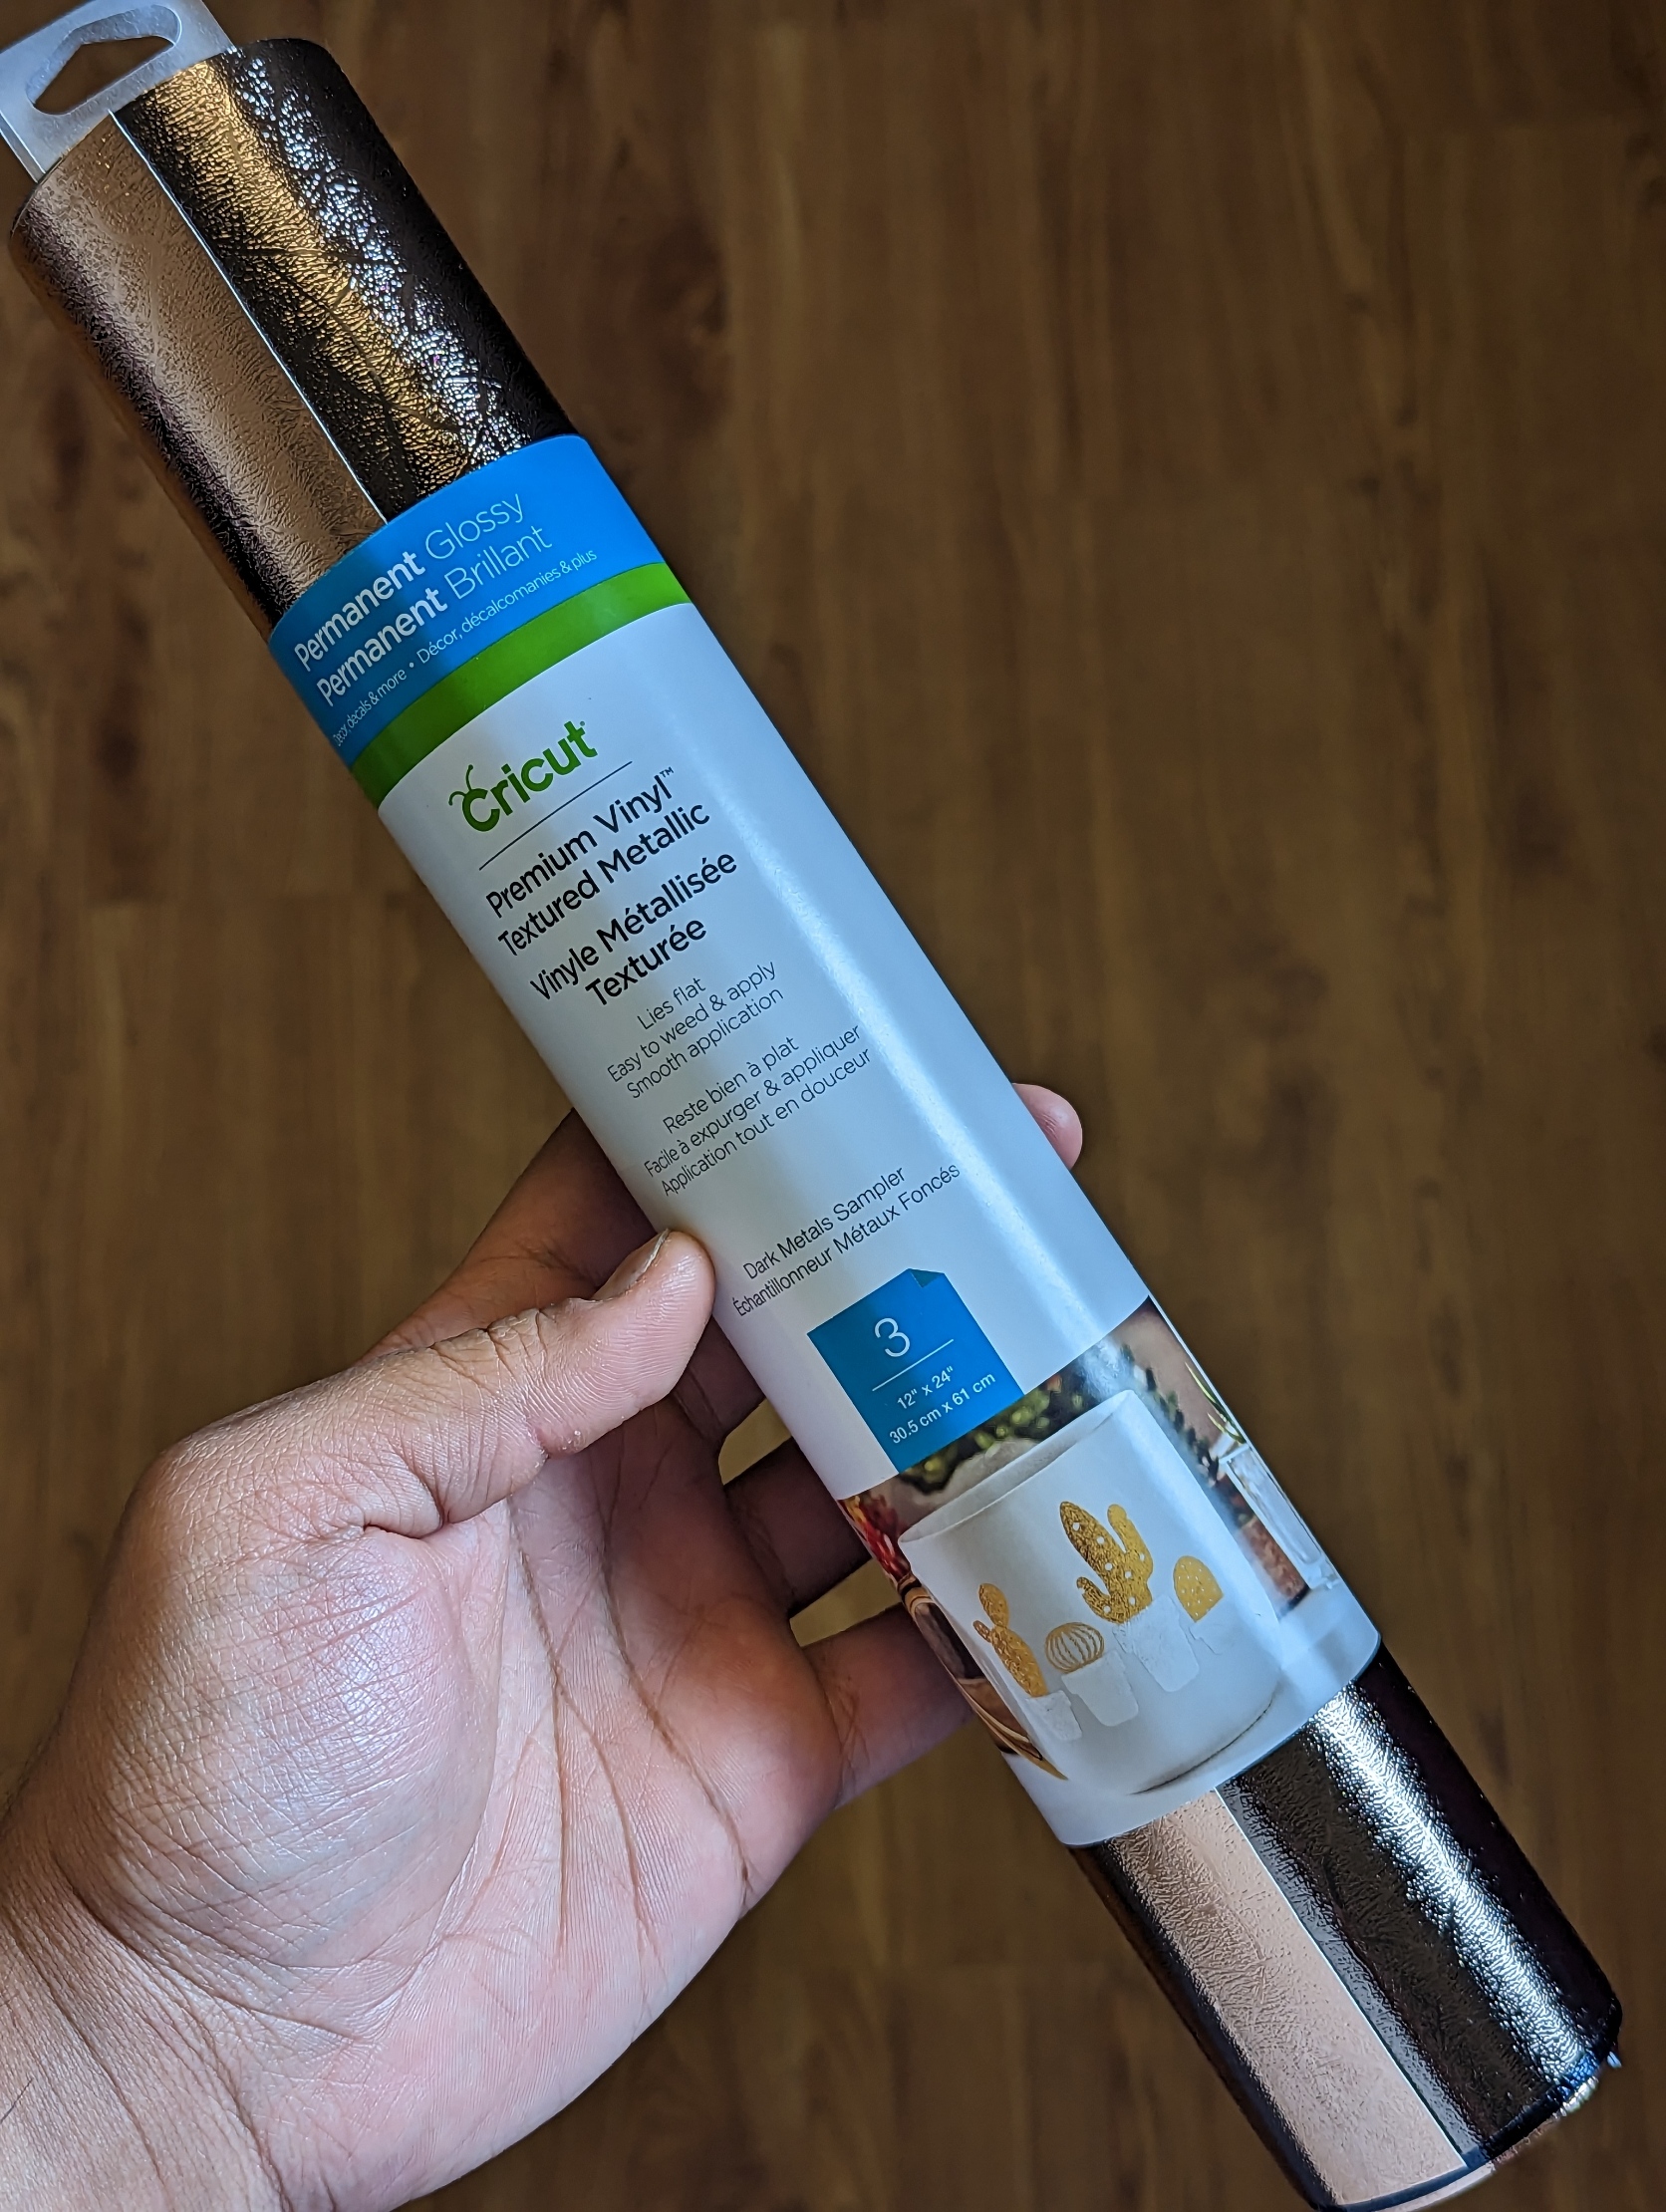
Also, I couldn’t find a dial for the watch that which would be minimally obstructive yet suit the Art Nouveau aesthetic. Due to this, I had decided to build my own dial out of metallic vinyl, as it would satisfy the space requirement due to how thin vinyl are and also suit the aesthetic.
The creation of the dial can be broken down into 4 parts:
- Looking for the best available materials:
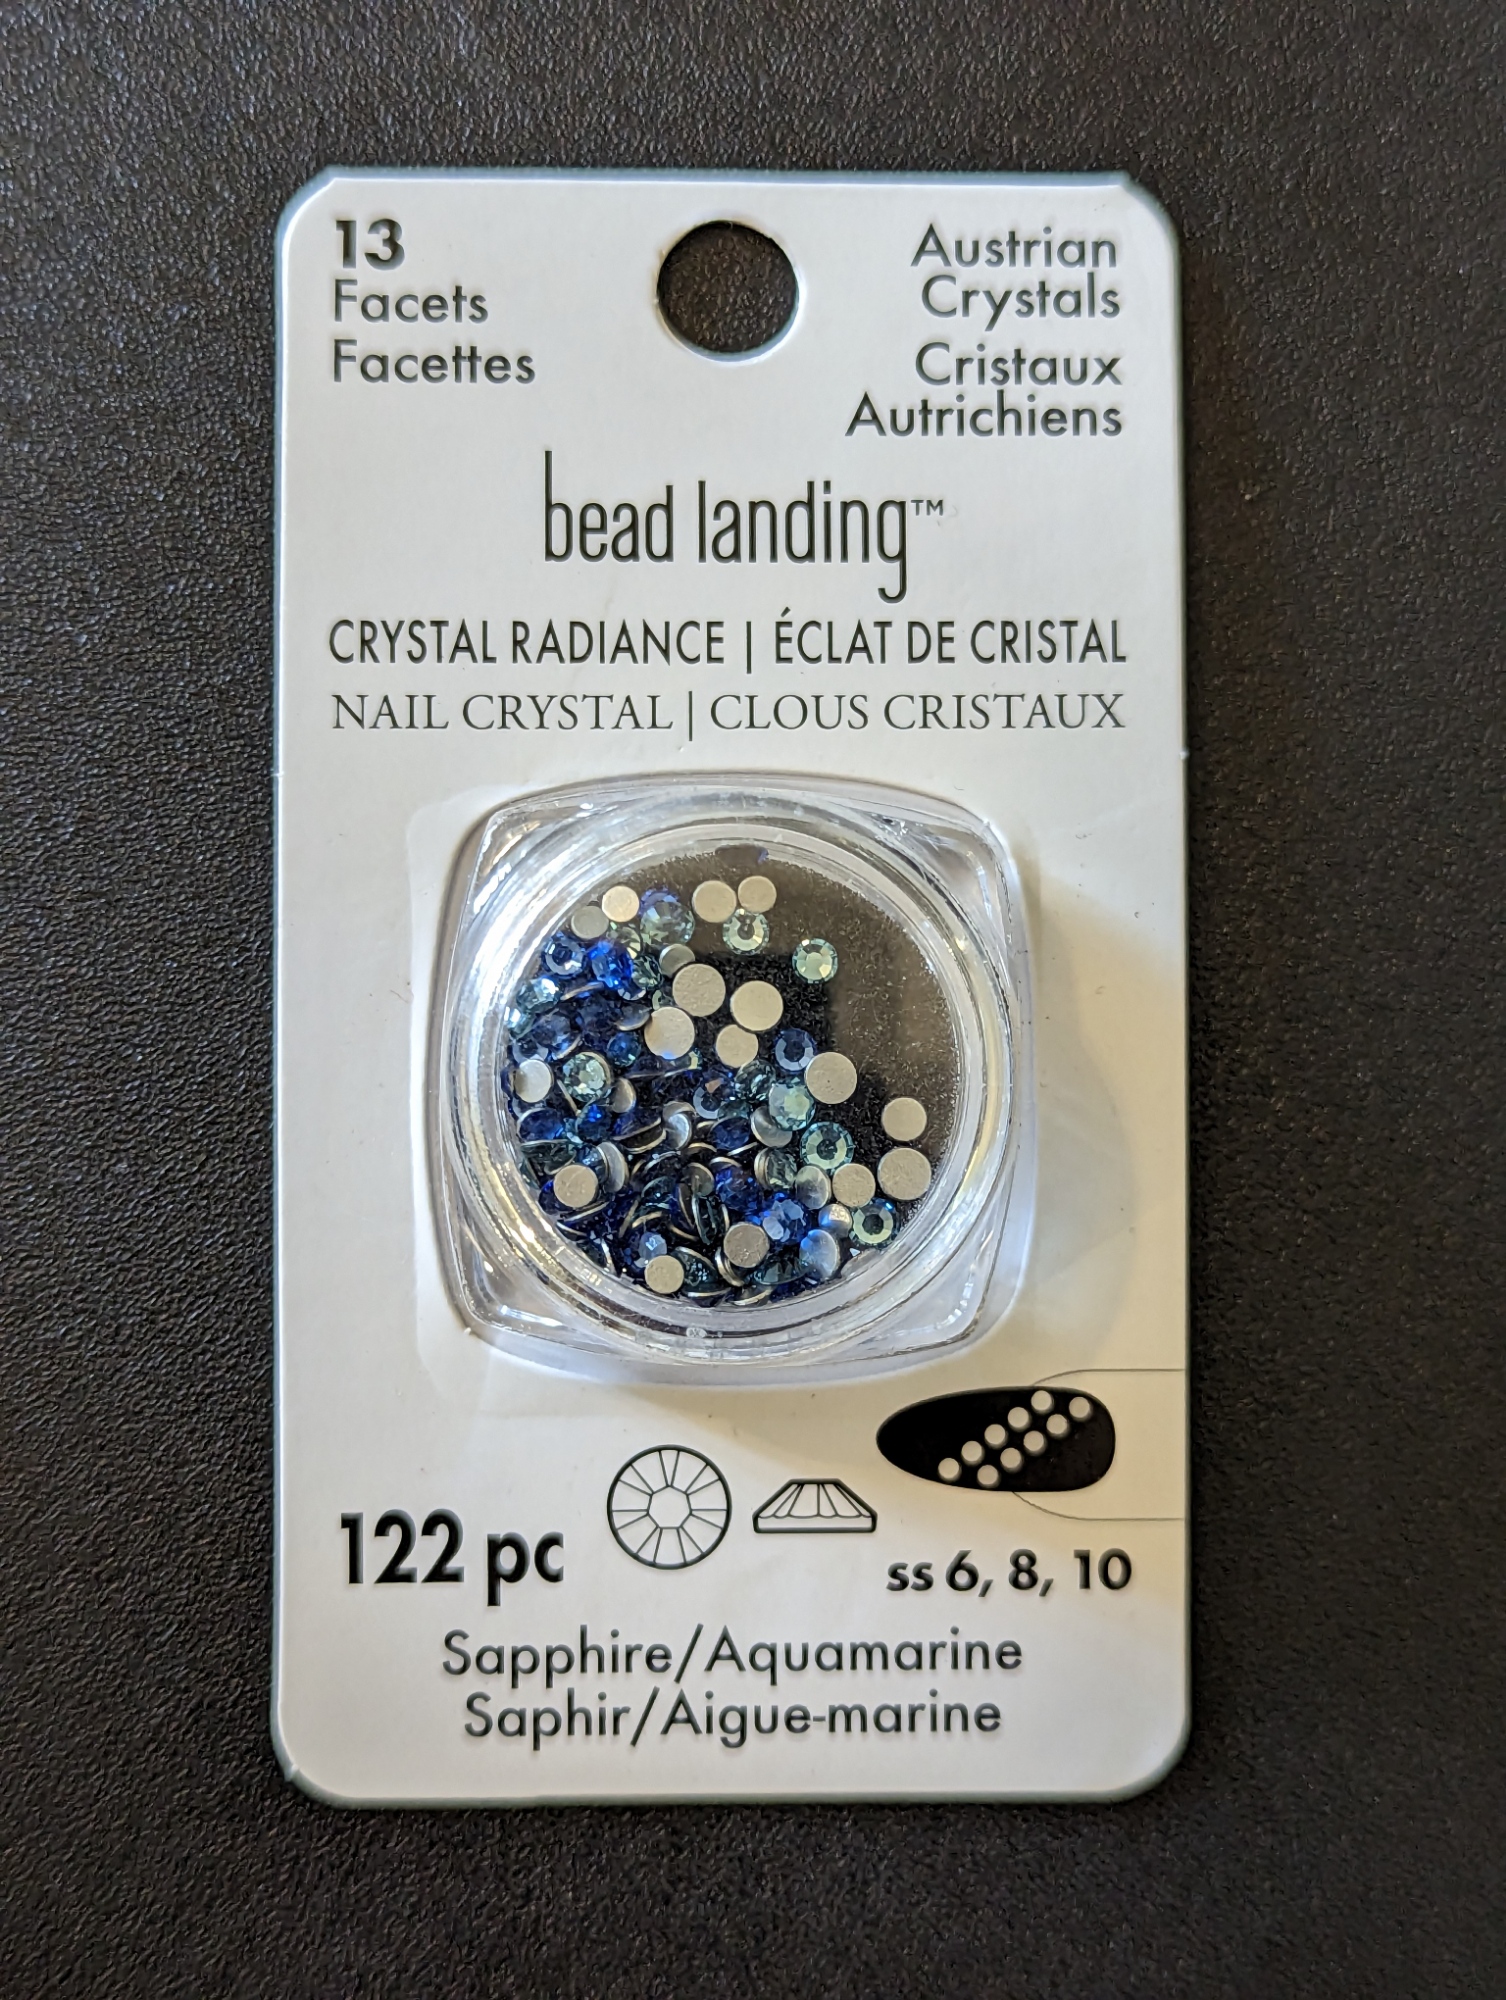
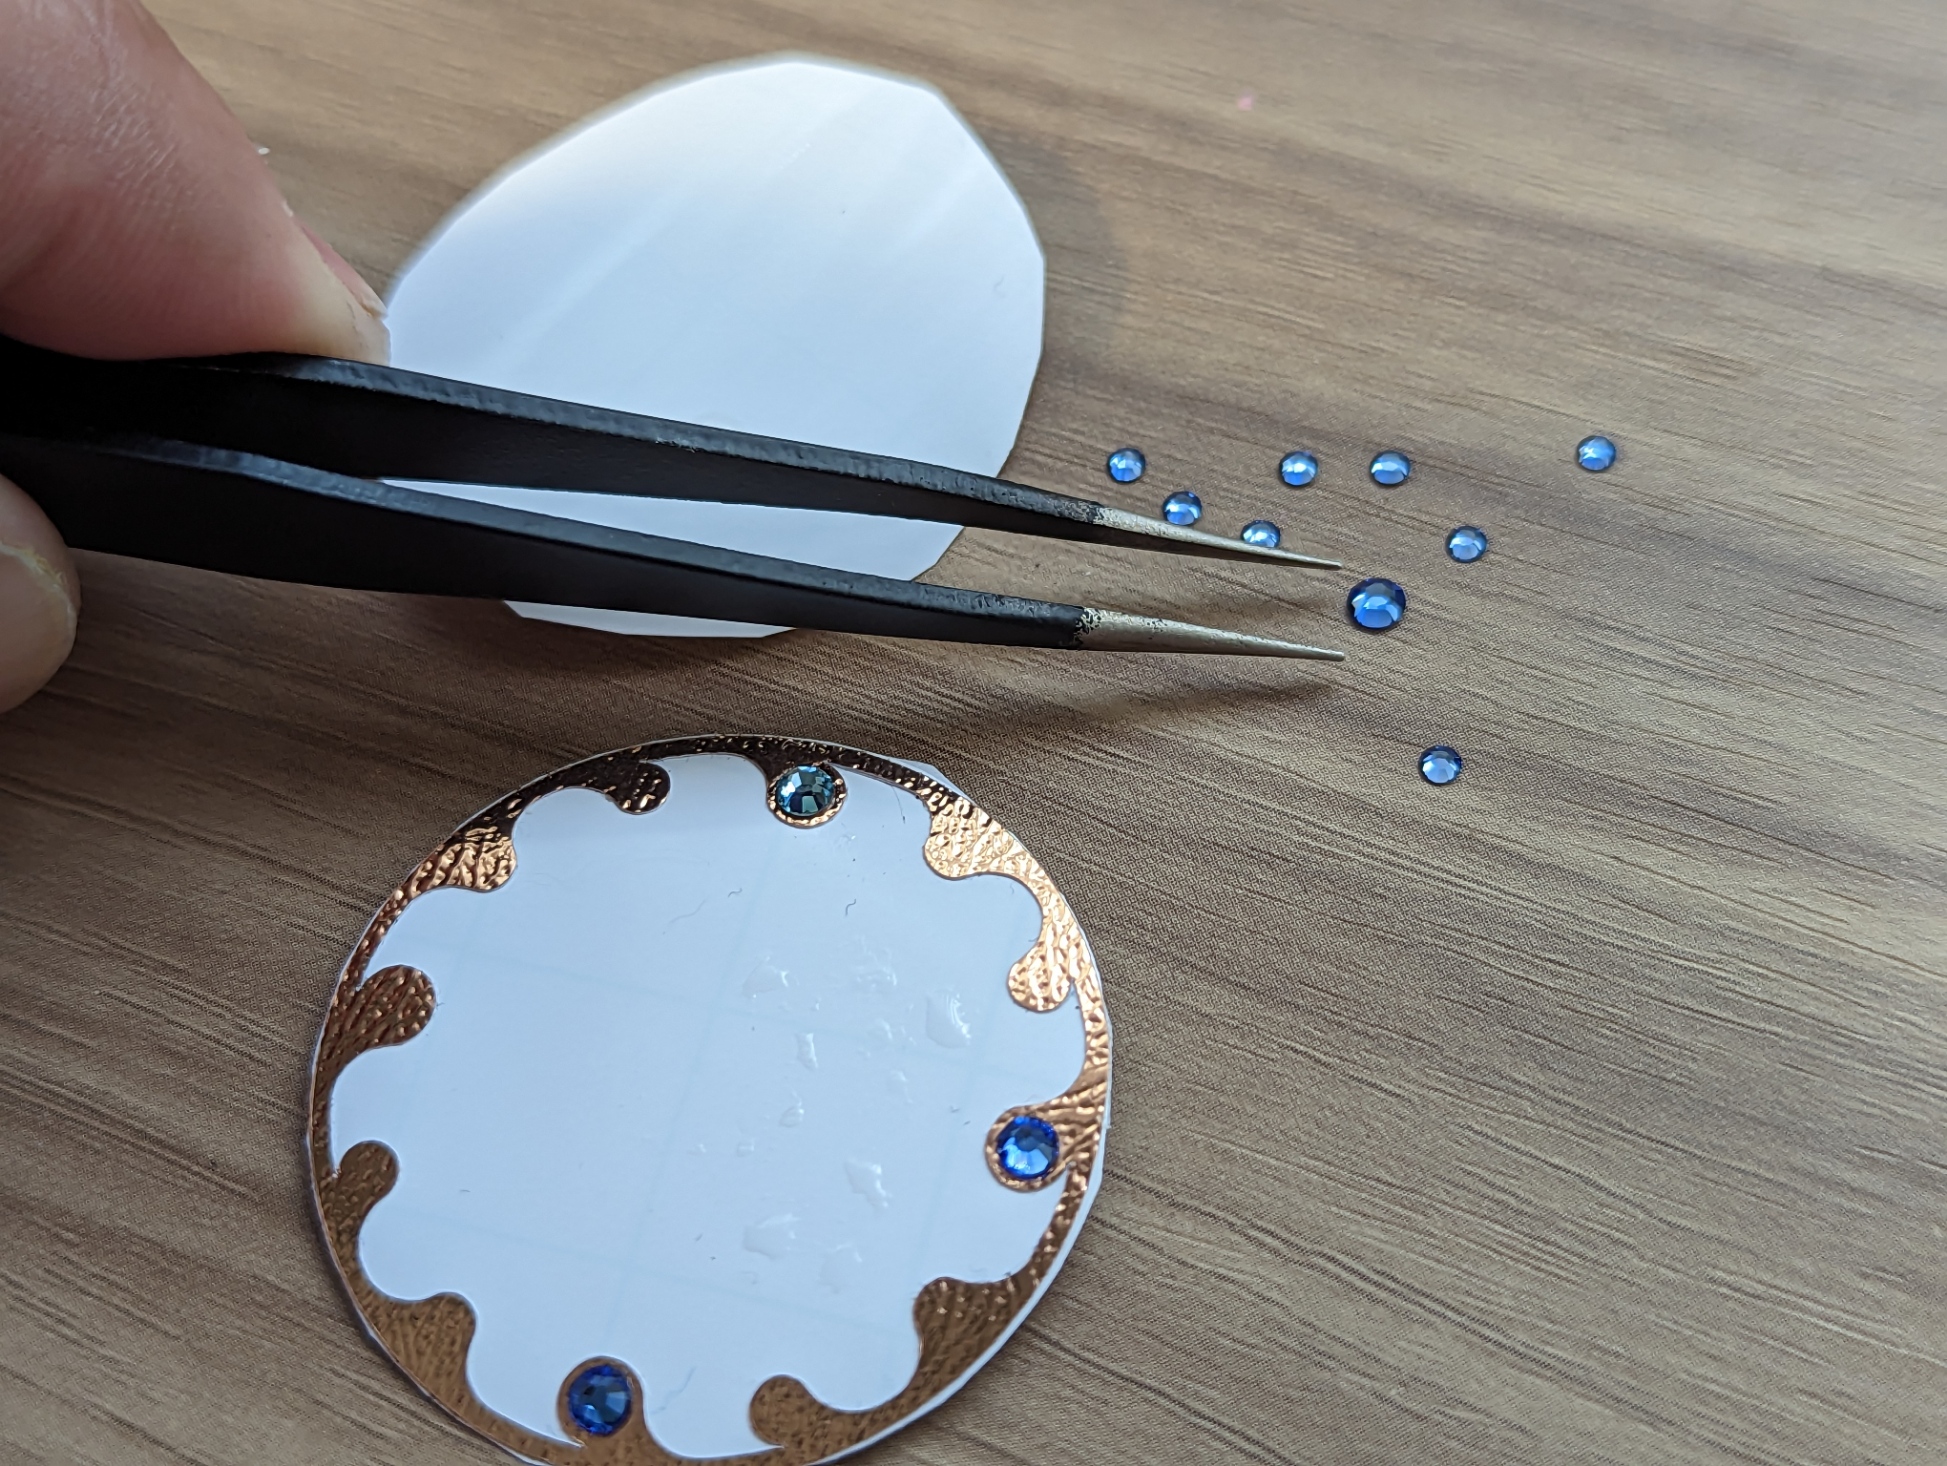
I was already able to finalize metallic vinyl as the base material for the dial due to its low thickness, but just the vinyl would not have been very ornamental. So I decided to adorn it with small blue gems as well to complement the copper color.
I was able to find metallic vinyl at Joann and found small blue gems of sizes ss6, ss8, ss10 at Michaels.
2. Designing the dial:
First I started with measurements and constraints for the design.
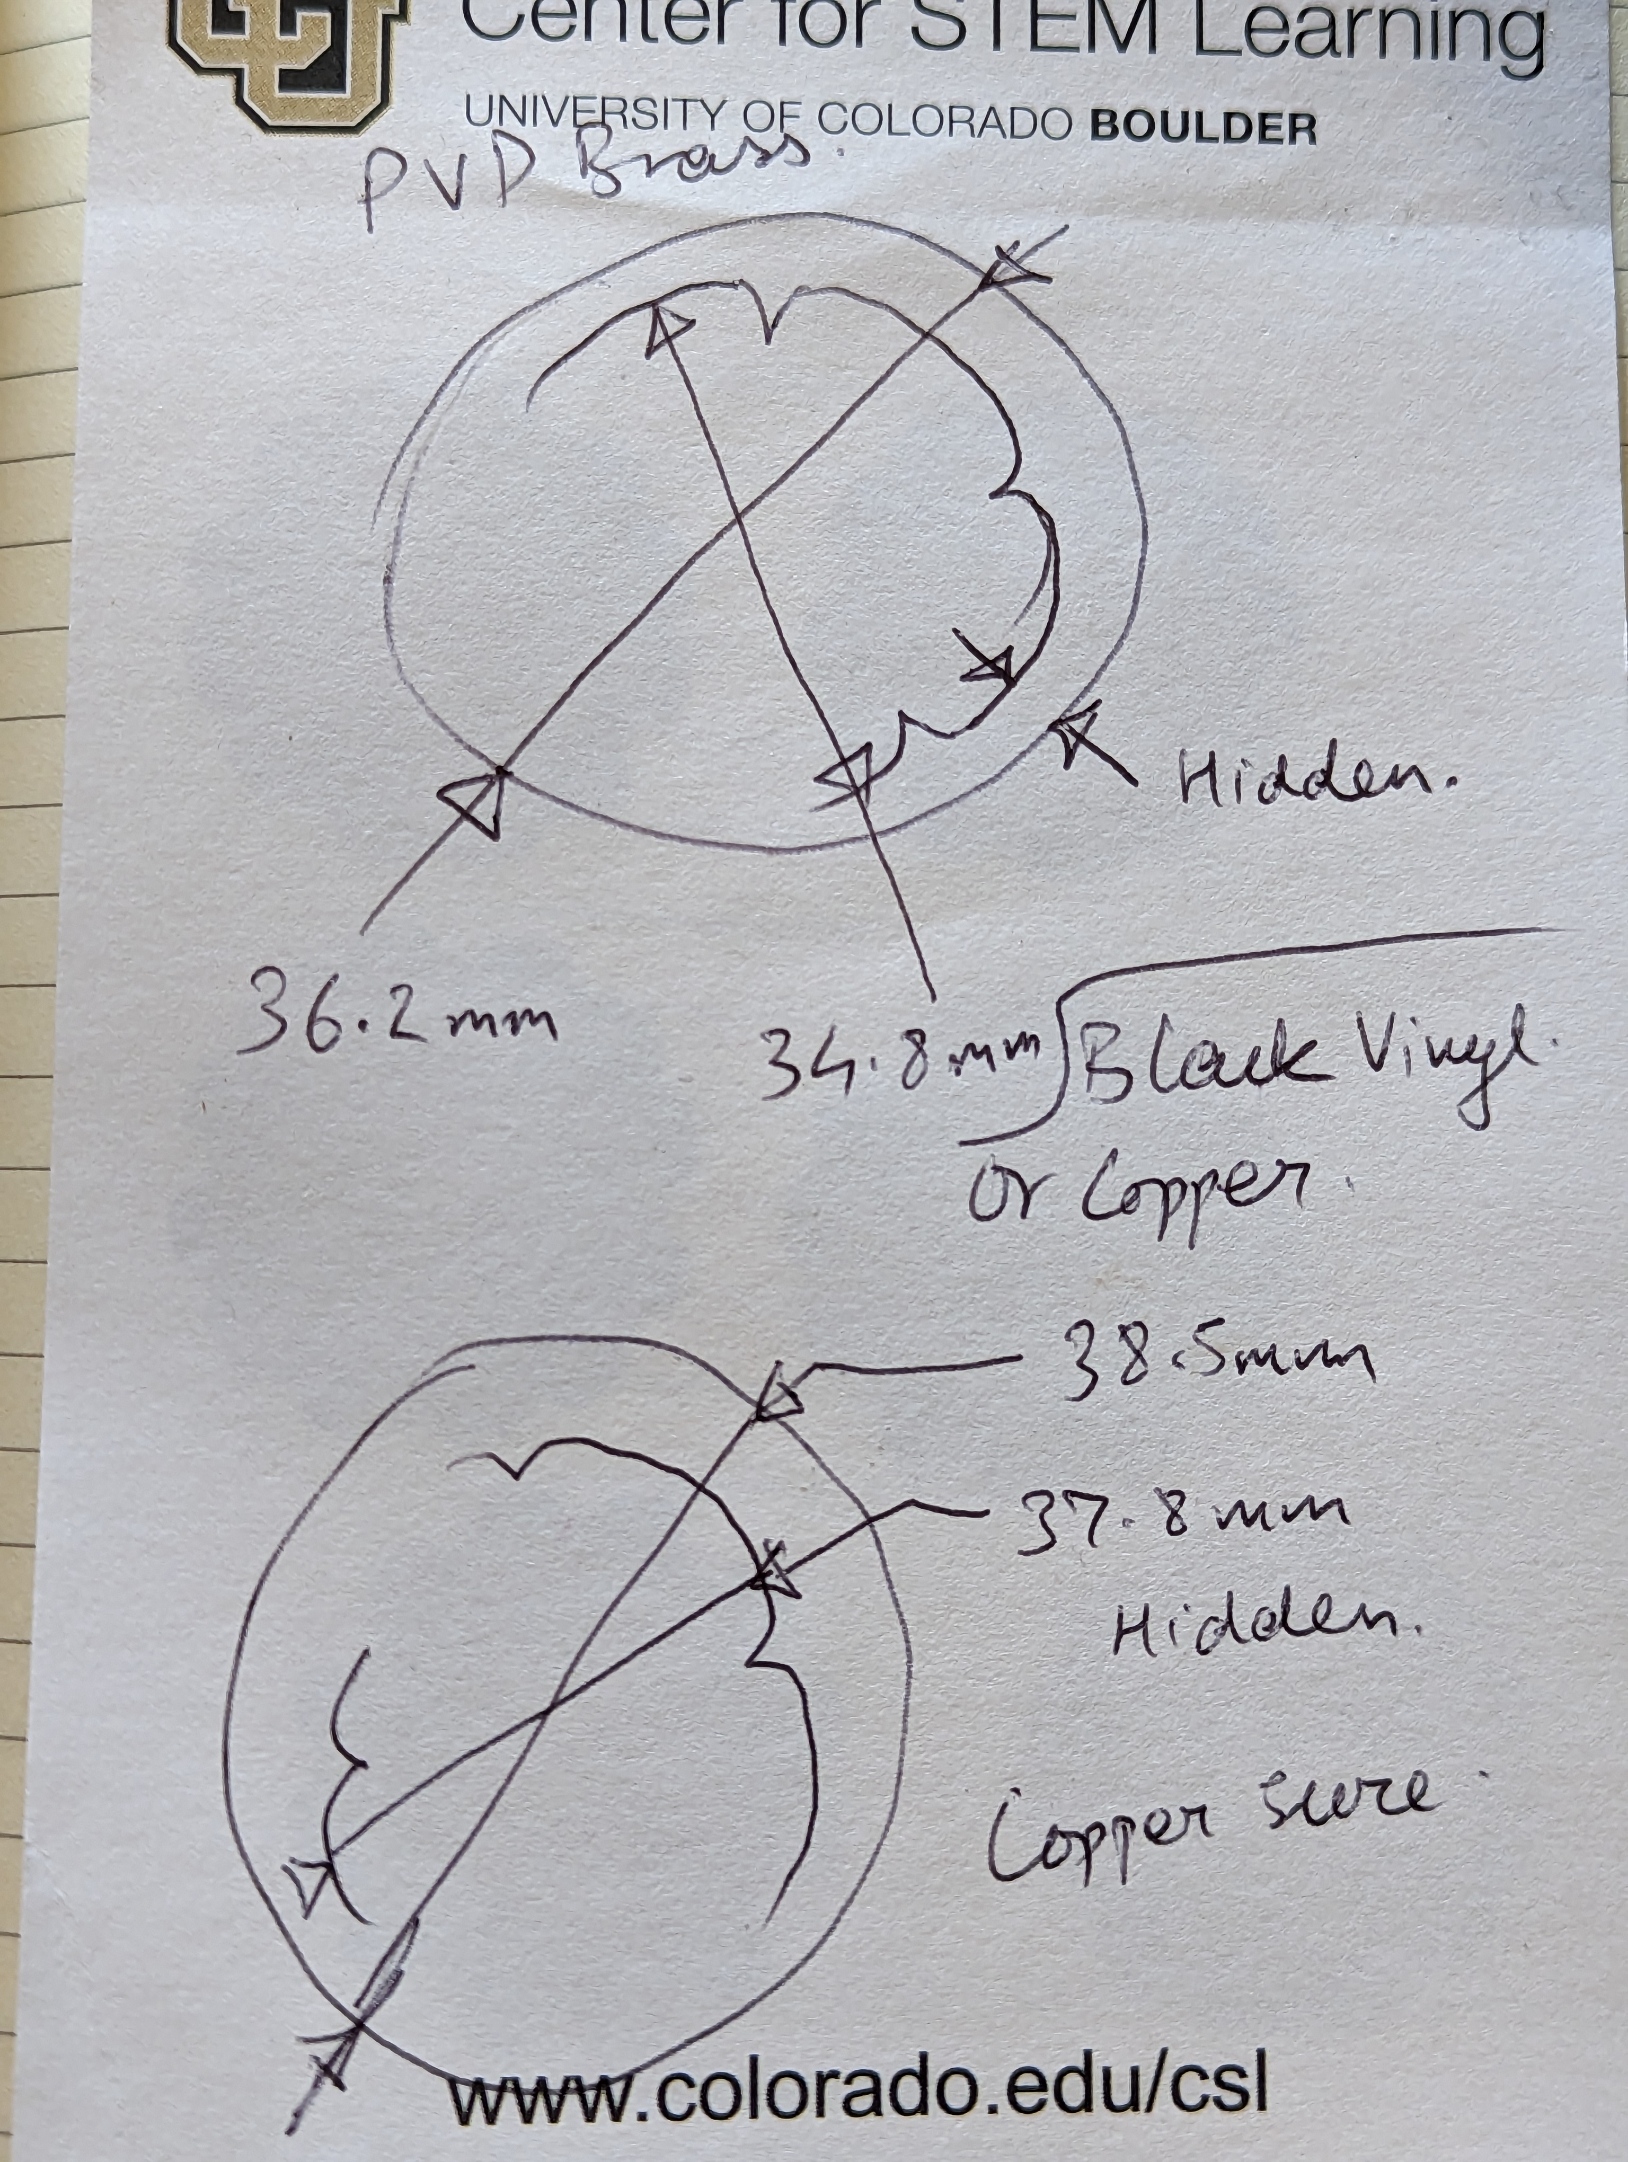
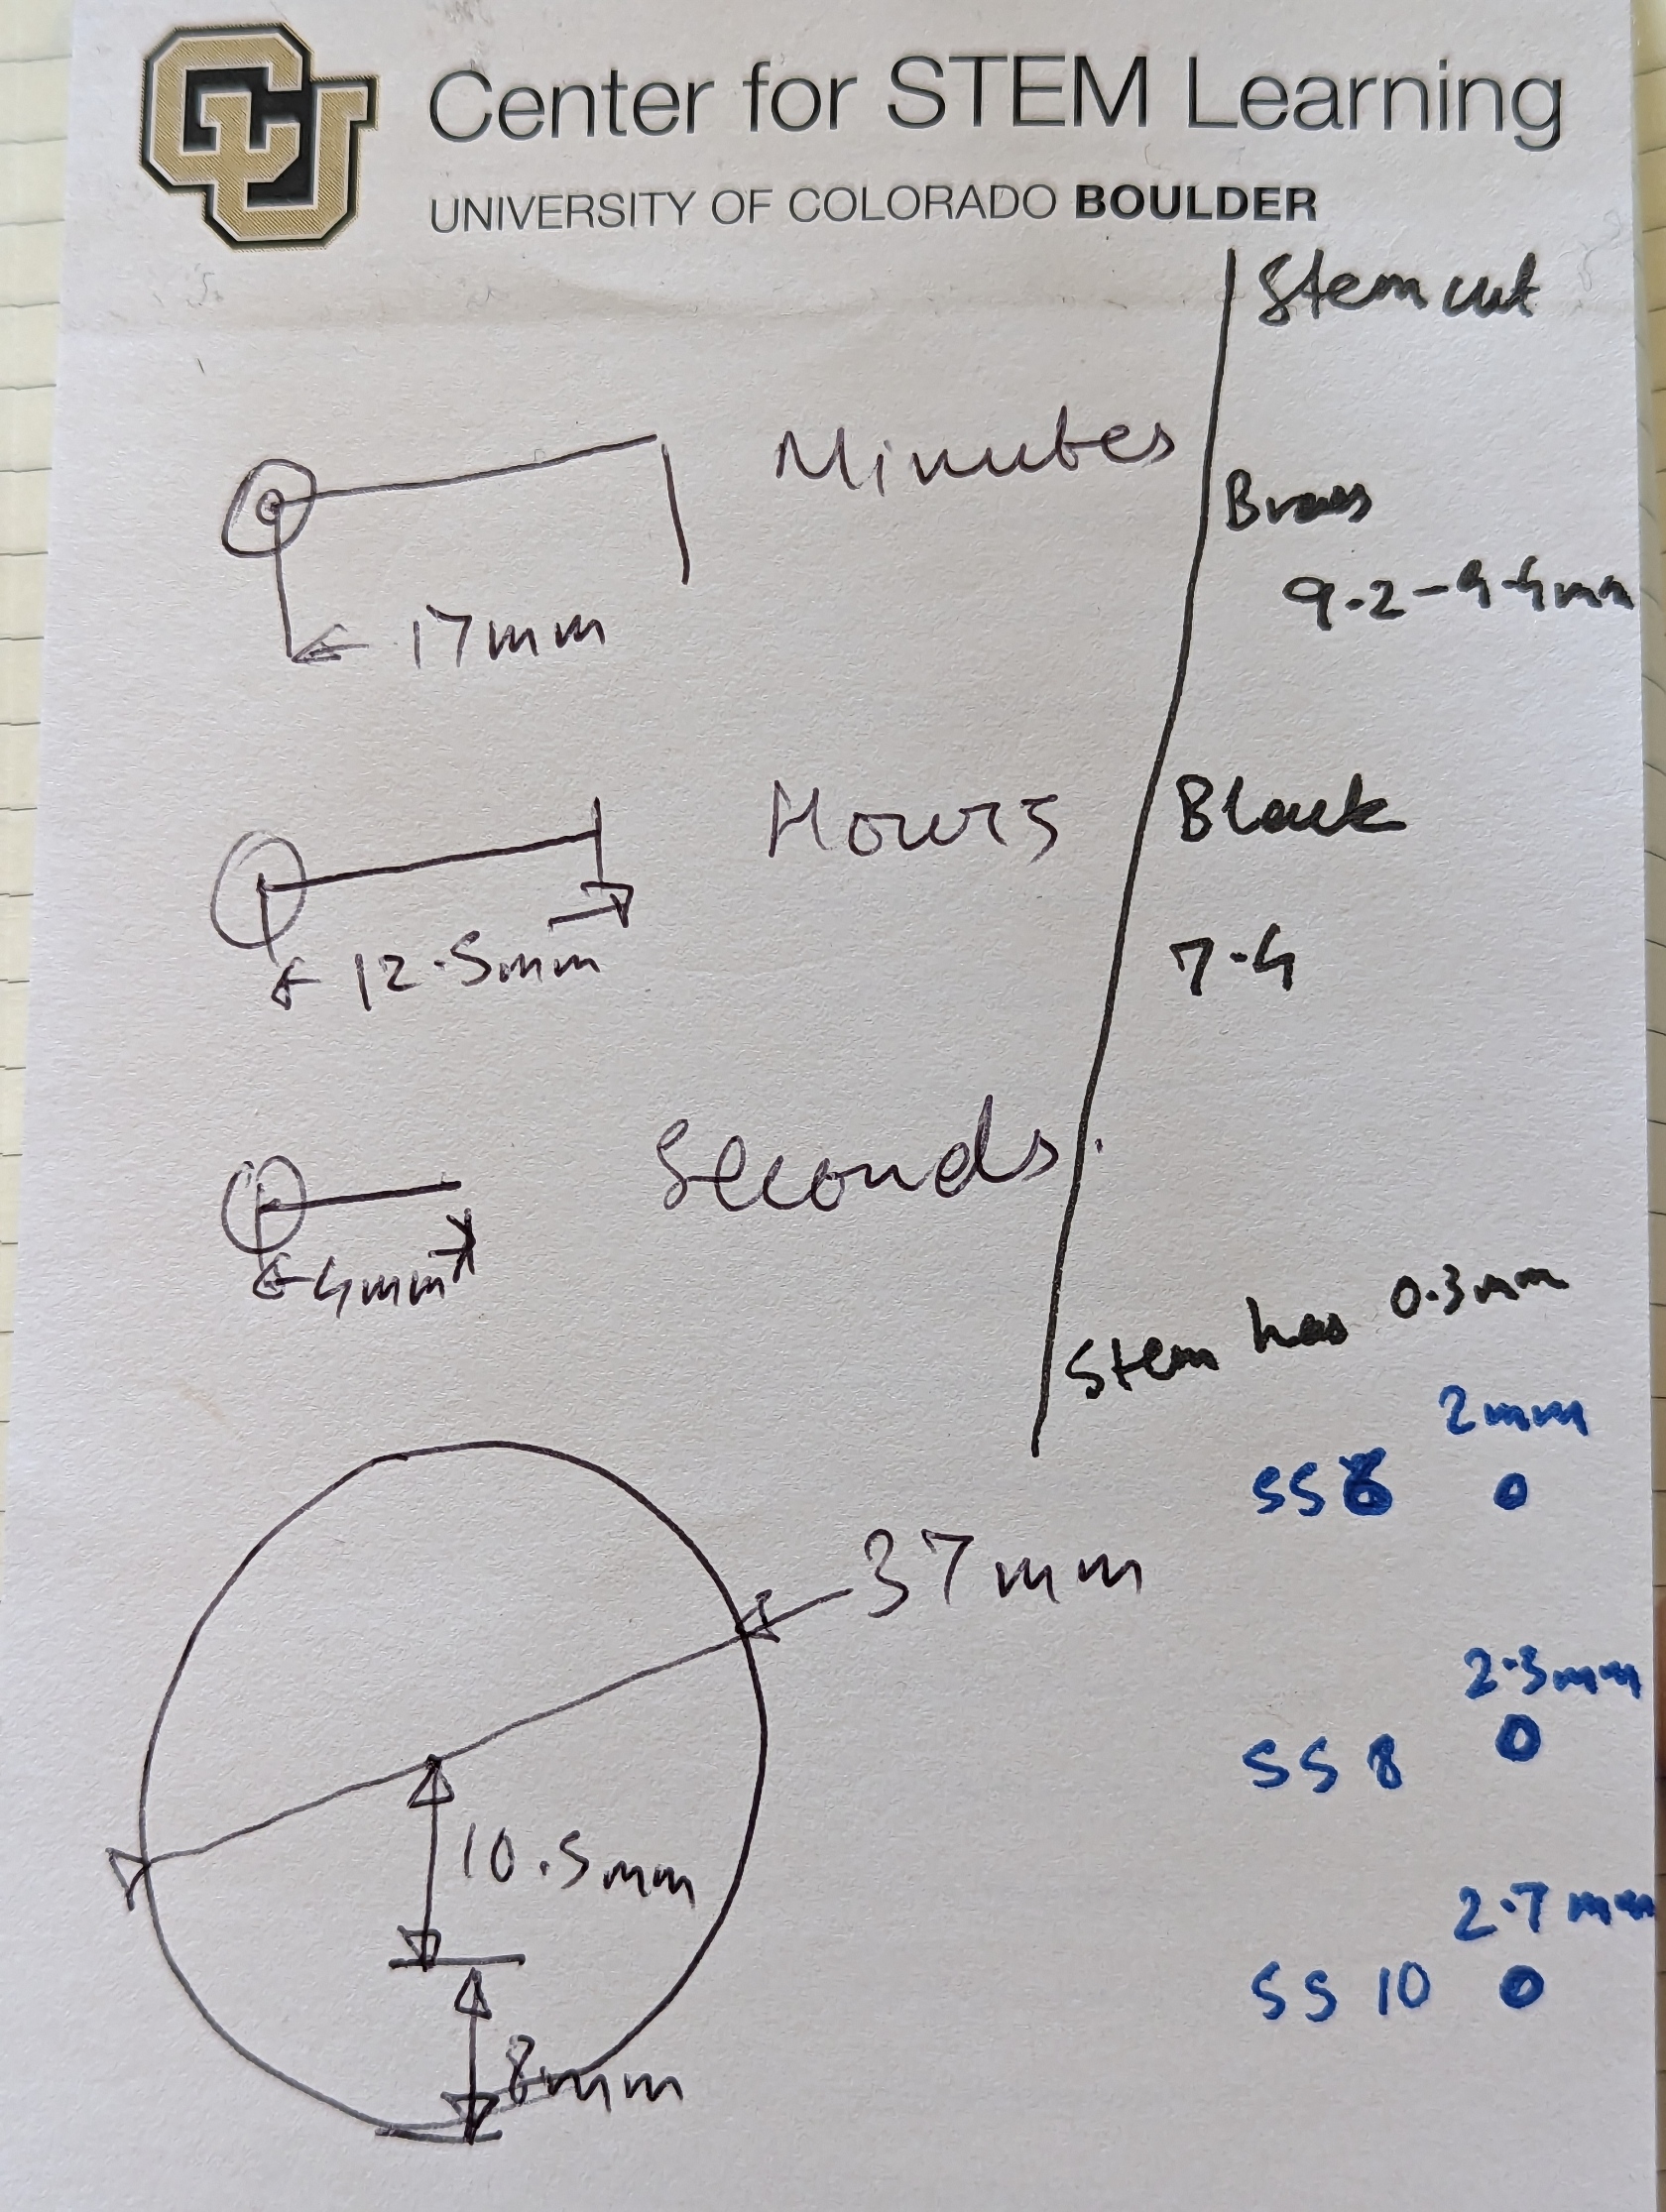
The available space for a dial inside a mechanical watch is generally between 0.2mm to 0.4mm. The thickness of the metallic vinyl is 0.1mm and would thus suit the purpose.
Next, the gem sizes of ss6, ss8, and ss10 had an approximate diameter of 2mm, 2.3mm and 2.7mm.
Then I measured the watch hands to determine what should be the inner diameter of the ring dial.
The watch hands of hour, minutes and seconds had radial length of 12.5mm, 17mm, and 4mm.
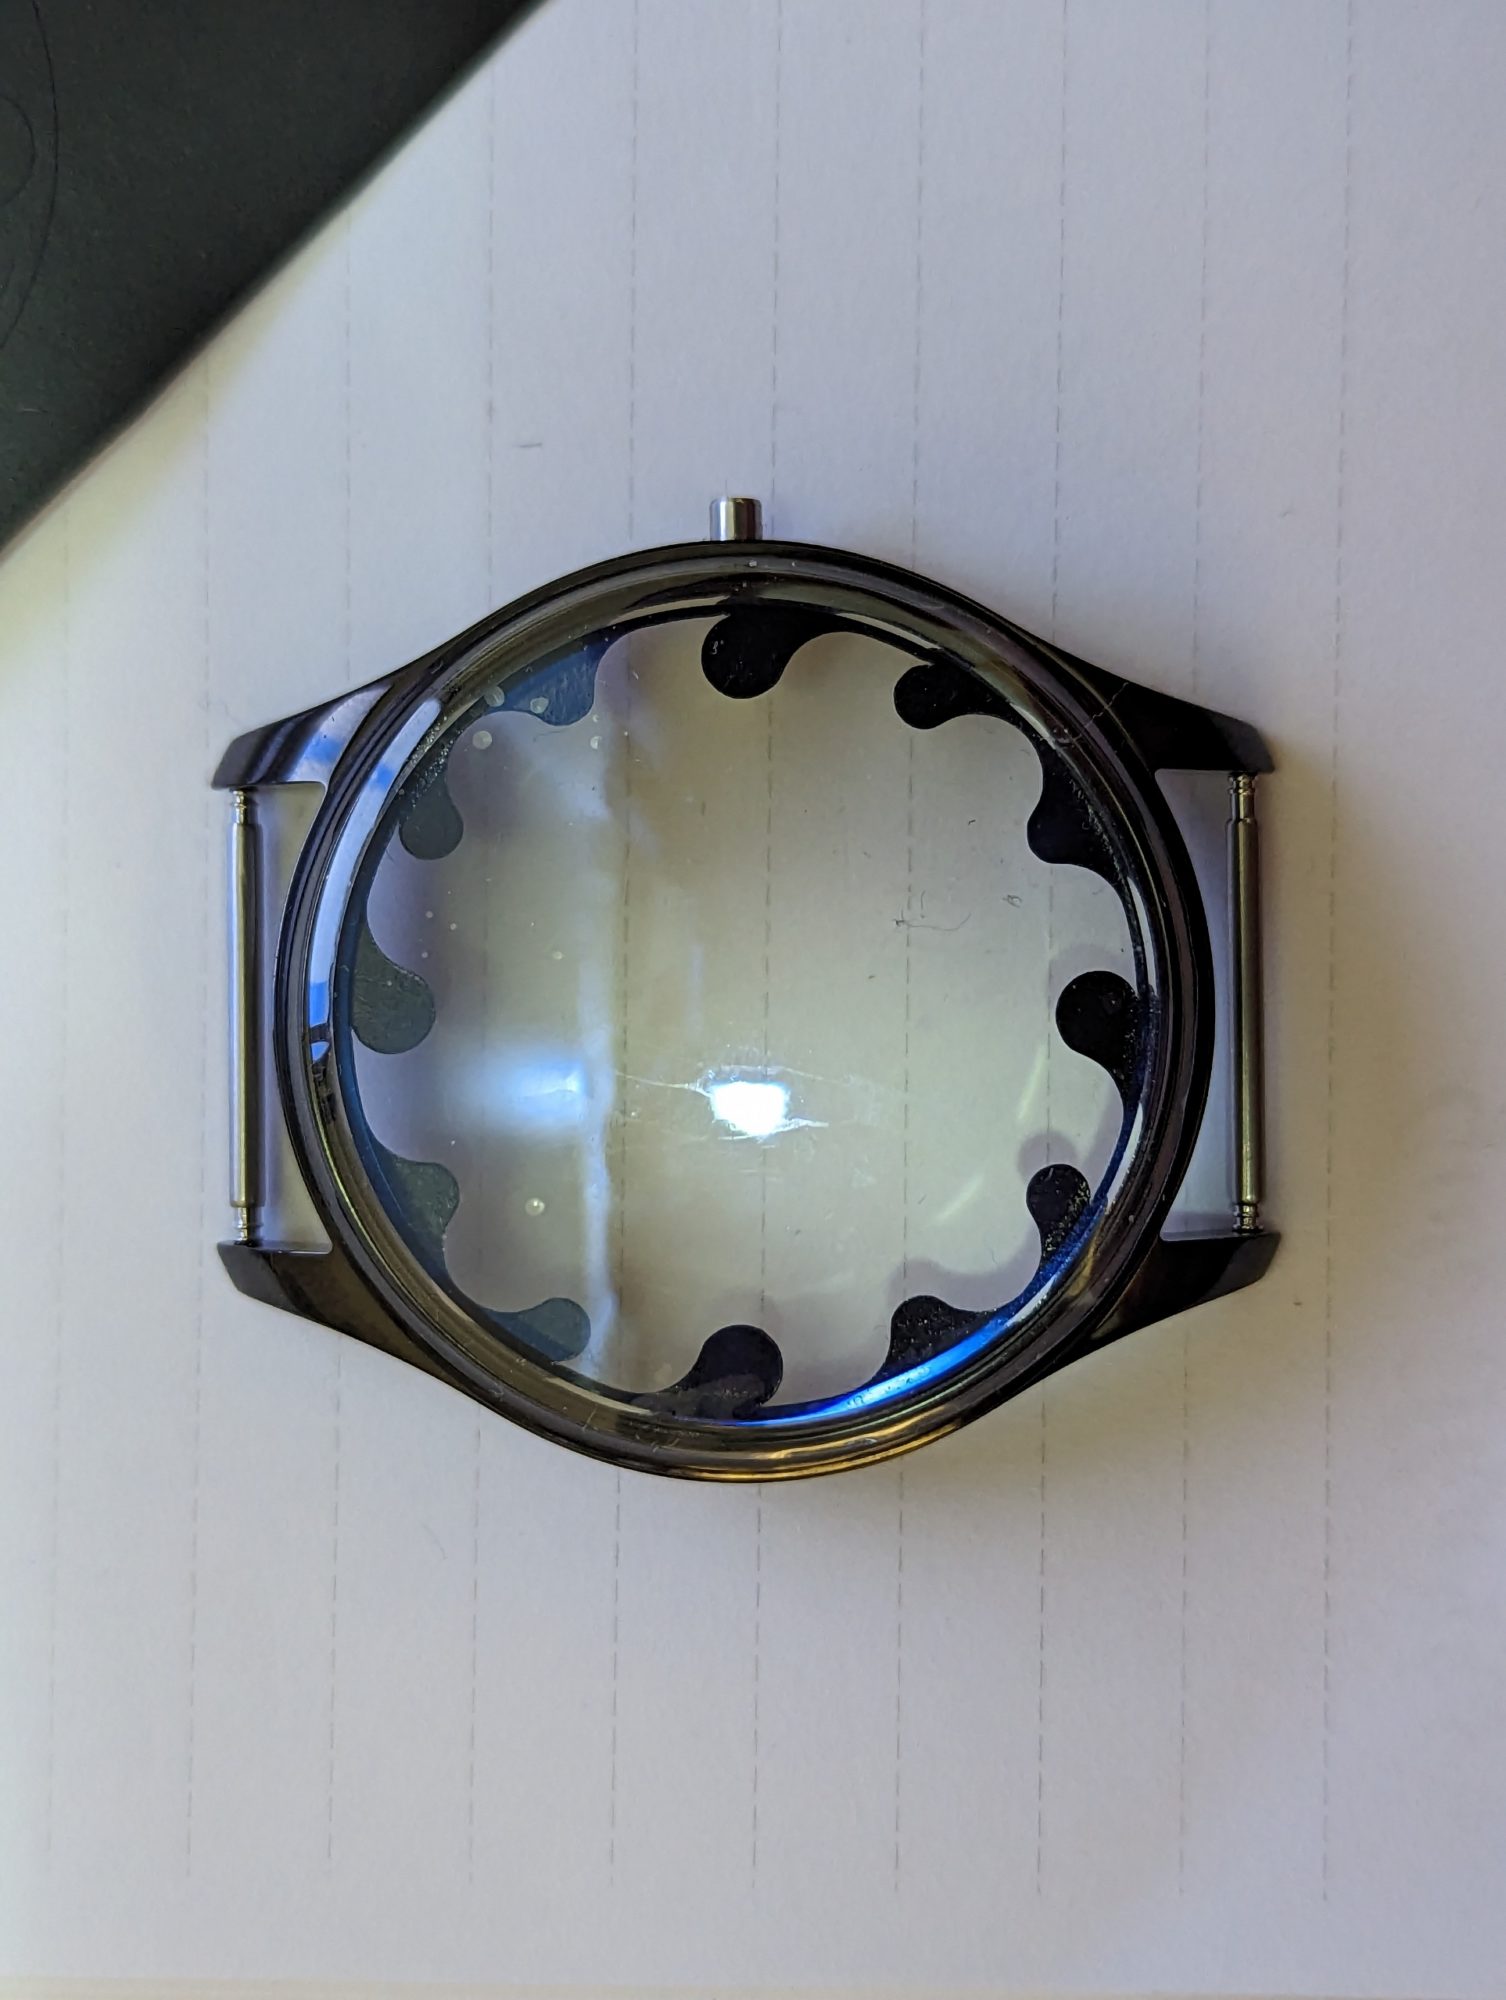
The outer diameter of the ring diameter would be determined by the inner size of the case where the dial would be installed, it was 36.2mm for the originally ordered watch case and 38.5mm for the backup black watch case.
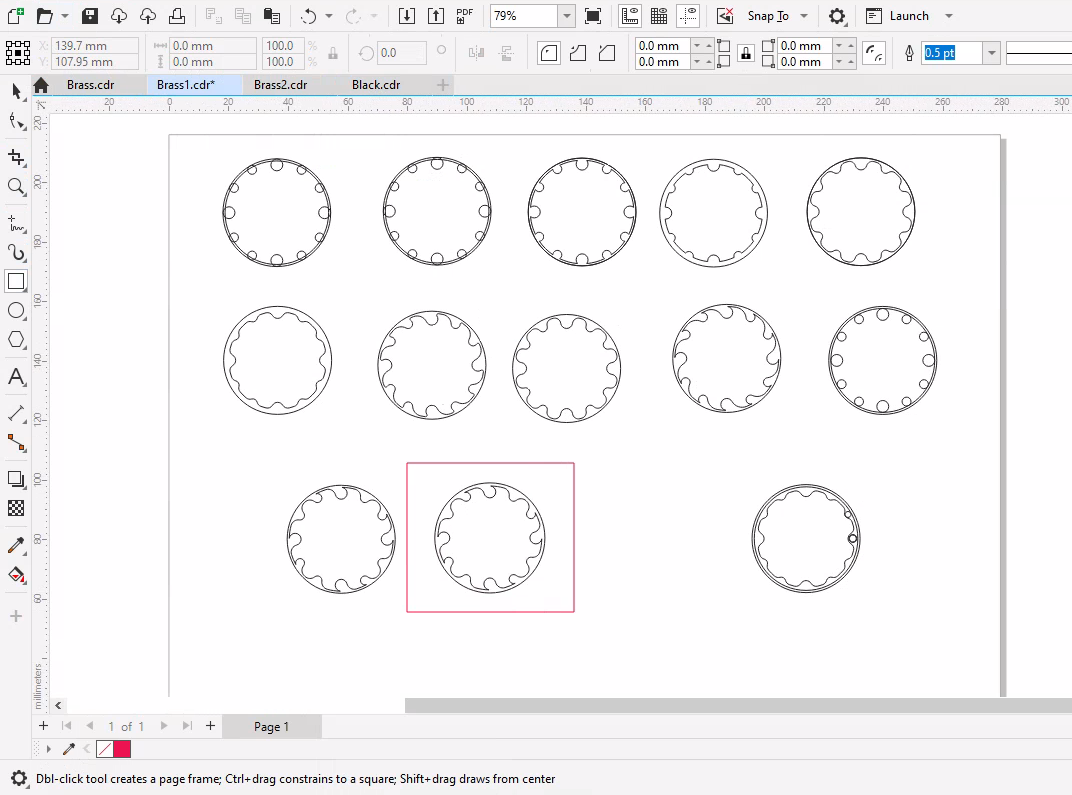
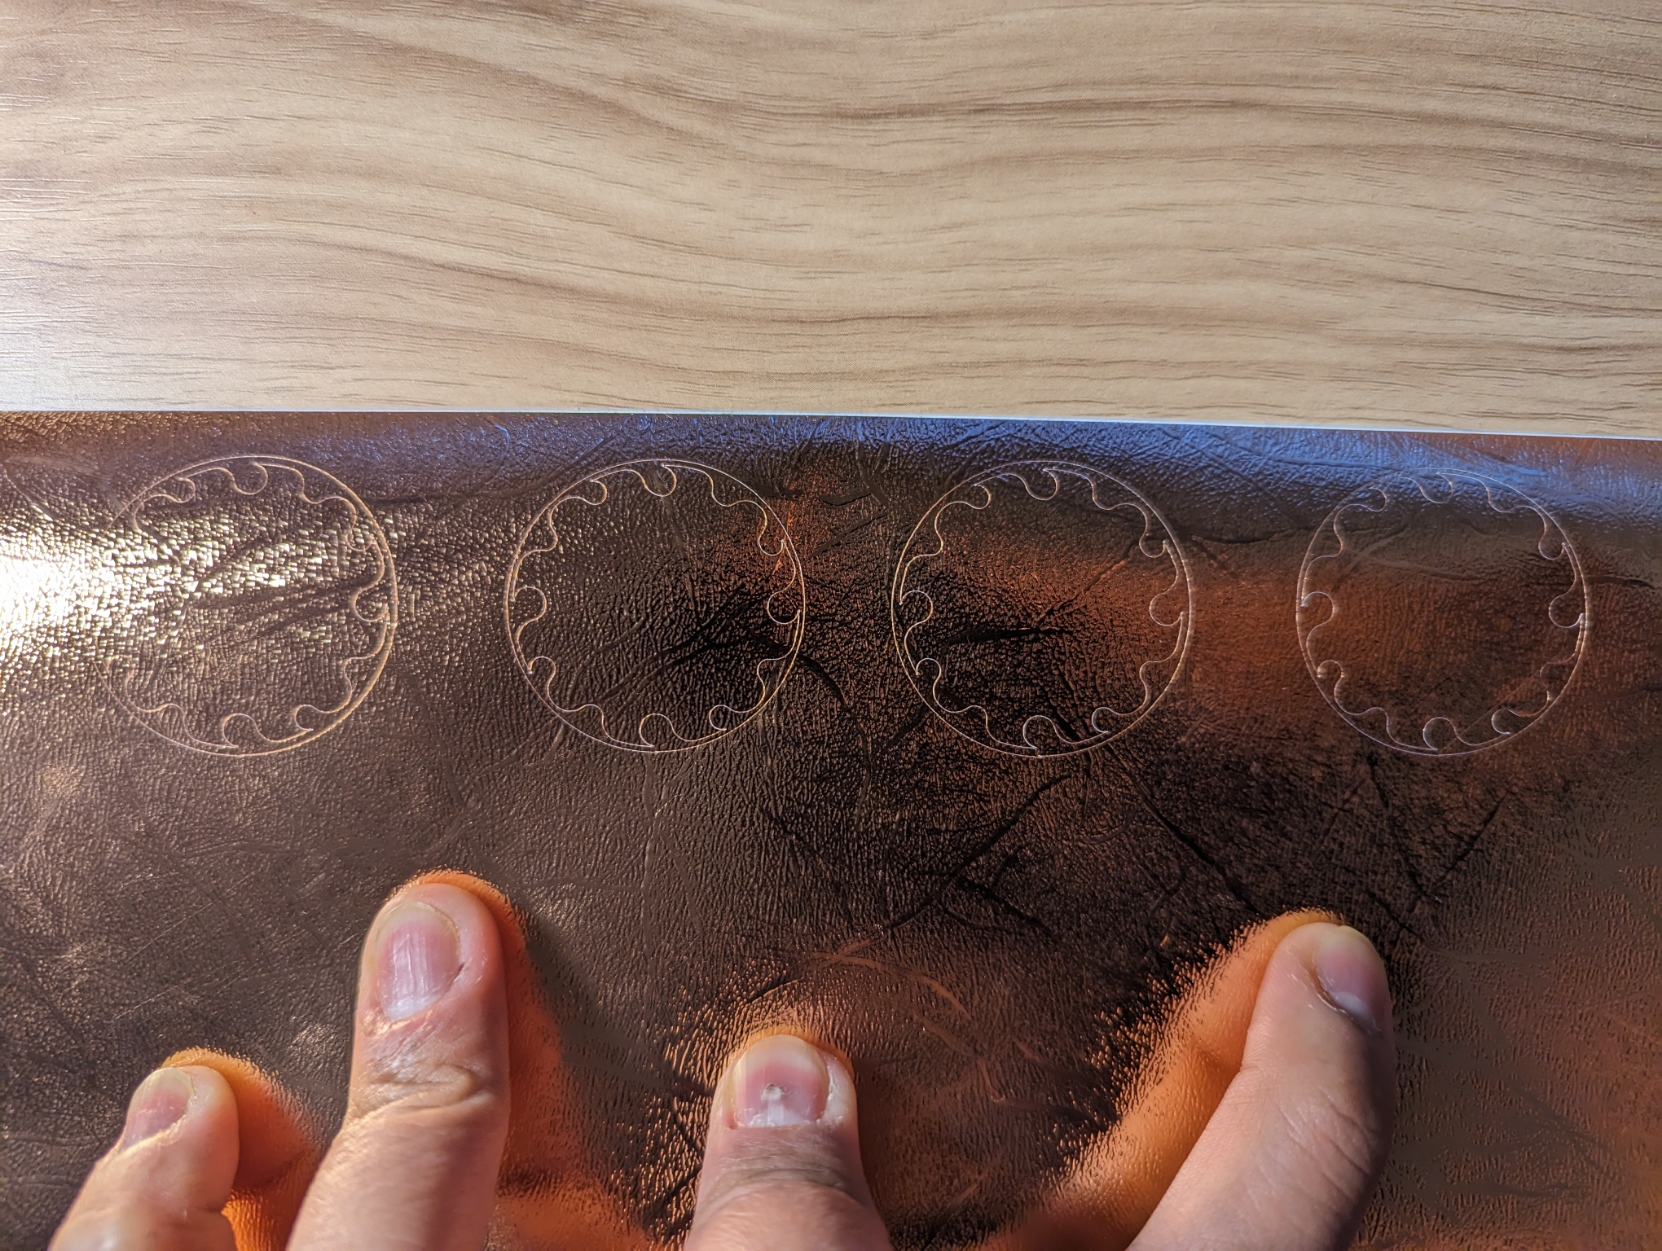
On to creating the CAD for the cutting. I had to use CorelDraw as it is available through the University OIT and a vector file is needed for the vinyl cutting software. I referred to a lot of tutorials for CorelDraw as I didn’t knew how to use a software and couldn’t properly perform simplest functions like how to do fillet at corners. My referred youtube videos are in the references.
I went through iterations of the design where I also had to change the sizes to fit the watch case snuggly. I was dry fitting different sizes of a black vinyl which was used for testing.
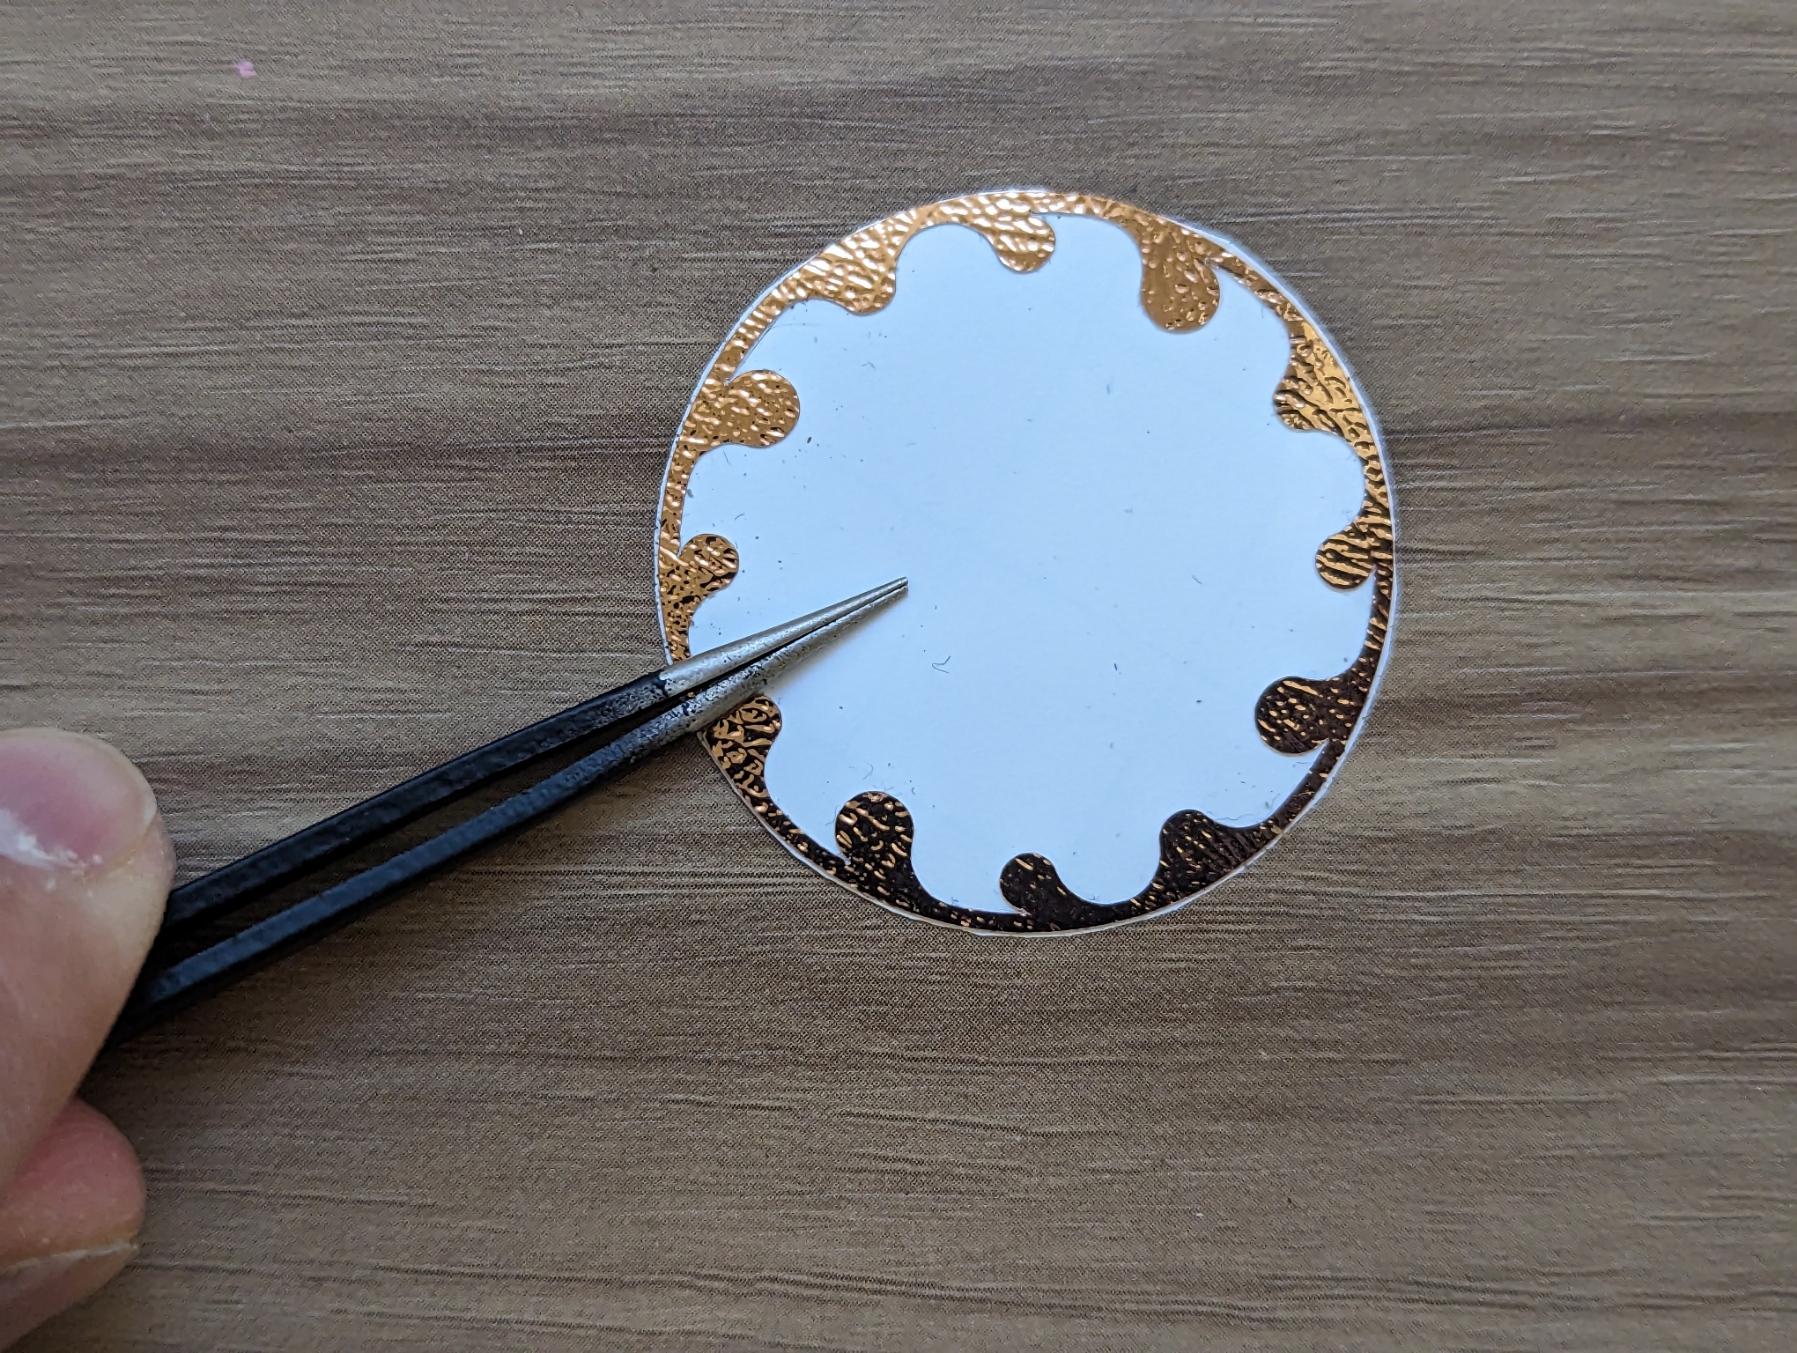
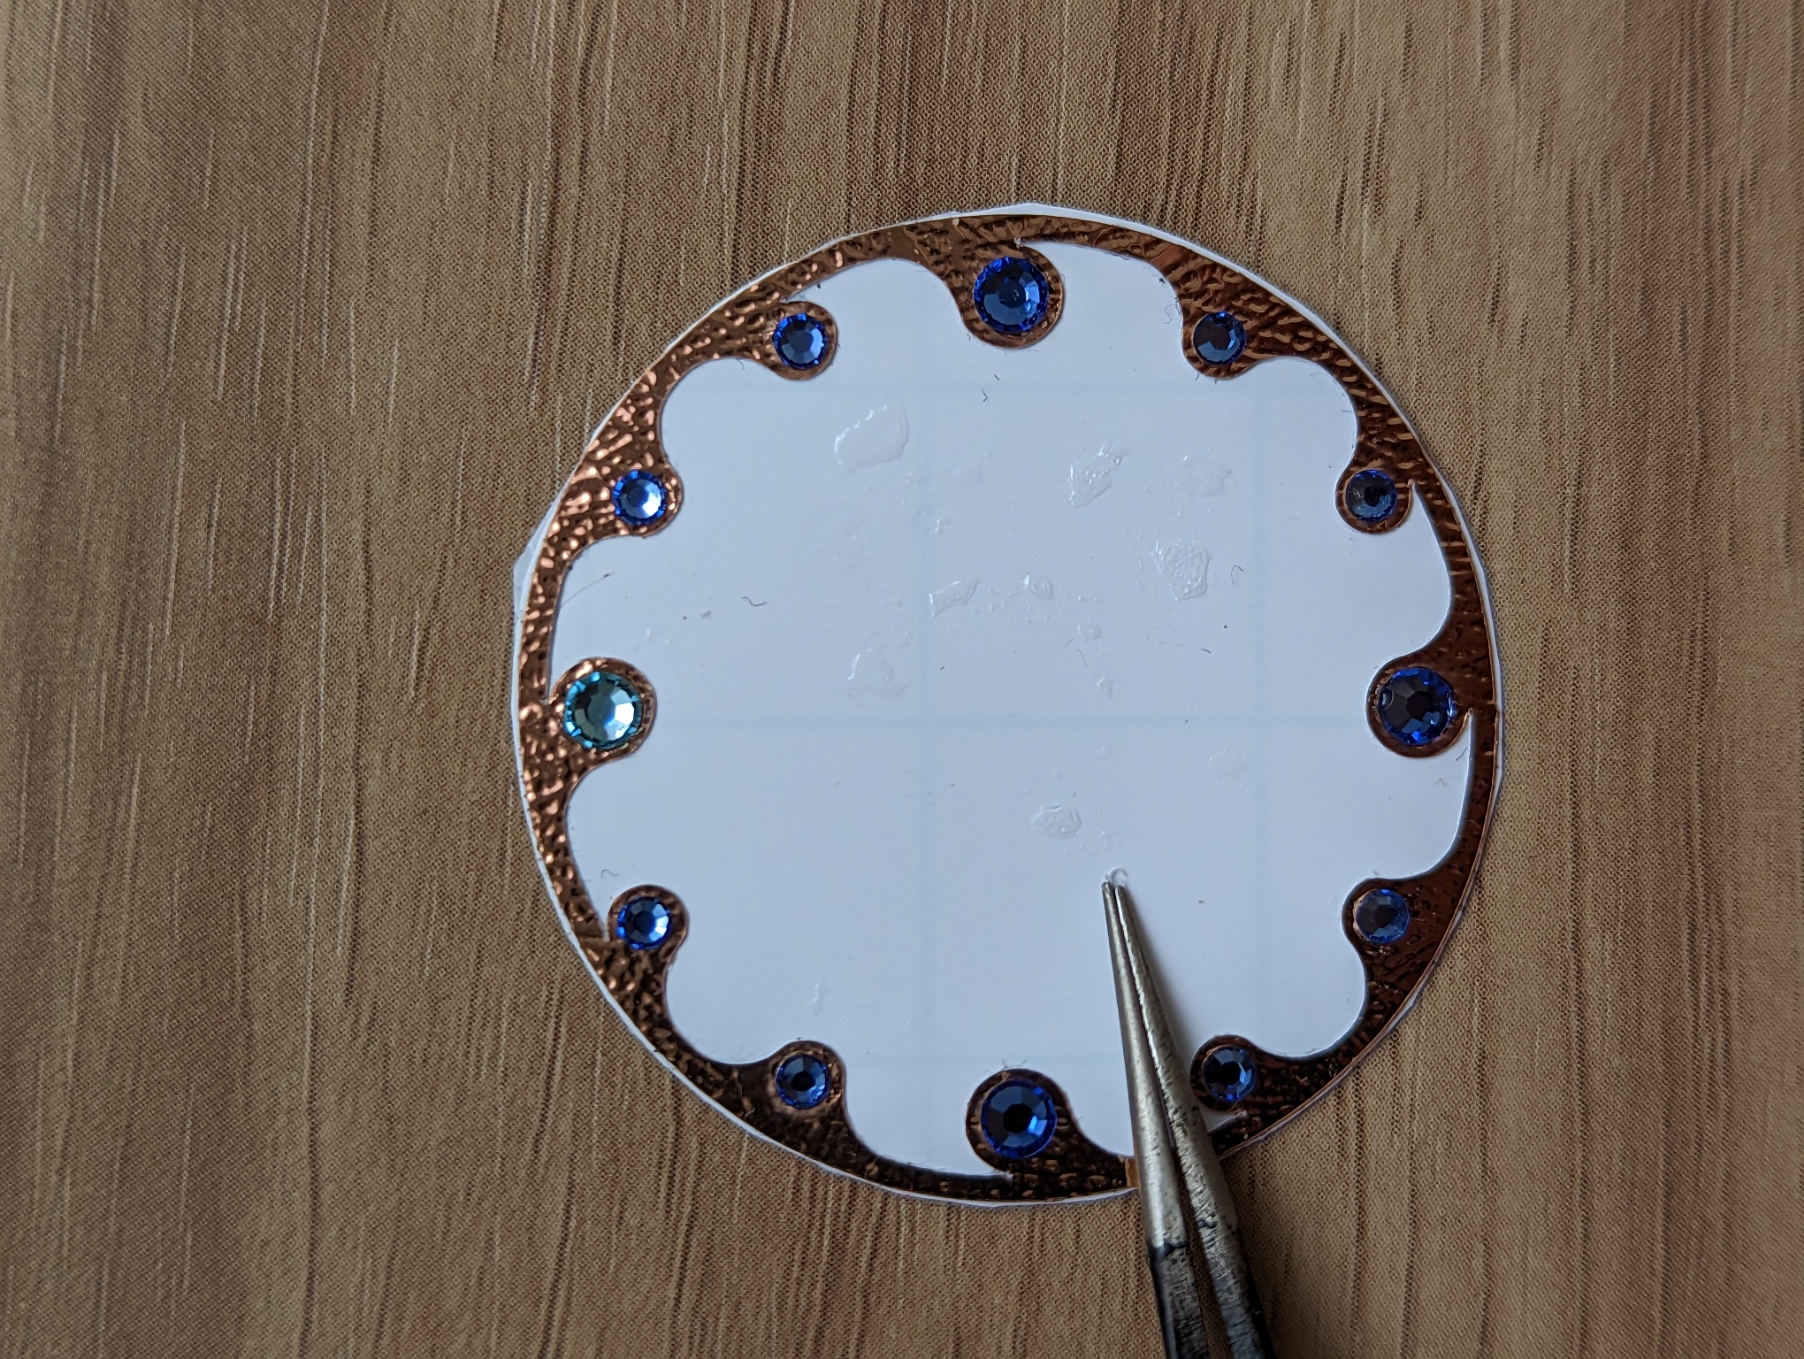
The 12, 3, 6, 9 hour markers were going to be of the ss10 gems while the other 8 would be of ss6 gems, so each had different size. I finalized on the dial design that was asymmetric and looked unique.
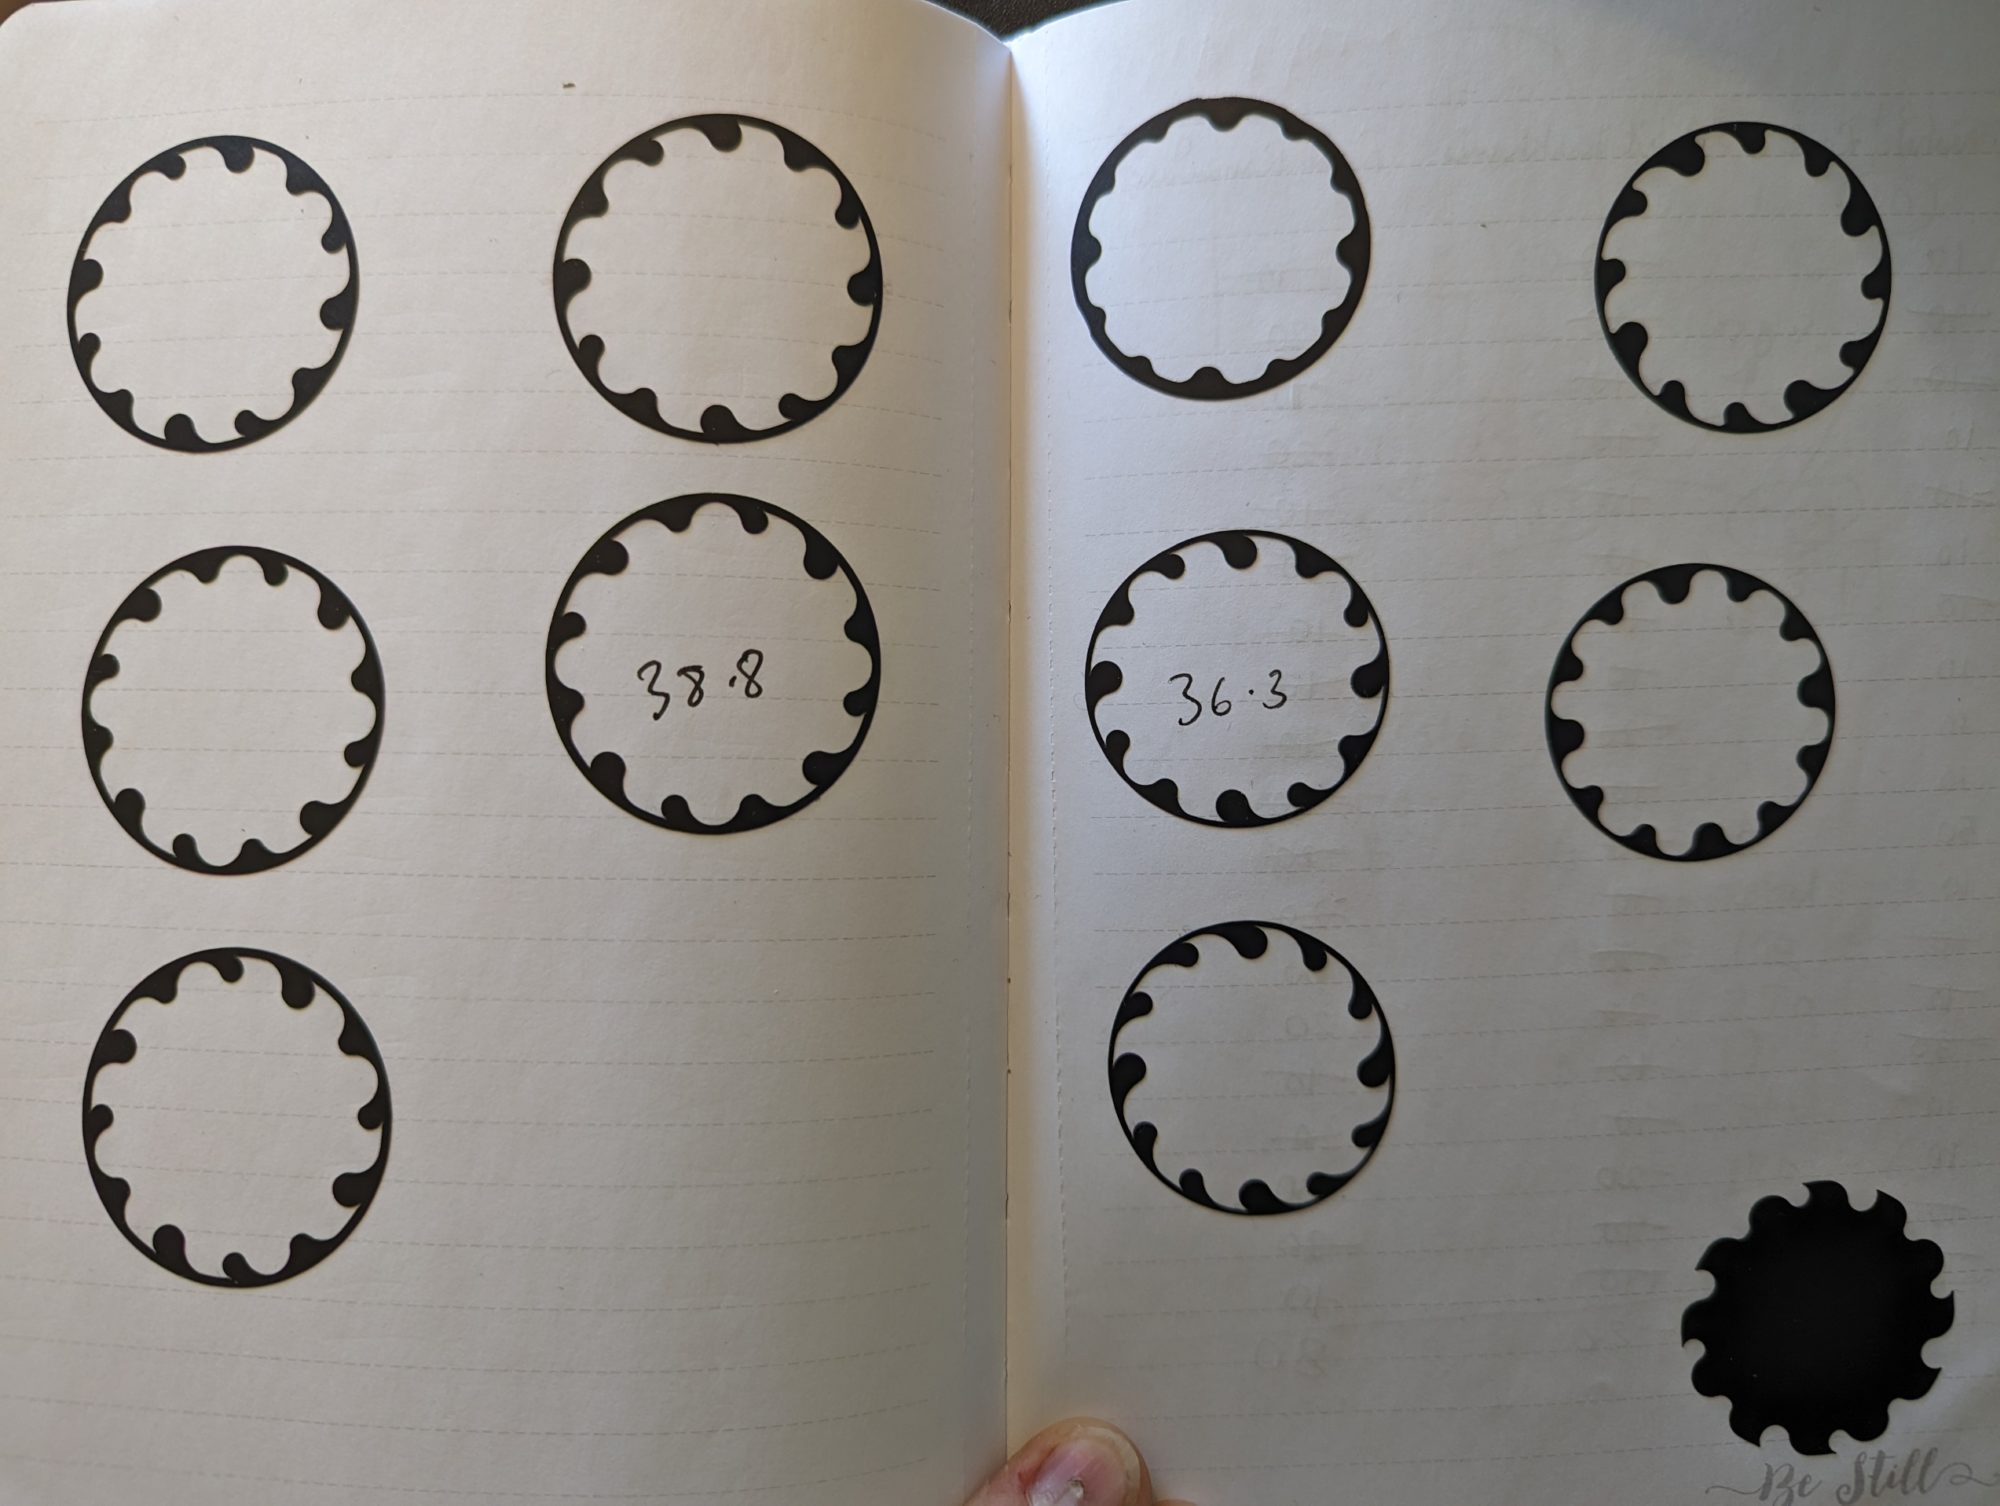
3. Cutting the dial
After finalizing the dial design after test, I had to take some quick tutorials on how to use a Roland GS 24 vinyl cutting machine and using the CutStudio for it. The university provided resources were referred for this as well as a couple of youtube video tutorials.
Here are the final vinyl cuts.
4. Assembling the dial
After having the vinyl cuts, watch building toolkit, and gems in hand, I started to stick the gems on the dial using tweezers and a minute dab of superglue. I intentionally kept the color of the 12 hour marker different to provide significance and directionality while installing.
After I had completed the dial, had all the required watch components and tools in hand, I started the assembly process which is described next.
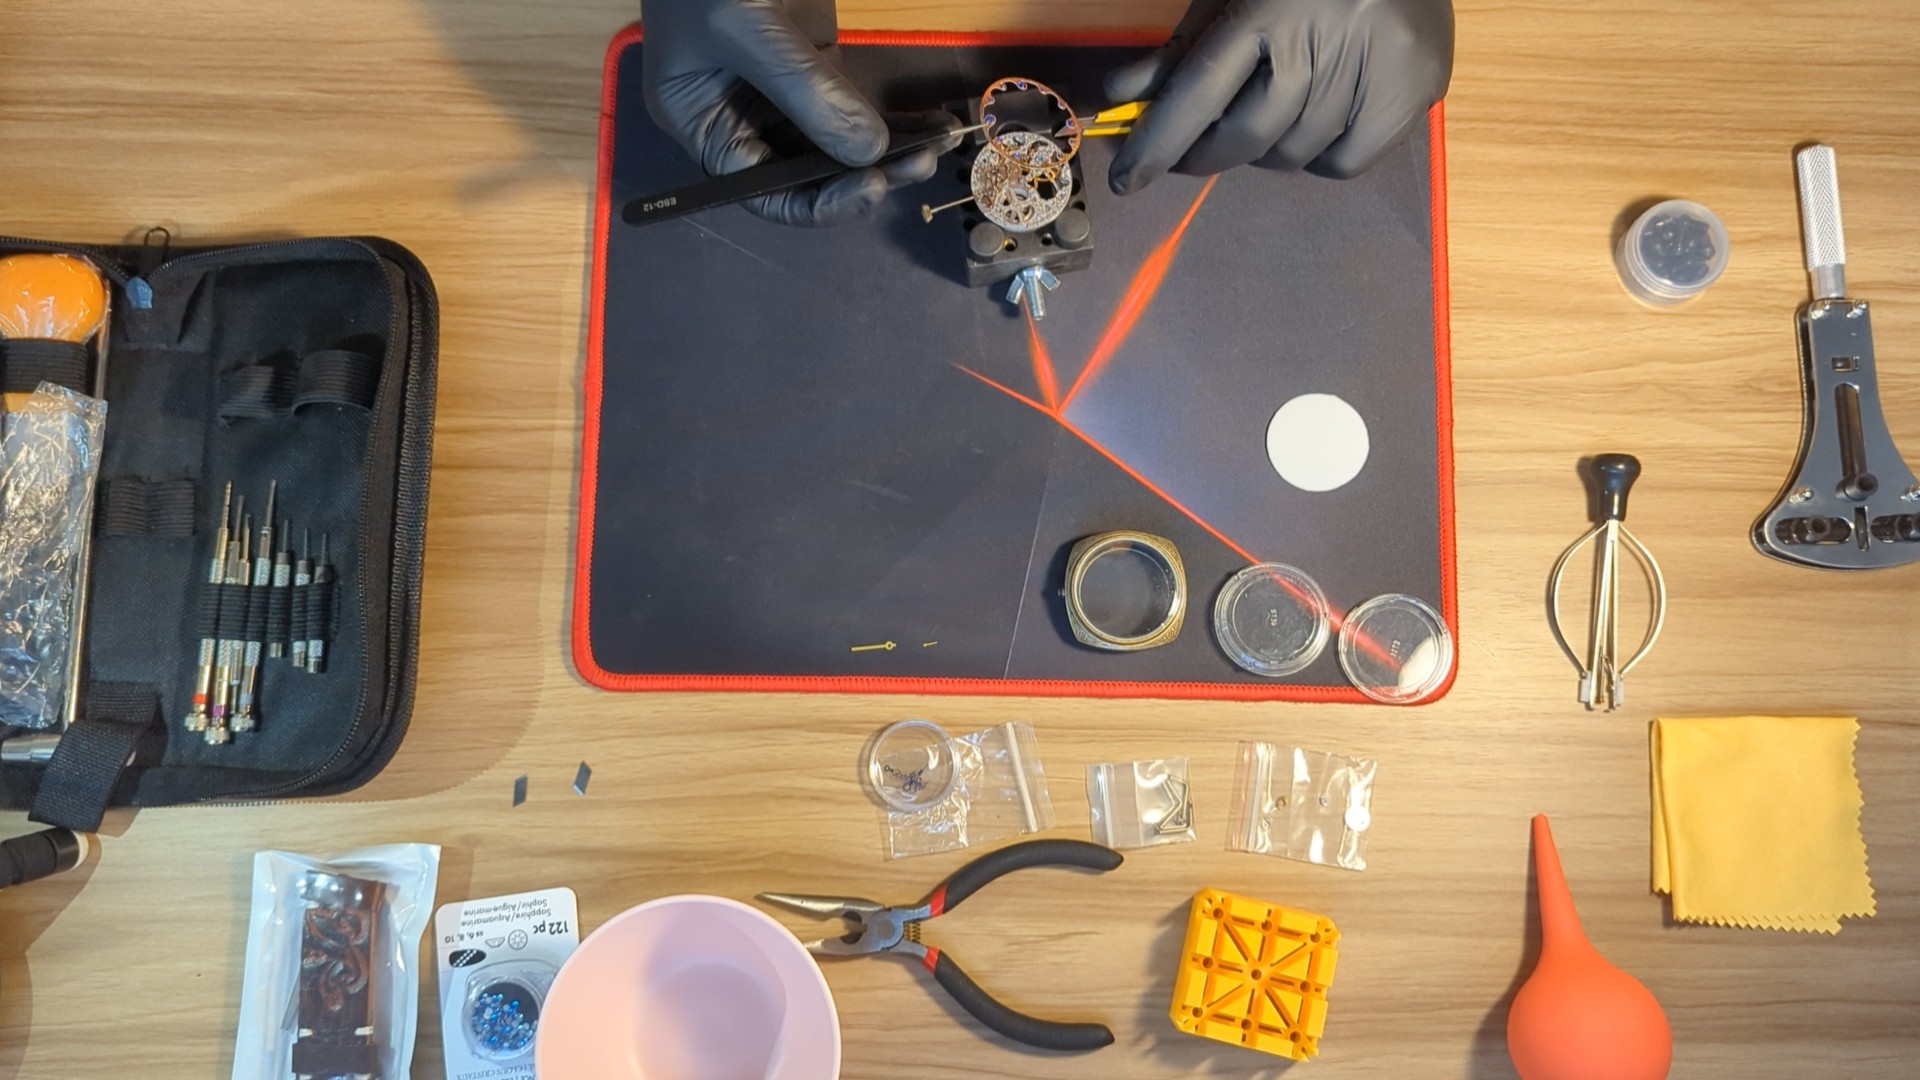
- The first requirement for watch building was a clean and organized desk space so that any small components won’t be lost and any dust won’t enter the watch as it will be there to stay forever and would also be visible to the viewer always. This is shown in the featured image.
- I then started with the watch movement, opening it and removed the, supplied hands, stem, crown, and installed it in the holder.
- Next, I applied my dial on the watch movement and made sure the orientation and alignment were correct.
- The next step was to install the designer blue watch hands on the movement. I installed the hour gear, hour and minute hands but the seconds hand and its shaft was really small and very tricky to install which needed a lot of time.
- I then placed the movement inside the watch case and aligned the hole for the stem.
- The next step was to measure the stem length and cut it appropriately. I then filed it down to remove any burr and install the crown and stem inside the movement.
- Then I fit the locking screws on the movement and watch case that held it in place. I mistakenly lost one of the locking screws that popped out of the tweezers and I couldn’t find it again due to it being so small.
- After that I blew away any dust that might have entered, placed the back panel and installed it using the tightening tool.
- The final step was to install the watch bands, and as this is a Panerai style watch case, it has 4 arms that need to be screwed in place with the watch bands.
The watch is now complete and here is a timelapse video of the watch assembly: Youtube link to the timelapse video of the build
In conclusion, this project aimed to create a wristwatch with a heavy inspiration from Art Nouveau and Clockpunk aesthetics and I seem to have accomplished it. Actually, I think I might have went a little overboard and the watch thus seems to have a more antique look than I desired. Because of this, I have decided to modify the watch using the simple black watch case that I ordered as a backup and its leather band. However, not only my other goal of learning watch making is accomplished, but I also learned CorelDraw and Vinyl cutting in the process, and I added a new skills to my repertoire. This has been a great journey for exploring new aesthetics, being creative, and learning.
Link to my final presentation: ArtisanalTime Final Presentation Video
Citations and references:
Watch building:
- https://diywatch.club/
- https://www.buildyourownwatch.com/
- https://www.instructables.com/I-Wanted-to-Build-My-Own-Watch/
- https://www.esslinger.com/make-my-own-watch-automatic-kit/
- Coreldraw and Vinyl cutting
- https://www.youtube.com/watch?v=d-BV4BZf1ZA
- https://www.youtube.com/watch?v=6Sq29e1dBYs
- https://www.youtube.com/watch?v=2U_7KhmTBDI
- https://www.youtube.com/watch?v=-7Dk_n6XhfI
- https://www.youtube.com/watch?v=1XpimtOTiik
- https://www.youtube.com/watch?v=eNyuAu7OGhc
- https://www.youtube.com/watch?v=vIW1wwvdYf8
- https://www.youtube.com/watch?v=nF8gr9VNdrw
- https://www.youtube.com/watch?v=Vu29KeLVDD0
Reference watches
- https://www.amazon.com/dp/B083LV7JYV
- https://www.aliexpress.us/item/3256803977734774.html
- https://sugesswatch.com/products/su3600y
- https://sugesswatch.com/products/su3600y
Purchase links: https://www.aesdes.org/wp-content/uploads/2023/05/Checklist-and-links-edited.pdf
1 Comment. Leave new
This is so cool to see the process of watch building, makes me want to get into it myself. I think the final product is excellent, I don’t know much about your aesthetic but I would want to wear that watch myself.