

Initial Thoughts
I began my journey with this project, deciding what I wanted to get out of it. With the project’s specifications to make an upcycled artifact that conforms to a specific aesthetic, it was for the most part as open-ended as we wanted it to be. I had a few ideas of where to take this while maintaining the restrictions to use a recyclable or scrap material and for the artifact to be between 0.5 to 8 cubic feet. I didn’t entirely know what I wanted to do, but I knew that I wanted to use the ITLL’s laser cutter and maybe their 3D printers too. Although I hadn’t used the laser cutters since a freshman year projects class I had I still thought that with the precision it allows and with as much human error removed as possible it would be a good tool to use to upcycle something that could potentially be trash.
Project Direction
With my tool selected that helped me narrow down my options for potential material that I could use. The materials I saw as viable options to laser cut were: cardboard, styrofoam, scrap wood, and acrylic. Of the options, I thought that using scrap wood would result in the sturdiest artifact that could stand the test of time while still being easily accessible as a recyclable material. From there I went on to begin some research and get some inspiration for where I might like to take a scrap wood laser cutter project. After doing a little bit of research and seeing what ideas other people had with wood and laser cutters what stuck out to me most were the topographic sculptures I had seen. Some of the ideas that stuck out to me that I used as a basis for my inspiration can be seen below. In looking at the examples they go from your most typical topographic sculpture on the left to more intricate and abstract on the right. These examples opened my mind to the possibilities of where I could take a topographic sculpture and helped me stray from a more traditional kind.


[1] [left] https://www.instructables.com/Easy-3D-Topographical-Maps/
[2] [middle] https://www.thisiscolossal.com/tags/topography/ [3] [right] https://www.trendhunter.com/trends/cardboard-sculptureMy Aesthetic
With some ideas in mind and a consensus of where this project was heading it was time to choose my aesthetic. With the examples in mind and my material choice being scrap wood, it felt natural to choose an aesthetic that continues in this direction. With that in mind, I decided that something to promote a more natural look would be a good choice so I decided to opt for an organic aesthetic. This would allow me the option to leave the scrap wood its natural color or paint it brown or green and either choice would fit this aesthetic. I also felt that it would be easier to continue with an organic aesthetic using scrap wood than to opt for something more industrial or modern. Additionally, in my post last week I explored the opposite aesthetic to an organic aesthetic: high-tech/modern. Though I saw the appeal in a futuristic-looking sculpture like the building seen in the photo below, I did not see the practicality in it for my project. 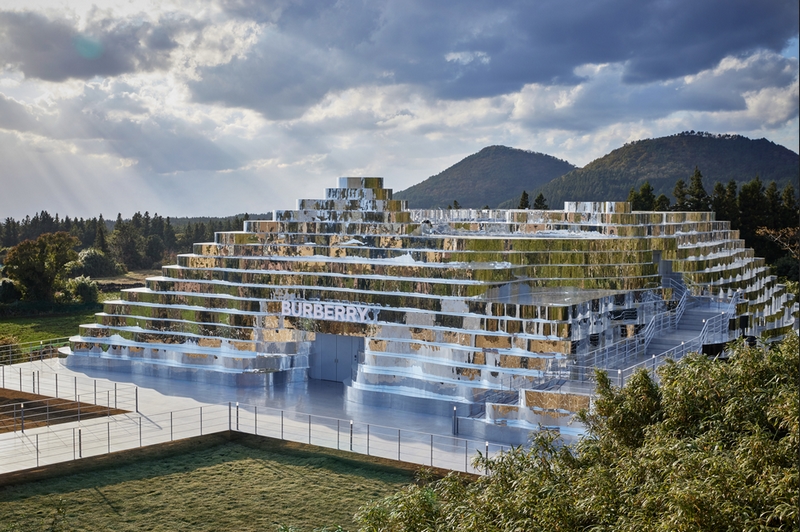
https://www.2luxury2.com/wp-content/uploads/2021/11/Burberry-unveils-topographic-mirrored-sculpture-Jeju-Island-Korea.jpg
With a requirement to use as minimal money as possible, I felt a modern or high-tech aesthetic would require the purchase of new or pristine materials. Thus, an organic aesthetic was my final choice for an aesthetic which then allowed me to begin planning and sketching.
Planning and Sketching
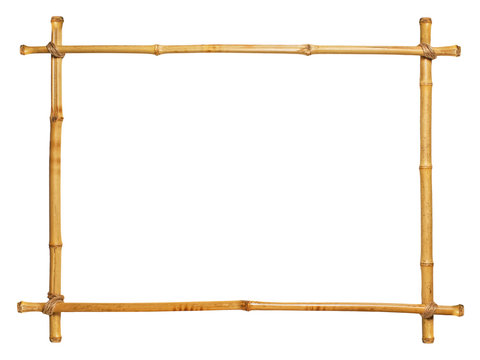
When I began planning this project I started with exploring the aesthetic and deciding what ideas came to mind that could be incorporated in a topographic sculpture. A few things that always intrigued me as a child were miniature sets of cities and landscapes and I always appreciated the tiny trees that they would incorporate. This also fits into my aesthetic as shrubbery or vegetation can provide an organic look. I also always appreciated the use of bamboo in sculptures or art so I wanted to find a way if possible to make this addition as well. Some ideas of what I had in mind for each of these can be seen in the photos below.

The next part I began to plan was what the purpose of the sculpture would be. I wanted the sculpture to be something I could keep and enjoy and something that would serve a purpose. From there a few directions I thought I could go were to make an advertisement, a logo, or maybe a sculpture for a lobby or house. So I decided to do a sort of mixture of everything and make an art piece that serves to provide visual appeal while representing something. With enough planning done to know the direction of my project, it was then time to start sketching and see where I could take this project creatively. The last thought I had before my first sketch was to have a general idea of how large I wanted the sculpture to be. I decided a piece around 3 feet x 3 feet would serve justice by allowing the sculpture to be big enough for a public walking area where it could be seen passing by and not require a person to be right next to it to appreciate it. Below are the sketches that I made describing my thought process behind them and why I chose those features.
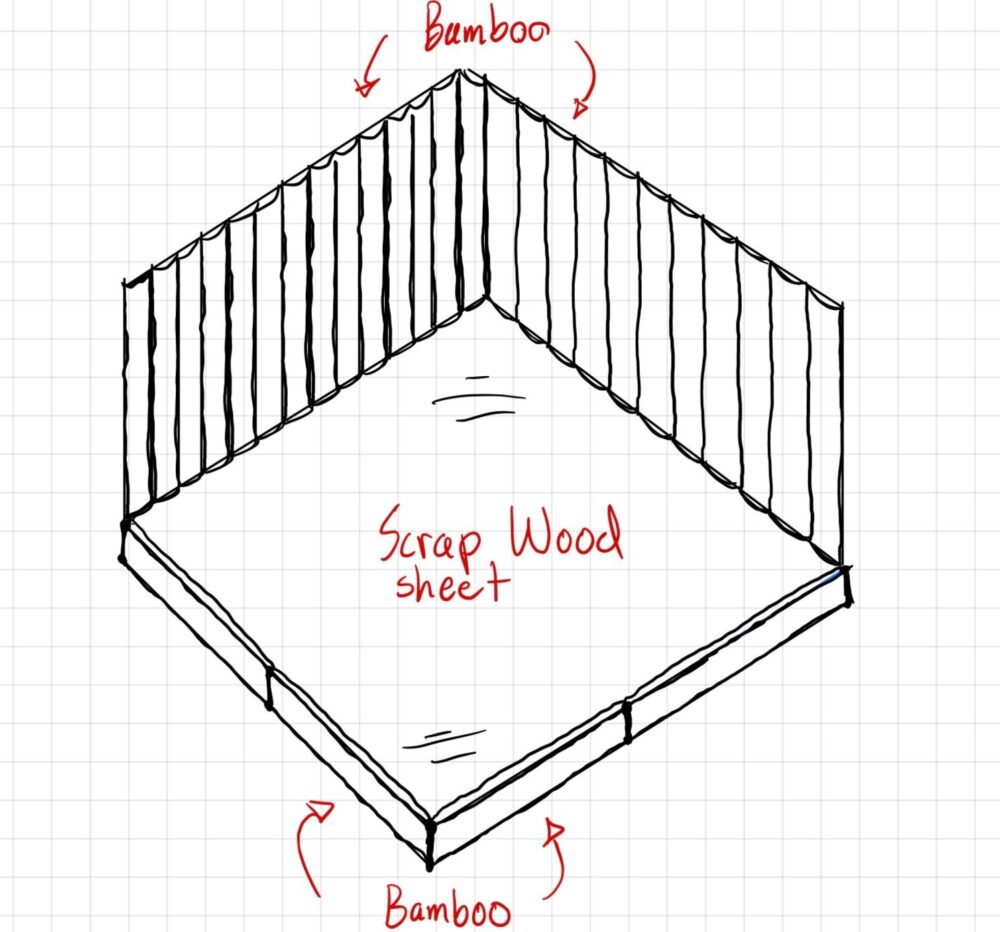
The sketch you see above is me tackling the question of what the base of my project will look like. Although I knew I was making a topographic sculpture I was unsure of whether I wanted to have it more as a picture frame that could be hung up on a wall or more of a sculpture that would sit on a pedestal standing upright. I decided on the latter and wanted it to rest horizontally while being propped up by a sort of stand which you can see how it would do so in the sketch above. Additionally, the sizing I chose was around 2.5×2.5×3 feet which would allow for it to be large enough to catch your eye but small enough to not worry about it taking up too much space. Another decision I made that is visible through this sketch is for the choice of the backdrop and “frame” of the sculpture to be made out of bamboo. I thought that with this it would pull the piece together and give it a sort of frame of reference as the only two walls of the sculpture were supposed to be on its backside. The bamboo addition also helped make the piece look more finished and thought through in my opinion.
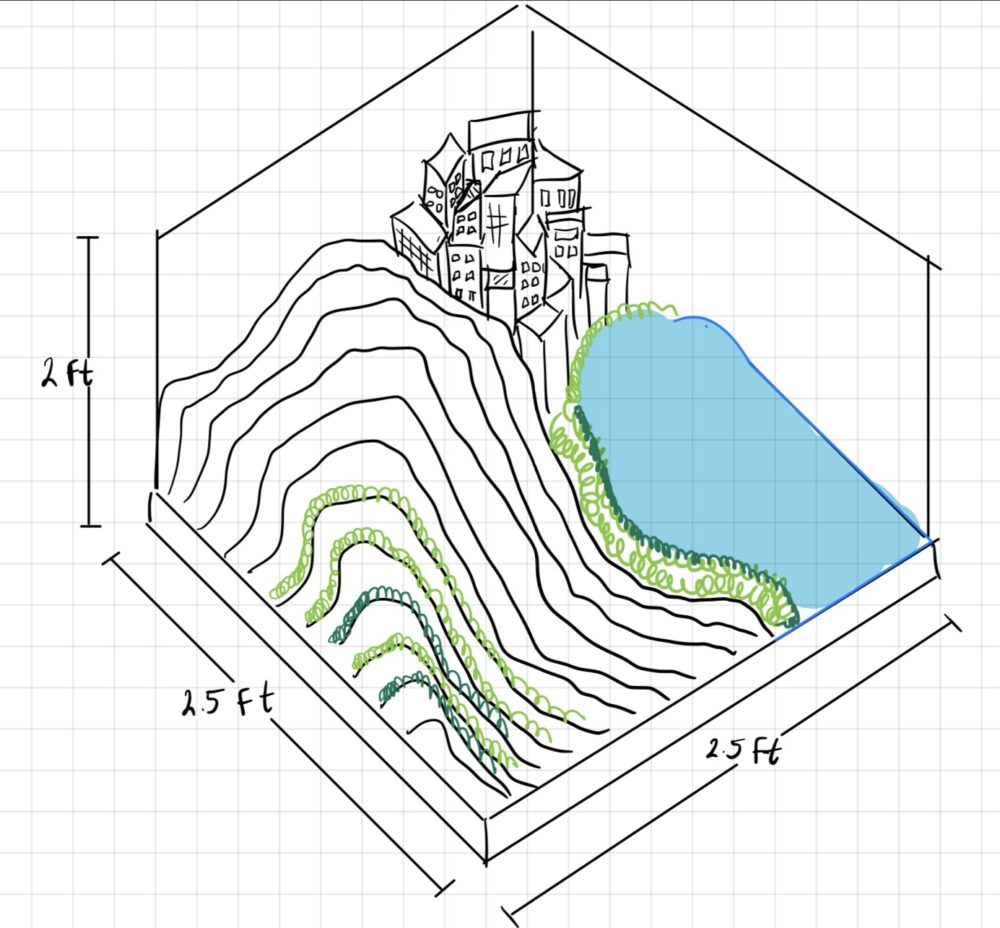
Once the base was made and I knew the space I had to work with it was time to think about the actual sculpture. To build on the organic aesthetic I felt that a mountain and possibly a body of water would be a center point for the project. Mountains are also very common in topographic sculptures as a topographic map itself is made to show the variation in elevation of a structure. As seen in the sketch above I settled on having a mountain range on the left leading into a lake or ocean on the right with some buildings in the back. Although the buildings didn’t provide too much to the overall aesthetic of the project I felt that it was a good use of the empty space in the back corner of the frame. Additionally, though my sketching ability needs work, the greens you see are meant to be the small trees or shrubbery I mentioned earlier that are common in train sets. The green adds to the aesthetic and overall makes the mountain more realistic as it brings it to life a little bit more.
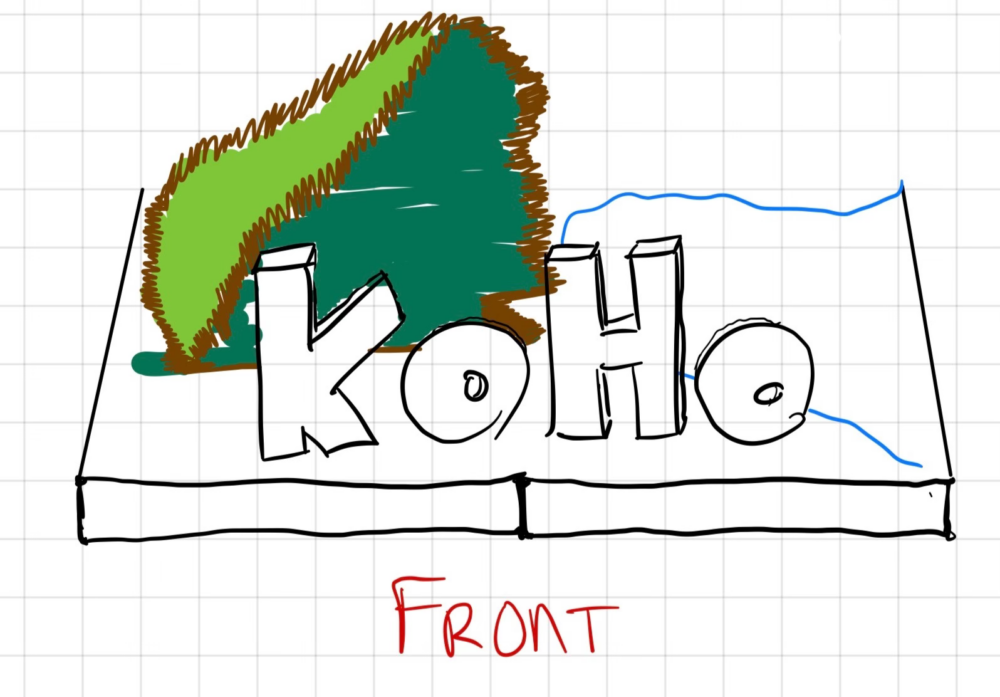
The final sketch I did was to determine how to incorporate the word “Koho” into the piece. When I initially found this word it was under the assumption that it was Japanese for highest point. After wanting to confirm this assumption before writing about this I did some research and found that it said this absolutely nowhere online. Which was unfortunate because it played perfectly into the aesthetic I had chosen but nonetheless I liked it and wanted to keep it in my project. As seen in the sketch I felt that having it in the front almost as a title or label for the sculpture made it clear to see and also stand out from the rest of the sculpture so it wasn’t confused as being part of the land formation. The idea for the letters was to use scrap wood cut the pieces into the shape of the and place them front and center.
So there I had it, the bones of my sculpture planned, the main “art” in the middle that would be pleasant to look at and I had figured out how I would incorporate Koho. Now for the problem part of my project.
Plans, Problems, and Solutions
The plan following my ideation and sketching phases was to begin collecting scrap wood and bamboo to begin laser cutting. However, after a few failed attempts and misjudgments, I realized that working around heavy machinery and moving large pieces of wood would not be the easiest to do with a broken leg. Although I came into this project with the full intention to cut it and build it, that came to a stop once reality set in. If I were to do this project properly I was going to begin creating several vector files on CoralDraw of the cuts that I wanted to make on the pieces of wood for the topographic sculpture. After iterating through a number of times doing some calculations on the width of the wood and how many cuts I would need to make to stack the wood on top of each other to reach a height of around 2.5 feet I would then collect all my material and begin cutting. I would have begun with a sample cut and made sure I had the settings on the correct mode for my material. After however many sample cuts it took to get the process down correctly I would then import my files and begin cutting through my scrap wood. Following that I would have my organized pieces of scrap wood ready to be glued onto my wood base and then start forming my sculpture while adding the additional features of shrubbery and paint for the water to make it look authentic and natural. But, again this was just going to be my process had I been able to do this project physically.
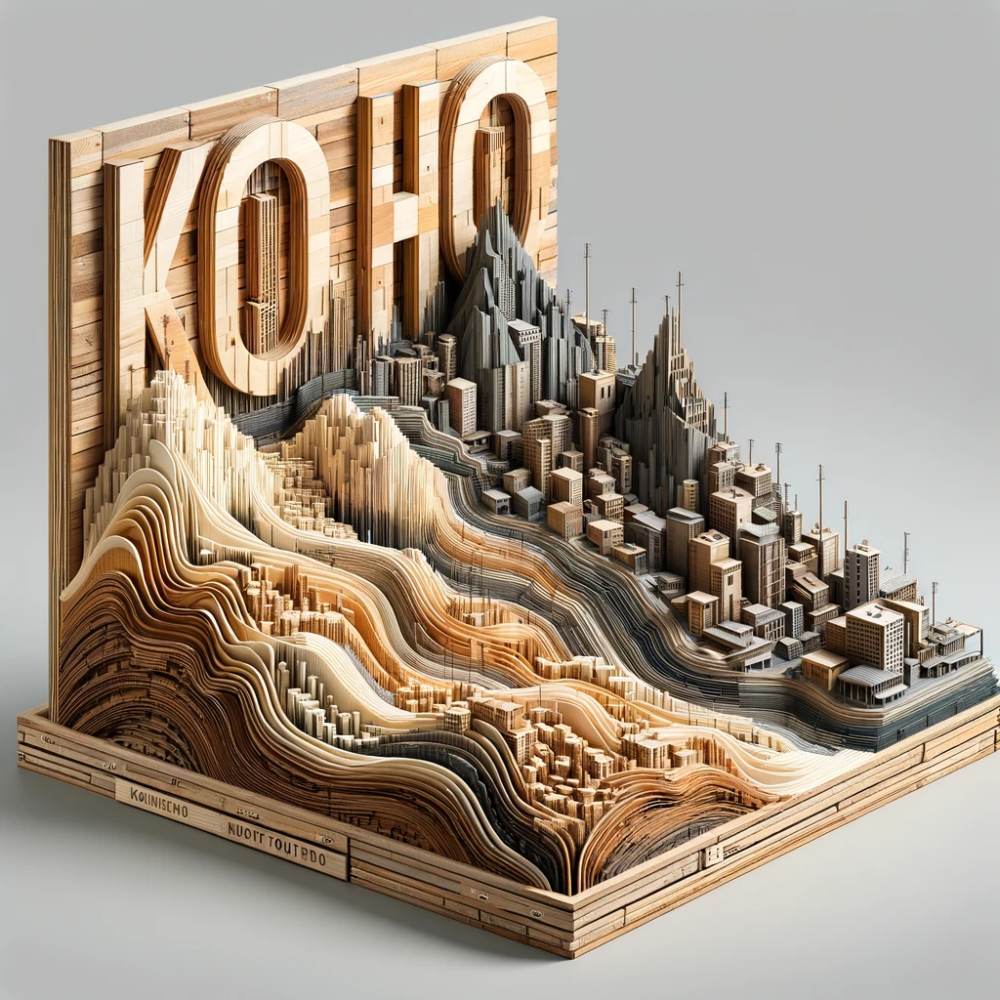
Instead, I began to think of ways I could create this project as accurately as possible with the ideas I had in mind and my minimal art skills. After doing some research I came to realize that the best way to represent this project would be to write a prompt for an image generator tool using AI and see how closely it could create it. So I dived down the rabbit hole and began trying to describe my project and goal with as much detail as possible and I am pretty pleased with the result. Shown below is the generated image that I liked the most.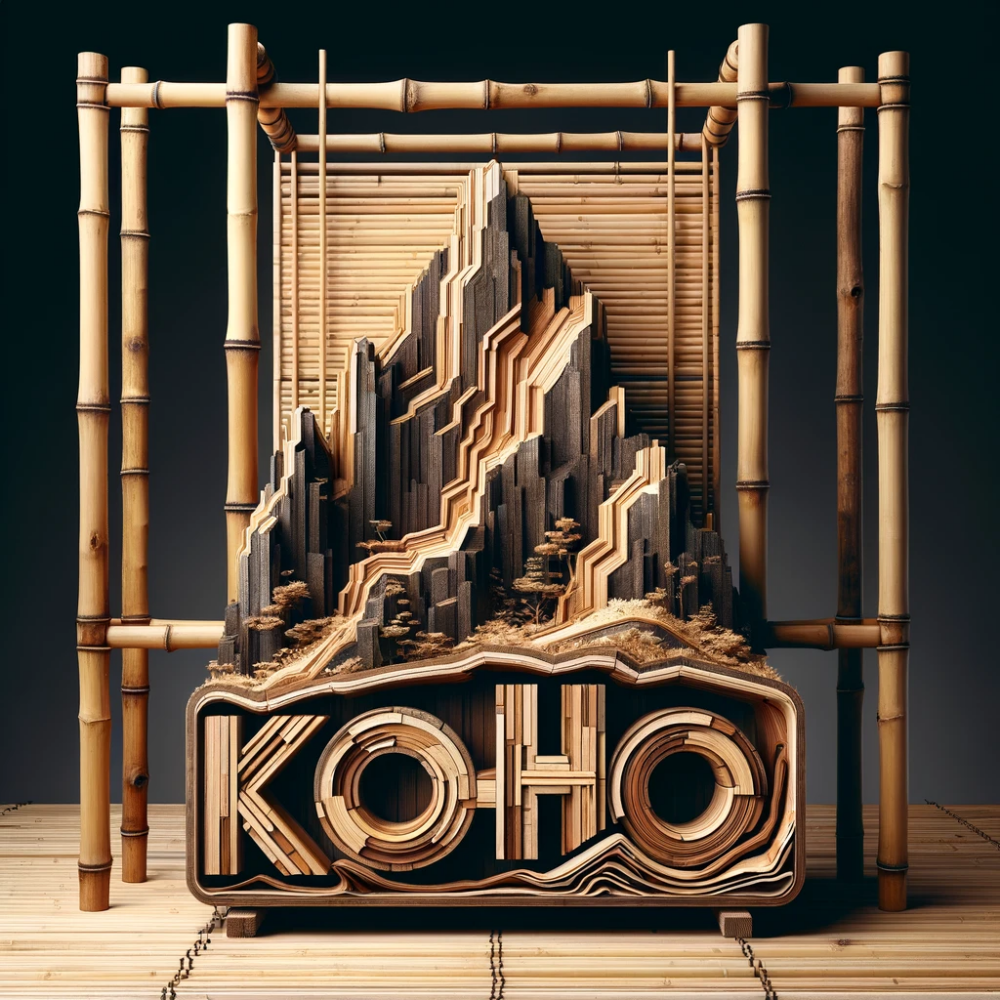
“Image generated by Image Generator Tool, an AI model developed by OpenAI, accessed 02/18
AI Prompts and Apps
To come to the images I have above I went through an iterative process through Chat GPT’s image generator to try and give the AI specific enough information about what I wanted but not too much that it lost track of what was most important. An analogy that came to mind was talking to the AI image generator was like talking to a toddler; you can tell it to do 5 things but it will only remember the last 2 and will completely disregard the first 3. Even when telling the AI that I liked what it had but wanted to adjust one minor part it would completely change the whole sculpture. The prompts that ended up providing me the most success and generated the images you see above were as follows, “I want to upcycle scrap wood into a topographic sculpture as a form of exposure or advertisement for the brand name ‘Koho’. Do you think you could make an image of this scrap wood topographic sculpture that is in a bamboo frame while keeping an organic natural aesthetic to it. With part of the sculpture being a mountain range and the other part being a body of water or city skyline”. Once it produced something that I liked I then gave it another step to add and told it, “Okay, much better however now I need you to add the text “Koho” in front/ontop of the sculpture and preferably make it stand out while still organic and natural “. However, Chat GPT’s image generator would then misspell ‘Koho’ and add an extra ‘o’ or it would put it in the back or it would alter the whole rest of the sculpture. I then prompted and asked it “can you make it more tropical vibed and less mountain vibe for the sculpture please” beside a few other minor asks for the image generator and after previous trial and error I came with the images you see above. I think to actually make the sculptures that you see above would take around 18 hours of work in the ITLL. Most likely 4 hours would be spent collecting materials and preparing them to cut through the laser cutter, 4 hours would be spent making the vector files to laser cut then the other 4 hours would be spent intricately gluing the pieces together and getting the bamboo frame oriented correctly.
Conclusion
Based on the AI images generated above, I like to think each of their aesthetics fits into my organic choice. My final opinion would be something in between each. I appreciate each in their own way. The image on the left I like its bamboo frame and that it maintains the natural look of the bamboo without taking away from its structure. The image on the right however fits the orientation and setup of the sculpture that I am looking for. I also like how the image on the left has Koho written up front and center whereas the image on the right has it as a background. My final conclusion would be to split these designs straight down the middle having the bamboo frame and Koho print on the left with the actual topographic sculpture seen on the right. I still would like to one day make this sculpture however for now I am happy with where I ended all things considered.
3 Comments. Leave new
[…] Link to Upcycle Project Post […]
Hey Maddox, This is a super cool idea. I love how you used AI to test how different variations of this project would look and took aspects you liked from each of the resulting images. I also really like the inclusion of the bamboo, and think it adds a lot to your overall aesthetic. It would be really cool if you did decide to make this irl. What do you think would be the biggest challenges if you were to bring this project to life?
This is such a cool idea. I would have loved to see how this would have been made. I wonder if you could have make this with carboard and laser cut it, given you broke your foot. Or designed a model in a cad program based off of the AI images.