
Design Inspiration
As a brief recap, my upcycle project is to use scrap/reused wood to create a knife block that is made to look like it is made out of a single block of wood as much as possible. The inspiration for a knife block specifically came from the fact that the knives I currently have are stored in a few drawers in various orientations, which scares me and isn’t really safe. I also think it would be nice to have a knife block that I can add to as I get more knives, since right now I only have a few.
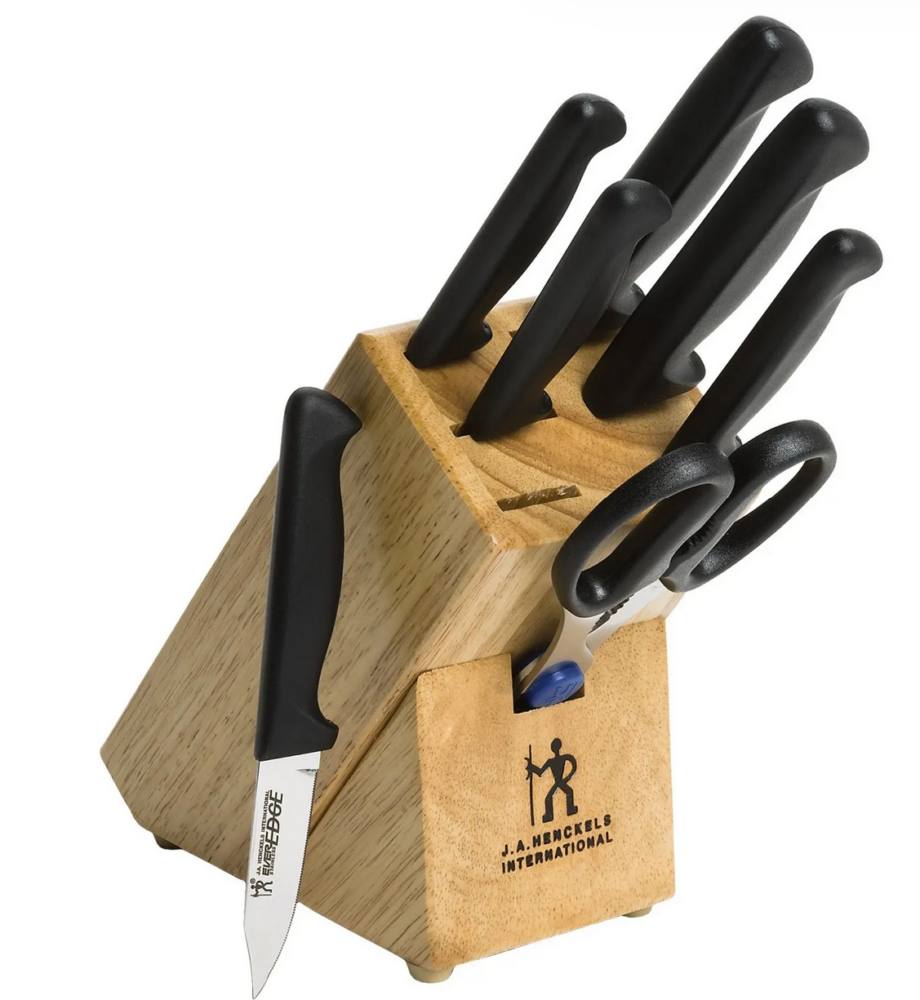
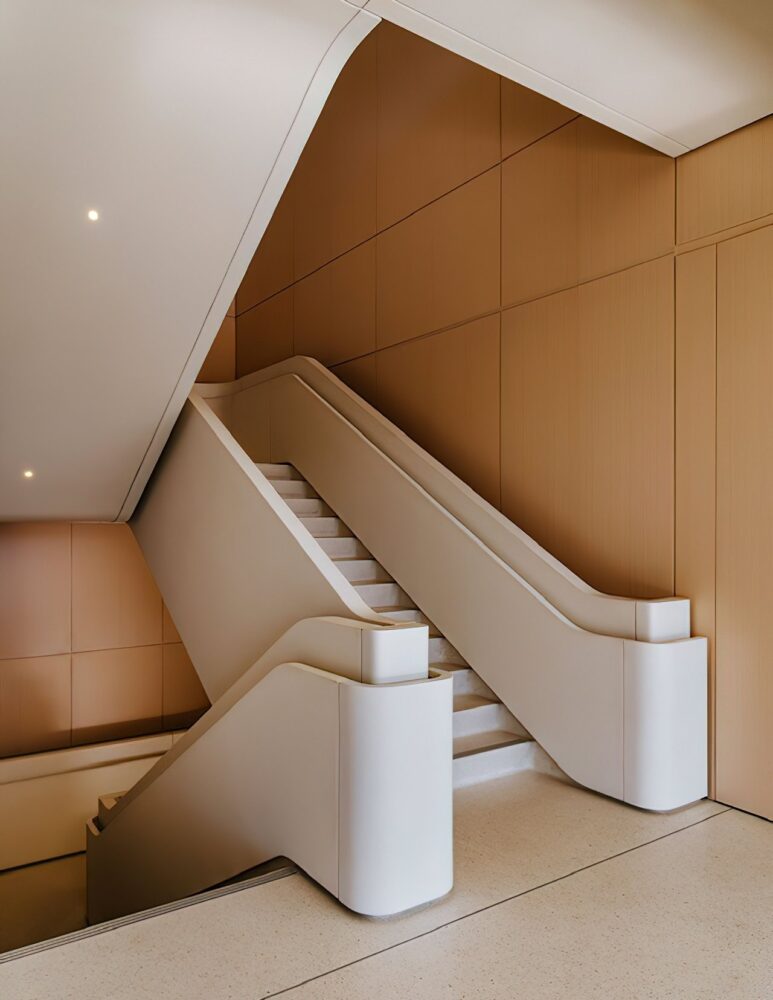
The image above is what most knife blocks currently look like. The main element that I wanted to change was how this knife block looks like there are two different pieces of wood glued together; one at the front and one at the rear. I don’t like this unnecessary complexity, and believe that a minimalist aesthetic applied to this would involve both of these pieces of wood being infused into one piece, creating an uninterrupted line on the sides. This comes from some of my more organic inspirations, such as the minimalism from Dieter Rams and Jony Ive at Apple Park, an example of which is the organic shape of their stairs:
Fabrication Process
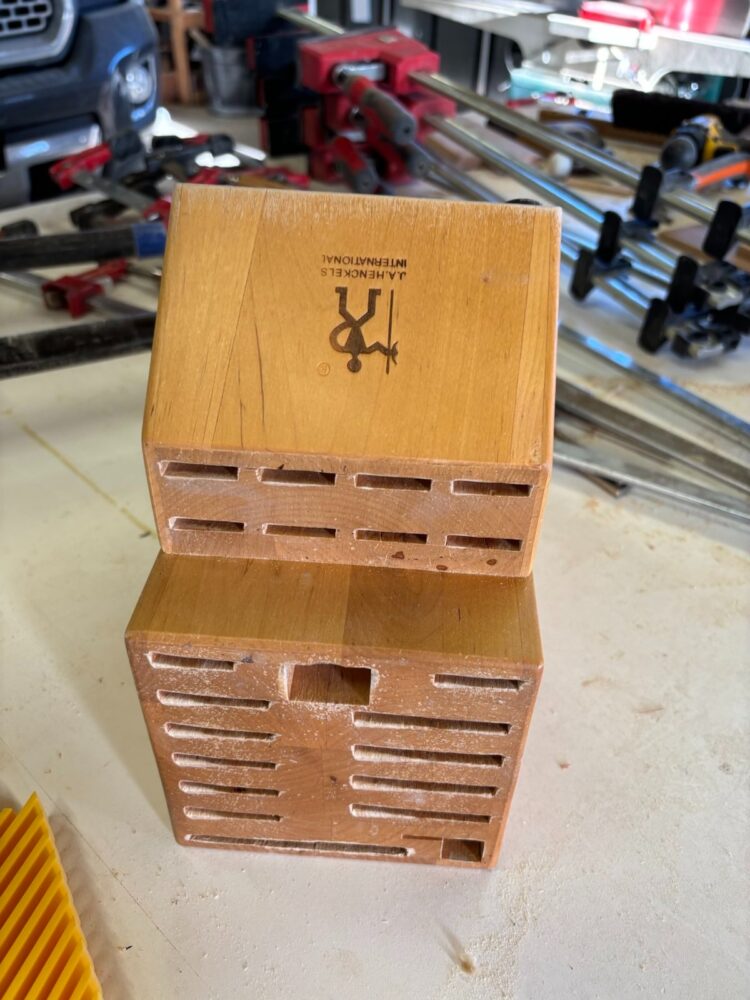
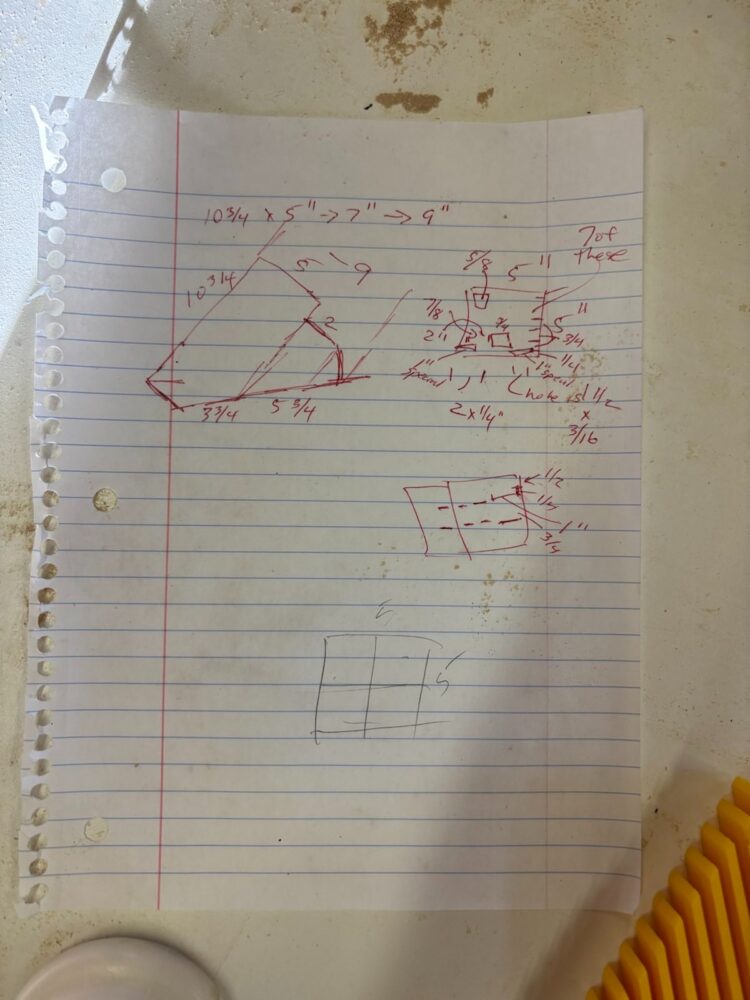
The fabrication process started by first using a knife block that a friend already had and gathering some dimensions from there in order to gain some intuition on the spacing:
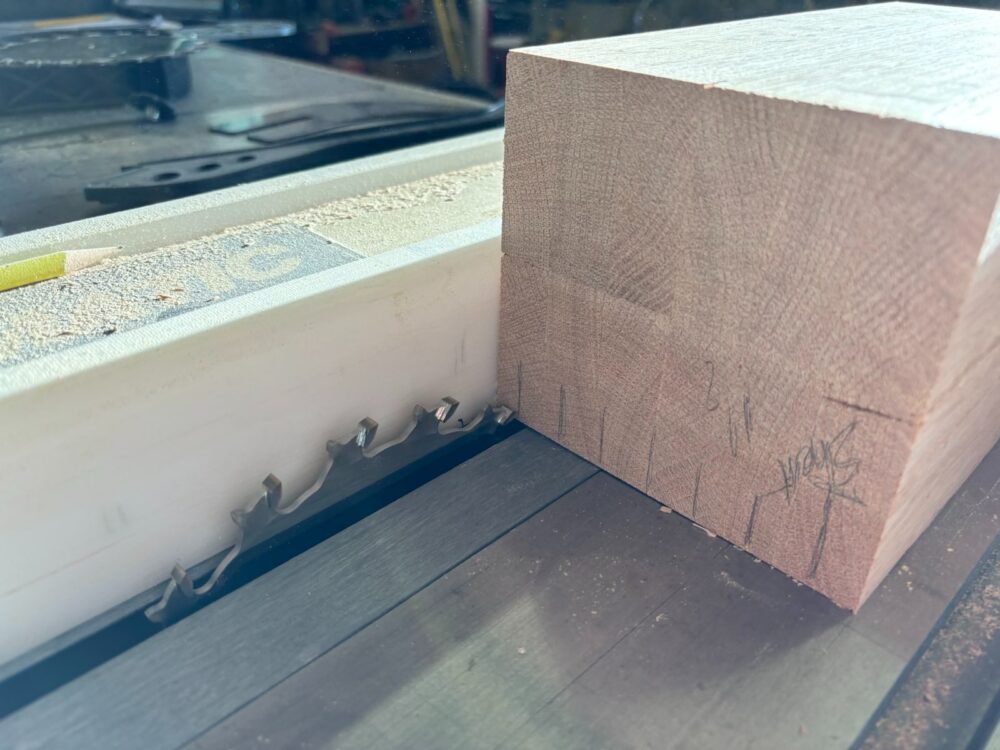
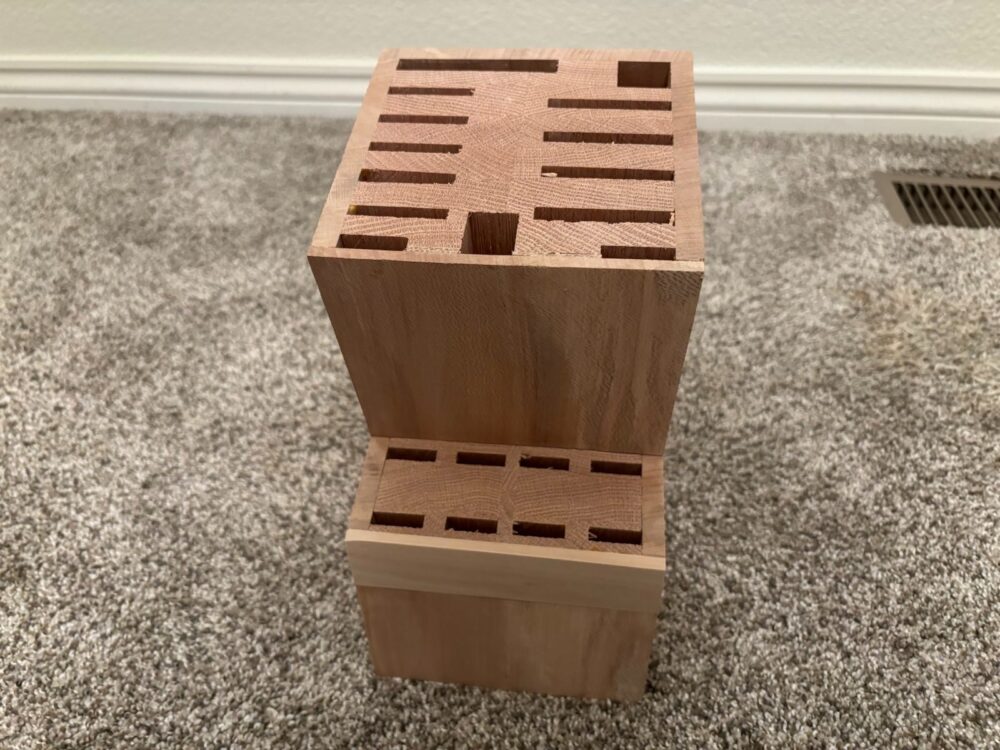
Once the dimensions were gathered, the raw materials were obtained. A long scrap piece of oak was found and was cut into several pieces and glued together to create the overall frame of the knife block. You can see this in the following picture. If you look closely, you can see what looks like four wooden squares glued together (note the difference in grain direction, that’s the giveaway):
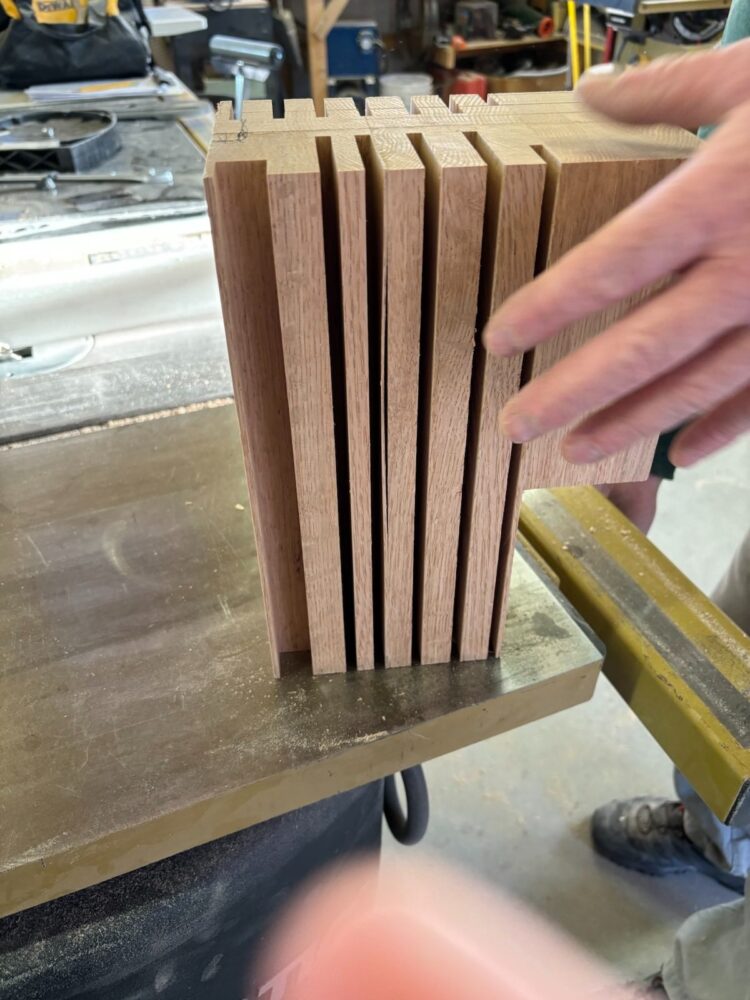
The original plan was to cut several incisions similar to the one in the image above on either side of the wood and then frame it with more scrap wood. That was all fine and dandy until this happened:
It might be hard to see, but the wood decided to split. I was going too fast and things started breaking. Not only that, the entire knife block split in half due to some of the wood glue not being able to set correctly. This meant that the entire thing had to be taken apart, sanded down, and then glued again. With a lot of clamps. Like more clamps than you’ve probably seen on something:
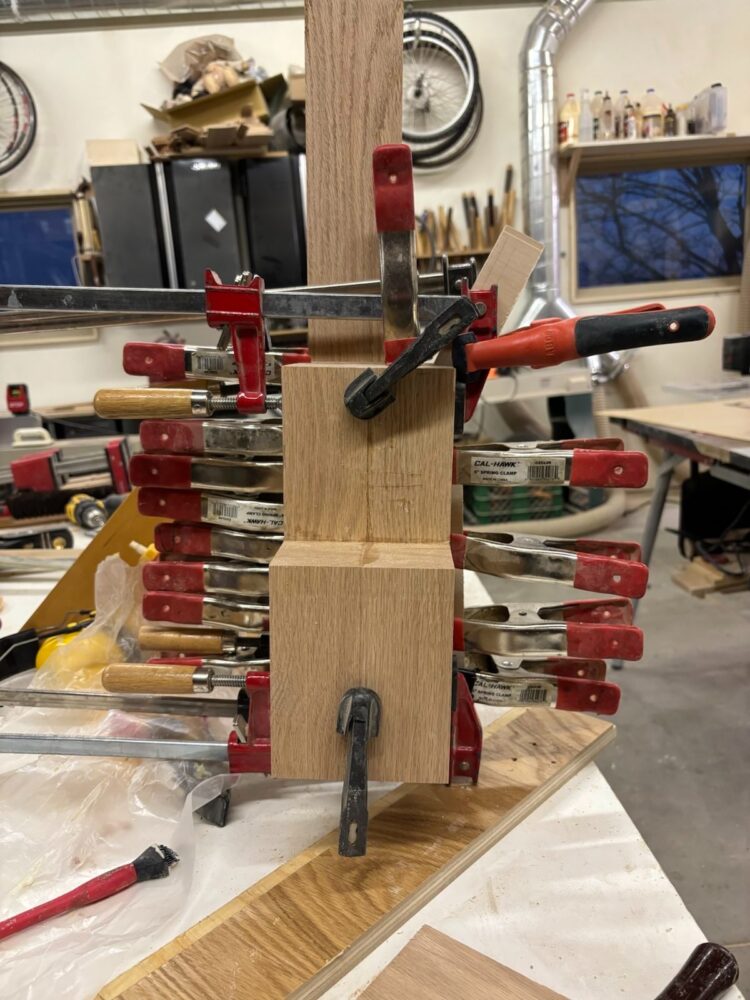
The crazy number of clamps were used to ensure that there was enough even pressure throughout the wood to make sure that the glue would create a solid bond with the wood. This part is really key, since wood is porous and the pressure must be applied over the top of parallel wood grains. Otherwise the glue fails and the entire thing falls apart (again). This set overnight so that the same mistake wasn’t repeated, and thankfully the glue dried and held.

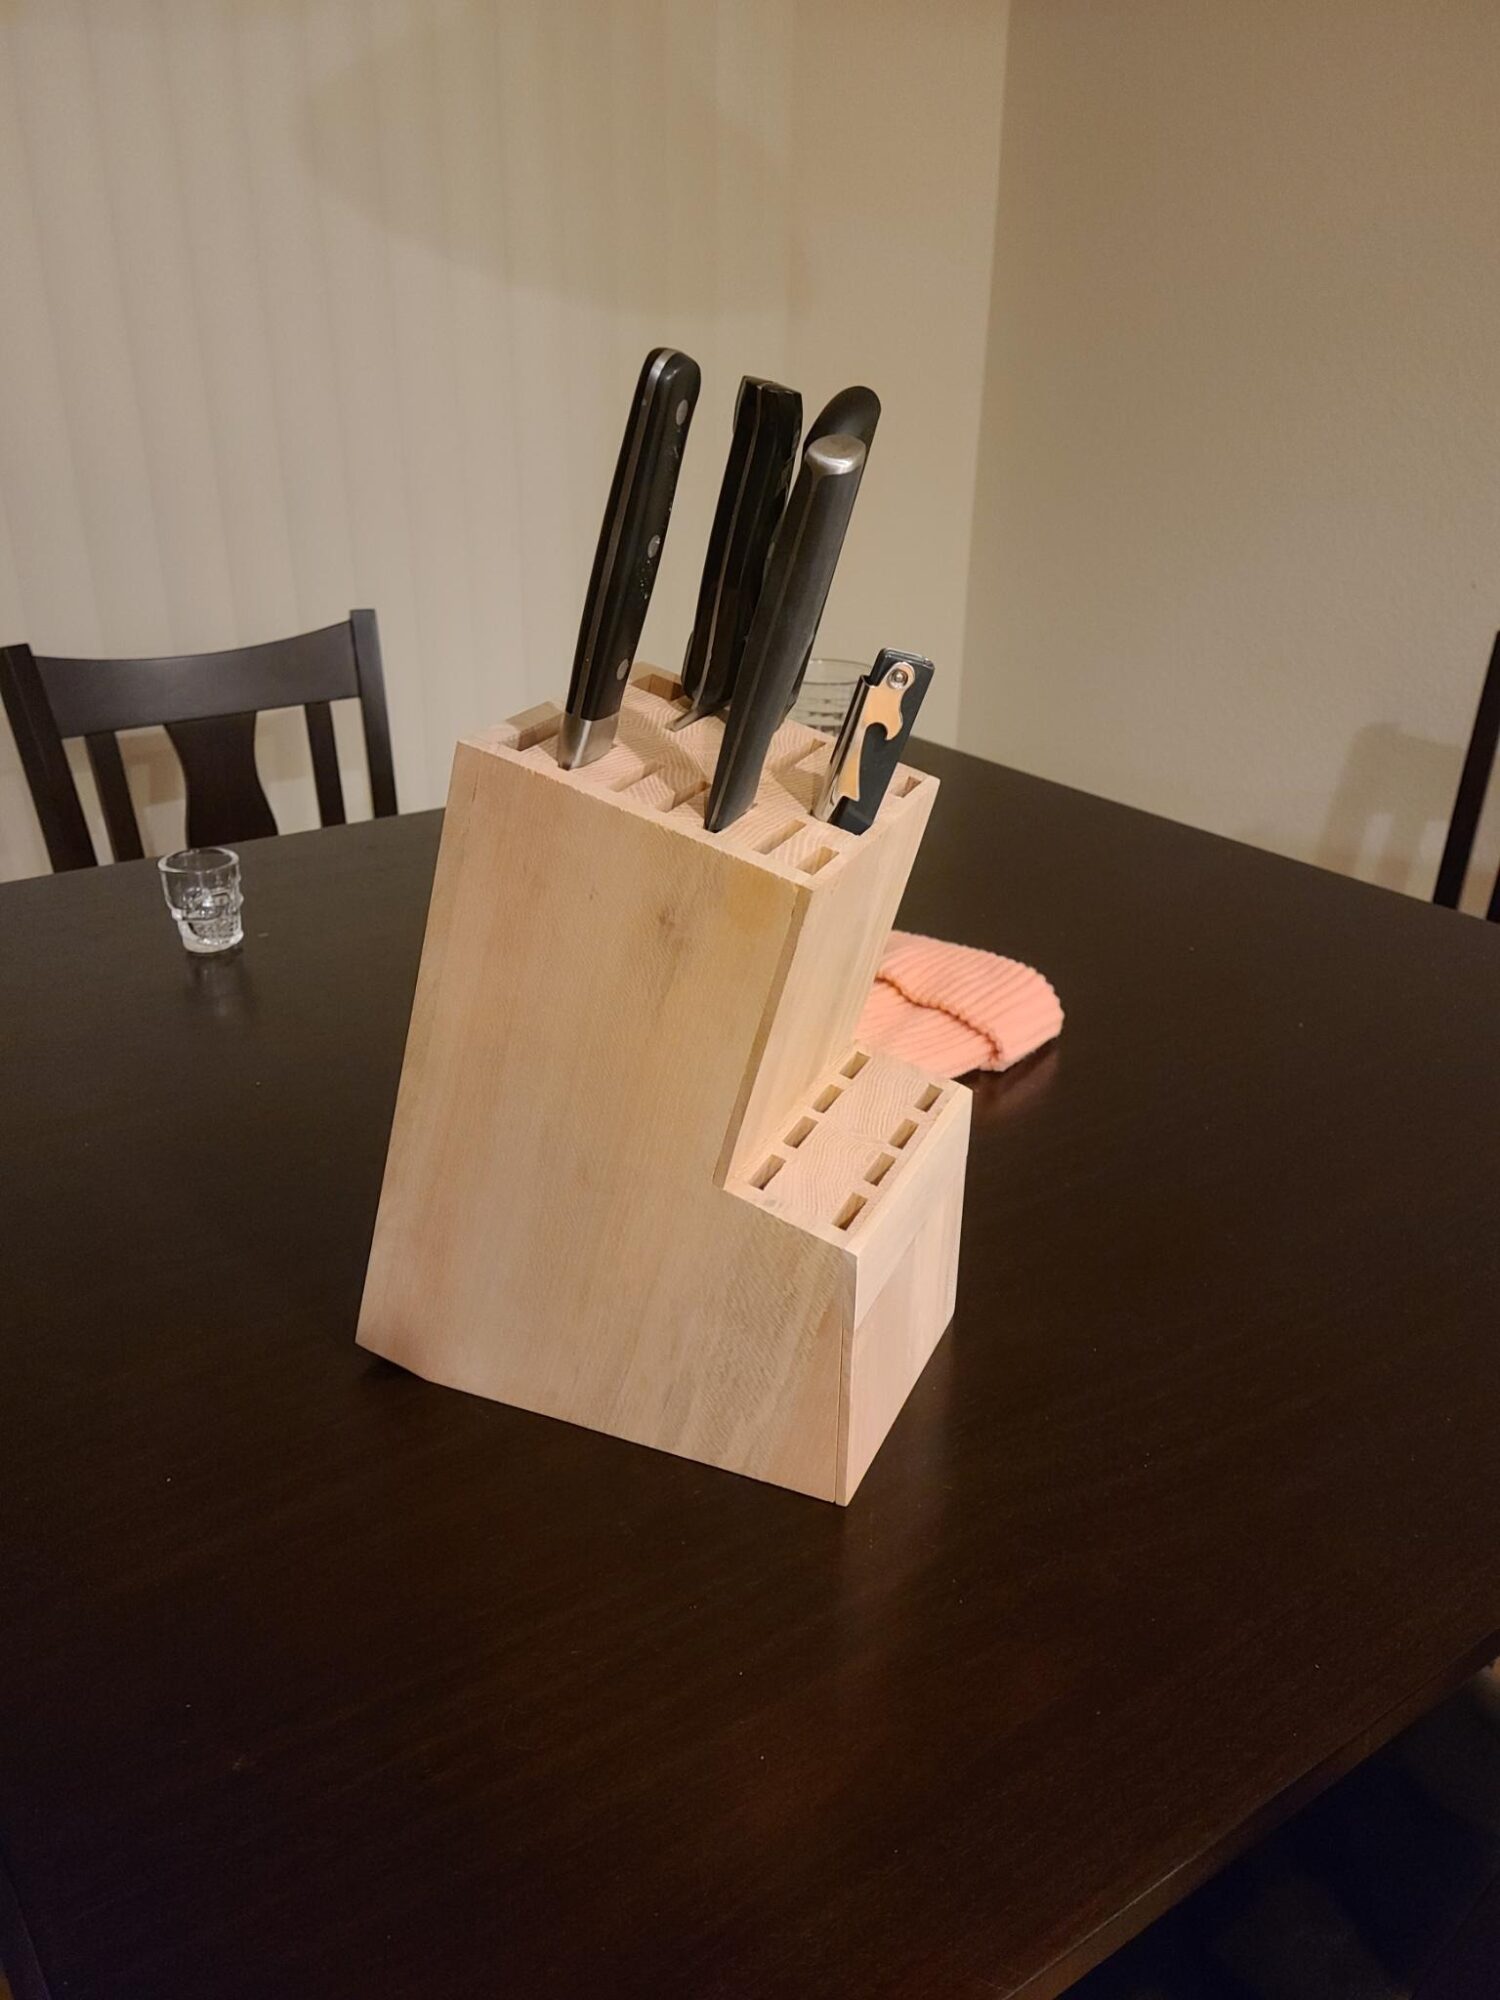
Another part of this experience was working with a friend who is extremely experienced in woodworking. He helped me think through the design, showed me the tools we would need to use and how to operate them, and overall his thought process in looking at a completed product, deconstructing it, and then modifying it to the aesthetic that I was going for. Furthermore, I learned a lot about the sheer amount of time making something like this takes. It was about 12 hours of work over two whole days, not counting the time for the glue to dry, which would add another several hours. The end product, after it was glued and sanded, is something I’m pretty happy with:
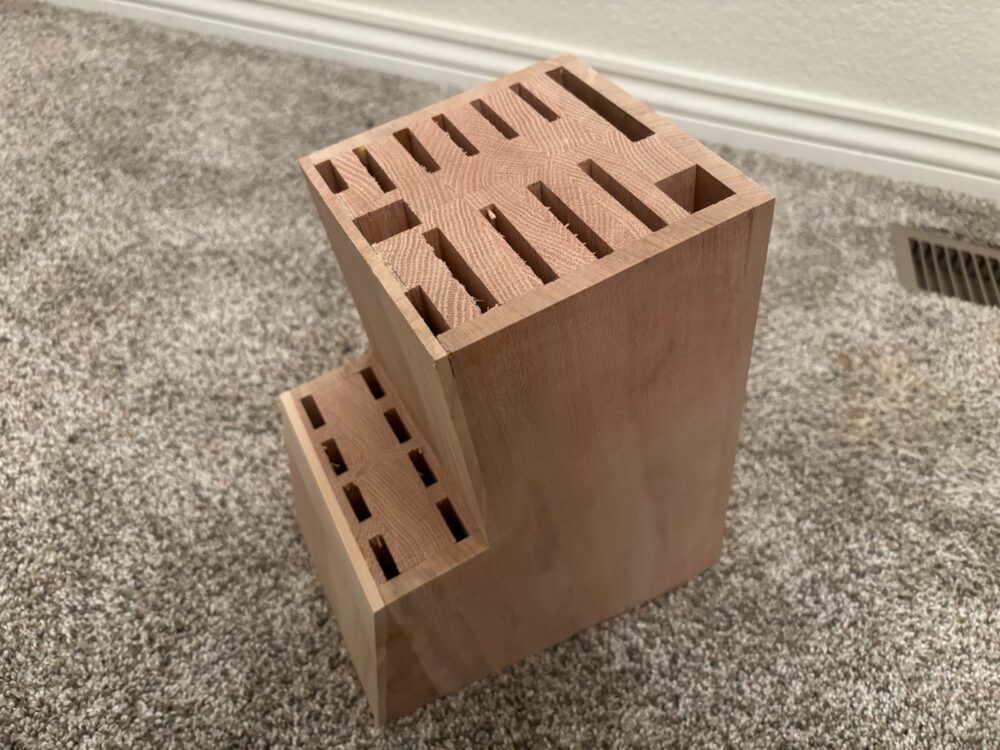
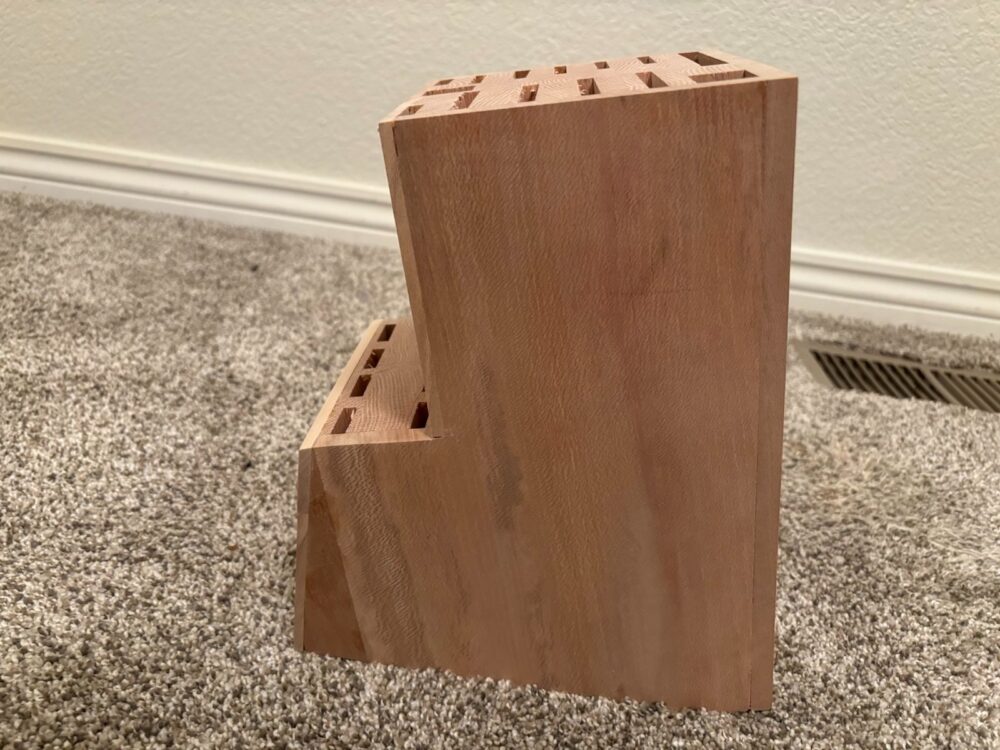
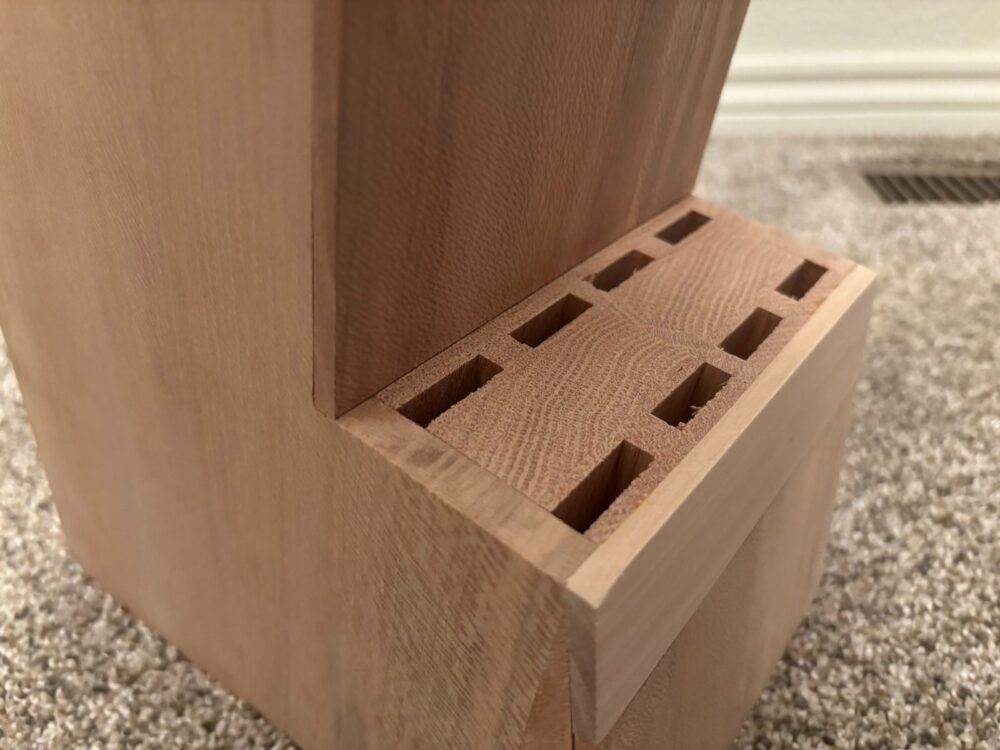

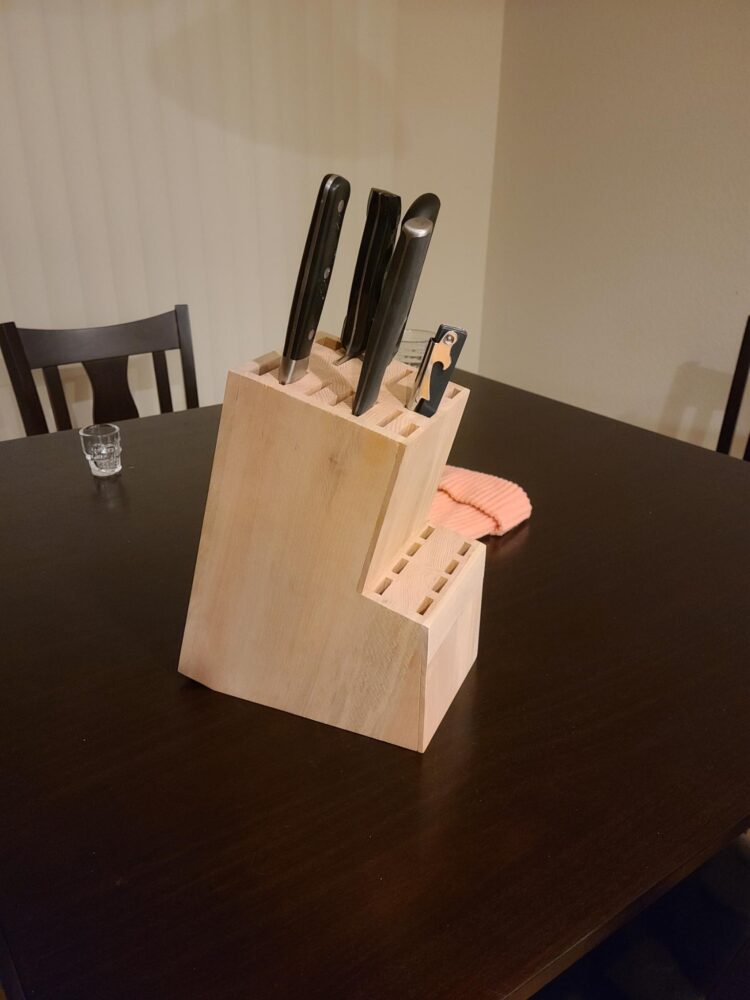
The sanding process was also extremely satisfying. The wood got softer to the touch than I even knew possible, and I also found a piece of birch wood to use for the top portion of the front (that’s the lighter band in the front view). I think it adds a nice splash of color, and when I go to stain the knife block it will add a nice contrast to the rest of the project.
While I didn’t get the rounded corners and edges I was going for by the time this project was due, I am thinking of going in and adding them. That being said, I did get some feedback from some members of my pod that they actually liked the edges and how it lends to an angular feature to the knife block, similar to the angular features from the side. I hadn’t really thought of this, but am going to keep the knife block on my counter for a few weeks as it is and see if I see it the same way, or if I do end up wanting to curve the edges.
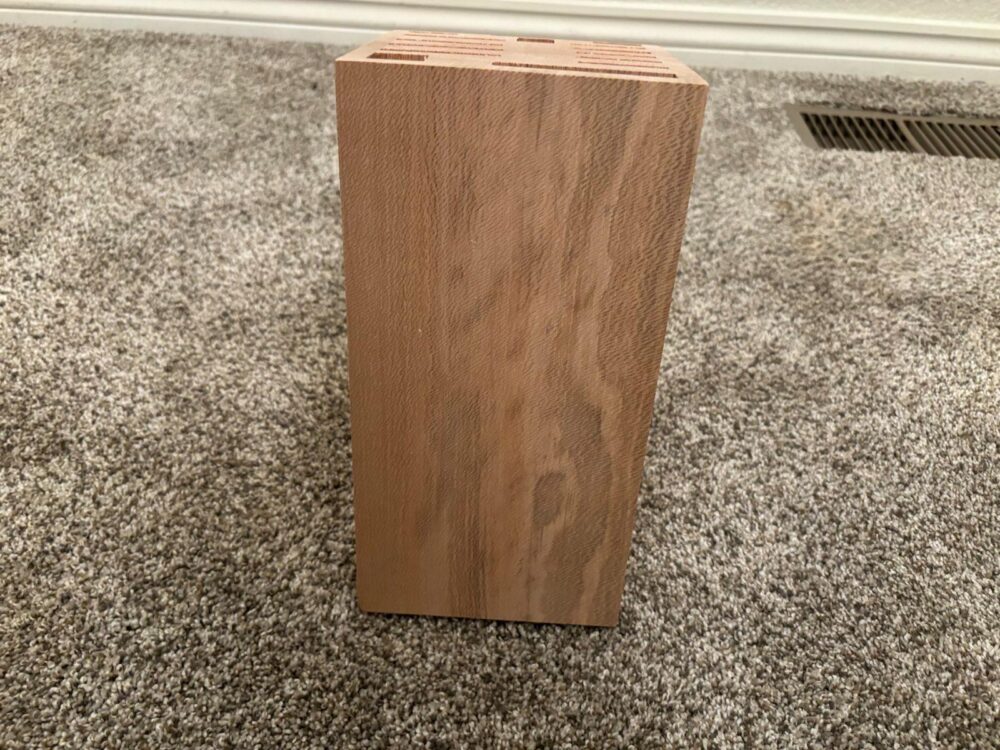
I am also going to go in and stain the entire knife block. Professer Hertzberg recommended walnut oil, which seems really interesting and I think would add a nice color to the knife block and make it appear more finished.
Perhaps the best part was seeing the knife block actually hold knives! I had put it in so much work, and I was so nervous that the measurements would be correct, but for some reason the holes would either be too big or too small. But seeing the knives slide right in was really satisfying. This is definitely something I am going to use for (hopefully) years to come, and will hopefully get a lot of love 🙂
3 Comments. Leave new
[…] There were quite a bit of issues I encountered with this project, mostly when the entire thing decided to split in half while the wood glue was drying. That was unfortunate to say the least. You can read more about it here. […]
Josh,
I am very impressed with the outcome of your final product. It is clear that your hard work in the planning stage paid off when it came to building the knife rack. I also think it captured your desired aesthetic very well. However, I am wondering if you would consider adding some light wood stain to it. Great job!
Hey Oliver,
Thank you! And to answer your question, yes, I am definitely planning on adding some wood stain to it so it all looks a bit more finished. I’m not sure if it will be a lighter or a darker stain, so we’ll see 🙂
Josh