

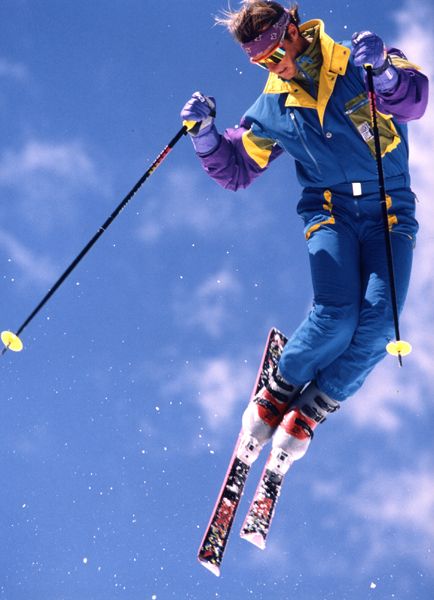
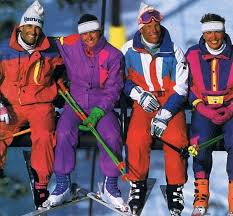
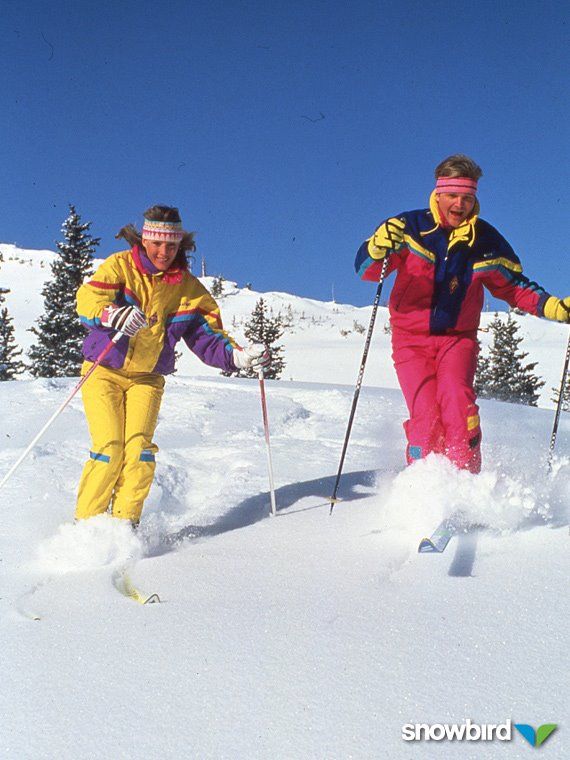
For my final project I am creating a bench made out of skis, in the aesthetic of Retro Skiing. I chose this aesthetic based off of my childhood experiences growing up skiing with my dad. The bench takes inspiration from the 80s era of skiing when my dad learned how to ski. Below are some images from the Retro Ski aesthetic that I have drawn inspiration from.
The vision for this project is a bench that can comfortably seat three people, with cupholders that can be pivoted and stowed away behind the backrest when not in use. I envision this bench to be a conversation piece and portray the aesthetic of Retro Skiing for any viewers. Another goal of this bench is to be durable and capable of being left outdoors. In order to be weather resistant, durable, and strong enough to seat three, steel tubing is required for the framing of the bench.
In terms of aesthetic I want the bench to be recognizably retro. In order to convey this aesthetic I will choose skis that have characteristic of the 80s ski era, including wacky patterns and vibrant neon colors. The skis I choose to construct the bench with will all be much thinner than modern skis, which was characteristic of retro skis.
Throughout my initial design sketching I also creates mock designs of what the bench would look like in different aesthetics. The two other aesthetics I designed the bench in were minimalist and industrialism. These alternative designs were cool to ideate, however I did not pursue either of these alternate aesthetics, because they did not fit my personal aesthetic and I felt no connection to their design. These other aesthetics helped me narrow down what I was looking for in my retro aesthetic.
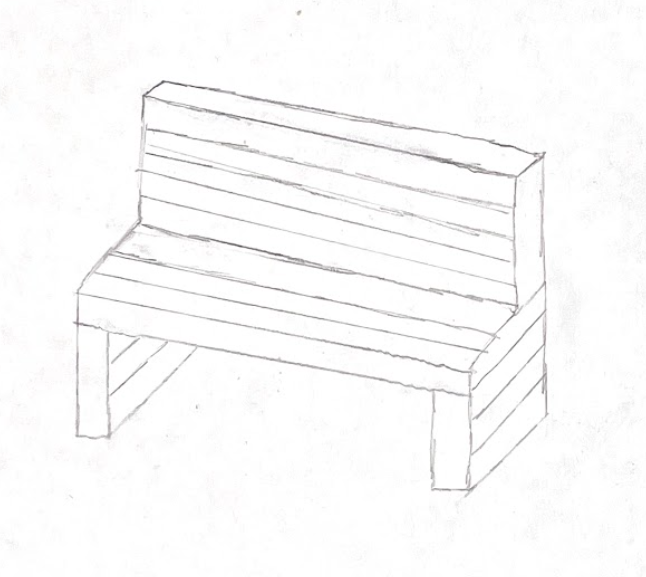

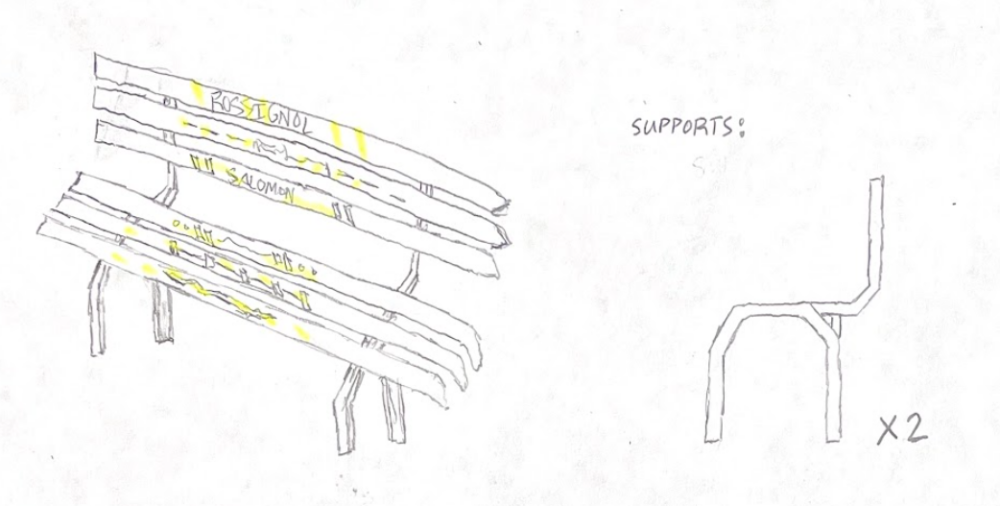
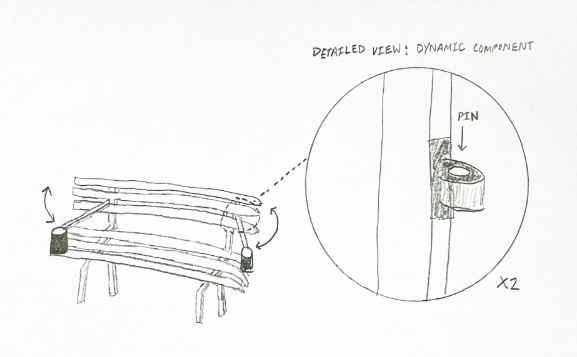
Once I had ideated through several aesthetics, I knew exactly what I wanted my final project aesthetic to look like. I pursued the Retro Ski aesthetic by minimizing the steel that is exposed to the viewer. This allows the retro designs and neon colors on the bottoms of the skis to be displayed without any distraction from the structural elements of the bench. This design and aesthetic also allows for the full ski to be on display, incorporating the original shapes of the retro skis to further portray the aesthetic. In my initial sketches I also designed a rough mechanism for the dynamic pivoting cupholders. A side view of the supports can also be seen in my initial sketches. Since initially sketching this support design, the design has been slightly simplified in order to accommodate for easier fabrication and less welding. The design allows the cupholders to be rotated 360 degrees around the back support of the chair, allowing for users to stow the arms away when not in use.
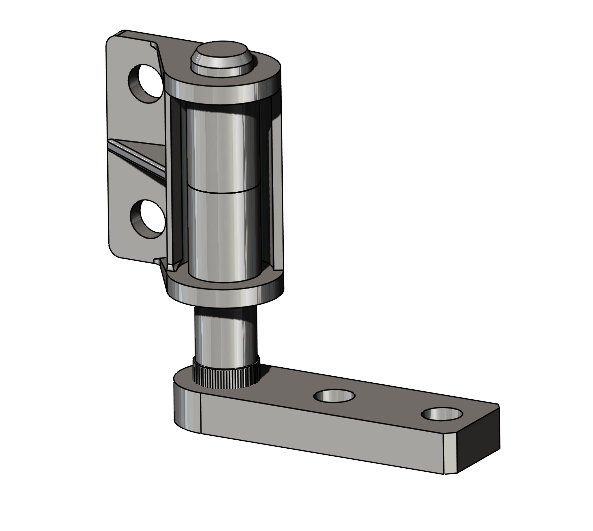
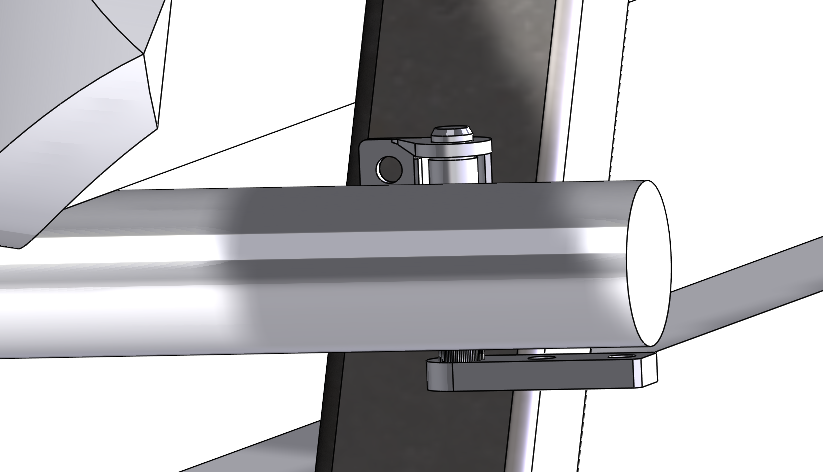
With my initial sketches and designs finalized, I then got to work on making a more exact design of the bench in SolidWorks. As I started to produce this design in CAD I came across several design changes that altered from my initial sketches. The first of these design changes was a more simple support design, that includes only 3 separate parts, and only one of those segments needing to be bent. Another design alteration I came across was the 360 degree pivoting mechanism for the cupholders. I was unable to find a part similar to what I sketched in the initial sketches so I found a 360 rotating hinge on McMaster Car that has holes for mounting to the frame and the ski pole. Another design change I needed to add when I started assembling the bench in SolidWorks was the amount of skis needed. In my initial sketches I planned for 3 pairs of skis, but as I planned out the true dimensions of the bench I determined I need 5 pairs of skis to make the design work. Below are images of CAD I have been working on.

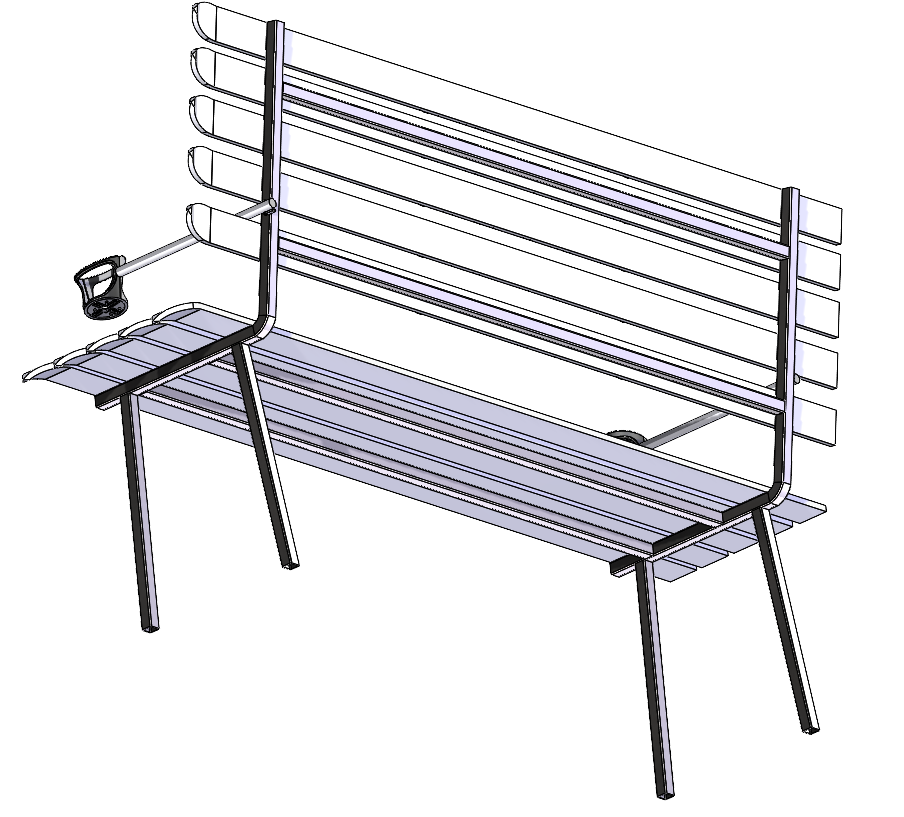
I designed my own ski in SolidWorks and tried to mimic its shape and neon graphics on the bottom. I also used CAD to create square tubing of the same dimension that I will buy. I manipulated this stock square tubing into the segments I needed for the bench frame. The hinge cad was downloaded from McMaster-Carr’s website [1]. I then created a mock ski pole CAD file and attached it to the 360 degree hinge and a cup holder design I downloaded from Grab CAD [2].

Although do not have all of the materials required to contract my entire project, I have been able to do some rudimentary prototyping in order to support the proof of concept of my design. In order to create an accurate and sturdy frame design, I wanted to learn more about how much the skis would deflect in the middle when applied with the weight of a sitting person. I determined this deflection amount would be hard to obtain using only written analysis, as I do not know the material properties and the complexities of the internals of a ski. Instead I decided to test the deflection of the skis experimentally. In order to test this I placed two skis I have already acquired in between two chairs, and sat directly in the middle. The deflection was significant enough that I did not feel comfortable putting my entire weight on the skis. This prototyping experiment indicated that the cross beams (as seen in figure 7) under the skis that connecting the two leg frames are necessary in order to limit deflection.
With this initial CAD complete, I now have a good understanding of the materials needed, and the amount of time needed for fabrication. I have laid out milestones and critical dates in a timeline below. This calendar will help me better anticipate the time required for more research, acquiring parts, fabrication, assembly, and finishing touches.
The fabrication process will start with the frame. This will give me a good base to work with, and allow me to tinker with the aesthetics without having to worry about the functionality. The final assembly of all the parts will happen once each part is made to spec, so all of the parts fit seamlessly together. Below is a flow chart of major fabrication steps in order, including any materials or skills I have to acquire for a step.
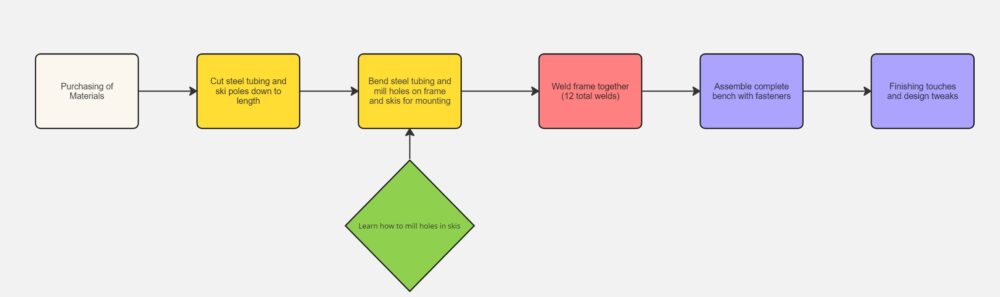
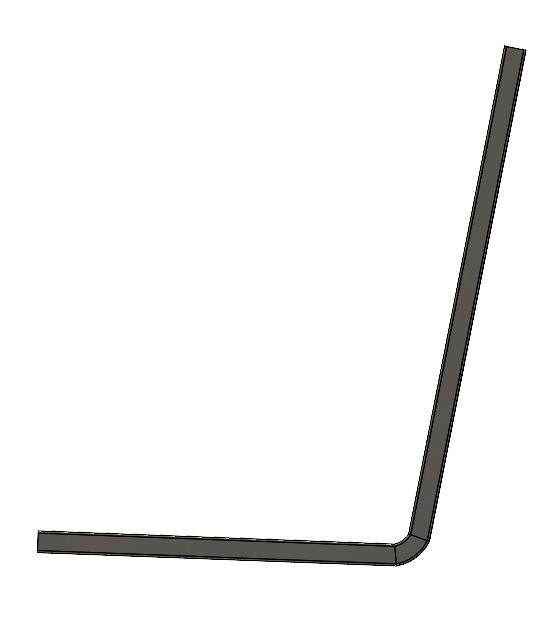
The first real fabrication step will be cutting the stock 1x1x0.083 in square tubing down to desired lengths. For the front legs, the back support, ski poles, and cross beam supports, that will be straight cuts, however for the back legs they are cut at an angle. The next step will be prepping the steel to be welded. All milling of holes and bending of the steel tubing must be complete and accurate before welding. The leg connectors and back support pieces (as seen in figure 8) each need 12 holes milled in them, and need to be bent at a 99 degree angle. The front legs, rear legs, and cross beam supports do not need any alterations before welding. The ski poles need 2 holes milled near there ends to be mounted to the hinge. Each ski also needs two holes milled into it. This is the one part of the project I will have to research and learn, because i am unsure with how to mill into a not machinable material, such as the core of the ski. I will ask around at the Idea Forge for the best way to mill these holes and what bit to use.
Overall I am pleased with the direction my project is going, and although I know I will run into unforeseen design constraints, I am happy with how have planned out the entire project and feel confident in my initial design and fabrication process. I cannot wait to sit on the final project and admire my work.
CAD File Sources
[1] https://www.mcmaster.com/1541A4/ [2] https://grabcad.com/library/mercedes-benz-vito-w447-custom-3-cup-rear-cupholder-1Pictures
[1] https://www.pinterest.com/pin/another-80s-ski-photograph-taken-by-peterlindecke-in-taos-new-mexico-for-the-german-catalogue-sportsheck-skier-bill_vip–559150109977322906/ [2] https://www.facebook.com/UVU.OAC/photos/a.294685241572/10155575923116573/?type=3 [3] https://www.pinterest.com/pin/308989224414604997/
2 Comments. Leave new
Hey Duncan, your project idea seems to resonates with a nostalgic charm, drawing inspiration from your personal skiing memories, which adds a heartfelt dimension to the design process. The intention to create a functional yet visually striking bench that serves as a conversation starter effectively communicates your passion for the Retro Ski aesthetic. I’m excited to see the final result!
Hi Kyle, thanks for reading my post. I agree the bench definitely resonates a nostalgic charm.