

Introduction and Aesthetic
I’m inspired to make my new gauge cluster as aesthetic as possible for my main project, while serving a couple additional functions. Currently, there are three gauges mounted to a stainless-steel fascia that has been laser cut, giving a nice frontal view in my opinion. Prior to this project, the wires that deliver data to the gauges (in the form of variable voltages to show water temp, transmission temp, and overall system voltage) are exposed and very unaesthetic. My main project will cover these exposed wires using a single piece of leather, stained to match the dark wooden color of some of the interior trim. Aesthetically speaking, this cover needs to be clean with not much clutter, in addition to following the mid-century modern aesthetic. I’ve chosen this aesthetic since the simple geometry and sleek lines that it contains are timelessly appealing in my opinion, and will please my eye over the hundreds, maybe thousands of times I’ll be looking at the result. Furthermore, I plan on incorporating more functional aspects to this project than just covering wires. Specifically, I plan on incorporating a pivoting, two-speed electric fan on the right side of the cover. Additionally, a phone holder apparatus would be very useful to have on the left side of the cover, towards the driver. These additional elements will admittedly make the overall aesthetic less appealing and more cluttered, but I aim to incorporate them in the most aesthetically pleasing way possible, since both a phone holder and a fan would be very handy. My inspiration doesn’t have a particular source for me to cite, but there are some elements of my vehicle’s interior that I take inspiration from. For example, main dash components having simple, one-piece construction that serve their function with minimal clutter, unlike many modern vehicle interiors. In addition, there is mahogany/dark wood colored trim that frames in the main blue dash pieces; these features lead to my belief that my truck’s interior follows the mid-century modern aesthetic, and I think any custom installations that I put in the vehicle (like this gauge cluster) should closely match this existing mid-century modern aesthetic. Alternatively, following the minimalist aesthetic should also get an installation very close to matching the existing aesthetic, like I did with the denim sun visor that I made for the previous upcycling project. Mid-century modern and minimalist are both visually pleasing aesthetics that utilize simple designs, so following either aesthetic could lead to a low clutter and visually pleasing piece. However, I’ve gone with the mid-century modern aesthetic for this main project since it more closely matches the interior aesthetic in my opinion.
Making the Gauge Cluster Cover
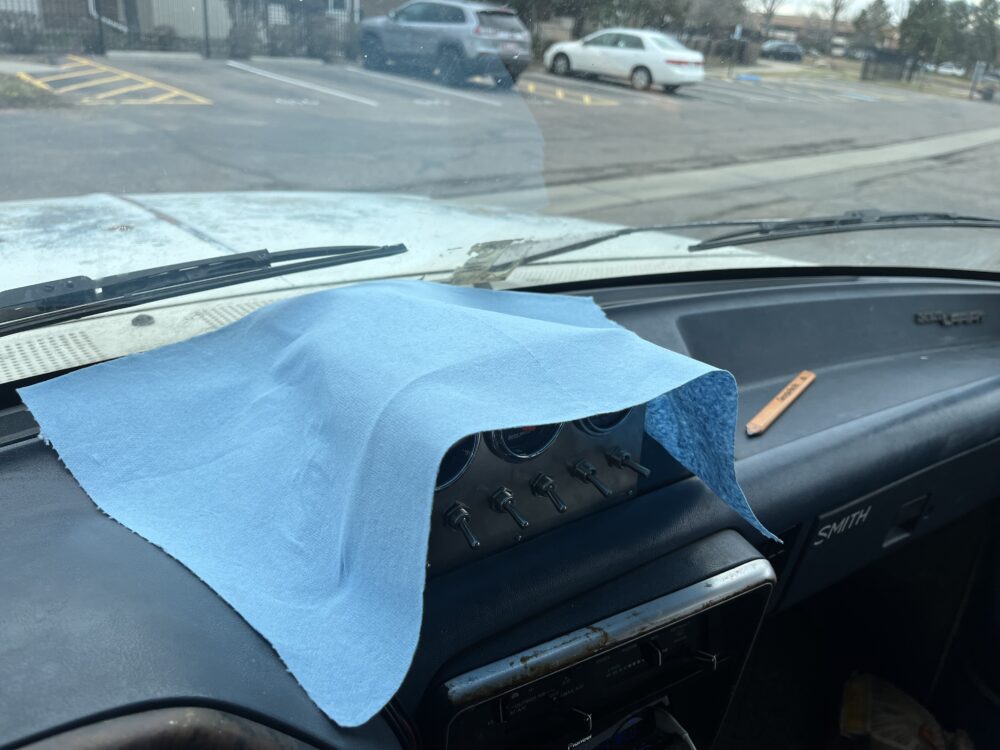
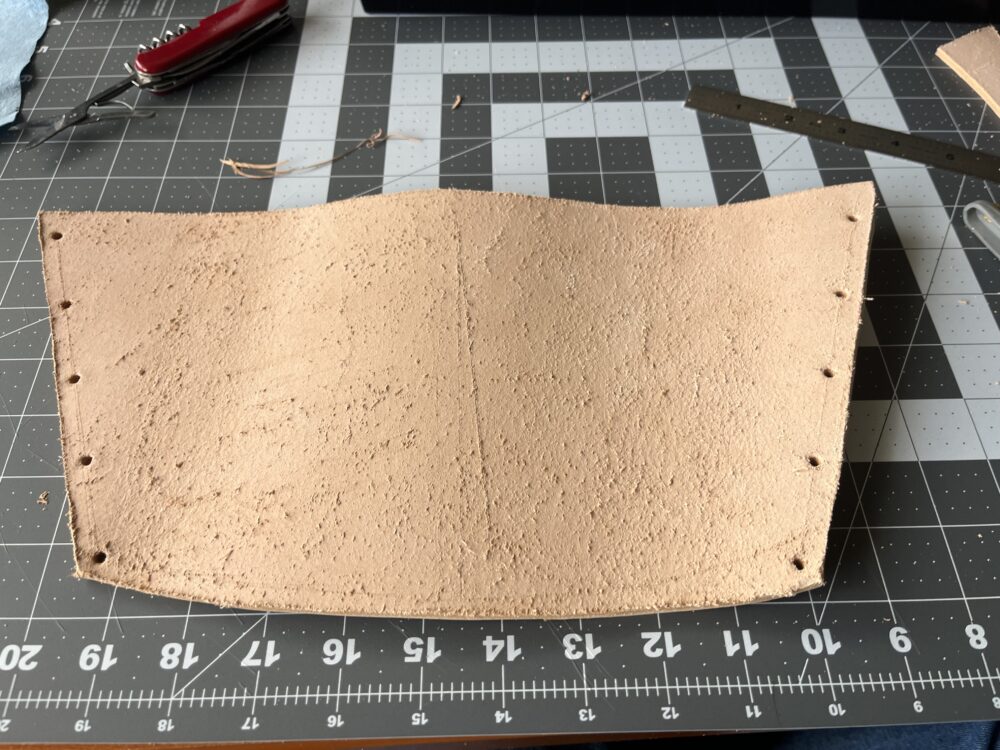
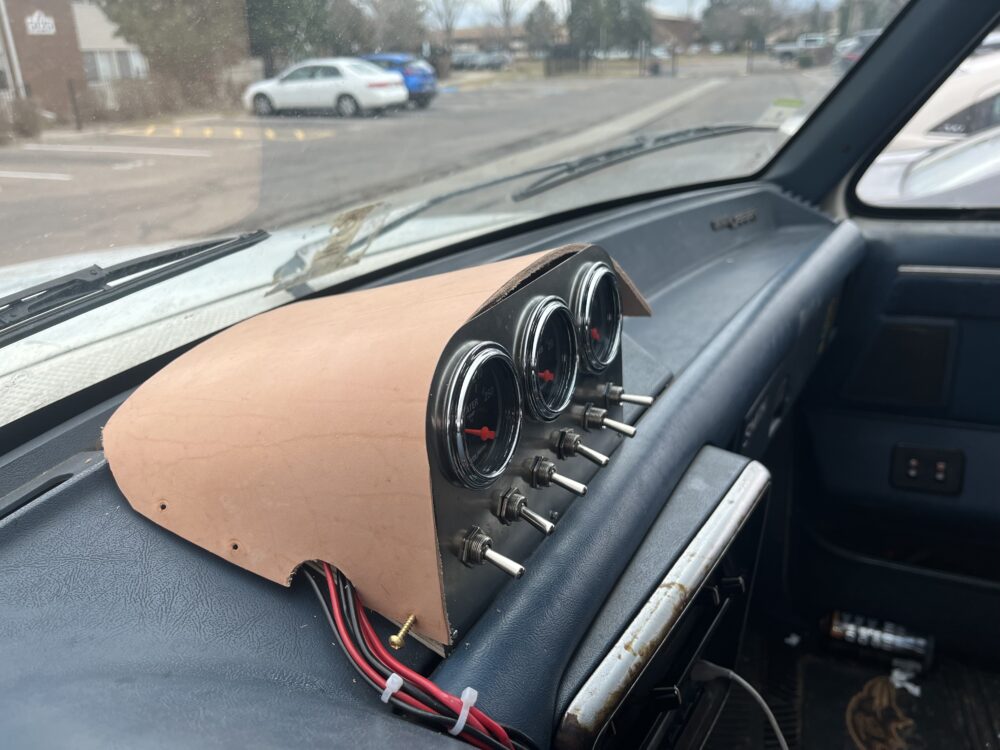
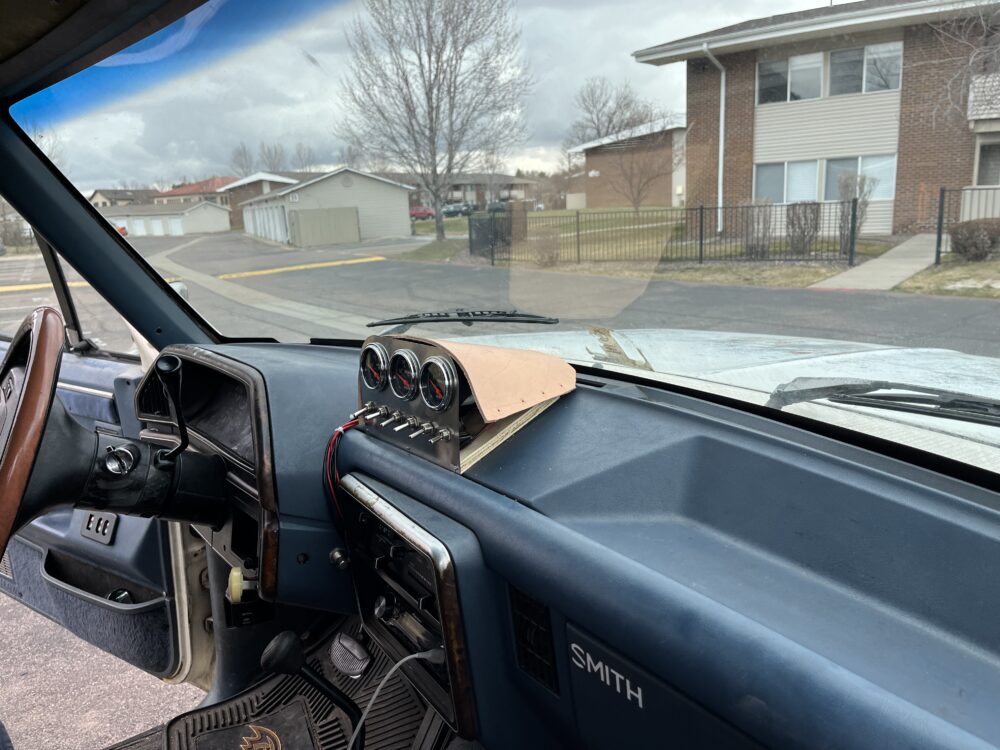
My idea to cover the exposed wires of my gauge cluster involves a single piece of leather with two filleted bends, with flat ends to screw into the wooden base of the cluster from the side. Since the leather is stiff and the geometry of the piece is relatively strange, it’s easiest to make a template from some other material to give a good starting point. By draping a large piece of paper towel and pulling it tight against the body of the gauge cluster, I can avoid messy calculations and get the shape of the leather much closer to the needed shape with fewer attempts by marking where I should cut the paper template. See the pictures below for a better understanding of this process. Once the paper towel is marked and cut out, I can transfer it to my leather piece and use it as a cutting template. When using a template-based process like this one, especially with an expensive material like leather, one should cut their final material at an offset a little larger than their template, in case they find that they need more material. I offset my template by roughly a quarter inch and got a final piece that almost fit perfectly. With my original design of mounting the leather piece to the utmost bottom of the wooden base, the width of the cover is simply too little to reach around the entire cluster and cover everything. However, when trying the piece on for size, I realized that mounting the leather piece slightly differently could be less ugly and could cover the entire internals of the cluster. Putting the leather on the outer faces of the wooden base, the leather would stick out past the stainless-steel fascia by exactly its thickness. This could be fixed by cutting a new, wider fascia that covers the leather, but that would require disconnecting all the gauges and switches. Instead, I can mount the leather to a separate layer of plywood, glued to the base and recessed from the outer faces by the leather’s thickness. This also brings the mounting plane of the leather up by half an inch on each side, allowing the leather piece to be shorter so the first one I cut out may still work. This method does leave the plywood base exposed, so Ill need to edge-band that portion of the cluster to keep the product appealing. The following images show the template process and the fit of the first piece of leather on the cluster, in addition to my choice of brass screws to mount the leather. The exploration stage involved creating a fabrication plan in my head, and it lasted from February 26th to March 6th of 2024. There wasn’t much skill acquisition needed for this project since I already had plenty of woodworking experience and a decent amount of leatherworking experience. Additionally, I already had most of my materials, including the leather, from previous projects so there was no shopping phase either. I’m now in the tail end of the fabrication phase, since I still need to stain the leather to match the interior trim, then mount it to the base of the gauge cluster and install a loom to cover exposed wires. Once that is accomplished, I can start thinking about how to mount a phone holder and fan to the cover, which may require panel reinforcements on the inside of the leather cover. This fabrication stage should be finished by April 15th, so that I have about a week to put together the final report.

2 Comments. Leave new
Jadin, I think this project will definitely tie together the interior of your truck. One thing that I thought of is laser engraving the leather. It might be cool to add some sort of design or logo.
Hi Jadin,
I’m very impressed with your project, it seems like you’ve already accomplished much of your project. I like the design you have in your pictures, but I believe doing another cut of leather, if possible and affordable, would help your design look even better. I was also wondering if you thought of putting any designs on the leather, like a logo, or flowers or something. I look forward to seeing how your design comes out in the coming weeks!