
For my final project I am designing and fabricating a bench made of old skis in the aesthetic of retro skiing. This aesthetic draws from the vibrant patterns and neon colors of the 80s era of skiing. I have made progress in many areas of the project since my initial project proposal report and I will be discussing that progress in this post.
I will begin with discussing my progress on the CAD of my project. The full CAD assembly, which I have created in SolidWorks, had to be updated a lot since its original creation when I ideated the project. When I started the project and made the initial CAD assembly, I was not considering the structural integrity of the CAD as much as I was considering the overall form and look of the bench. The initial CAD was good for seeing how each part fits together, and what general dimensions I need to get an idea for the scale of my project. However, as I attempted to make progress on my project, I realized the initial CAD would not cut it for determining exact lengths of members, and determining if the bench will be structurally sound.
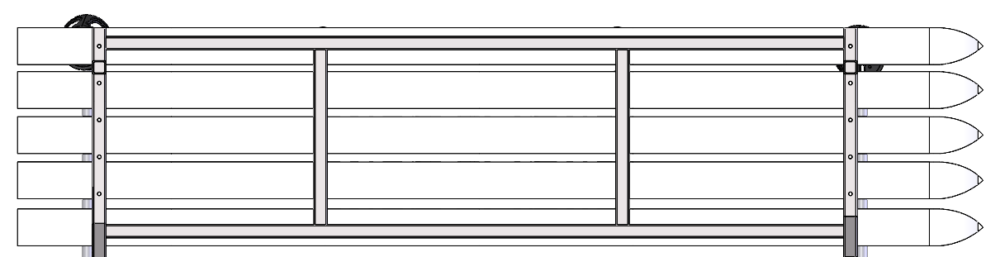
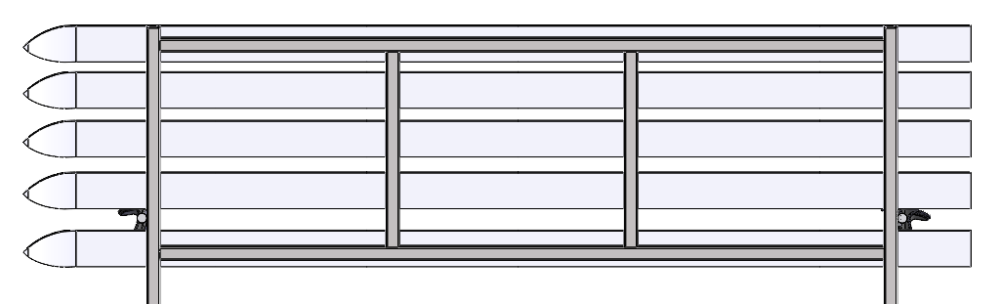
In order to make accurate deflection calculations and determine the exact length of tubing needed, I drafted a final version for the bench frame. I added 2 members to the mid section of both the seat and the back rest. This will eliminate deflection and better support the mid section of the skis where they will bend the most.
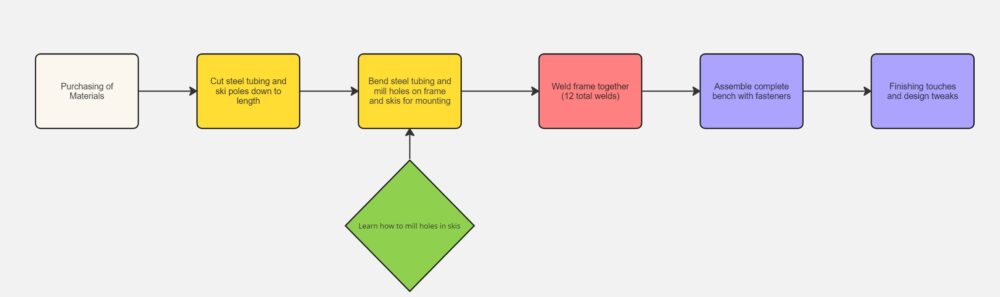
Once I had drafted the final version of my CAD assembly, I looked back on my project progress flow chart. I decided since all of the CAD and theoretical planning was done it was time to start putting the designs into physical form. The first step in this flow chart is the purchasing of materials, which I have made significant progress on since my first project report.
With the final CAD assembly with the correct frame lengths, I could accurately sum the total length of square tubing needed for the framing. Adding the lengths of all the members I determined I need approximately 400 inches. I doubled checked this calculation then ordered the tubing from Metal Supermarkets. The tubing will be ready for pick-up early next week.

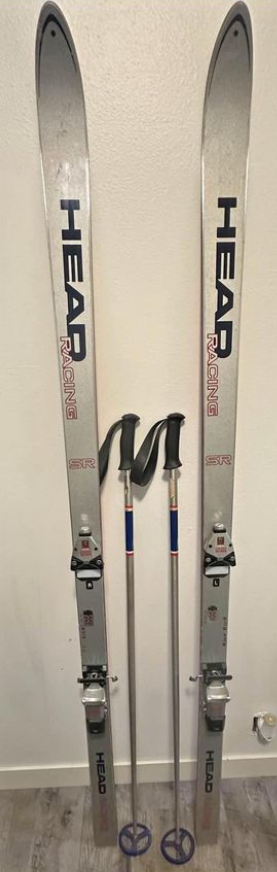
The other components that I have acquired during the progression of my project have been the hinges, and 2 more pairs of vintage skis. I bought the 360 pivoting hinges on McMaster-Carr and they are being delivered to me. These hinges are for the pivoting cup holders that attach to the backrest. The two new pairs of skis I acquired are both from Facebook Marketplace and fit the Retro Ski aesthetic I am going for.

Overall I think I have made good progress on the project, and I think I am on track to finish. I am hoping to have all the frame parts machined next week and be welding by the end of next week.
4 Comments. Leave new
Well thought out, it looks like much of the process of the project’s fabrication has been considered. Hope for a speedy obtainment of the needed skies for the final assembly.
Thank you I’m hoping for a speedy obtainment of materials as well.
This project looks amazing!!! Do you have all the pairs of skis that you need now? Also, I am curious if you will be doing any finish on the skis to help the aesthetic. Great progress!
Not quite enough skis yet, I probably need 1 or 2 more pairs to be safe. Also, I will not be doing any finishing of the skis, I want to keep their original vintage looking base design.