

Hexagon lights
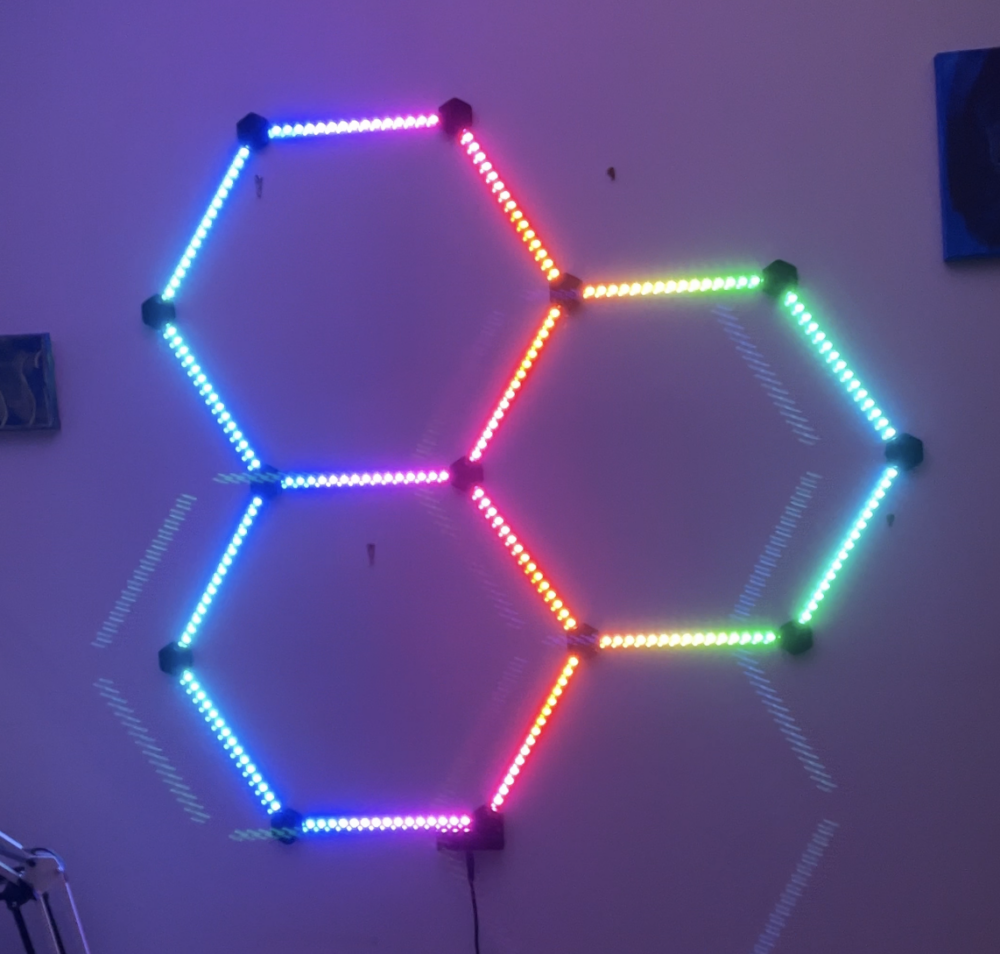
The goal of my project is to create an LED light fixture to go on my wall. Right now, I am testing a version with 3 hexagons but I am also looking into other designs.
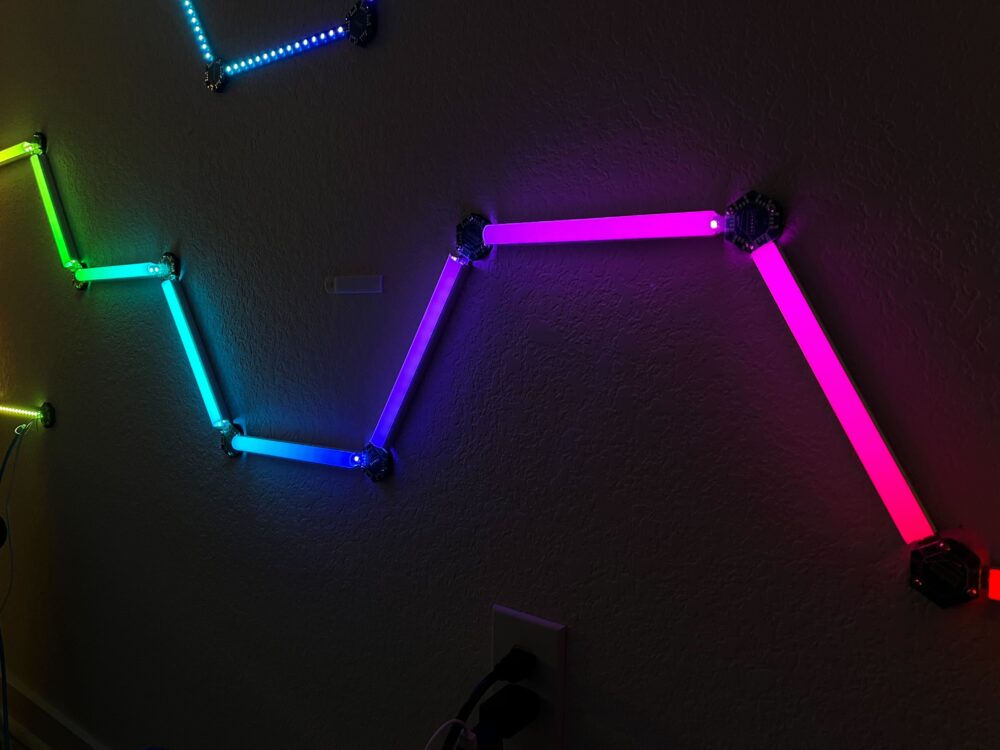
Here is a picture of the LED segments with diffusers on. Here, I am experimenting with different formations. In the final product, the node covers will be installed so the circuit boards do not show.
The controller board is responsible for setting the colors of all LEDs. This board uses the ESP32-C3 microcontroller as the main brain. It is a small, low-power, RISC-V based CPU that is capable of WiFi and Bluetooth connectivity. This allows to control the lights from your phone or connect them to your Spotify. There is a USB-C connector and a 5V input on the bottom and the knob on the top is a mode selector.
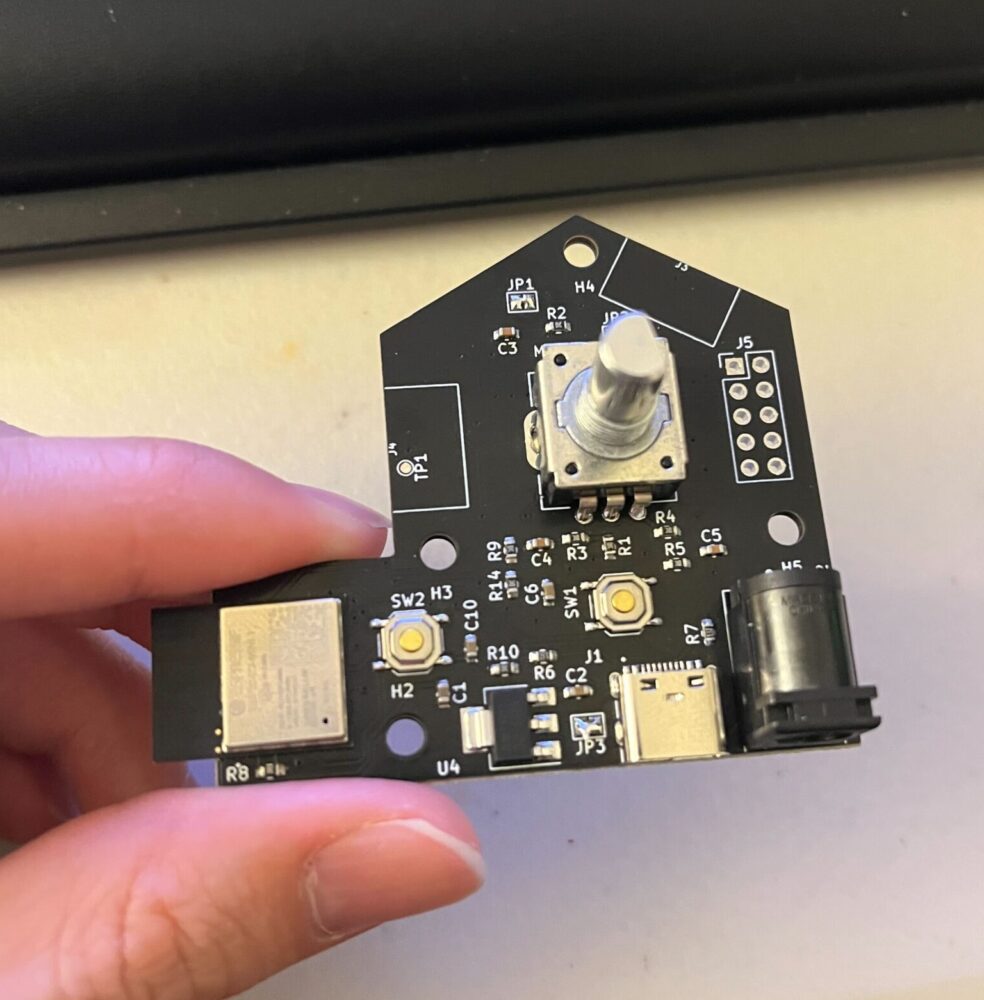
Unfortunately, when testing this board, I discovered that I made a mistake on this board. When I ordered this board, I accidentally ordered it as a 2 layer board instead of a 4 layer board. This means that I am missing the internal ground planes and I suspect this is the reason that the USB connection is unreliable. Unfortunately, this means I need to order a completely new board. Oops.
These are pictures of a node without a cover, a node with a cover, and some LEDs. 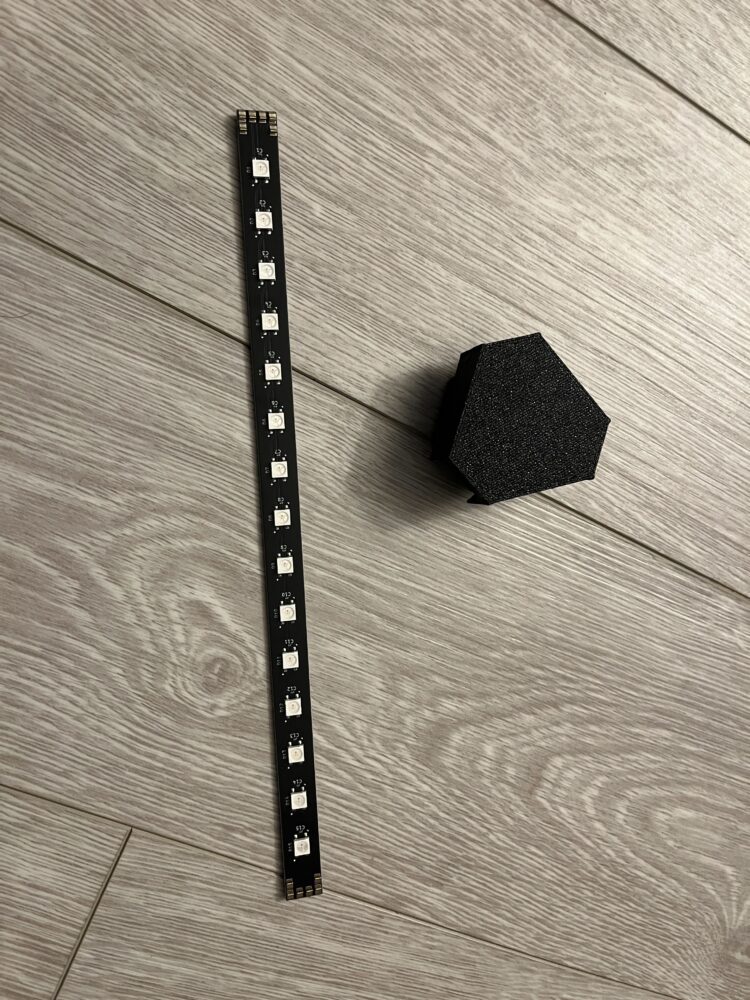
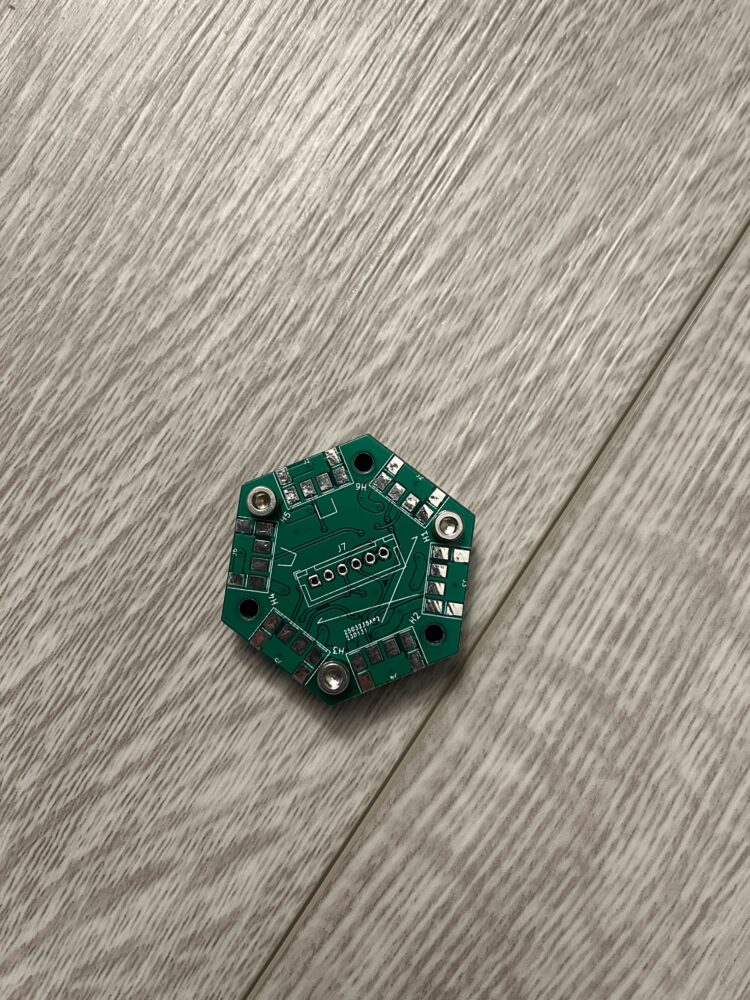
The strip on the right is a custom PCB with custom connectors on it. There are gold-plated contacts on the ends that mate with the tin contacts on the node (right). The nodes connect all the LED segments together to create larger shapes. In the middle is a node with the cover on. The main focus of this is to create a minimalist aesthetic. I don’t want any exposed wires or PCBs so it is necessary to cover everything.
Unfortunately, the fabrication has been behind schedule. I hoped to have the entire thing put together by today, but there were some delays in getting parts made. Hopefully, I can resolve this soon. Other than that, things have been going decently and I should be on schedule to deliver a finished project.
4 Comments. Leave new
It looks like it will be mostly smooth sailing from here now that you’ve passed the pcb production portion of this project, which to me feels like the most time consuming. Have you gathered the final supplies needed for the final frames the LED will be attached to?
Hi Benjamin, PCB production was definitely the biggest hurdle. I actually found a mistake on that board and I had to make a new one. The frames and new PCB just came in and the next few days will be really busy as I need to fabricate the frames as well as write and test software for the final version.
It’s cool how the LEDs came out, especially with the exposed connection points that seem to fit just fine. You mentioned that the microcontroller can connect to your phone/Spotify. Is there an app that functions with it, or is it something along those lines?
I have messed around a little with a simple web app but to keep things on schedule, I have decided that any phone/computer control will be out of scope for this project.