
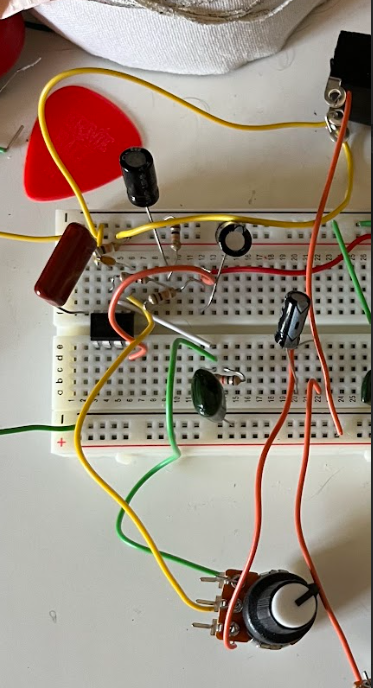
In the past 2 weeks a lot of progress has been made on my guitar pedal. First off, all of my components were ordered and shipped to my house so I could start constructing my circuit. Using reference schematics from an online pedal community, I made my very own overdrive guitar pedal circuit using my bought components, a breadboard, and jumper wires. This pedal was a proof of concept to myself as I started with a clean guitar tone just hooking up a wire between my mono guitar jacks and eventually got to a distorted/overdrive gain sound by adding an op amp and various capacitors. I Eventually was able to get the gain, tone, and volume potentiometers wired in which took some experimenting around on the breadboard to get their circuitry working properly.
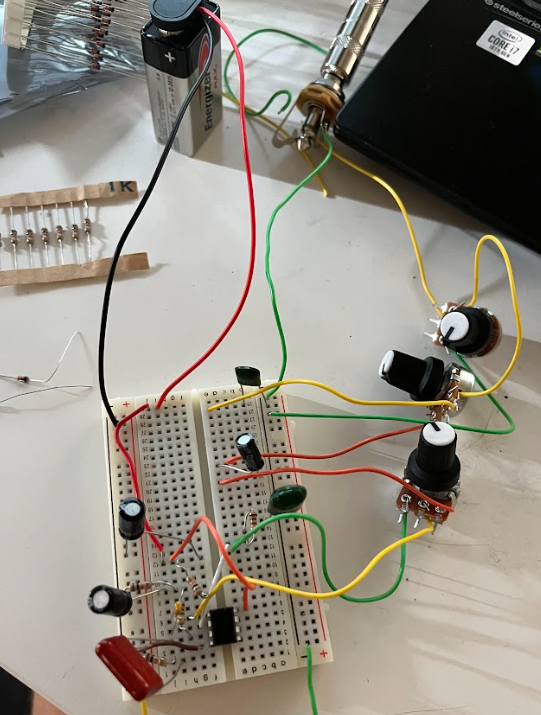
As I started playing my guitar through my new breadboard pedal, I realized a large oversight in the functionality of my pedal. While plugged in and 9V power was distributed to the pedal, the overdrive sound sounded great. There were minor scratchy tones coming through it which I attribute to loose connections as the wires hadn’t been soldered. However, the issue was that while plugged in, I couldn’t turn off the overdrive sound. Since guitar pedals are supposed to be turned on and off during play by stomping a footswitch I realized I would further need to modify my circuit. I got some footswitches and created a test circuit to see how the wiring in the foot switch functioned. In my test circuit, I connected the footswitch to two different LED lights along different circuit paths, I then added in the footswitch the check which wire path the current was traveling through. Once this was done I had to figure out how to integrate the footswitch into my circuit. Good news is, this wasn’t too crazy to figure out. I wired on the path of the switch at the very most input and output points of my existing circuit. Since current travels in the path of least resistance, the assumption is that current would flow from input, to the switch, and to the output without going to any other circuitry that is essentially the overdrive pedal. This wire path is called the bypass as the guitar signal essentially “bypasses” the pedal circuit. The other end of the circuit was wired from the input directly into the pedal circuit without anywhere else to travel to. This ensured that on this switch mode, the pedal circuit had to be activated and all guitar signals would be distorted by the overdrive circuit.
Aside from the circuitry, I have opted for an aesthetics switch. I talked with a CU staff member who makes guitar pedals and told him about my idea for the casing to be made out of clear polycarbonate for the transparency aesthetic. He advised me to instead use an aluminum stomp box case since the pedal will have to withstand my weight (170 lbs). This way the polycarbonate epoxy will not break and the entire structure of the pedal will be more sound. Now that I have this casing, I am thinking about doing a minimalist white and black colored pedal or more of a graffiti type and cover it with stickers. Since assembling the case is the last step, I still have a few days to figure this out. 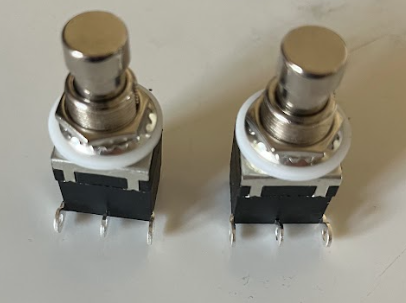
3 Comments. Leave new
I think this guitar pedal is a great idea. I also play and i’ve always had the idea to make a pedal but ive been scared. My question, is what kind of enclosure could you utilize?
Looks like the pedal is functioning perfectly, and seems like you learned a lot about electronics through the project so far. I think that going with stickers and more of a random street/skater aesthetic would be the best way to go.
I am excited to see the final assembly. Does all the circuitry get housed instead the pedal box? I think the graffiti aesthetic could be cool as you could make your design more personal. How are you planning to create the aluminum housing? Good luck with the final steps of the project! It seems like you are making great progress on the electronics and now you need to focus on the aesthetics of the outer housing!