
The Aesthetic
I’ve been going back and forth between many different aesthetics, mainly Industrial, Minimalistic and Neo-Tokyo. Another requirement I had was that it had to be something useful to me and wouldn’t end up in the corner of my closet at the end of the semester. In the end I came up with an idea that can incorporate many different aesthetics into one. That being a Programmable LED Display.
After a lot of back-and-forth, I landed on an idea that could mix a bunch of different aesthetics, a Programmable LED Display. It’s not just a static piece of art; it can change to be whatever I want. I could put an animation on it, a clock, a photo, or maybe even show notifications on my phone. It allows me to express my creativity and change the aesthetic of the project to whatever I want it to be.
This display isn’t just about looks, it is about expressing my creativity. It’s my way of adding some flair to my space without cluttering it with stuff that’ll end up in storage before finals hit. I didn’t just want something pretty, I needed it to be functional, not just a dust collector by the end of the semester.
Inspiration
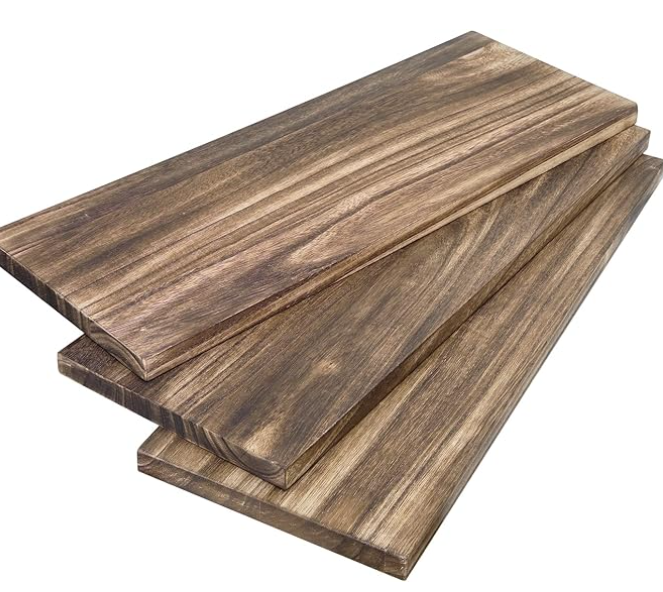
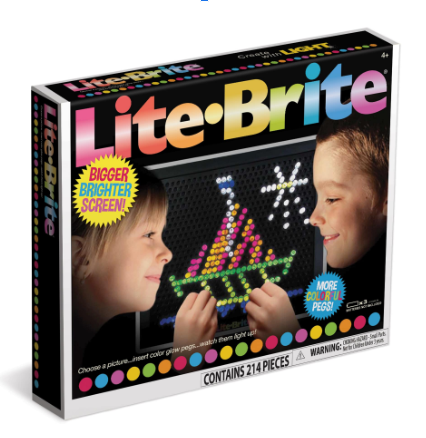
My inspiration came from the lite brite which I often used as a toy as a kid to make art. I want my design to have a black background much like my inspiration with a nice wood to contrast it. As most of this project and its aesthetic is based around programming an array of LEDs, coding the controller will take up the majority of the timeline.
Programmable LED Display
This device would be a small housing that you can program to display any art you want in a kind of retro style. It would be small enough to put on your desk. I’m thinking about adding in features such as a clock or maybe having the art also be animated but given the time I will see where I end up. I think that if I have time adding in integration with your phone notifications would be really cool.
I want the display to be small enough to not be the main focus of my desk but subtly add to it. It would be nice to have it be charged so I don’t have to have a big cord hanging off the back of it.
I plan on making the controller be able to be accessed remotely so I can change the art or adjusting the code without having to plug it into a monitor or have any sort of cords coming out of the frame. This might also serve as a way to integrate it into my phone to see notifications or reminders on it but as of right now, I don’t know how hard that will be.
I think that this project goes beyond just a piece of art and it would allow you to express your own individual creativity. It blends art and function in a good way that doesn’t invade your space more than you want it to and can adjust to any mood the user is feeling or any user that uses it. Its size and lack of cords would also allow it to be placed really anywhere in a house.
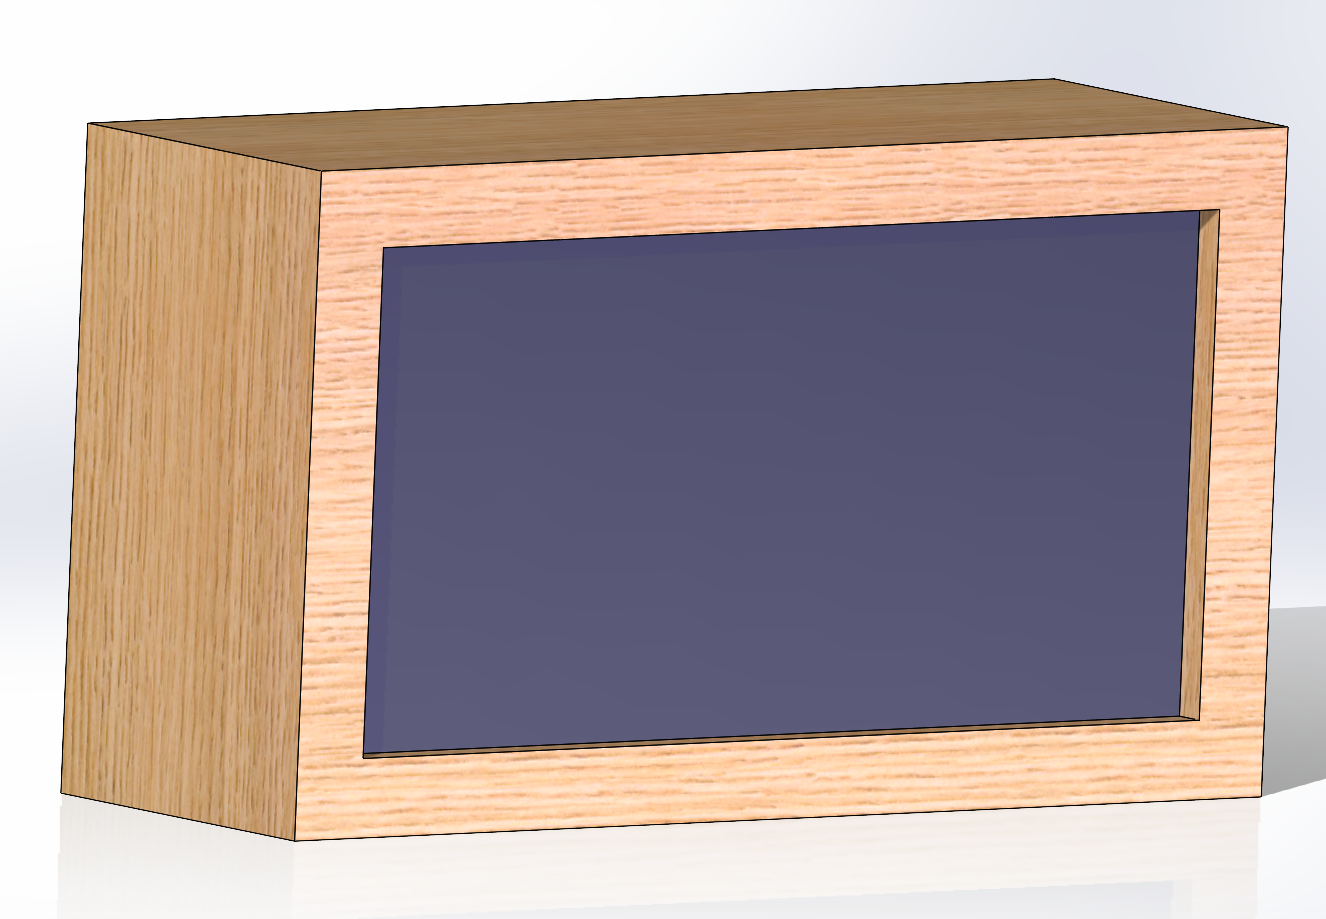
Current CAD Model
Timeline
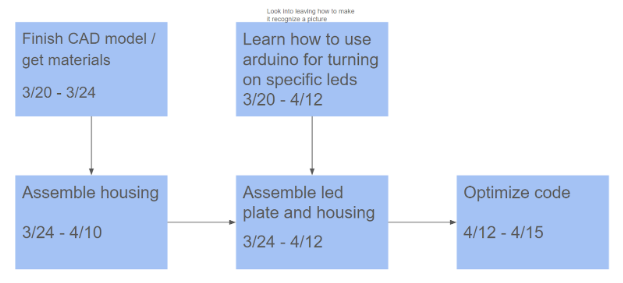
- Starting on the twentieth of March I plan on finalizing my CAD model and getting/ordering all my materials, my materials being wood, LEDs, and cables. I know there will be some unforeseen expenses later down the line but I will order the majority of my components by March twenty-fourth.
- Simultaneously I will be learning how to code on a controller for the panel. Im thinking that an Arduino might do what I need but I am also considering using a Raspberry Pi as the controller. As this will be a very large part of the project im leaving the majority of the project in this part of the timeline. Im allocating from March third to April twelfth for coding
- For assembling the housing im allocating around 16-20 days because this part of the project doesn’t have to be done until the LED panel is finished. This is just the wood that is holding the LED panel.
- Im also a leaving similar time frame for assembling the LED panel as this will take longer than the housing itself
- The rest of the time will be spent making the code run better and adding the final touches.
Specifications
- Funcaility: I want to ensure that it works as the part that makes the project look good is the display itself. As the entire aesthetic revolves around what is on the screen, ensuring that it actually works is integral to the project.
- Size: due to the size of the LED panel I will be using 2 slabs of wood both being 8.75in x 2.95 in. and another that is 3.5in x 2.95in to create a housing that is 8.75in x 2.95in x 5in
- Resolution: The resolution will be determined by the number of LEDs packed into the display area. I’m thinking of 64×32 for a good ratio between quality and simplicity.
I am text block. Click edit button to change this text. Lorem ipsum dolor sit amet, consectetur adipiscing elit. Ut elit tellus, luctus nec ullamcorper mattis, pulvinar dapibus leo.
1 Comment. Leave new
Hi Mathew ,
I like how you outline the development of a Programmable LED Display, blending Industrial, Minimalistic, and Neo-Tokyo aesthetics into a functional piece that avoids becoming mere clutter. This details your inspiration from childhood toys, material specifications, and the technical challenges of incorporating features like animation and phone notifications into the design.