
From my post 8, I developed a timeline that I wanted to follow for the design of this project. This can be shown below. 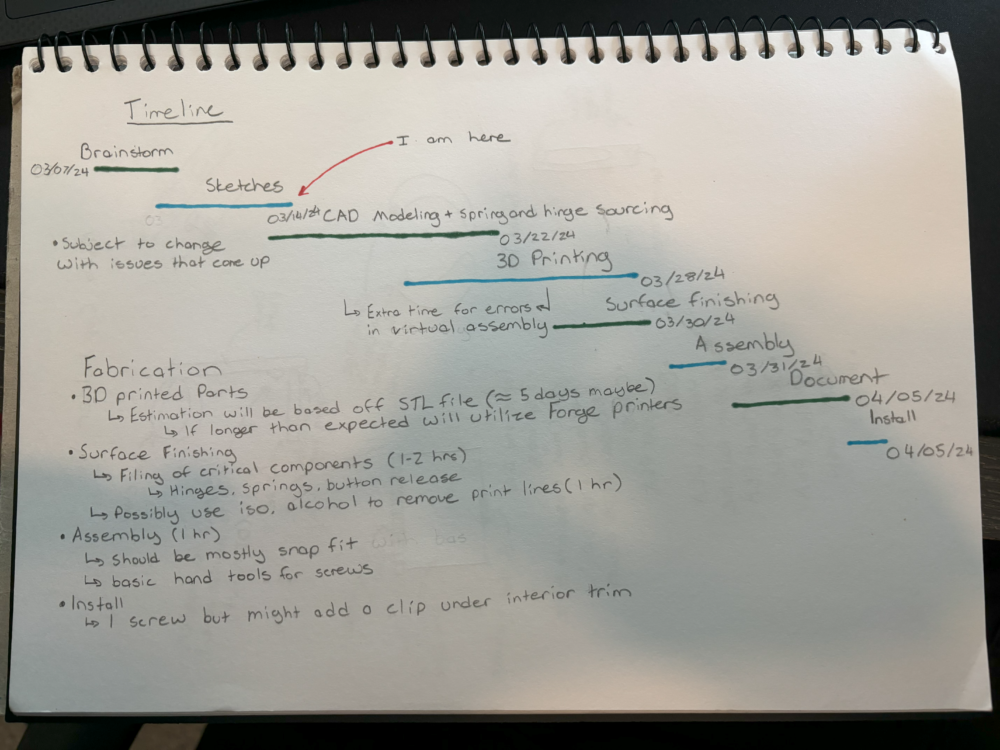
Originally I had developed this plan to create my spring design but as mentioned in my previous posts, I switched directions. I ended up going with the netting idea instead which I think resulted in a better design given my constraints.
Fabrication
My first step in the fabrication was sizing the snap fits from the clothes hangar. To do this, I used calipers and then created some prototypes to ensure the snap fit would work. Then I went ahead and printed a prototype frame to make sure the snap fit would work. Luckily I sized it right and the snap fit worked perfectly. Below you can find a photo showing the snap fit in place. 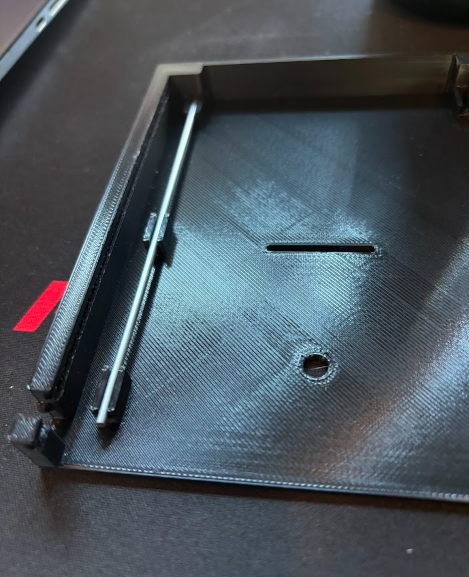
This rod would then be threaded through the mesh netting to secure it into place. Below you can find a photo showing this where the snap fit secures the netting. 
The next step was creating the snap fit for the elastic cord and placing the metal crimp on the end to secure it firmly. This allowed the netting to take shape when the cup holder is open and to make sure the netting is securely held at the designed height. This can be shown below.
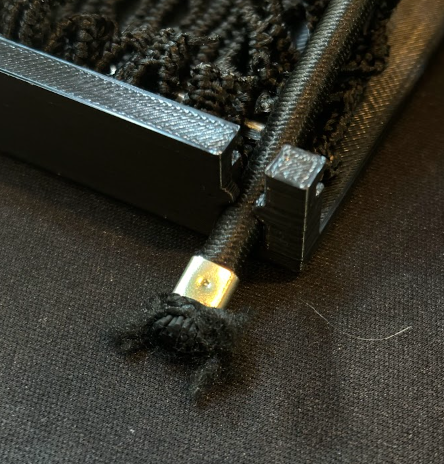
As you can see, the 3D printed frame has rounded holders which allow the elastic band to fallout if the force is great enough but holds it firmly in place if not. The hole is also smaller than the metal crimp which prevents the cord from slipping out.
The next step was assembling all the pieces together to create the netting assembly.
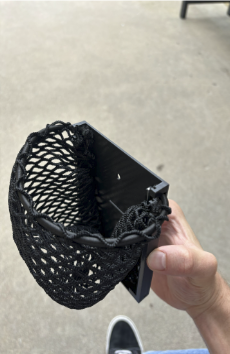
This image shows the netting assembly which houses the bottle or object. You can also see the elastic band which allows the netting to form the cylindrical shape required to hold the bottle.
Now to create the slide which was also 3D printed but to make sure that it would fit nicely into the frame. This was done with slide rails on the inner walls of the frame. Below you can see the slide in place.
The last step was to install the holder into my car. Below you can see some photos showing the location and the look of the design when installed.
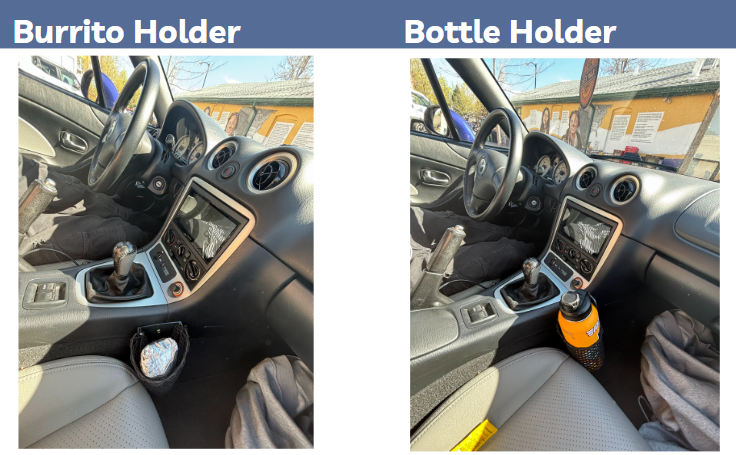
As you can tell, the design worked out really nicely. It doesn’t take up too much room and, in my opinion, looks like it was originally design to fit in the car. It also has multiple uses as a burrito holder as shown but it can be used to hold anything I like.
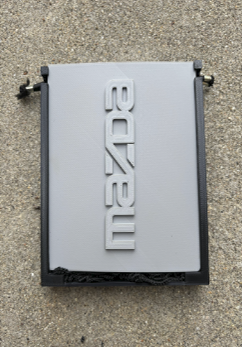
In conclusion I really enjoyed making this product. I think there is some room for improvement especially with the slide. I don’t really have a place to put the slide when I’m using the holder and I think I could’ve created a way to stow it. Aesthetically, I think it definitely fits. It matches the color of the interior, and the overall quality is pretty high. This with the addition of the Mazda logo really make it look like a finished product. In the future, I have decided to try and make a few to sell to the local mx5 community. There are some logistics issues I need to sort out like moving away from a clothes hangar and a disassembled Amazon product but I’m hoping I can solve a few other mx5 owner cup holder frustrations.