
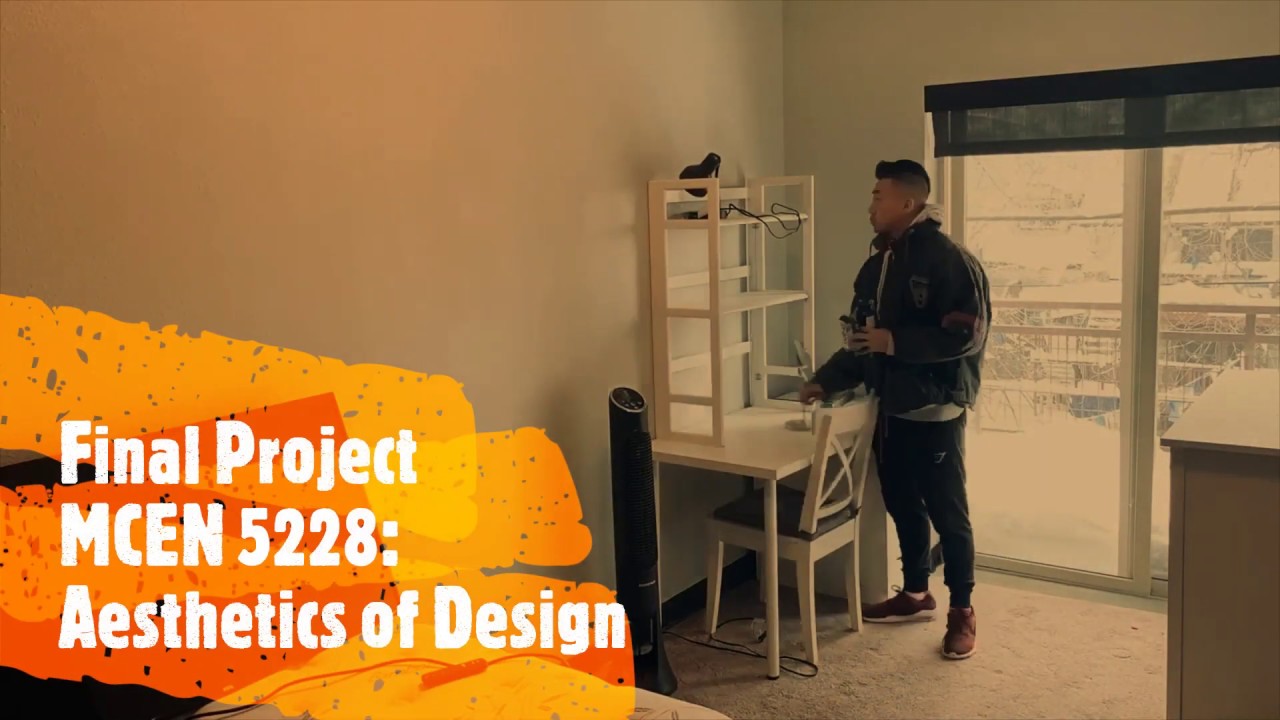
EXECUTIVE SUMMARY:
The Executive Summary can be summarized by the following Time-Lapse video:
I. INTRODUCTION
The following report will entail the specifics of Part 1 and Part 2 of the Final Project in MCEN 5228: Aesthetics of Design, instructed by Professor Jean Hertzberg. The differences between Part 1 and Part 2 aren’t too different, except for the fact that documentation of the design process (via timelapse) was improved upon in Part 2. Most of the report retains the information from Part 1, except for section VI: Part 2 Report Edits, Presentation, and Closure, feel free to skip to this part of the report if you have already read Part 1. The report will detail the documentation from both pre-COVID-19 as well as post-COVID-19 processes, as they are of importance for the overall timeline and culmination of learning experience garnered from the project. Moreover, this resembles a real-life scenario similar to a company in budgeting season, finding meaningful work to justify salaries amidst unfortunate times likes these. To begin, dating back from 2/19, the project needed to satisfy the following requirements:
- Deliverables will be a functional artifact that satisfies an aesthetic of your choice, plus documentation
- The artifact must be dynamic or complete a task (demonstrating form/function balance)
- Has to be aesthetic
At the time, my friend was thinking of building an electrical guitar but recently graduated and couldn’t use the facilities’ resources on campus (turns out later I couldn’t either). After discussing the class with him, It presented a possible opportunity to help him make the electrical guitar, while having both a great function and aesthetic balance. We decided to re-purpose an already existing guitar that he had (figure 1) by replacing it by an electrical body that I would be making with the CNC ITLL Machines, by importing CAD files to make the cuts for the pickups, bridge, neck, and electrical components. 
Figure 1: Friend’s current electrical guitar that I would be replacing with my own hand-made body, re-purposing the other components.
II. INITIAL VISION
The overall vision would refurbish the guitar in figure 1, mainly the body which is not aesthetically pleasing currently, and then overlaying that aesthetic to all the other components. The aesthetic itself of the body, then is very important and a number of aesthetics have been played in my mind. Looking my planned aesthetic, I hope to combine a streamlining aesthetic with a modern matte black aesthetic, both considered at their respective points as very modern aesthetics. Streamlining aesthetic (figure 2,3) has a very shiny, curvy, and aerodynamic look to it, naturally intrinsic to electrical guitars I feel. The aesthetic emerged in the 1930s and was used in industrial design, namely: railroad locomotives, telephones, toasters, buses, appliances, and other devices conforming to the sleek and modern impression. The electrical guitar itself was developed in 1932, so I believe this type of aesthetic is very fitting for such a piece. 
Figure 3: Motor Car No. 9 (without tail fin) with streamline aesthetic. Very smooth and soft aesthetic that can would work amazing on an electrical guitar. Source[1]: https://www.nybooks.com/daily/2013/11/13/streamline-dreamer/

Figure 4: Another Streamline moderne automobile in the 1930s. Source[2]: https://www.hemmings.com/blog/2014/05/29/1930s-auto-design-art-deco-and-streamline-moderne/
My thought behind combining a matte black modern aesthetic onto what once was considered a very modern aesthetic will try to infuse both modern aesthetics into my project. Matte finish are similar to flat finishes with non-glossy finish to diffuse reflection. However, the two aesthetics do contrast each other in some ways as streamline aesthetic is shiny, so I imagine both will exist but not be mixed on the electrical guitar (Figure 4). 
Figure 4: There is a separate shiny piece that contrasts with the matte black finish of this particular electric guitar, something I hope to do better.
III. INITIAL DESIGN
Below (Figure 5) are some previous CAD renderings of the guitar body that I was planning on CNC Machining with the ITLL lathe machines. By placing my CAD drawing into their program, the cuts could have been done overnight. By hand and with limited power tools, it became a much harder scope detailed later. 
Figure 5: The top row is the rendering I had chosen to outline my guitar pickups with.
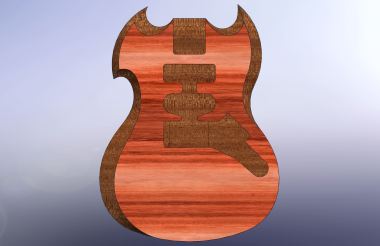
Figure 6: Without aesthetic rendering, this is what the guitar looks like, and was ready for ITLL CNC cutting.

Figure 7: Another CAD I made, but was scrapped due to the complexity that it had.
IV. DESIGN CHANGES AMIDST COVID-19
To be concise, here were a number of manufacturing logistics that had changed due to COVID-19 and how I plan to implement them:
- (1.) I can no longer use ITLL CNC Machines to carve the body and the pickups.
- Alternative: Hand-make the body, carve with hand saw or band saw. Sand edges down.
- For pickups: use hand-drill and saw afterwards. Try asking for a router and router bits if anyone has, or a router kit/router template for an electrical guitar in Slack.
- Alternative: Hand-make the body, carve with hand saw or band saw. Sand edges down.
- (2.) I can no longer use ITLL Laser Printer for the pick guard.
- Alternative: Design a more geometric pick guard, perhaps in the shape of a trapezoid that sits under the strings. Pick-guard material will be sourced from: https://www.wdmusic.com/wd-custom-pickguards-material-details.html. But will re-purpose sheet metal If found.
- (3.) Body material will be re-evaluated, since this will now be a hand-made electrical guitar body.
- I will use an inexpensive ash-body wood or plywood material as I am hesitant that my project will meet my initial vision’s standards.
- (4.) The original stretch goals no longer exist.
- The stretch goal is now replaced with the initial goal of this project, to refurbish and have a functional electrical guitar, meeting the previously stated requirements.
- (5.) The Aesthetic will be minimalist
- I do not have the purchased lacquer or paints. Whether or not I can source these materials will largely affect the overall aesthetic of the guitar. For now, it will be labeled as minimalist, using what I can to produce something simple yet eye-appealing.
V. MANUFACTURING PROCESS
Like many others, COVID-19 has affected my project and de-scoped it from it’s original vision. The main issue was having something functional/completes a task/dynamic at the end of the project. I had been looking at Guitar Wood Experts and looking to order soon[3], their woods range from $25.00 to $200.00, but they did not respond to my order, so I had to find a cheap $20 piece of Plywood that my friend had. It took 10 hours alone band-sawing and outlining the frame of the body itself (figure 11) out of the hard and inexpensive plywood I have outlined the cuts needed for the neck and bridge pickup, bridge, and electrical components that go into the guitar body itself, from the SolidWorks file that I had, in previous. Hand-making the rest of the guitar will be the equivalent of a 50 hour work week, that I do not think is plausible, given I have 3 other spring graduate courses that have also had major changes, largely not in benefit, as they are mainly engineering courses. What I do have – is CAD renderings of the electrical guitar body that I was originally going to cut, with the ITLL CNC machines. My current progress on the construction of the electrical guitar body is at the top of this post. As you can see, it has been difficult with rudimentary hand tools. Below I measured the current depth that the neck of the old guitar had with the previous electrical guitar body and marked that depth on my drill bit accordingly (Figure 6-8).
Figure 8-10. Finding the depth to drill into the guitar body.
After the holes were drilled into the pickup areas, I would be drilling into the holes with wood boring bits (figure 11). 
Figure 11: Electrical Guitar Body, and if you look closely, an outline of the guitar pickups
The following are the tools that I had used in the video: Makita Drill, drill bit set, wood boring set, athletic tape, ruler, pen, scissors, sand paper, Black and Decker sander, Rotorrazor Saw, Chisel, Hammer, Bandsaw, 25lb dumbbell as a camera stand, headlamp.
VI. PART 2 EDITS, PRESENTATION, AND CLOSURE
Part 2 of the report sees the removal of the watermark of the last timelapse video in Part 1. There are also added annotations that will help voice my manufacturing process of trying to hand-make an electrical guitar. Part 2 also sees the upload of the presentation done in Zoom, this recording on 4/27 can be found in the slack channel: Pod B (Figure 12).

Figure 12: Screenshot of zoom recording of 4/27 presentation, found in Pod B slack channel.
Further documentation comes in the form of the CAD done for this course, seen in my SolidWork’s feature manager table in the type of features I used to design my guitar renders (Figure 13, 14).

Figure 13. Guitar 1 Design with SolidWork’s Feature Manager Tree displayed.

Figure 14. Guitar 2 Design with SolidWork’s Feature Manager Tree displayed.
Closure comes in the form that I had given a very honest effort in carrying out initial project completion under the circumstances that came up throughout the year. The completion would have came in the following steps:
- After sanding the edges of the guitar to the body outline, finish smoothing out the pickup outlines by hand-sanding and further chiselling
- Drill, Bore, and Smooth outline of the electrical guitar components
- Paint the guitar with the following substeps:
- 3a. First Coat: Grind Coffee Granules and Yellow Dye and apply
- 3b. Second Coat: Red Dye
- 3c. Third Coat: Step 1 again
- 3d. Fourth Coat: Varnish (Tommy Walsh Gloss), then dry for 3 hours under bin
- 3e. Fifth Coat: Repeat Step 3d
- Drill into place the Neck, Pickups, and Bridge into their respective cut locations in the new guitar body.
- Place electrical components through respective cut outline, and solder wire back to jack plug opening
- Re-tighten down the strings and plug into amplifier sound box to play.
I feel as though I still, in part, accomplished the class requirements following:
- Time-lapse, in a way satisfies as an aesthetic, in itself, as it showcases the beauty of videography, of a functional artifact: the electrical guitar body.
- Satisfying Requirement 1: Deliverables will be a functional artifact that satisfies an aesthetic of your choice, plus documentation
- Video forms a guide to show how you can hand-make an electrical guitar with basic power tools. The report finishes this guide in the painting/completion guide mentioned above.
- Satisfying Requirement 2: The artifact must be dynamic or completes a task (demonstrating form/function balance)
- Again, the time-lapse, Cad renderings, and electrical guitar body done so far are all quite aesthetic.
- Satisfying Requirement 3: Has to be aesthetic.
VII. CONCLUSION
Overall, I learned a great deal from this project and the design process involved in making an aesthetic artifact. I satisfied the project requirements, in a way, as mentioned in section VI. I do believe there is room for improvement, and I do plan on finishing this guitar in the near future. Lastly, I want to thank you professor Jean Hertzberg for the guidance that she showed in project closure, in the face of unprecedented circumstances.
VIII. REFERENCES
- [1] Filler, Martin. “Streamline Dreamer.” The New York Review of Books, www.nybooks.com/daily/2013/11/13/streamline-dreamer/.
- [2] Hemmings.com, www.hemmings.com/blog/2014/05/29/1930s-auto-design-art-deco-and-streamline-moderne/.
- [3] “Home.” Guitar Wood Experts, guitarwoodexperts.com/electric-guitar-wood/?sort=featured&page=4.
2 Comments. Leave new
It’s crazy seeing that you did end up making this by hand. I really enjoyed the time-lapse video, and I’m just curious if you are going to put any lacquer over the wood as you finish it in the future. Well done.
Xiang
Will, this is a really awesome project and I’m very impressed by how you portrayed the project. The fabrication video was awesome and definitely gave your whole project a cool professional aspect. How long do you think it’s going to take you to finish the project? Im really bummed to not be able to see the final product, but do you think you’ll post it here once it’s done?