

Hello everyone,
Here we are at the end of the upcycle project, after many mistakes and design looping for many of us. The following is all of the steps and thoughts contained in my project: the cardboard laptop case!
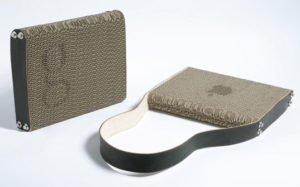
I did not google this idea before I began (honestly!) but Fig.1 is something I found that is closest to what I’ve done.
The Vision
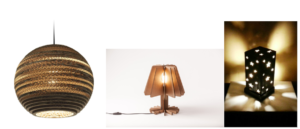
When I started the project, I began with cardboard lamps (Fig. 2). I wanted to make something functional, and I wanted to use the laser cutter. The internet held some of these kinds of ideas:

In terms of function, the following features were necessary: durability, handles, and a lid. Seemed simple. Never is (you’ll see).
Design Process Loop
Here is the design loop I actually did:
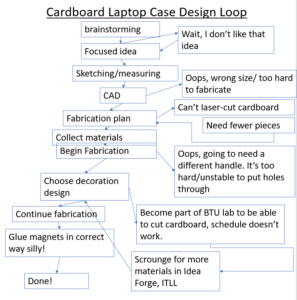
Figure 5: Final design loop with many trials and tribulations
I mis-understood the design loop blog entry the first time. It was supposed to be what you though the design loop would look like for the whole project, not where you were at the time. Regardless, I would say that this finished loop differs from what I guessed would happen in that I think the CAD mock-up prevented me from messing up as much as a would have. At one point, the distance between the computer holders was an inch too short! But I caught it in time. This project has been the most mistake-free on for me in a while. Maybe because of my simplistic art goal.
The Construction
1) begin the mock-up of the idea in the Solidworks program (Fig. 6). The holes in the top of the box here were for the handles of the case, where I googled “purse attachments” in google, and got a photo that looks like Fig. 7. I thought this would be easier than gluing the handles between some of the layers, as I had first thought.
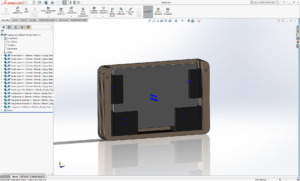
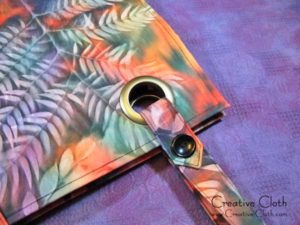
Figure 7: Original idea for attaching the handle [8]
2) Receive the bad news that I can’t laser-cut cardboard at the ITLL. Fill out an application to the BTU lab in ATLAS that Sara P. mentioned (thanks!), where I can maybe cut it instead. This piece is key for a really polished look.
3) realize that even if I can cut it out with the laser-cutter, I won’t have enough time before it is due to assemble and troubleshoot. Etched design idea goes down the tube. Also, I realize that the holes for the handles will look sloppy if I cut them by hand and measuring, so I choose a new handle design, through the top and back of the box, as it is in the final.
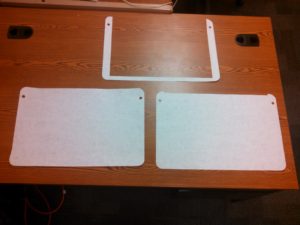
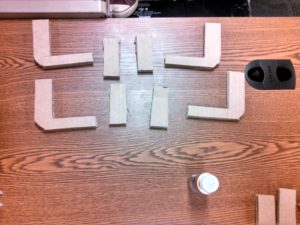
4) start work on cutting the pieces out by hand using a box cutter. A friend of mine at work, Evan C. suggested that I didn’t need solid layers to construct my box, I could use spacers between layers (see Figure 9 below). First I cut out the pattern for the pieces in the laser-cutter on paper (Fig. 8), then I traced them on the cardboard and cut out by hand:
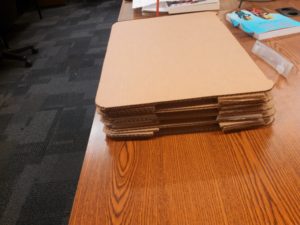
a) a front and back (Fig 8, two below)
b) 4 full inside layers (Fig 9, thinner above)
c) 18 corner spacers and 18 sides spacers (just used portions of Fig 8, above)
d) the top pieces for the latch (not pictured)
Ah! After setting up all the cut pieces prior to gluing, I realize it’s too short to contain the Styrofoam blocks, so I cut out 6 more corner and side spacers.
5) Glue the back of the box, and all the spacers together.
One of the final steps was gluing the top on. I still needed to decorate it and install handles.
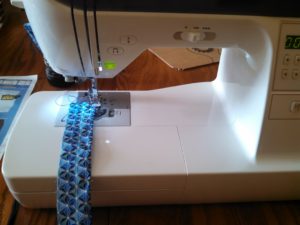
6) Sew the handles and hem the strip of cloth for the top-of-box hinge (cloth sourced from ITLL sewing station scraps)
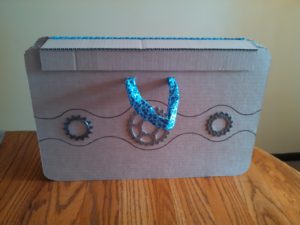
7) Try to burn designs into cardboard with a soldering-iron instead of laser-cut. It will take forever and look sloppy. Can’t do that. Find the gears in the component design box leftovers in the Idea Forge (Fig. 12), and go back to solid works to design the round pattern around them, cut it out and trace it to the front of the box.
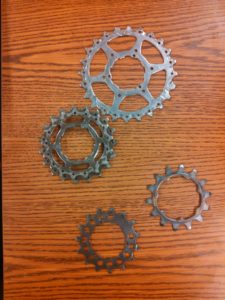
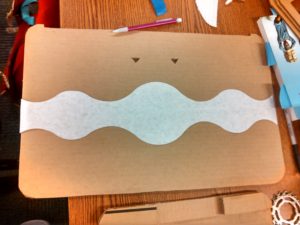
Figure 13: Trace cut-out of design around gears, made in Solidworks and cut out with laser
8) glue everything together and install the closing latch magnets (the super-strong kind, found in my basement)
Goals
functional: The laptop case is pretty close to what I wanted functionally. It is strong and sturdy, which is good, and the top latch with the cloth hinge works well.
artistic: I really wish I could have used the laser cutter, because it would have been a bit sleeker, and I could have put in the design I wanted. It’s also a bit bigger than I expected, mostly because I have a large computer. Looking back, one more thing I could have done was to make the top latch a bit more artsy. Perhaps just not included the downward flap, so it looked more streamlined. I liked my use of gears, I think that was pretty novel (and upcycled!) and I’m glad my sewing skills came in handy.
Looking forward
This is a fairly sizable box to carry my computer in, and if it rains that day it will be ruined. I think there would be a less strong, but prettier way to do this, and many companies have with more expensive materials. Actually, I’m not sure if carrying this around would embarrass me or not. I guess I’ll just have to find out, better luck next time? Realistically, it will probably live in my basement until class is over.
Presentation Video Link
References
1. http://inhabitat.com/giles-miller-corrugated-cardboard-laptop-case/
3. http://inhabitat.com/vicara-gives-the-traditional-lamp-a-facelift-using-recycled-cardboard/
4. http://www.instructions.tips/how-to-make-lamps-with-cardboard/
5. https://www.epiloglaser.com/assets/img/how-works/applications/wood-engraving-samples.jpg
6. http://asmithblog.com/tag/minimalism/
7. http://more-sky.com/group/minimalism-wallpaper/
8. https://www.linda-matthews.com/how-to-use-curtain-grommets-as-attachments-for-bag-handles/
8 Comments. Leave new
Really cool project. I like that you only used upcycled material in you project. I think it was a smart idea to design it in cad beforehand. The fact that this project is both functional and aesthetic is really impressive. Great job!
I really like the overall design of the box. It looked well made even though it was made of such a weak material. I also really like your attention to detail. You made sure everything fit just right before your actual construction.
You obviously put a lot of thought and effort into this project. I like that you made something functional, while most of these projects were simply art. The decorations definitely added to the aesthetic and feel, while simultaneously highlighting it as an engineering project. I like that you shared what you would change if you could, the closing lip.
I like all of the planning that went into the project and how you were able to use SolidWorks to find flaws in your design that could have hurt you in the long run. I like the minimalist/steampunk aesthetic that was achieved in this project. I also wanted to use the laser cutter to cut cardboard but ran into the same issue of not wanting to start a fire. Great work on this project.
I love how you took something so simple and added a lot of enjoyable and functional features. Your design came out very sturdy. The addition of the foam on the inside, along with the magnetic snap close for the lid truly gives it the feel of a laptop case. Great job on the function, and given your material I think you achieved an intriguing aesthetic.
You definitely reached both your functional and aesthetic goal! good craftsmanship and ingenuity. I like the incorporation of a magnet to keep it closed and the overall construction is impressive. Even though you were going for the minimalist design, I believe some color fill in the stripe on the front would have been a nice addition. But I like the idea and the result you got!
Thanks for the suggestion about the color stripe, I think maybe you’re right!
I like how you used the original packaging that laptops typically come in, very good idea especially to ensure that your laptop is snug and in place. The overall construction actually looks very sturdy considering it is made entirely out of cardboard. The cloth handles, decorative gears and hinge top are all very nice additions. Maybe consider switching the clasping feature to something other than a magnet. Magnets could be harmful to electronics.