
Upcycle Progress: Japanese Gi Inspired Patchwork Jacket
The first step in this project was planning. I had all the scrap material laying around but needed to know exactly how I was going to cut and sew it together. To figure this out I took a crew neck long sleeved shirt that I liked the fit of and used it as a template. I traced this shirt on to construction paper I bought at Art Parts with room for a seem allowance. The key detail here is that the front template had to have an overcut, drawing inspiration from the traditional Japanese Gi. The image below shoes these templates and some scrap belt material:
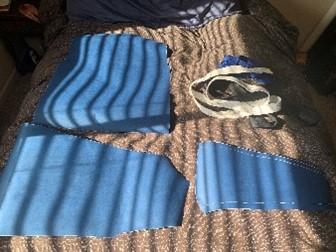 Figure 1: Back Template (Top Left), Front Template (Bottom Left), Belt Material (Top Right), Sleeve Template (Bottom Right)
As I am a beginner in sewing, I wanted to start with something that I could mess up on. With this in mind I decided to make the inside liner. The material for this component was also sourced from Art Parts as it caught my eye. I used the templates I had made previously to cut out the panels and sewed them all together. This effectively made an inside out jacket which is shown below:
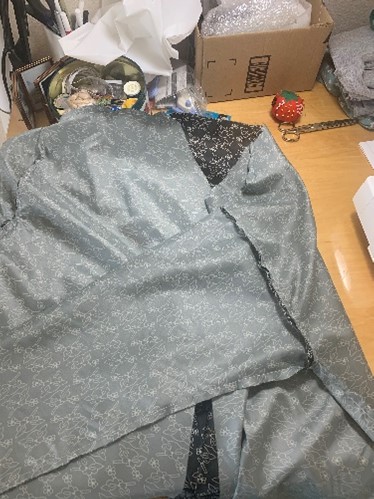 Figure 2: Liner component of jacket
The next step in making this project was making what I call the dummy layer. This layer will be between the liner and patchwork surface, allowing it to be messy. It exists to provide both more insulation and allow easier sewing of the patchwork material. To make this component I used some scrap black fabric from Art Parts and an old black t-shirt. The two images below show the sleeves and chest piece of this layer:
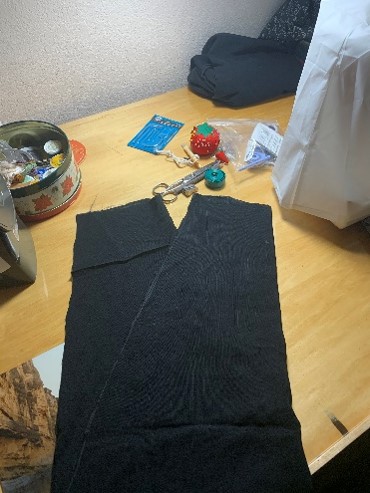 Figure 3: Dummy layer sleeves
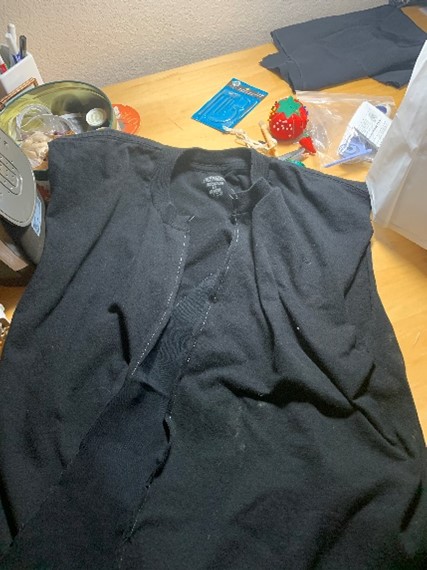 Figure 4: Dummy layer front and back panels
With the dummy and liner layers completed I have begun to shift my focus to the final patchwork layer. Due to seeing time constraints on the horizon I decided to make each panel a different color to achieve the patchwork aesthetic. While I would like to make smaller detailed patches, this does not currently seem feasible. All my old Gis were from when I was younger, this means that none of the sleeves will fit me anymore. However, some of the pant legs are long enough for my arms. A cut pant leg is shown in the image below which will be used a sleeve:
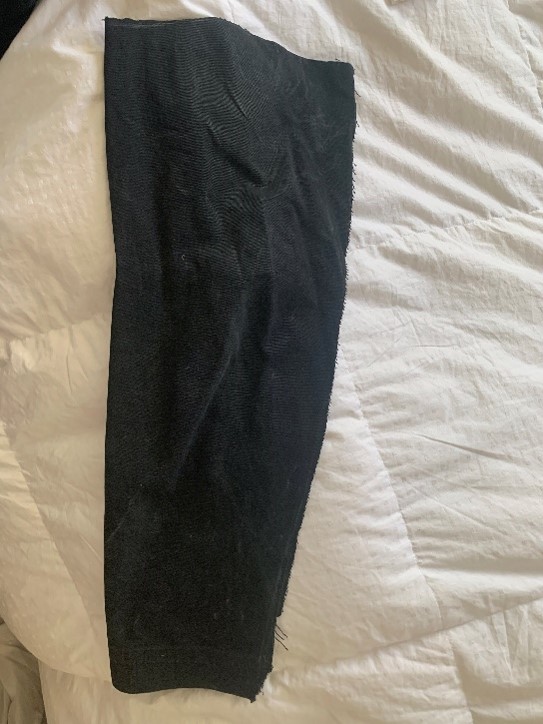 Figure 5: Cut Gi Pant for use as Sleeve
I have also started to sew patched onto the dummy material. Before starting this, I had to take all of the old Gis and cut them in to matching panels as I used in the stencils at the beginning of the project. Now that this is done, I can take each piece one at a time and sew them together. One of my favorite patches that I am using in this project was the upper back of one of my Gis that has a large black and gold dragon on it. The image below shows this patch sewed on to dummy layer:
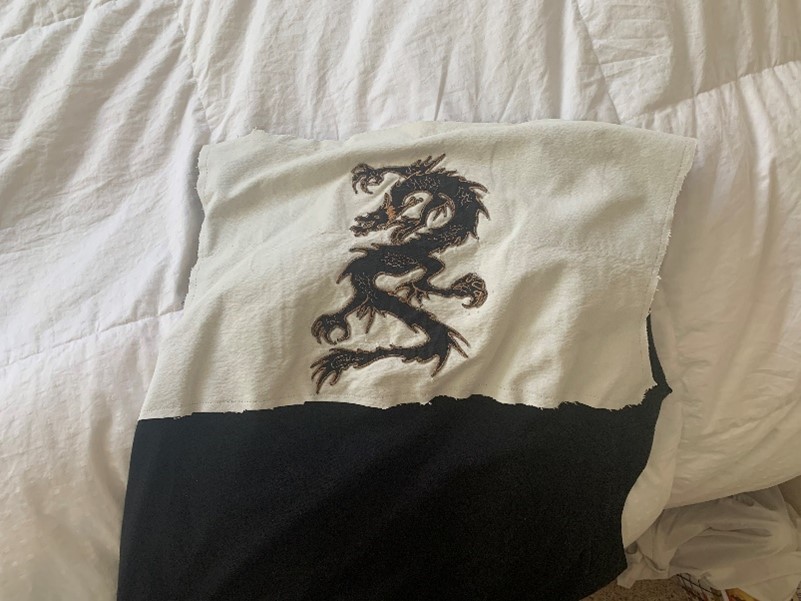 Figure 6: Upper Back Panel Patch
Picture 1: Original Image
Picture 2: Original Image
Picture 3: Original Image
Picture 4: Original Image
Picture 5: Original Image
Picture 6: Original Image
2 Comments. Leave new
Hey Michael,
Very cool to see this idea coming along! After seeing your last post last week, it looks like you’re making some really good progress. I love the dragon patch that you chose for the upper back patch piece. Has putting this together thus far been fairly difficult? Are you just using a sewing machine at home?
Thanks for the great feedback Maya! I am definitely making some good progress but am also feeling the deadline coming up fast, because of this I cant fix all the mistakes quickly. The problems that can’t be fixed quickly are those that make the jacket smaller. This has compounded and made the jacket a little snug on me. If it wasn’t for the sewing machine I have this project wouldn’t be possible.