

THE WHAT:
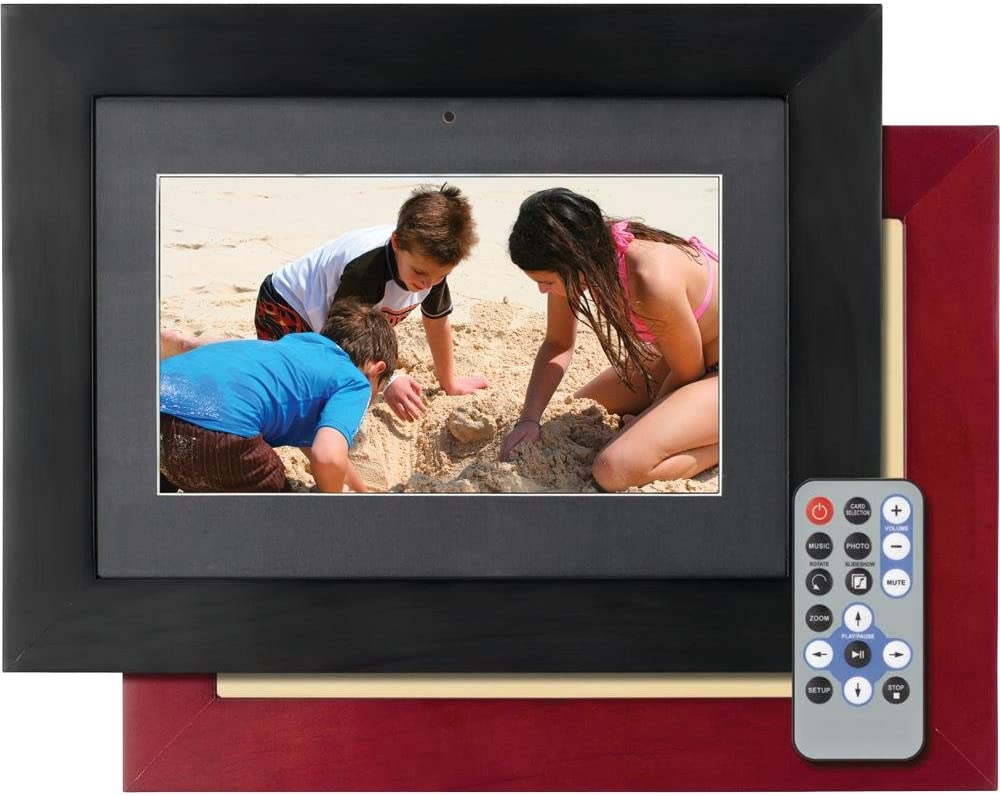
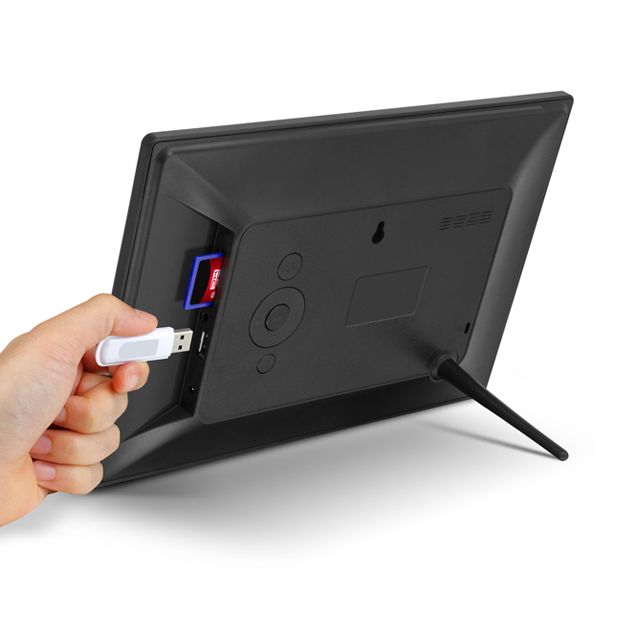
My father has been asking for a digital picture frame for christmas or his birthday for years now. For some reason each year we neglect his request and get him something else. Why? I have no idea. But delay no more, for my final project in Aesthetics of Design I produced him a beautiful digital picture frame. There are many designs out there on the internet for creation of a digital picture frame, and in parsing through them I couldn’t find one that I truly liked. What I was able to do, however, was formulate some sort of idea of what I needed to create my own, from there I figure the design will come on its own. Of course digital picture frames are available commercially for pretty cheap these days, and my one off version is not quite as powerful, or inexpensive as one from amazon. But building my own picture frame from scratch allowed me to personalize it to my father in ways that a commercial product simply could not. The digital picture frames that are on the market today aren’t particularly aesthetically impressive anyway, which is shown by the following images.
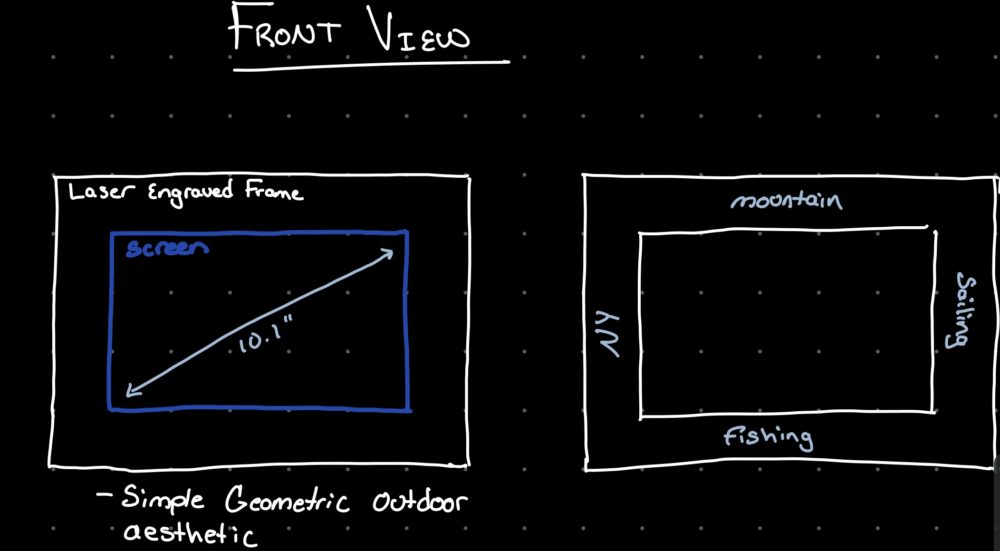
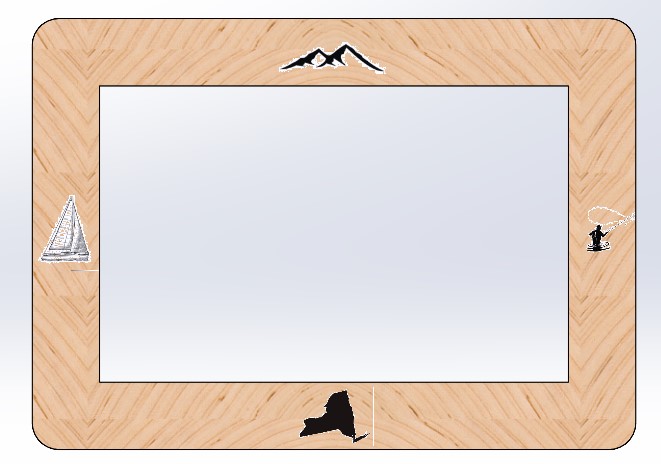
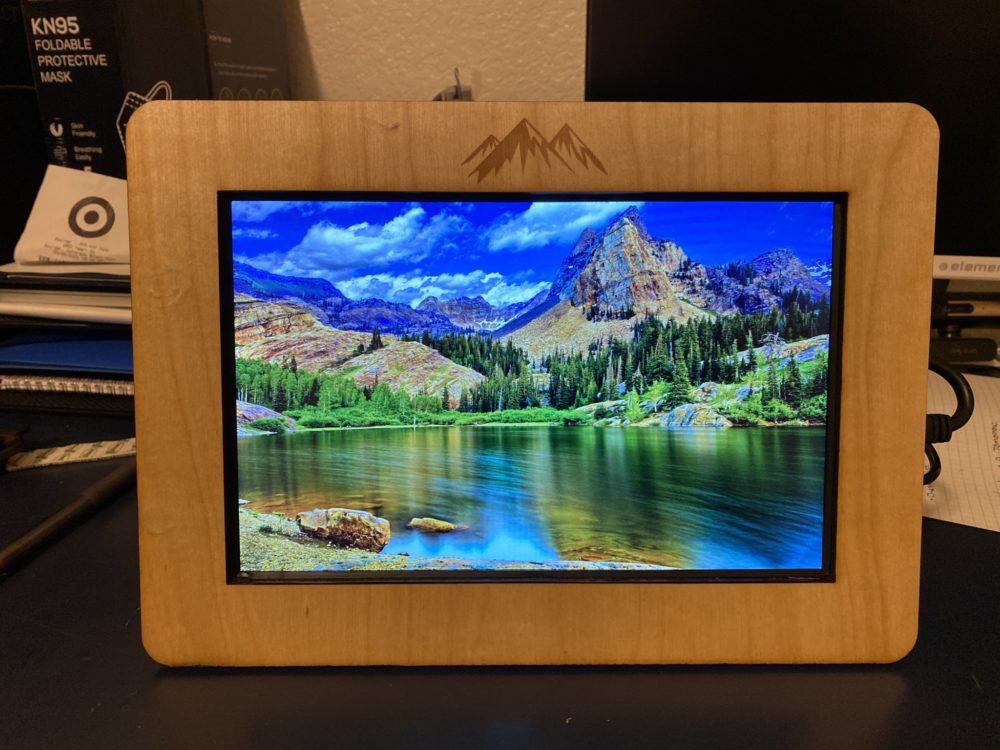
My intent with this project was to give my dad a digital picture frame that was not only functional, but that takes on an aesthetic that is meaningful to him. At the same time though I wanted the design of the frame to be simple so as not to distract from the pictures that it will be displaying. I landed on a clean and simple outdoor and active lifestyle aesthetic that made use of lightly stained woods and clean rapid prototyped parts for all of the non electronic components. The following few pictures show my initial design sketches. Around the display I included a 1.5″ wooden border that was engraved with different images that helds some general meaning to my dad. Originally the plan was to have one image on each side, mountains on top, on the right side a sailboat, on the left the state of New York and on the bottom a man fly fishing. As I moved into fabrication I decided that that look would be too busy so I simplified it to only mountains centered on the top of the wooden border.
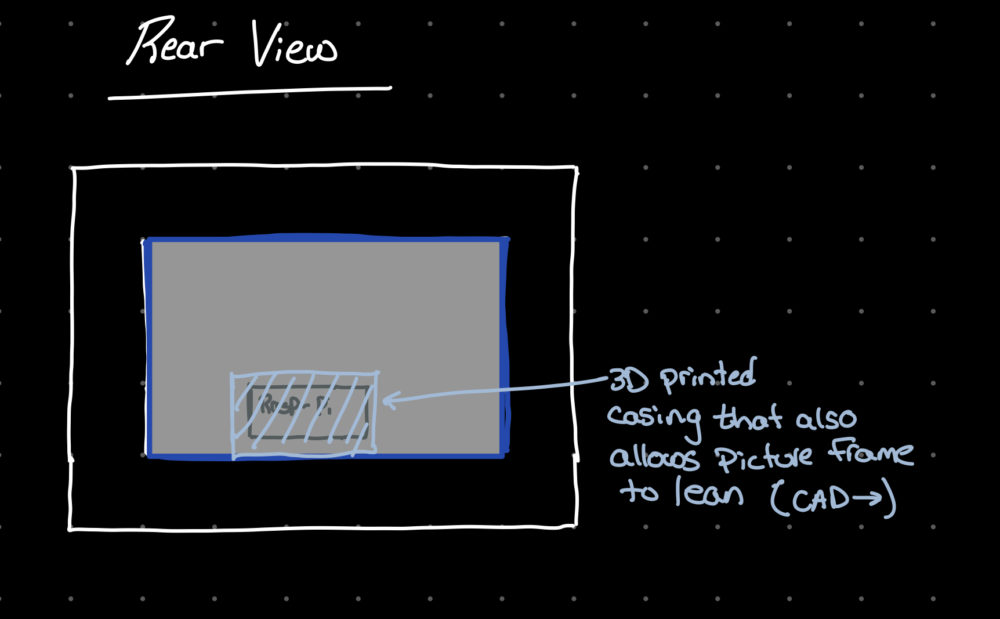
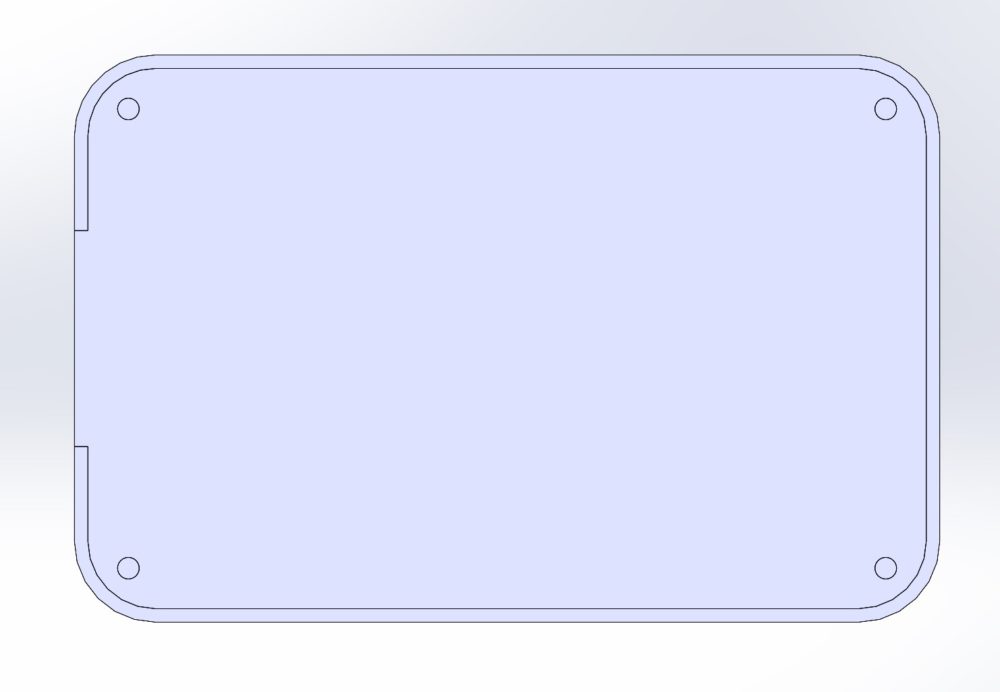
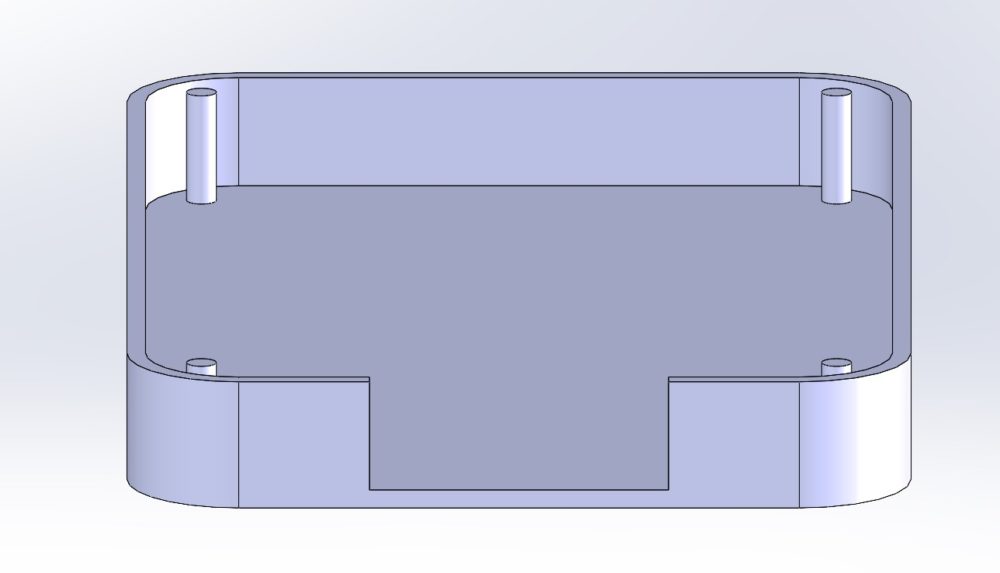
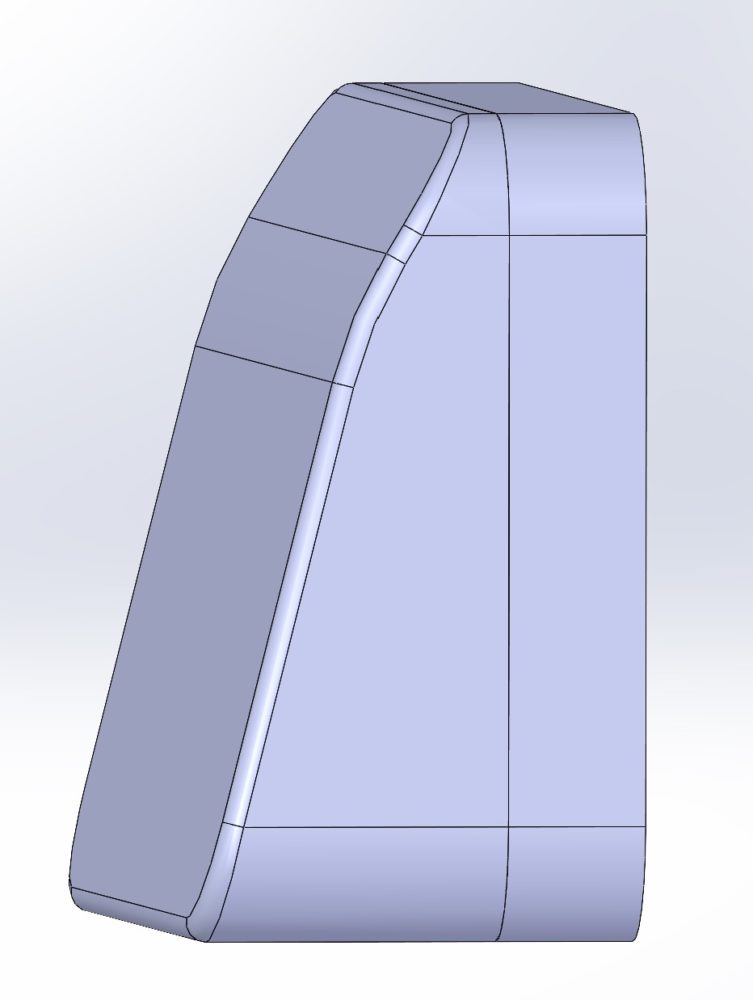
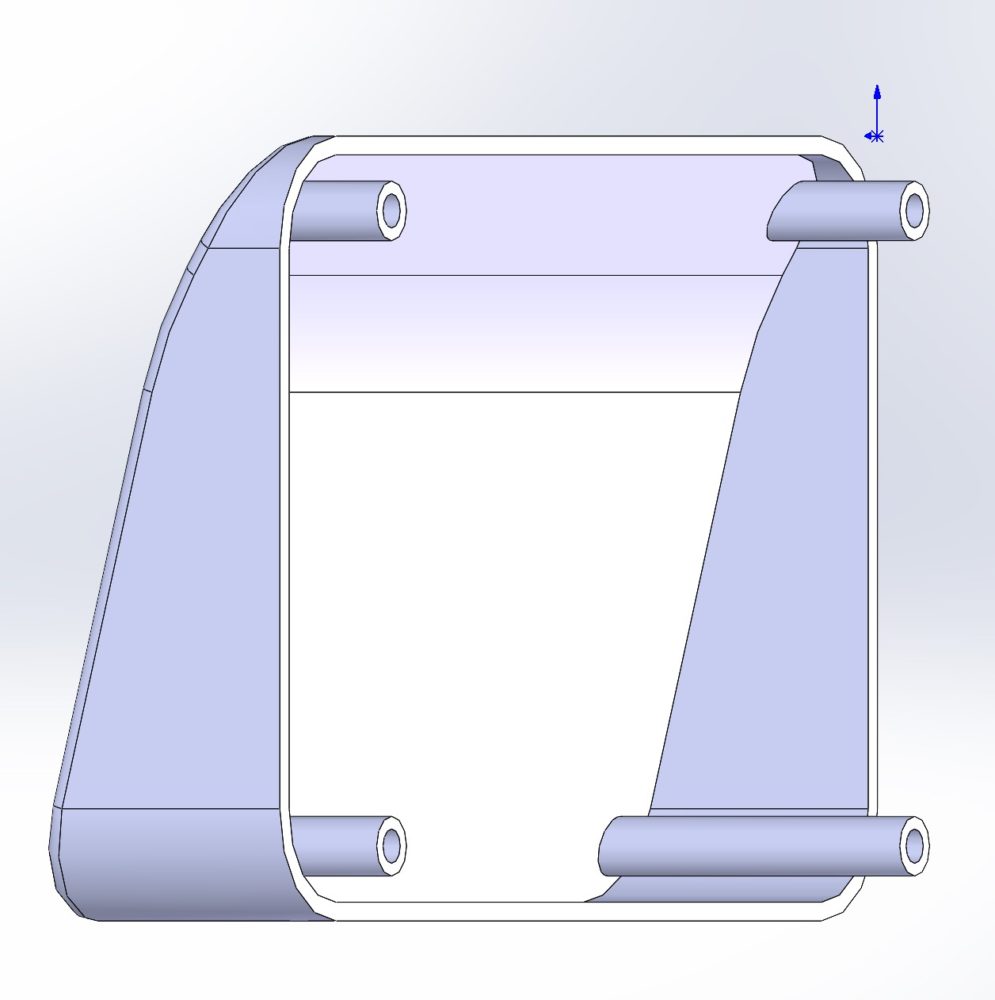
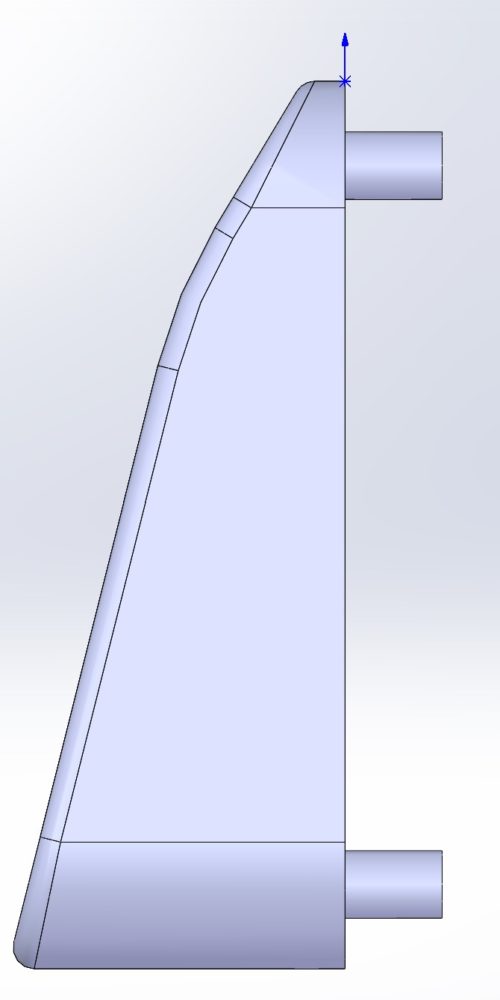
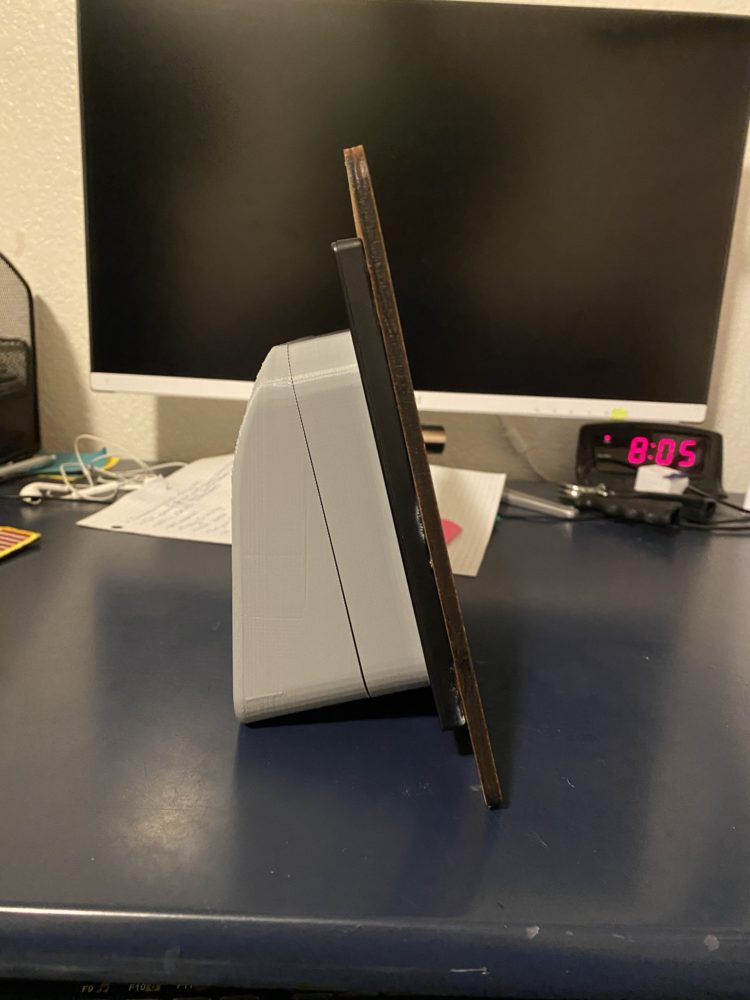
I designed a simple housing for all the electronic components that would also function as a stand for my picture frame. The housing remains simple and sleek and does not (in my mind) distract from the true aesthetic piece which is the front of the frame. Many of the electronic components secure to the housing with velcro so that the frame is modular and easy to repair should I need to rework anything that isn’t functioning properly.
My design of the frame is pretty much entirely unique. However, in the early stages of my research I latched onto a DIY picture frame design called Dynaframe . Dynaframe used a raspberry pi and some old computer monitors to make rather simple digital picture frames. I didn’t like much about the design of Dynaframe, but what it was useful for was the software side of things. Its creator had uploaded an open source image of, Raspbian, the raspberry pi operating system, that was altered specifically for use as a digital picture frame. That piece of software was the only thing I used from their design.
The latter half of this post will describe how I went about assembling all these individual components into a digital picture frame, but for the remainder of this post I will share the final product of my work. Check out these awesome pictures:
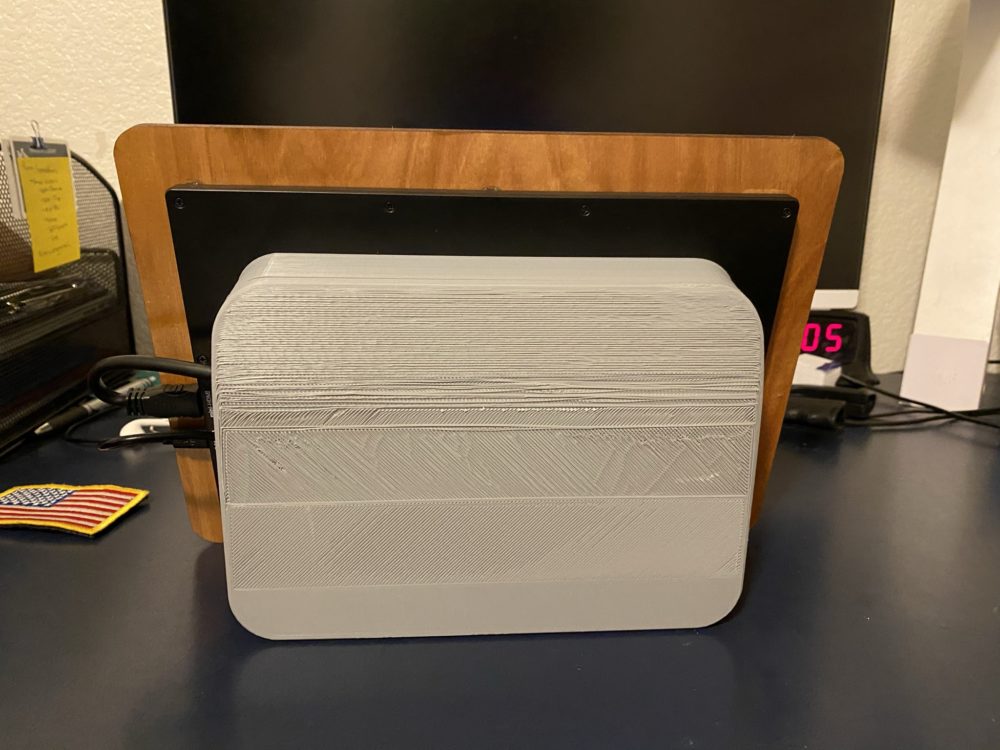
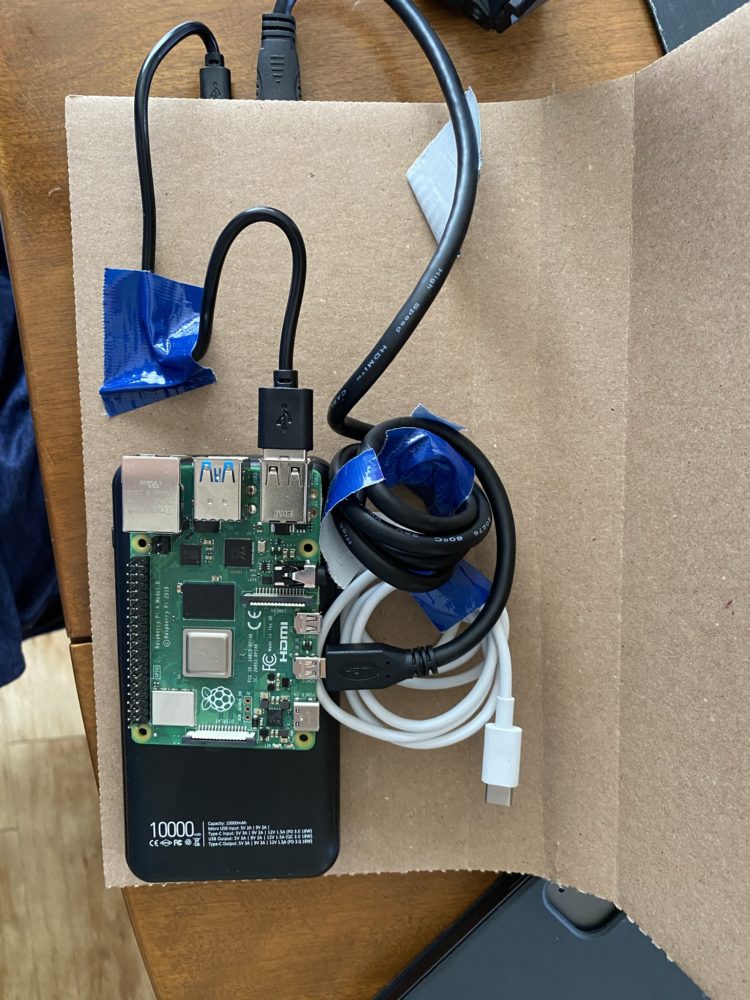
The frame actually functions like a regular desktop computer. The Raspberry pi I used, and software I installed has 2GB of ram, and 64 GB of storage with full wifi bluetooth and internet connectivity. When you plug in a keyboard and mouse, this thing can be used just like any other computer. The benefit to that is that it won’t take much for my dad to decipher how to use it, and he will be able to log right on to his dropbox account and download any picture he wants right onto the frame.
The great thing about my design is that I have complete access to just about every component, so should something break, or if I decide I want to improve the functionality of the frame I will be able to do so easily.
All in all, I am extremely pleased with how it came out, and think my dad will be as well!
THE HOW:
This was a really fun project to build, it helped me gain new skills in the areas of coding and electronics that I truthfully have not had much experience in. The first step was to set a list of requirements and specifications that would guide me through the process of creating my digital picture frame. I have listed those requirements below:
- Repairability: The picture frame must be easily repairable should any component break. By virtue of using a platform such as the raspberry pi, this specification has very much been met. I am also using non permanent adhesives like velcro to secure some components together such that they can be changed out.
- Wireless Upload: My dad must be able to upload pictures to his frame in some wireless way. The method could be bluetooth, wifi, or another local network connection. Regardless of the upload method, the interface should be as user friendly and simple to use as possible.
- High Definition Display: Being that the purpose of this artifact is to display photographs, the screen’s resolution must be very high quality. I accounted for this spec my purchasing a full HD display.
- Personalized and simple/ clean aesthetic: The frame should have a simple, clean and natural look. The frame should also include meaningful design that speaks to some aspect of my Dad’s personality.
- Large Photo Storage: The frame should be able to store a large number of picture. Ideally the frame should have the capacity to hold over 1000 photos.
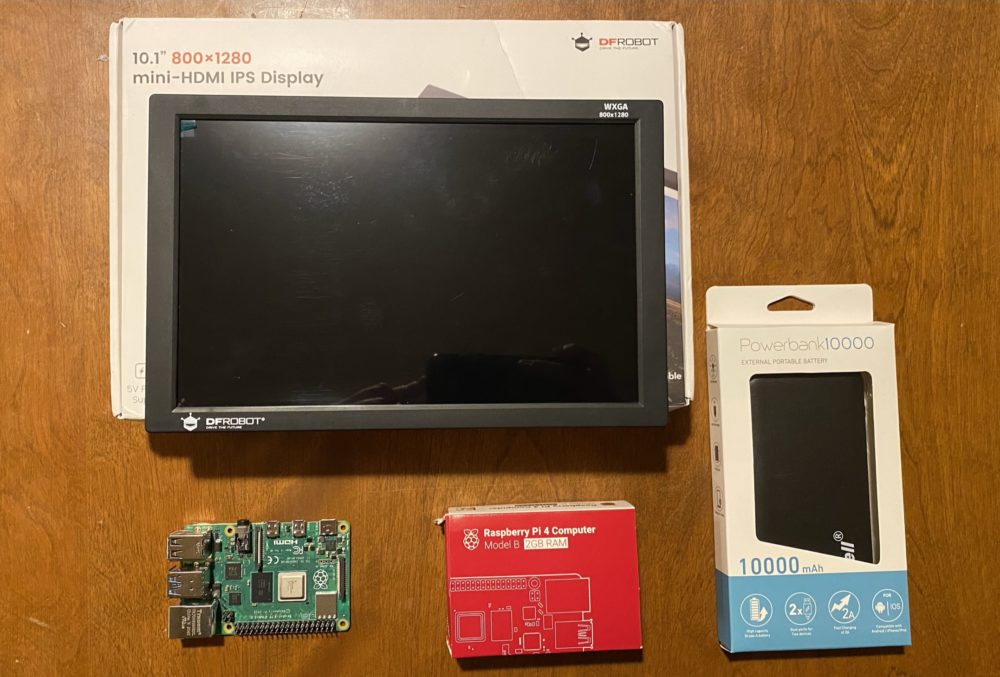
The next step was acquisition of all my materials. I researched and chose components that would meet my desired aesthetic and functional specifications. The following is a list of what I purchased and the respective amounts I paid for them.
- Raspberry Pi 4 ~ 35.00
- DFRobot 10.1” HD Display ~ 60.00
- 10,000 mAh Battery ~ 15.00
- Accessory wires ~ Included with display
- Maple Plywood Sheet ¼” ~ 5.00
- 3D print Filament ~ sourced from ITL (3.00)
- 64GB micro-SD card ~ 15.00
- Superglue ~ Free to me!
So overall I was in about 133.00 dollars on this project, which I thought was reasonable for a fun experiment as well as a great gift for my dad.
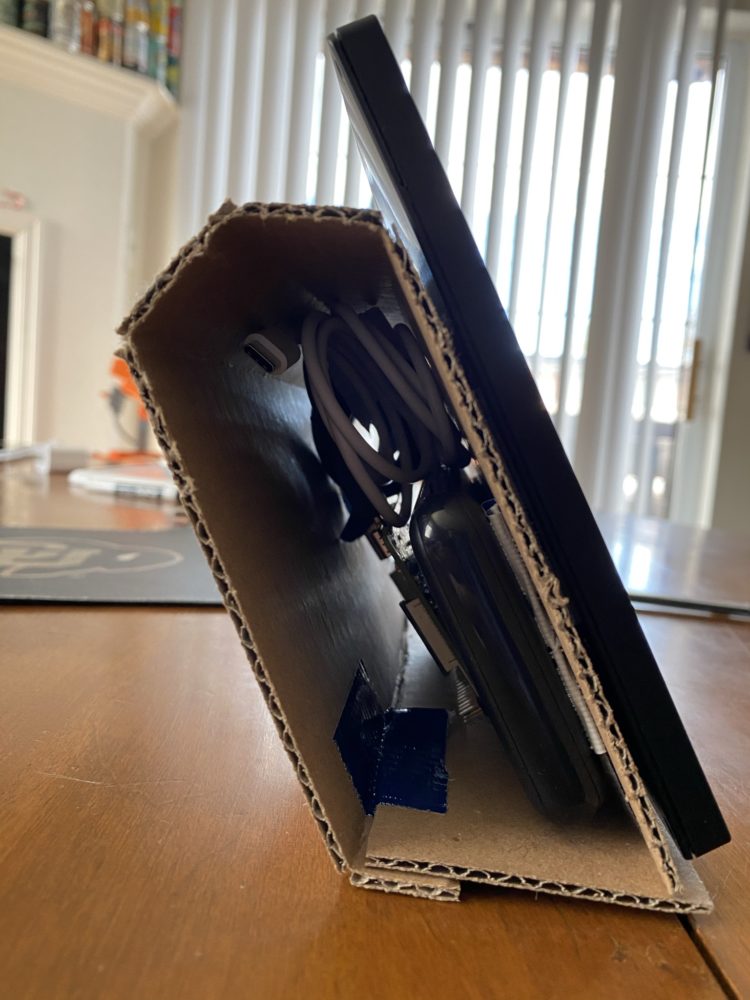
Once I received all the components, I went into a process of making system mock ups to see how I wanted to design the electronics housing. From some initial cardboard iterations, I decided that I wanted the enclosure to also double as the frame’s stand which lead me to the design that was shown earlier in this post.
Next using the design that I had created to house all of my electronic components I submitted a fabrication request to the ITL for 3D printing. I received the print back in just a few days which was phenomenal! What is great about this design is that the top cover comes off, exposing the electronic components inside so that
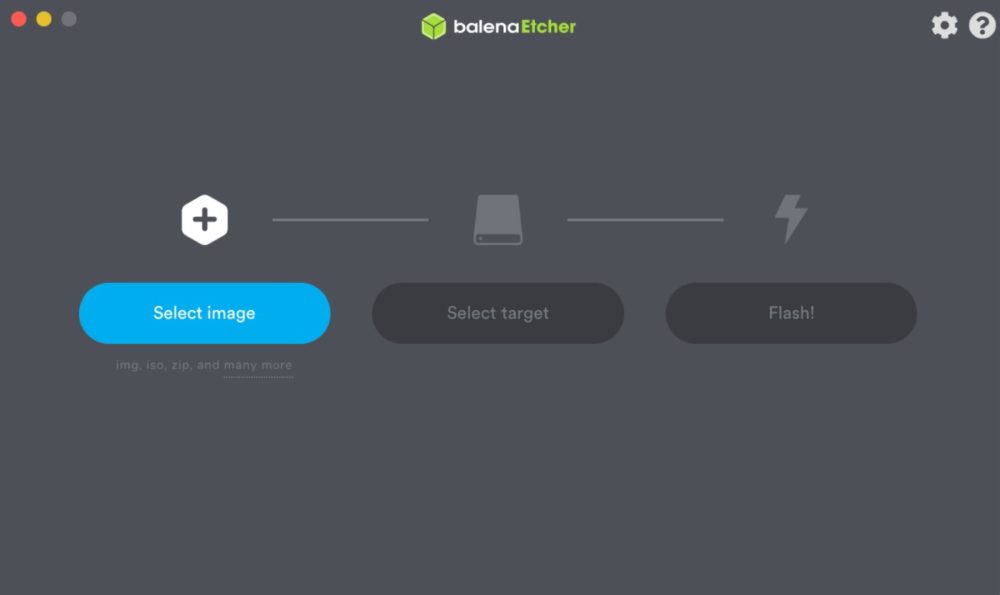
By far the hardest part of the project was getting the operating system on the raspberry pi to work to my specifications. What was surprisingly easy was the process with which I got the raspberry pi running. All I had to do was go on their website and download their free open source operating system “Raspbian” to my computer. From there I used an SD card burning software called Etcher to burn an image of the Raspbian OS onto the micro USB card I purchased for the project. The last step to get my Pi up and running was to insert the SD card and plug it into power.
The next challenge came from getting the display to work. Unfortunately when I first plugged in the HDMI cable to the display it appeared to power on, but was showing only a black screen. In my trouble shooting I determined that something must be wrong with the display, because when I plugged the Pi into my TV it would boot up and show a home screen. After scouring the internet for some assistance I discovered that DFRobot displays require an additional few lines of code to be written on the PI to get them to work. I added those lines and lo and behold, it worked! I now had a fully functional computer essentially with full access to the internet, wifi, and with a built in photo display software from Raspbian.
With the code working I went to work getting my beautiful wooden frame designed. My original design had 4 images on each side of the frame, however, after some thought I concluded that it was too busy and that it would look more natural if I just included one engraved image. I decided that image would be a small mountain range. To fabricate this part I took my solidworks file to the ITL and sat down at the laser cutter where I cut out the frames profile and then raster engraved the mountains in the top center of the profile. As a finishing touch I added some spray on clear polyurethane to protect the wood and deepen its color.
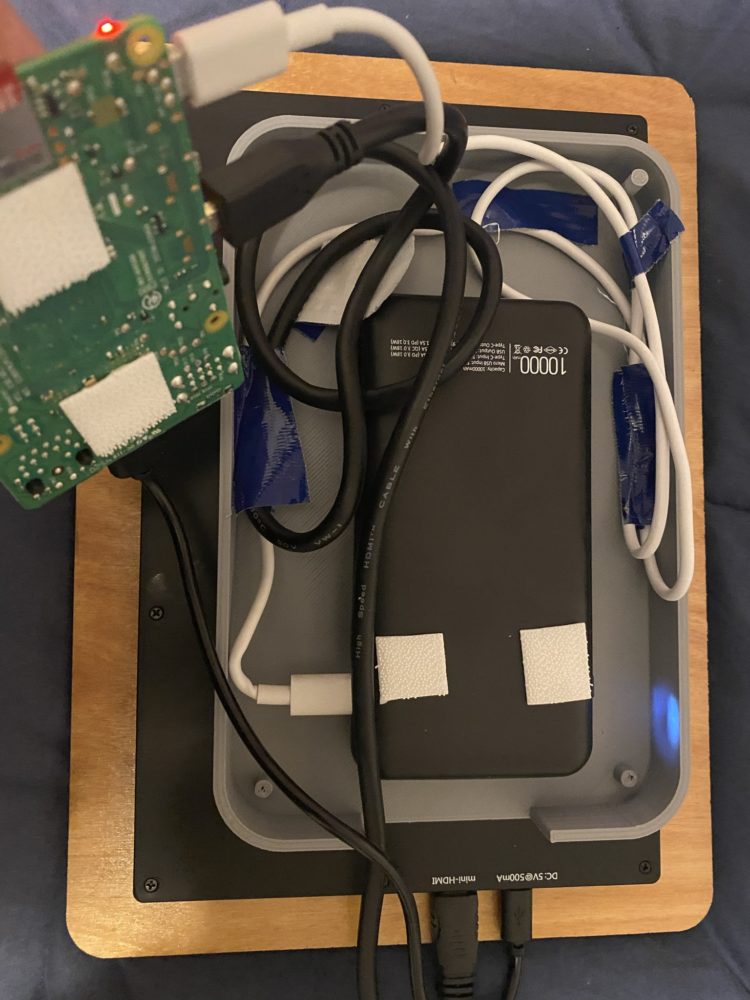
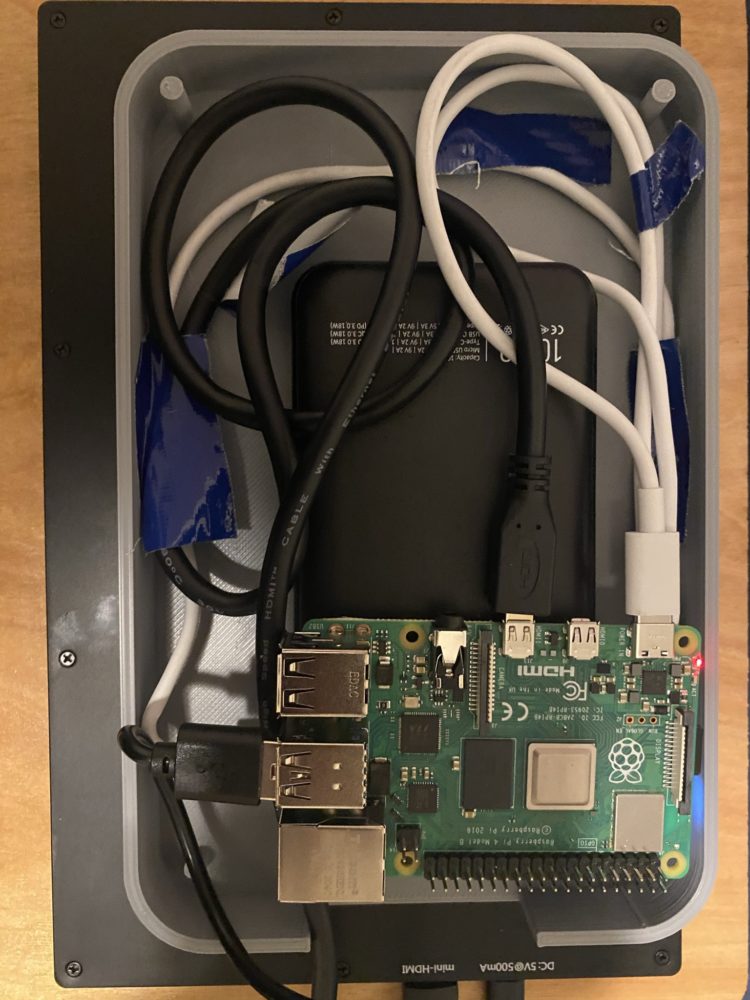
I then went to work figuring out how to orient the electronic components within their housing so that they were accessible and interchangeable. Every component is secured with velcro so that it can be moved or interchanged in the event that it breaks. There was also plenty of room within the casing for wire management and concealment. To help keep wires out of the way I used some regular old duct tape!
The final step in fabrication was to put everything together. I used superglue to attach the electronics housing to the pack of the display as well as to attach the wooden frame to the front side of the display. After everything dried my final product was done and looked beautiful!
I think the frame matches my desired aesthetic well, as it looks natural simple and clean and alludes well to an outdoorsy feeling. Additionally the frame meets the majority of my design specs with a beautiful display, ease of access to internet databases of pictures, 62GB of photo storage, and easy access to all of the components inside. The frame also features a battery life that is well over 4 hours.
Thanks for reading and staying tuned through my progress! Until next time!
Image Sources:
Image 1) https://www.amazon.com/eMotion-Digital-Picture-memory-frames/dp/B003B8KI8W
Image 2) https://nymag.com/strategist/article/best-digital-picture-frames.html
All other images were taken by me!
Dynaframe:
Dynaframe – An Open Source Digital photo AND Video frame!
2 Comments. Leave new
Hey Jake, this is a really awesome project. I have never seen a digital picture frame that looks this good. I wish you could buy something like this because it is a huge step up from what can be found on the internet. I also like how you can operate it like a desktop computer. However, I was wondering if you considered making the angle of the frame adjustable? It could make for a better viewing angle in some situations. Overall, this is a really cool project, and your final results are very impressive, nice job!
Hi Jake, awesome project! I wish I would have thought of making a gift for someone as part of my project, it would have given me more inspiration and connected me to the project emotionally a little more than my current one. What was the biggest thing you learned about your project while you were making it? If you could have done something differently, what would it have been?