

Organic Desk Fountain (Sculpture) Final
I want to make a Water Fountain that can sit on my desk. These systems are often battery or USB powered with a small pump to bring the water upward. I have seen these in offices acting as a calming visual and auditory element. An example of a Desktop Water Fountain is shown below:
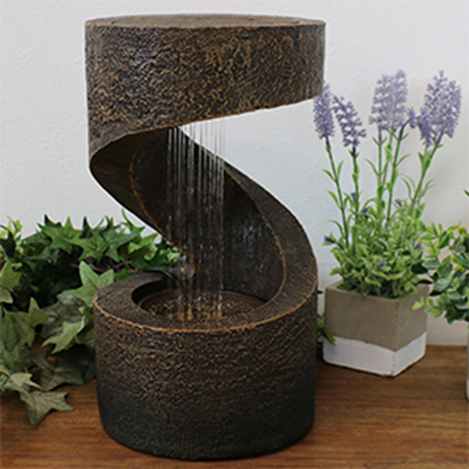
Figure. 1 Desktop Water Fountain
The flowing water in these fountains will act as the dynamic aspect of my project. Although I would still like there to be more movement which I will further discuss later. Another aspect of this that will work to my advantage its that water easily plays into the Organics Aesthetic.
Organic pieces of art are inspired by nature and have many often time chaotic curves that when viewed as a whole offer a sense of harmony. The nature inspiration for my final project is standing at the base of a tree and looking upward. While everyone can do this themselves, I have attached an image below:

Figure. 2 Upward View of a Tree
I also wanted to show another example of art inspired by organics and nature. Nature almost always follows the path of least resistance. This is what determines which direction tree limbs grow and even how pain spreads on canvas. With this commonality one can often look like another as shown in the art by Sana Shaw below:
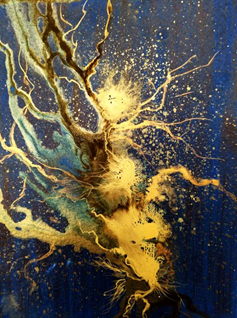
Figure. 3 Sana Shaw “The Essence of Plants”
The initial reason I decided to move forward with the Organic Aesthetic was because of the Topology Optimization tool in SOLIDWORKS. This process maximizes the stiffness to weight ratio of a given component. Basically, Topology Optimization strategically takes away material from the part while attempting to maintain maximum resistance to a load.
The outcome of these simulations are very organic looking parts that are striking for viewers. To test this tool, I thought to benchmark it against a common loading case such as a cantilever beam as shown in the figure below:
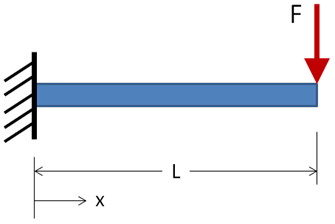
Figure. 4 Cantilever Beam Load Case
Along with the common knowledge that the strongest shape is a triangle, the outcome of these simulation often show triangles. The image below shows the outcome of a Topology Optimization simulation of a cantilever beam:

Figure. 5 3-D Printed Cantilever Beam Topology Optimization Output
I ended up 3-D printing the outcome of the simulation as shown above because I really like the shapes and now use it as a bookmark. While the image above shows a 2-D load case, the same process can be done with 3-D models. Following the idea of triangles, I made a Triangular Prism in SOLIDWORKS and added various loads to it. The 3-D printed outcome is shown below:
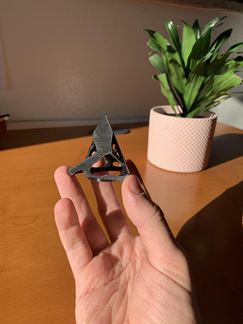
Figure. 6 3-D Printed Triangular Prism Topology Optimization Output
Simulations using Topology Optimization at its highest setting take multiple hours which ended up making this process take multiple days of work. I found it worth it sense this is the main component of my project.
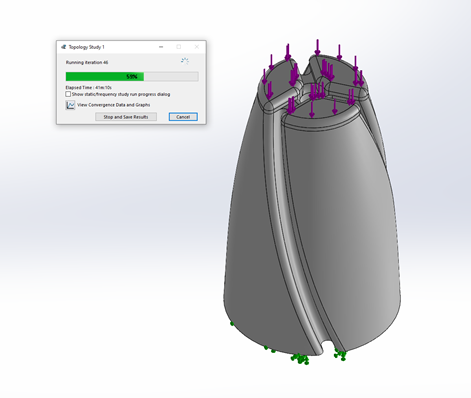
Figure. 7 Simulation Progress
The model in the image above is basis for what the Topology Optimization tool takes away from. There is a channel throughout the middle of the component for water to be pumped up though and then grooves down the side of the part for water to flow down.
While it is often difficult to get a visually appealing output of a Topology Optimization Simulation. Balancing manufacturability and holding true to my inspirations was tricky. I managed to get it right after ten tries. The figures below show off the crazy organic structure:
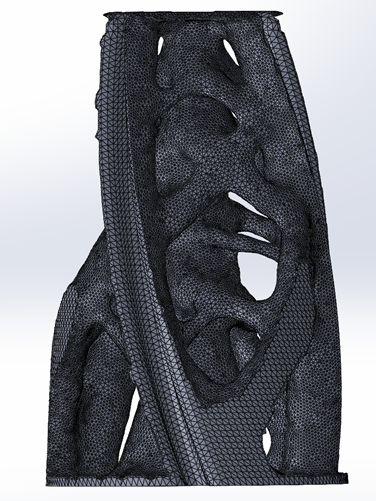
Figure. 8 Topology Output Side View
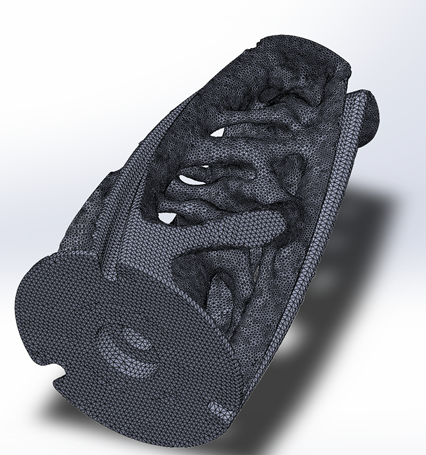
Figure. 9 Topology Output Bottom Isometric View
In these figures, each small triangle is an element in the Finite Element Analysis used in Topology Optimization. The only way to really manufacture components like this is 3D Printing with a lot of infill. Even then, the surface finish is lackluster. For this issue, I bought some PLA sealant, which causes an exothermic reaction and should smooth out the final 3D Print of the Topology Optimized structure and provide a nice shine.
I am using a bearing at the bottom of this piece where hopefully in the absence of friction and the water flowing at an angle down the side will cause the whole thing to spin. The figure below shows a cross section of my design for the fountain:
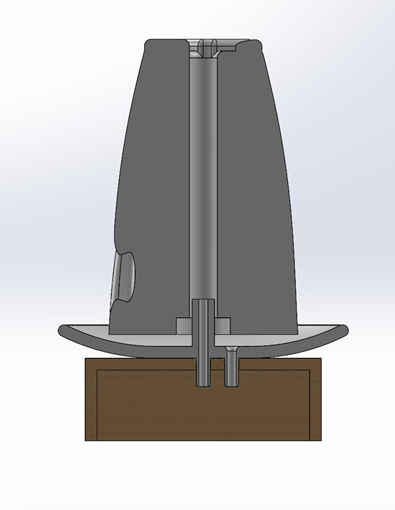
Figure. 10 Fountain Cross Section
Below the top component of the fountain, a dish is present to capture the water as it falls. It also acts as the interface for the tubing of the pump. This dish sits on top of a simple wood box to emphasize the tree inspiration.
With all of the design work completed for my final project, I started to gather components and begin fabrication. The image below shows the required hardware for my Desktop Water Fountain:
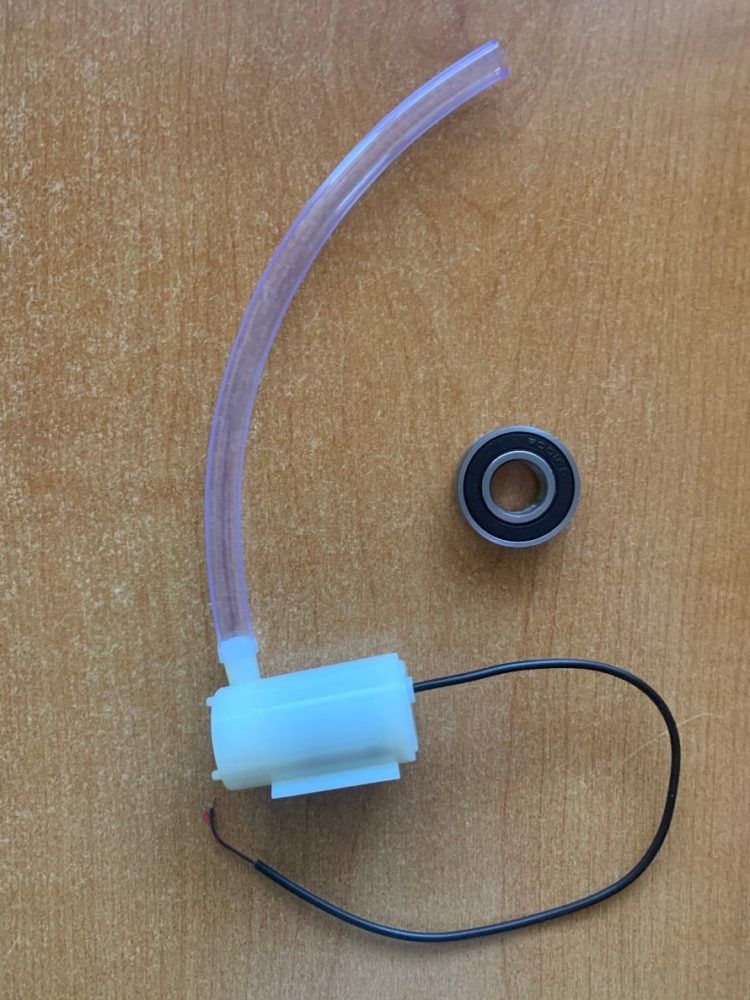
Figure. 11 Fountain Hardware
The pump is rated for 3-6 V which determines the pressure head. I plan on implementing a potentiometer to be able to dial in how high the water goes. The bearing is sealed and should allow water to get through it. However, this makes the bearing slightly harder to spin. Hopefully, this doesn’t stop the Fountain Head from spinning due to the water’s flow.
I have also been able to 3D print the fountain head. However, I have not added the sealant, so it still looks a bit rough. An image of it is shown below:

Figure. 12 3D Printed Topology Fountain Head
The sealant is meant to fill the the small layer gaps in the 3D print and cure as a smooth glossy finish. I wanted to implement this because sanding a component such as this would take a lot of time due to all the small faces. An image of the finished, sealed fountain head is shown above.
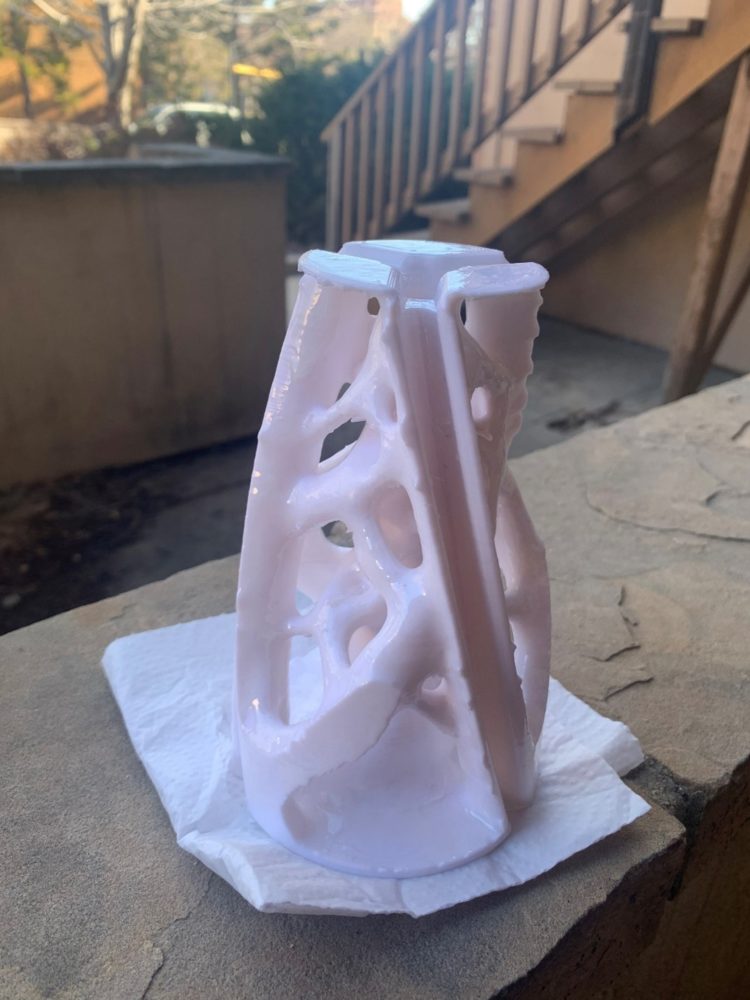
Figure. 13 Sealed 3D Printed Topology Fountain Head
I really like how this component turned out. This was important to me as the fountain head is the star of my project. I think I should have applied a slightly larger coating of the sealant to ensure all the cracks were filled. But over al this sealant makes the entire thing look a bit better.
The next mechanical component of the project was the natural wooden base. I used some 0.75” think scrap wood to put this together. In hindsight, I think I should have used a thinner board because this left the electronics cramped as I will discuss more later. An image of this simple wood base is shown below:
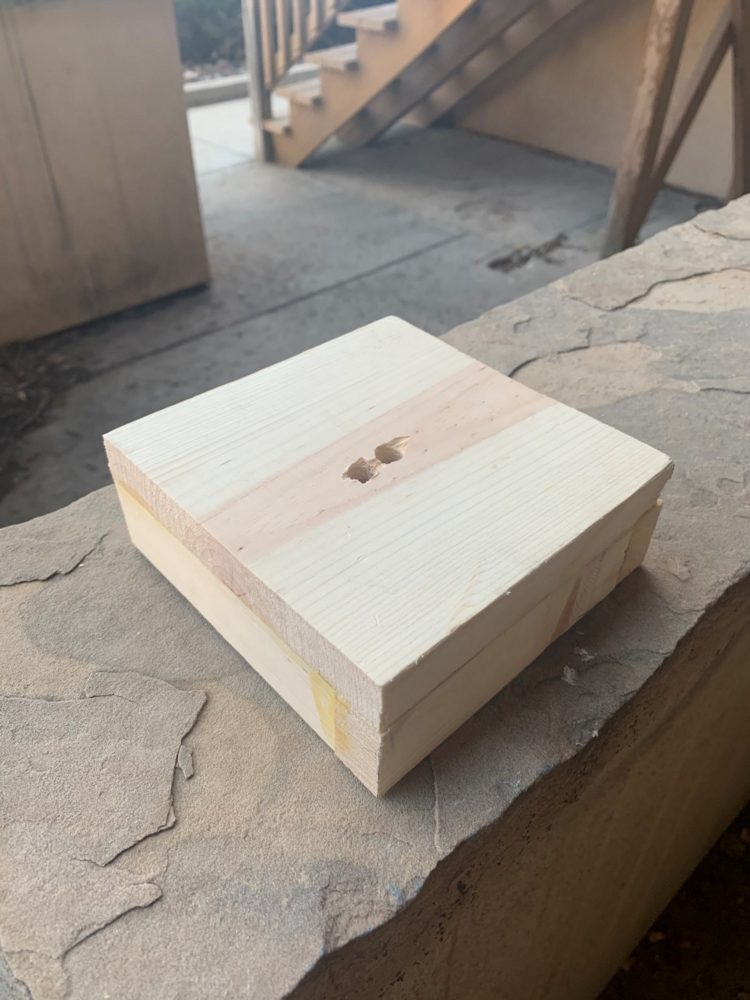
Figure. 14 Natural Wooden Base
The two holes at the top of the base are made to allow the dish to transport water from above and below the base. I made this in an attempt to show off the exposed corners of the wood further emphasizing the organic aesthetic.
Another component that I 3D printed was the dish that would collect water falling from the fountain. An image of this is shown below after applying sealant.

Figure. 15 Sealed 3D Printed Dish
This print turned out like crap and the support was almost impossible to take out. Even after a lot of sanding I was not making a lot of progress. I decided to just apply the sealant and move on as this component can be replaced in the future.
With all of these components I went ahead and put together the full mechanical assembly. An image of this is shown below:
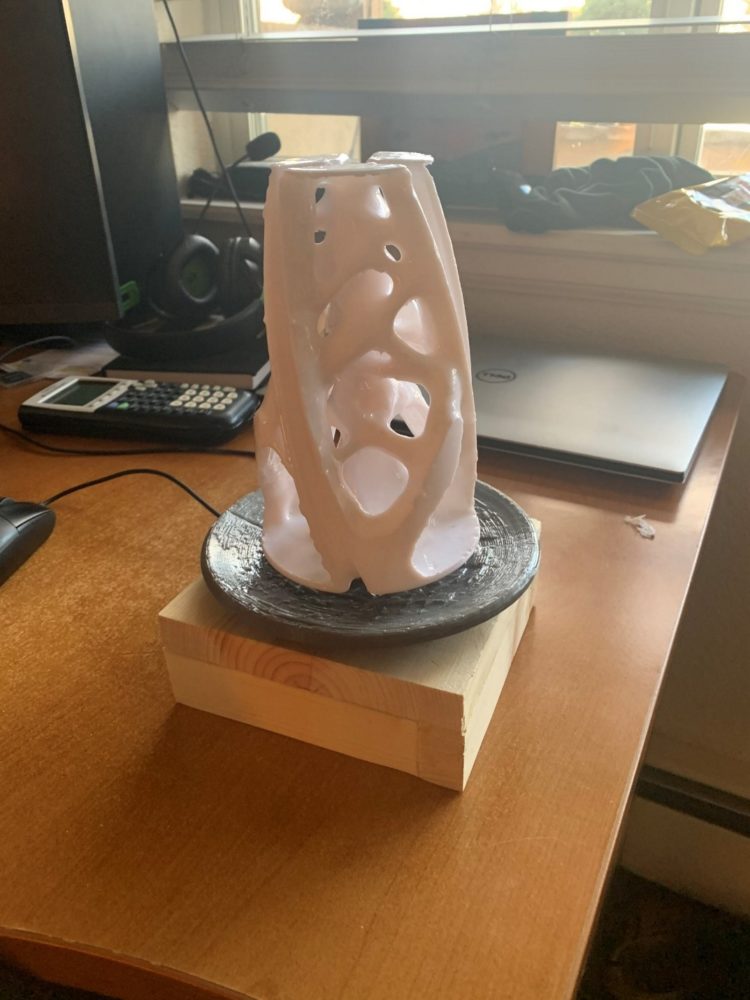
Figure. 16 Full Mechanical Assembly
Overall, I was happy with the mechanical assembly of my project. While some it looks a bit sloppy, I think it really gets the organic aesthetic though. Proportions of the fountain were also good to me.
Now that I was happy with mechanical features, I shifted my focus towards the electronics needed. A picture of my first electronic and tubing attempt is shown below:
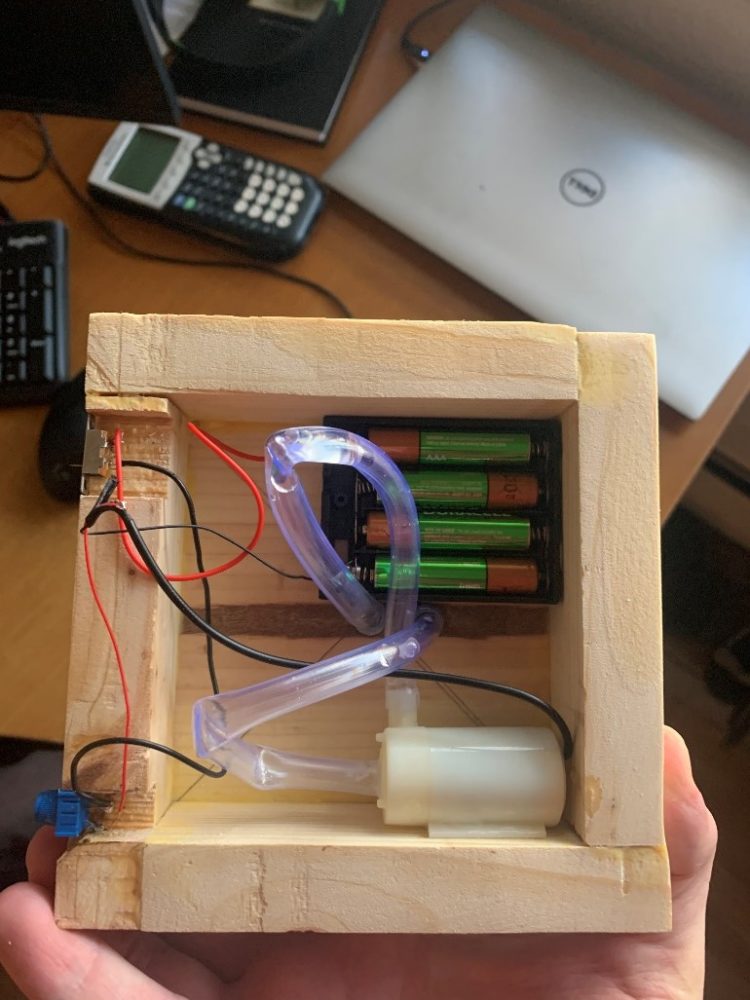
Figure. 17 Electronics Attempt One
This iteration had fully functional electronics with a rechargeable battery pack, simple switch, potentiometer, and pump. The only issue her was that the tubing I was using was very prone to kinking. This didn’t allow the entire system to function.
I did some researching and found a kit of Anti-Kink tubing and some hard components that would make 90 degree turns easier. An image of this second electronics and tubing attempt is shown below:
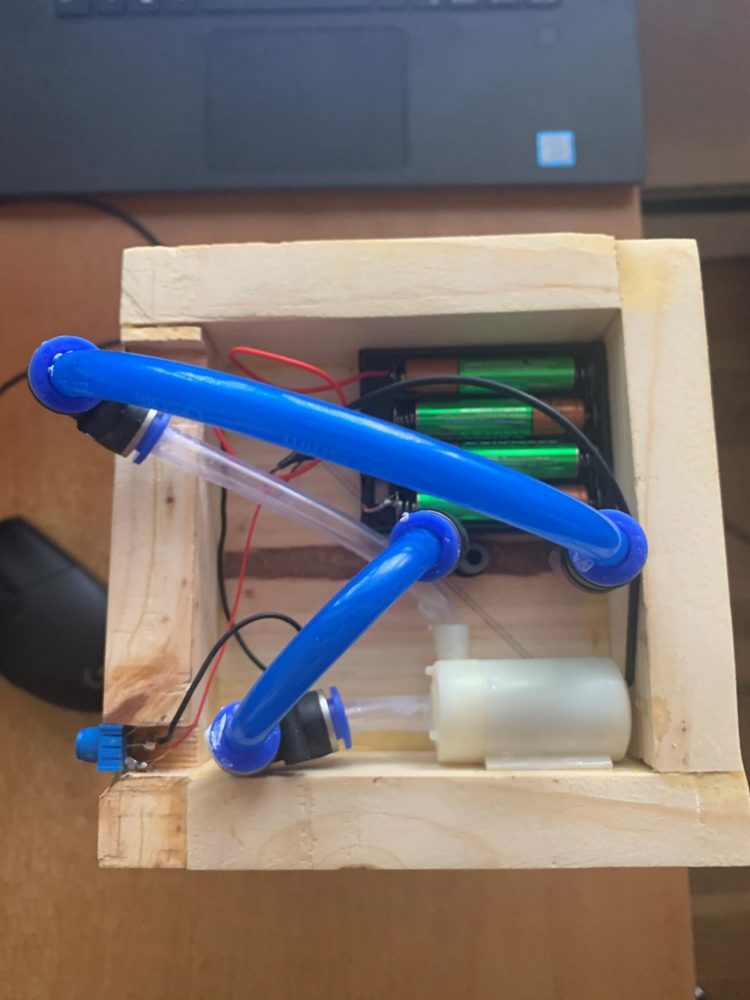
Figure. 18 Electronics Attempt Two
One issue with this setup is that the tubing takes up a lot more space and I would need to extend the base of the fountain down further to allow it look nice while in use. Also, the hard components I added were very prone to leaking. The moment the system was pressurized water came spilling out. I attempted to fix this with super glue but ended up breaking the electronics.
While the fountain aspect of this project didn’t turn out exactly as planned, the spinning fountain head still give this sculpture a kinetic element. With all of this progress in mind and the feedback I received during my presentation I believe I have a clear path forward. I plan to redo everything except for the fountain head in time but the main design difference is using hard tubing the water. This will allow easy sealed pipes to make 90 degree turns easily without a lot of space. If you would like to the final project in motion the video below of my presentation has a gif at the end.
Picture 3: https://i.pinimg.com/originals/cf/ef/fd/cfeffd2d1fe846e5e499a48671a2d6ac.jpg
Picture 4: https://mechanicalc.com/static/img/FEA/Validation/Cantilever/cantilever-beam-01.png
Picture 5: Original Content
Picture 6: Original Content
Picture 7: Original Content
Picture 8: Original Content
Picture 9: Original Content
Picture 10: Original Content
Picture 11: Original Content
Picture 12: Original Content
Picture 13: Original Content
Picture 14: Original Content
Picture 15: Original Content
Picture 16: Original Content
Picture 17: Original Content
Picture 18: Original Content
Presentation Video Link:
https://youtu.be/1jEjgBWx5SQ
3 Comments. Leave new
Realy nice article; I got lot of help by this article and another article that is
https://mechanicalboost.com/jet-pump/
My favorite part about you r project in the organic lattice structure in the center. It really sells the piece and confirms the aesthetic. Fantastic project and I would love one in my house.
Hi Michael! I think that this turned out super well, I love the cross between engineering and aesthetics in this project. The way that you used optimization for the design is really interesting. The final product with the stand and everything looks really nice. Do you plan on keeping this anywhere specific? Also, were you always planning on using white material and do you think that it might need to be cleaned somewhat often now because of that choice?