

The What:
With remote work not going anywhere anytime soon, people are making the most of their home spaces to create a space that allows for work to be done while also creating a relaxing space. I want to create two office spaces in a spare room that will still be able to function as a home library/hangout space. Overall how we expect to use this room is as a workspace and somewhere where you can watch movies or read a book. This would be an easy concept, except that the space available is not the biggest. In order to maximize space I thought it would be great to have the tables fold up on the walls to create more space while also adding something aesthetically to the room. My partner has a desktop computer, so to make this work the monitor will be mounted to the wall.
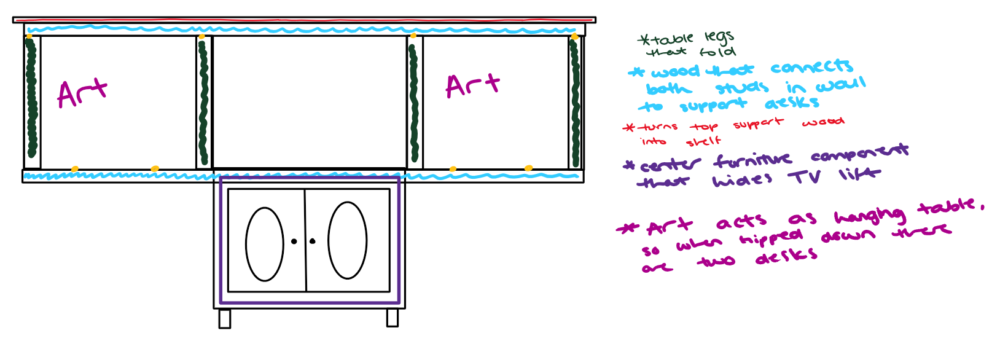
[1] Original mock up of the design.
A lot of the inspirations I had for this project was seeing photos of home libraries that look to be a part of the room. I would like the project as a whole to look like it matches whatever built-in bookcases I might add later on whether that be by color or by structural means. Overall I wanted to keep with the modern craftsmen aesthetic. This means using craftsmanship similar to that seen from the Arts and Crafts movement that occurred in the early 1900s. Some of my early sketches as seen in the post show the presence of clean joint work and lines in wood work.
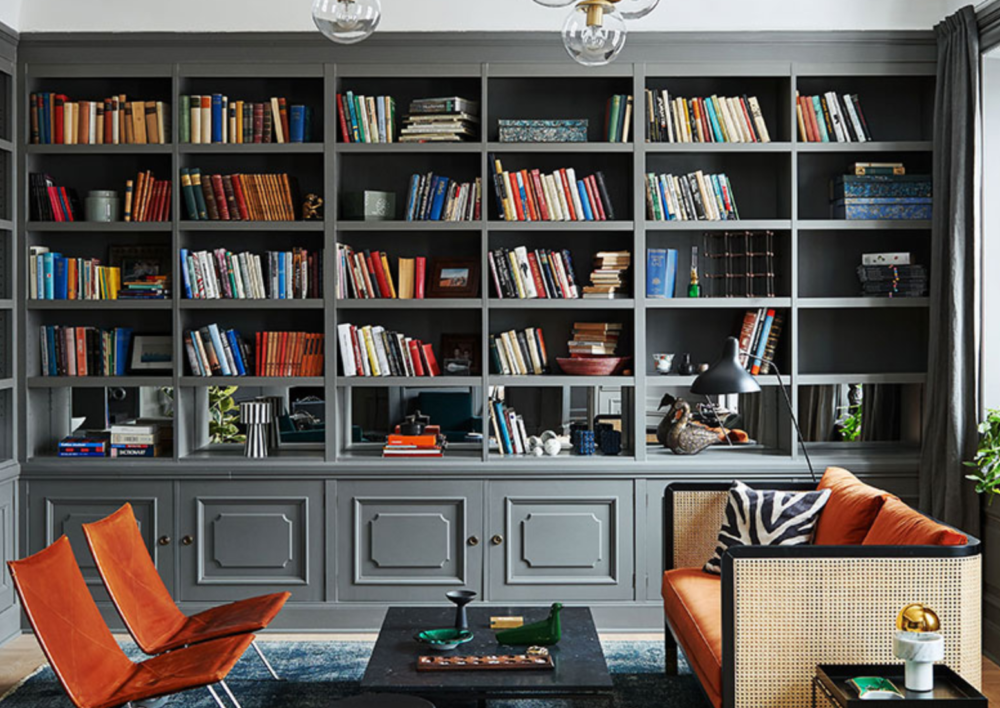
[2] Styled by Annika Kampmann from PH Studio
The modern aspect of this design would be shown through the finishes on the cabinet. In the beginning I wanted to use a vibrant color or something moody to really make the design stand out in a neutral colored room. I plan to use modern door fixtures for the cabinet pulls and possibly add feet to the cabinet to add more height.

[3] Past design thoughts for the cabinet
The wall that I will be building on however, does not have enough horizontal wall space to have both the computer and TV up at the same time if I want the swing down desks to be the same length. This means that the entirety of the overall project plans revolves around the space the TV will sit on. Since a productive workspace does not need a TV, I decided that having the TV be in a cabinet on a lift that works only when you are not using the space as an office would be the best route to save space on the wall.
The idea behind this design uses the cabinet as an extension of the desk when in use so that you have space to spread work out. Originally I had hoped to make both parts of the workspace, meaning both the table top and TV cabinet. However as the semester continued both time and money became a constraint. Therefore due to these I decided to focus on the cabinet design for the class project. In the future I will make the add-on desk portion, however it will not be documented for this class.
The How:
In the design preview post I went in-depth on the manufacturing process of this design which also gives the guide to making this project, TV Lift Cabinet Guide. Due to that Figure 4 briefly reiterates the process with how each of the tools were used.
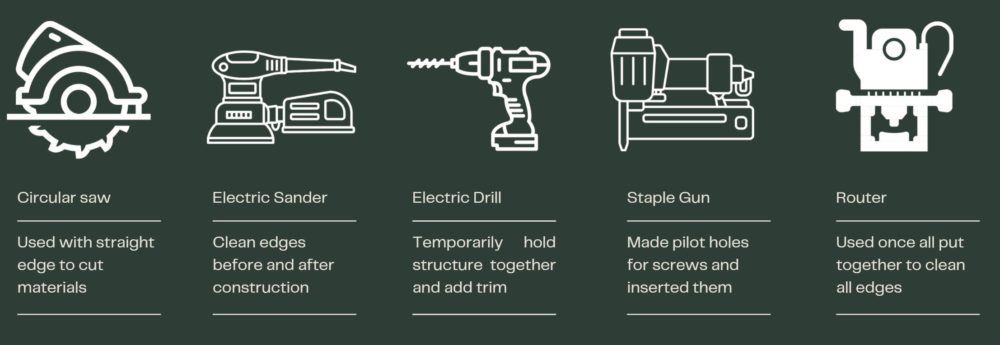
[4] Image showing the tools used with a brief description.
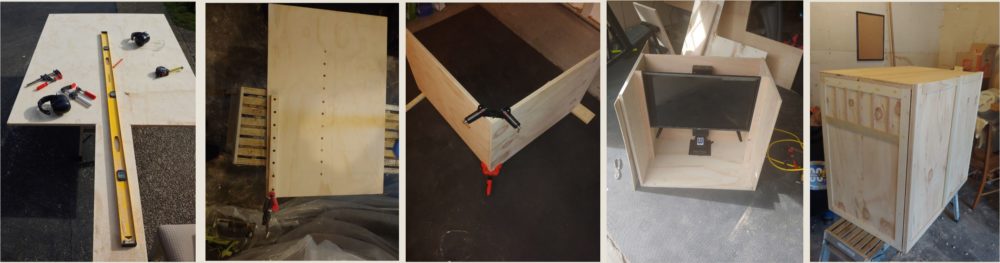
[5] Image of the cabinet during various stages of manufacturing.
After fully constructing the cabinet, the next step was to add the finishing touches. This included deciding what final method I wanted to use to cover the plywood including painting, staining, contact paper, and etc. In the end once walking through various stores I decided to use fabric to cover the door panels and paint to finish it off. I ended up choosing a multicolored fabric with flower print, some of the reason behind this might have been because I have been in a planting mood recently from trying to get my garden together. I also just enjoyed the color of the print with that vary autumn feel. I then chose the paint color from the print and decided to go with a dark green because that is one of my favorite colors at the moment.
![]()
![]()
![]()
![]()
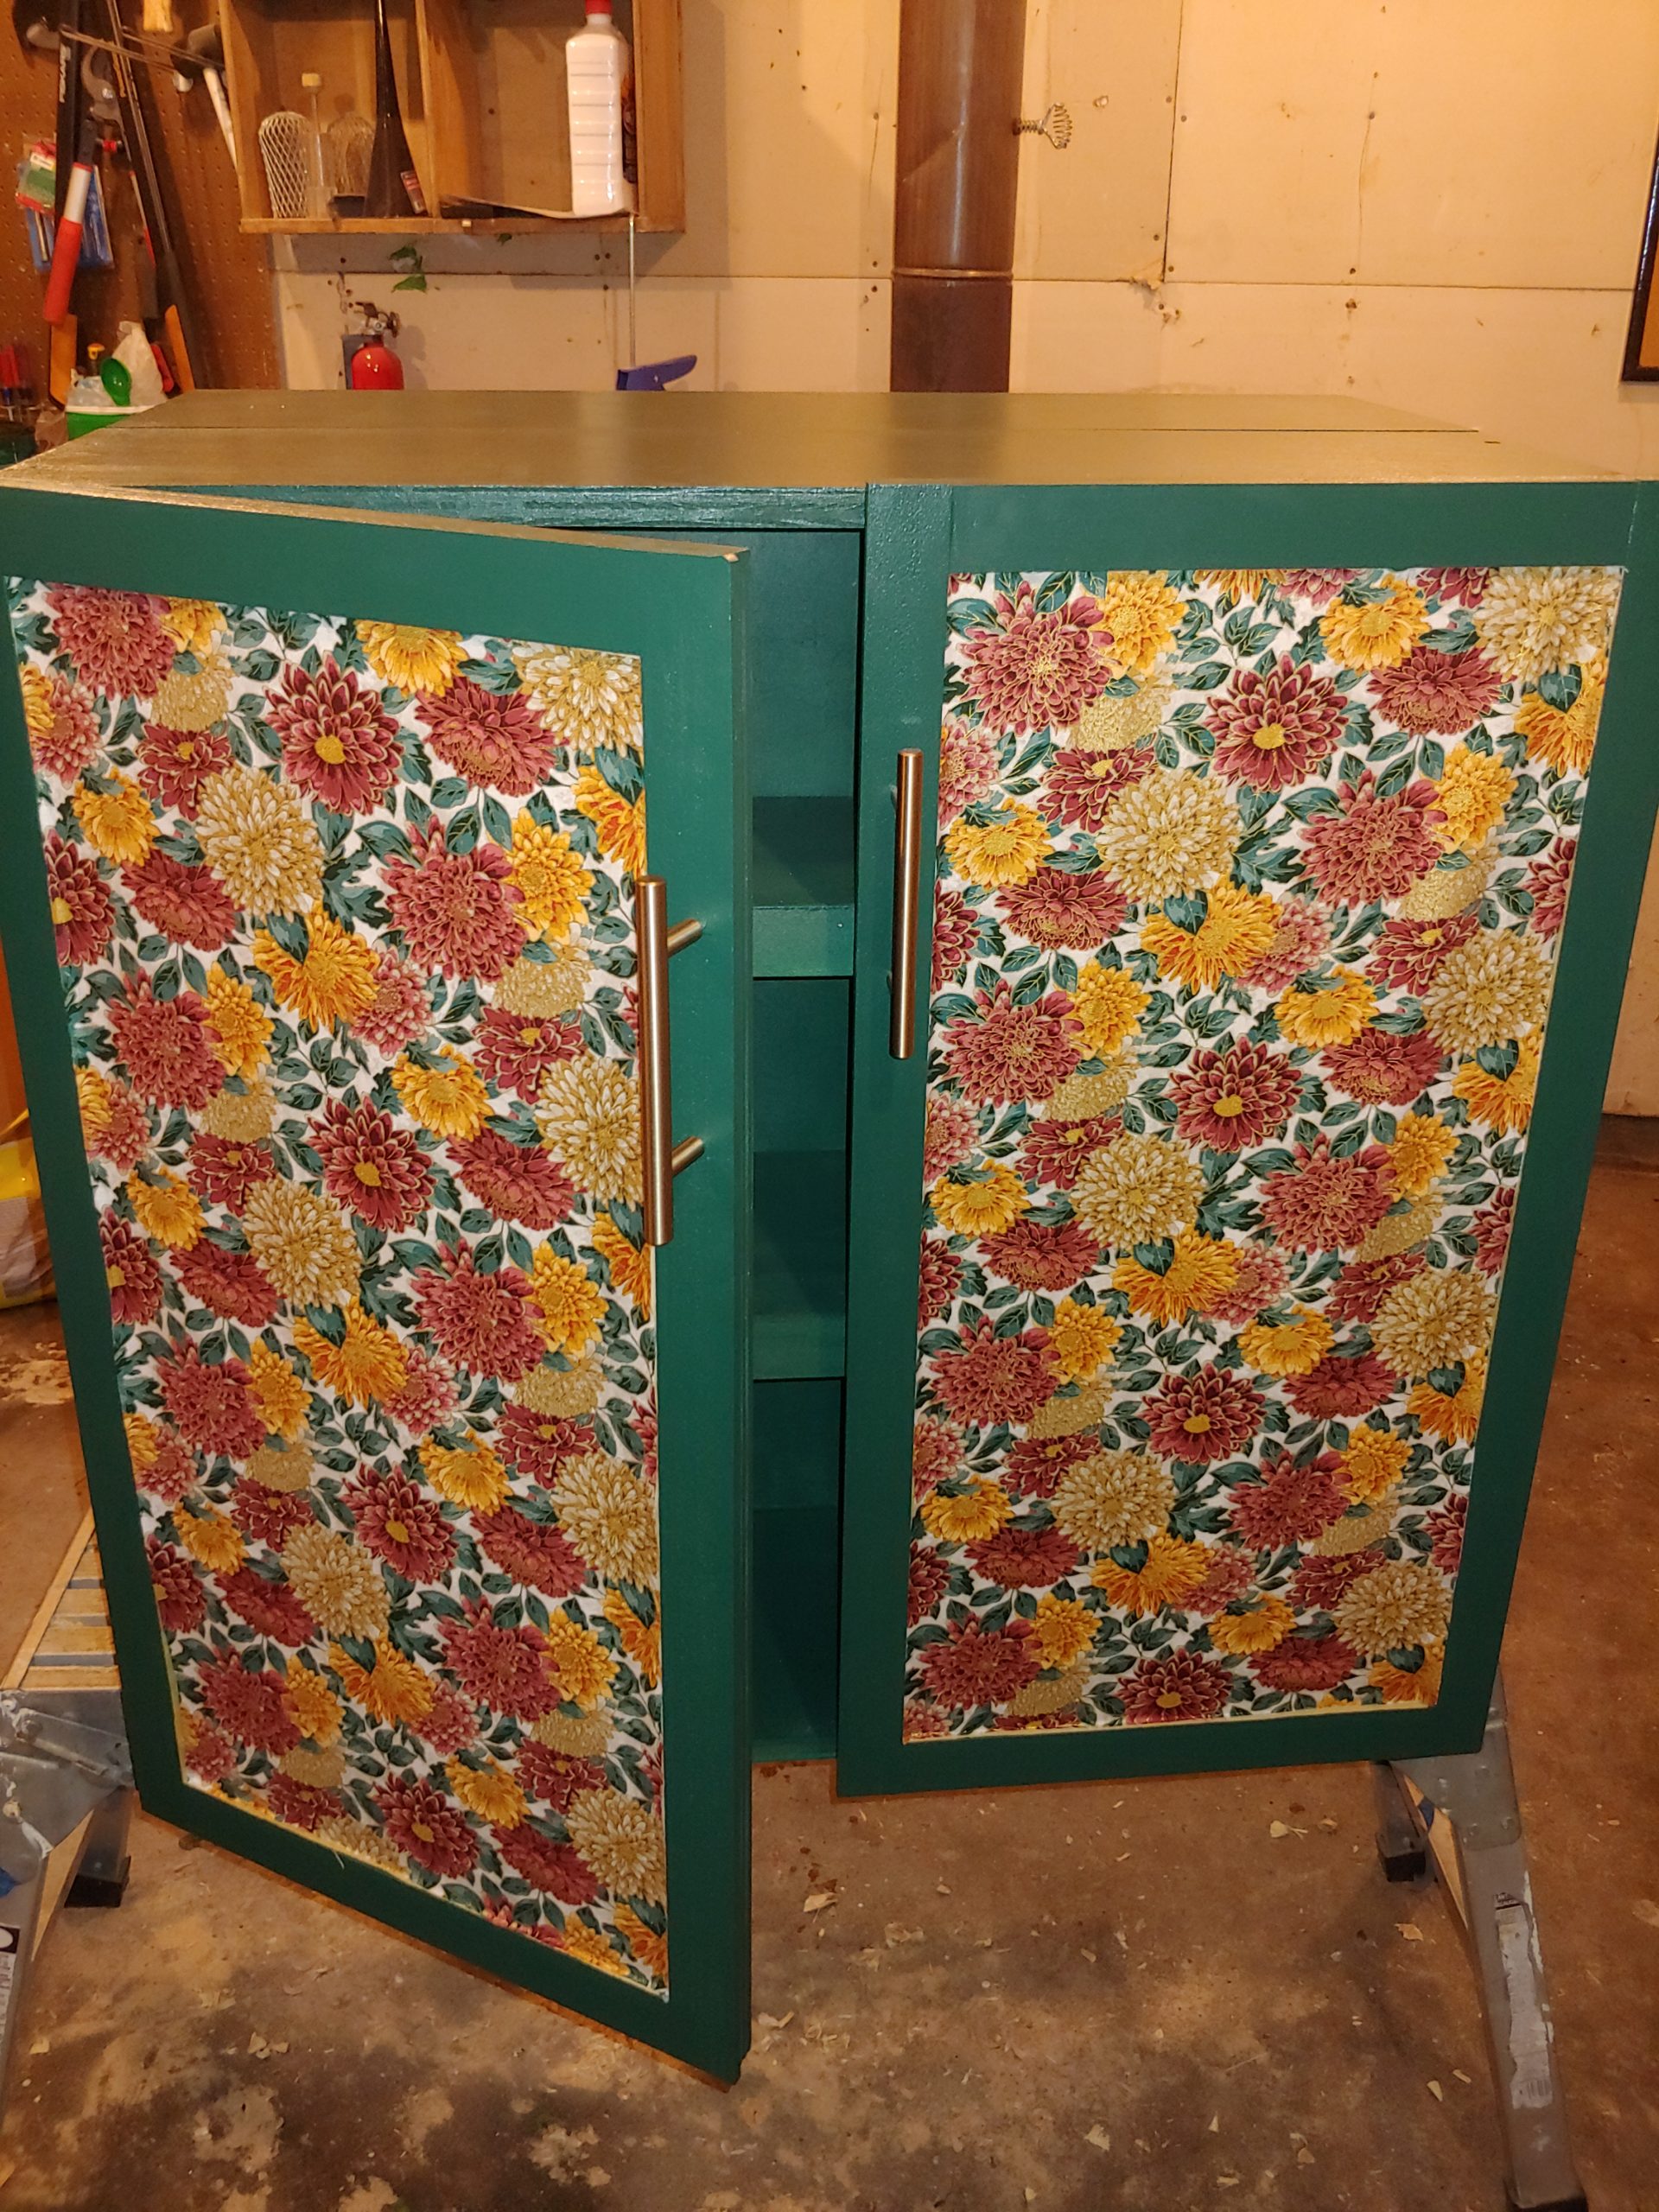
[6] Cabinet with the handles on.
To attach the fabric to the wood I used Mod-Podge. If you haven’t used it before it is similar to a multipurpose higher quality glue. I cut the fabric panels to size, put glue all over the front of the door, then slapped on the fabric, and let it dry for 30 minutes. I then added the door handles I got that followed the goldish tint seen in the fabric and decided to finish the doors off with a little more trim.
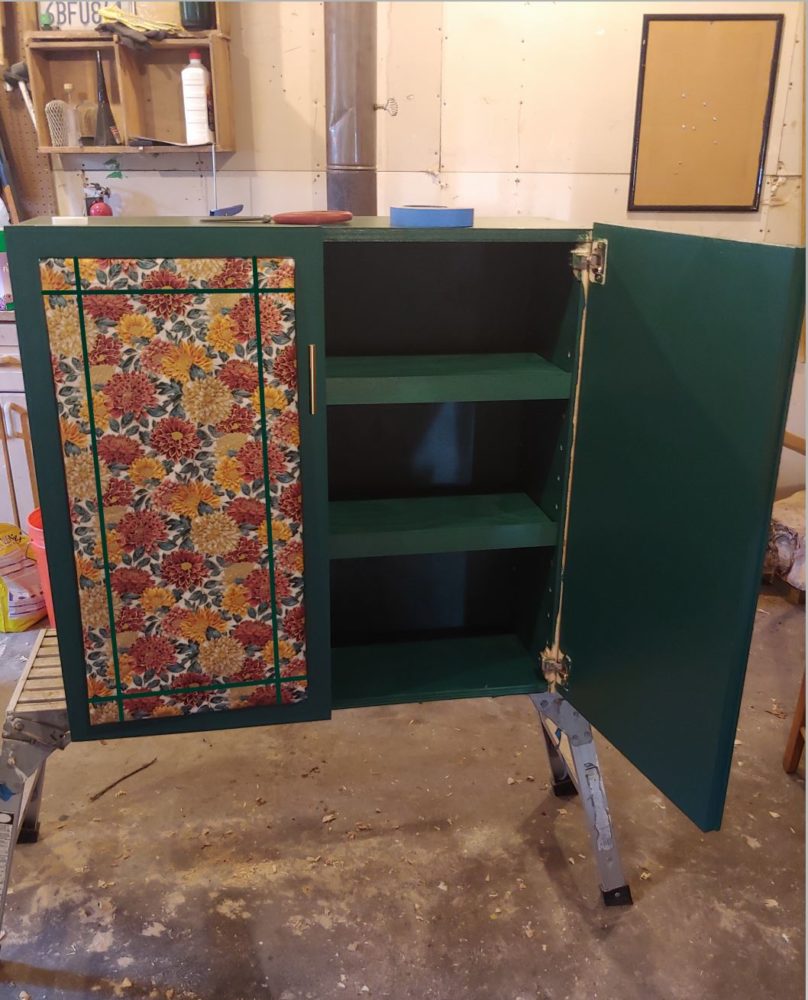
[7] Finished cabinet with door open to show shelves.
Once I had finished putting together the cabinet, I brought it to the room I planned on using it in and realized the ratio I would have wanted the picture turned desk top did not look right. So, I have sense decided that I needed to rethink my design concept into something else that better works for the leftover space I have. This might possibly look like something that has the desk flip up rather then down to get rid of the weird sized photos on the wall as originally planned.
Overall Thoughts:
Overall I think that the fabrication of the cabinet went really well and I am happy with how it looks. I think by utilizing the trim I was able to show the craftsmen aesthetic I was going for, and then by using the darker paint with the fabric I was able to show the modern craftsmen aesthetic I was going for in pervious posts. That being said, I do not know if I am 100% happy with my decision on the print. I think it might be a little too busy/not the right design I was going for. So there is a chance I might end up repainting it a few times to get it just right.
Video of presentation: https://youtu.be/QY37QU6_H3g
[2] https://www.pufikhomes.com/en/2018/10/novye-interernye-vkusnosti-ot-annika-kampmann/
1 Comment. Leave new
Hannah,
I really like this design. I hadn’t followed your project so far this semester so it was really cool to read about it from the beginning to the end. I think this would look good in any house and you really nailed you aesthetic.