

PART 1: WHAT
Inspirations
For this project I really wanted to create something that I would use long term as opposed to making something just for this class. I thought of creating a chess board since it is a hobby that I picked up at the start of quarantine to pass the time and yet I still don’t own my own board and pieces. A couple of my friends have made projects using LEDs in the past, so I thought incorporating LEDs into this project as my time changing element could be interesting and serve as a way to combine a couple different aesthetics.
Vision
My vision for this board is to have it be a combination of both a rustic and technological aesthetic. The rustic aesthetic will be achieved by having the entire framework of the board be assembled out of wood. The technological aesthetic will be achieved by having acrylic components to make up the board and the compartments as well as LED lights. My vision is to be able to have a board and compartment for pieces all in one assembly. My main goal for this project is to have something that is sturdy enough to last me a long time and withstand lots of use.
Initial Sketches and Final Design Plans
INITIAL
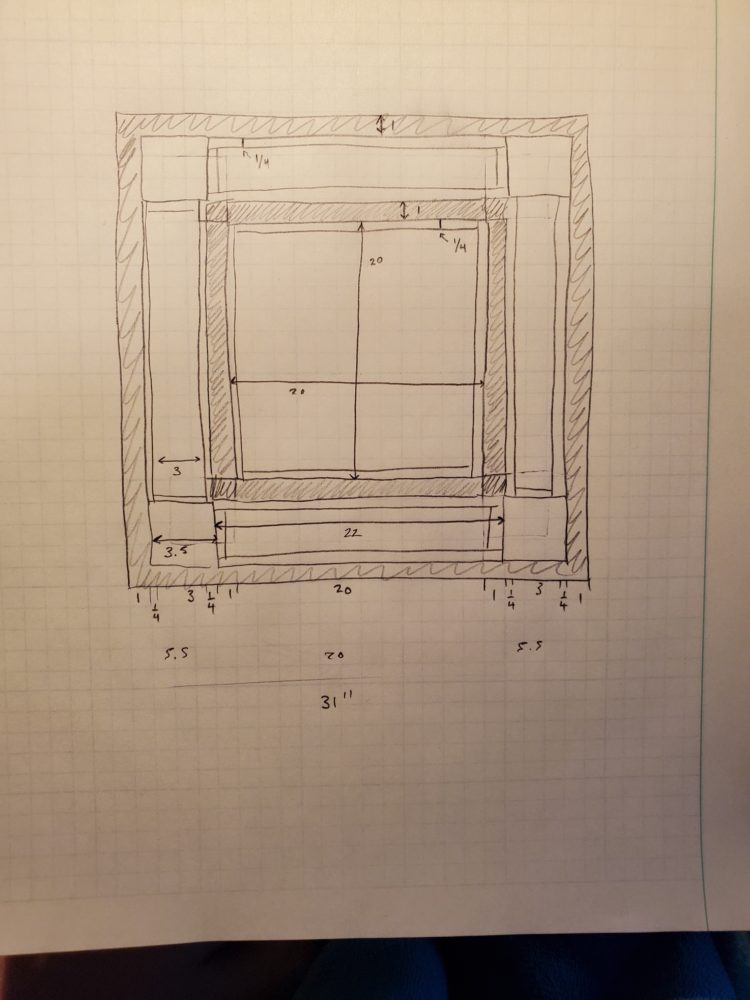
Photo 1: Inside view of the board that shows where all the compartments are going to be to house the pieces and the LEDs
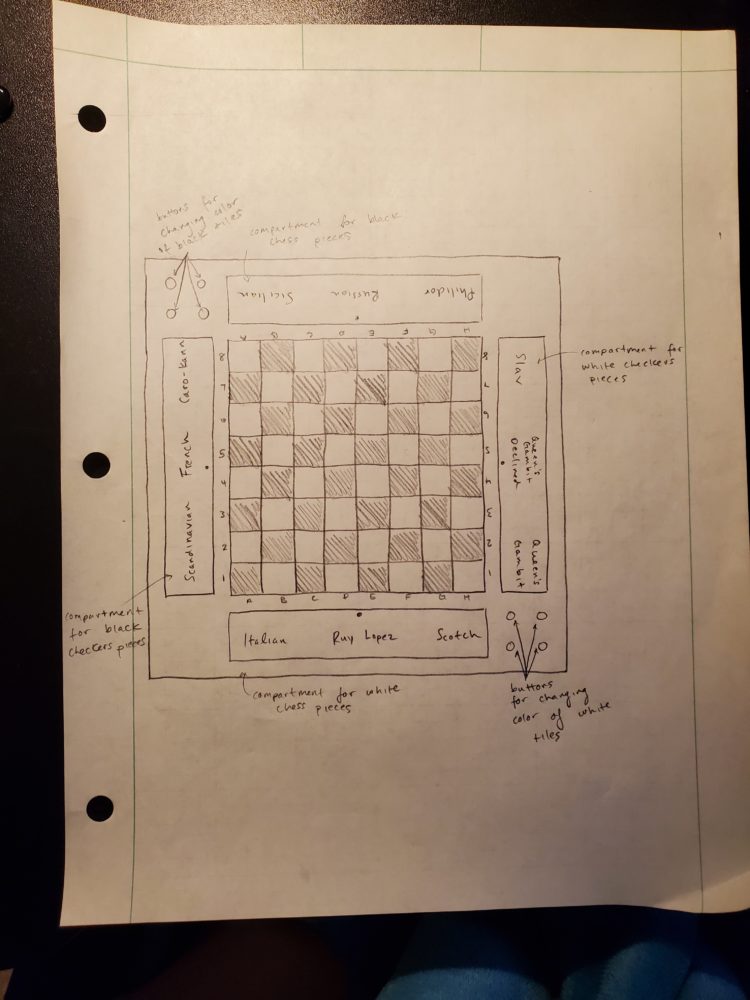
Photo 2: Top view of the board showing what the board itself will look like as well as the covers for each of the compartments
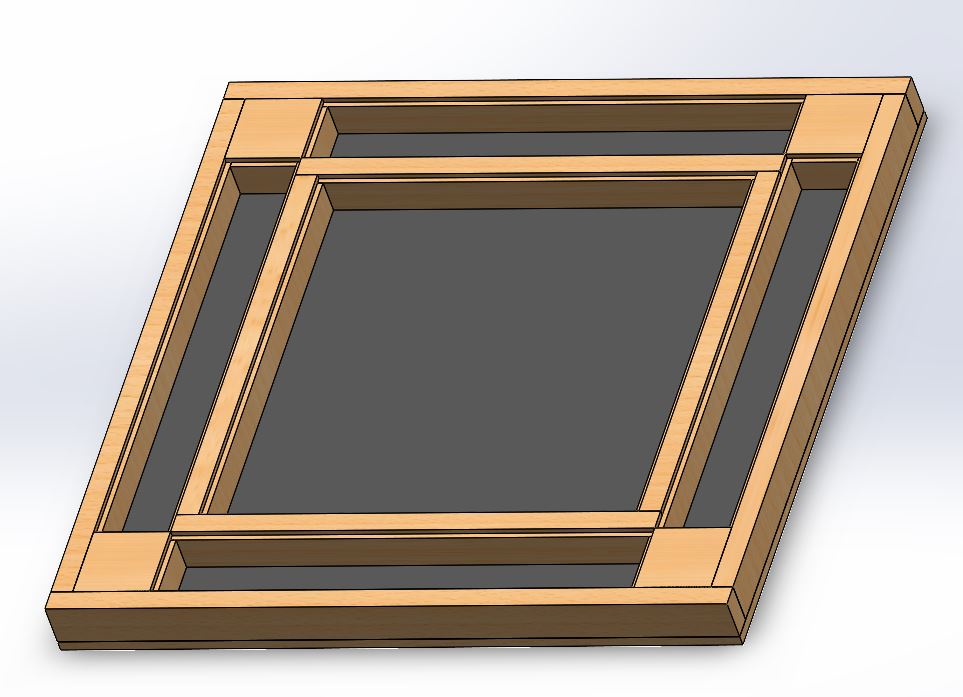
Photo 3: CAD rendering of the wood components of the build
FINAL
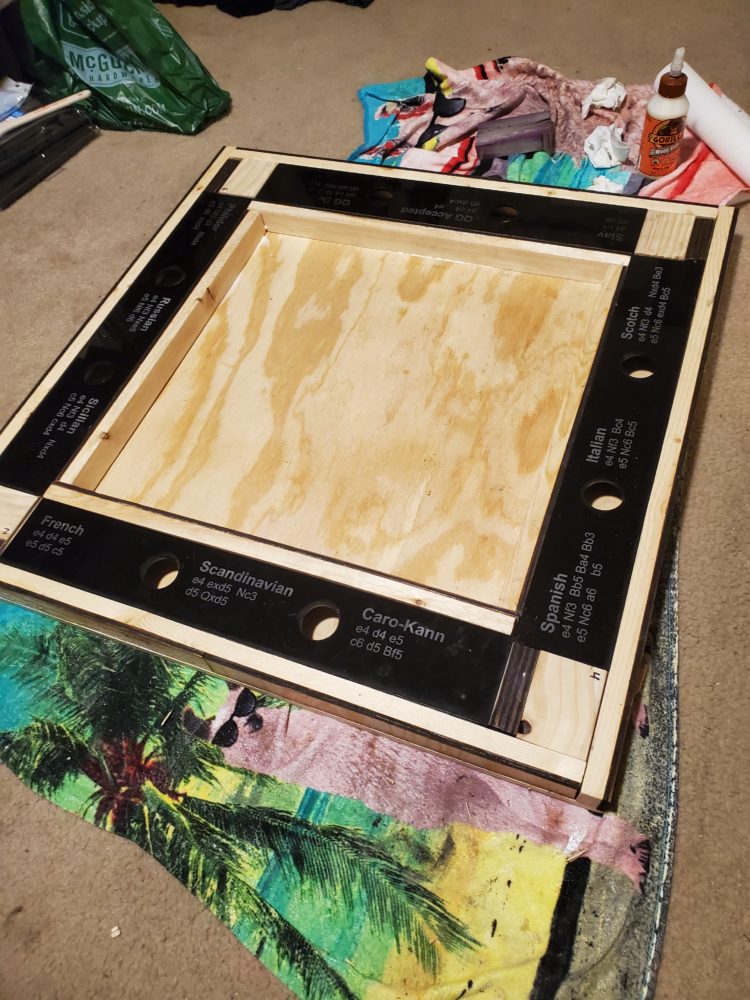
For the most part my design remained consistent throughout this project. There were only a few changes that needed to be made. First, since the wood I purchased was not the size a expected, I had to add on an extra 1/4″ thick piece of wood to add the larger pieces of wood to make them the correct size. The only other change I made was to add an additional piece of wood to each corner to serve as a cover to hide some of the size adjustments I needed to make.
PART 2: HOW
Timeline
- 3/28 – 4/3
- Cut all the wood down to the correct sizes
- Acquire the types of acrylic that I am going to use
- Order chess/checkers pieces
- 4/4 – 4/10
- Use software to plan out the designs that will be put onto the acrylic covers and cut out the acrylic squares
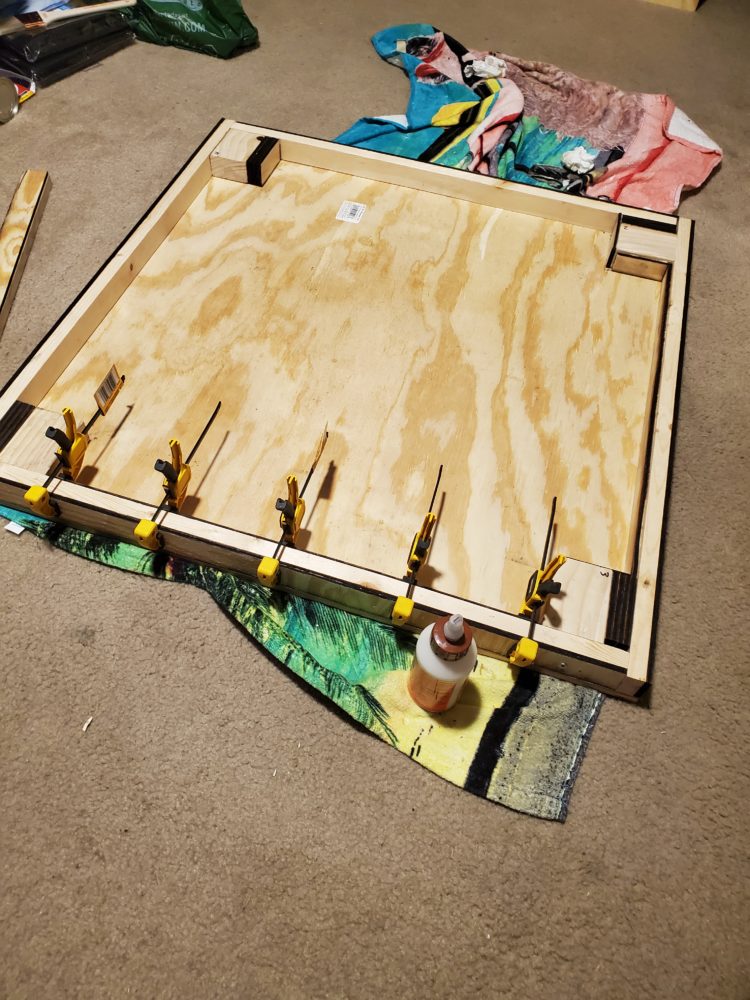
- Assemble the wood frame
- Purchase LEDs
- 4/11 – 4/17
- Epoxy the acrylic together to have the board finished
- Make adjustments to the board to fit the acrylic correctly
- 4/18 – 4/24
- Implement LEDs into the final build
- Do the final report
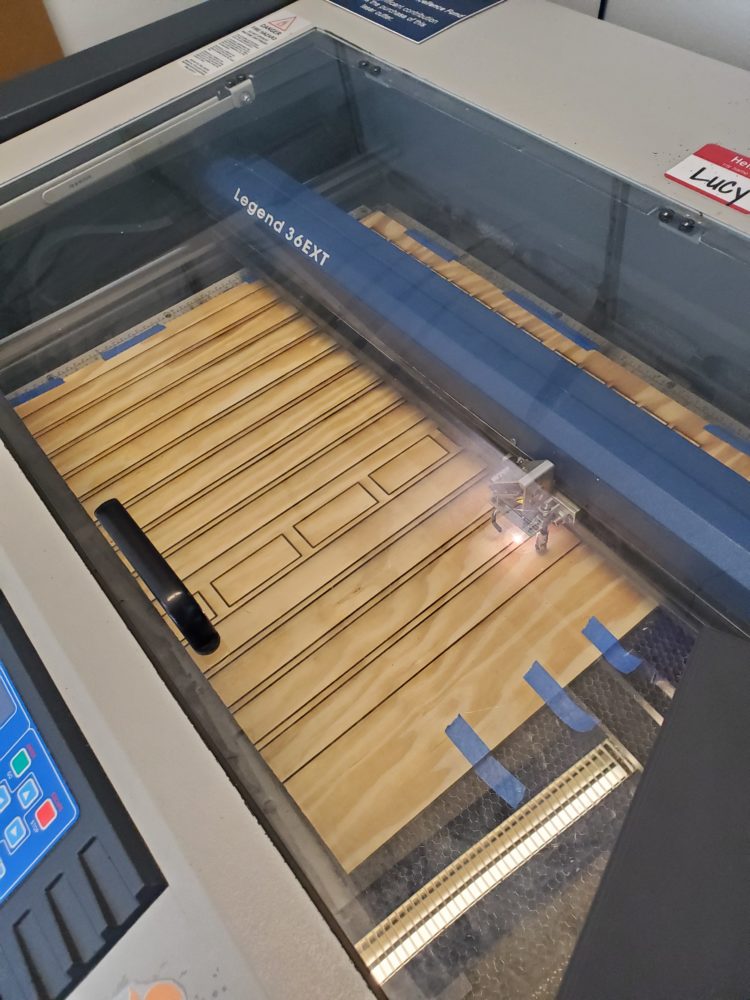
Fabrication Process
- Wood
- Several 1”x2”x8’ pieces will be chopped down to 2 sets of lengths 31, 29, 22, and 20 inches using a saw
- A 2”x4”x4’ piece of wood will be chopped down to four 3.5” squares using a saw
- Several 2’x2’x1/4” pieces of plywood will be lasered down to a height of 1.75” with eight lengths of 22”, eight lengths of 3”, two lengths of 20”, and two lengths of 19.5” using a laser cutter
- A single 4’x4’x1/2” piece of plywood will be chopped down to 31”x31” to serve as the base of the entire board using a saw
- Due to the lengths of the wood being slightly off, an extra layer of 1/4″ plywood was applied to each of the 1″x2″ pieces to make them the correct size

- Acrylic
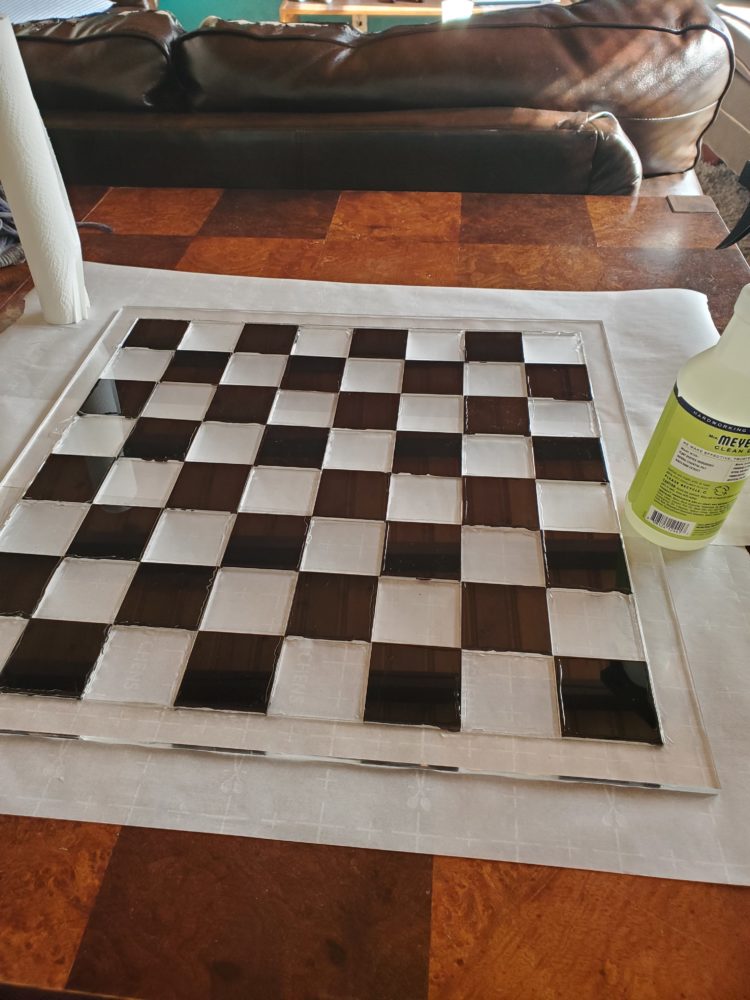
- A single piece of black acrylic that is a ¼” thick will be cut to a size of 20”x20” and have a 18”x18” hole cut out of the center
- Use white frosted acrylic to cut out 32 squares that are 2.25”x2.25”
- Use gray frosted acrylic to cut out 32 squares that are 2.25”x2.25”
- Use acrylic cement to combine all of the above pieces into a single board
- Use black acrylic to cut out four 3.5”x22” covers for the compartments and laser engrave the designs that I want on them
- All cuts/engraving will be done with a laser cutter
Conclusion
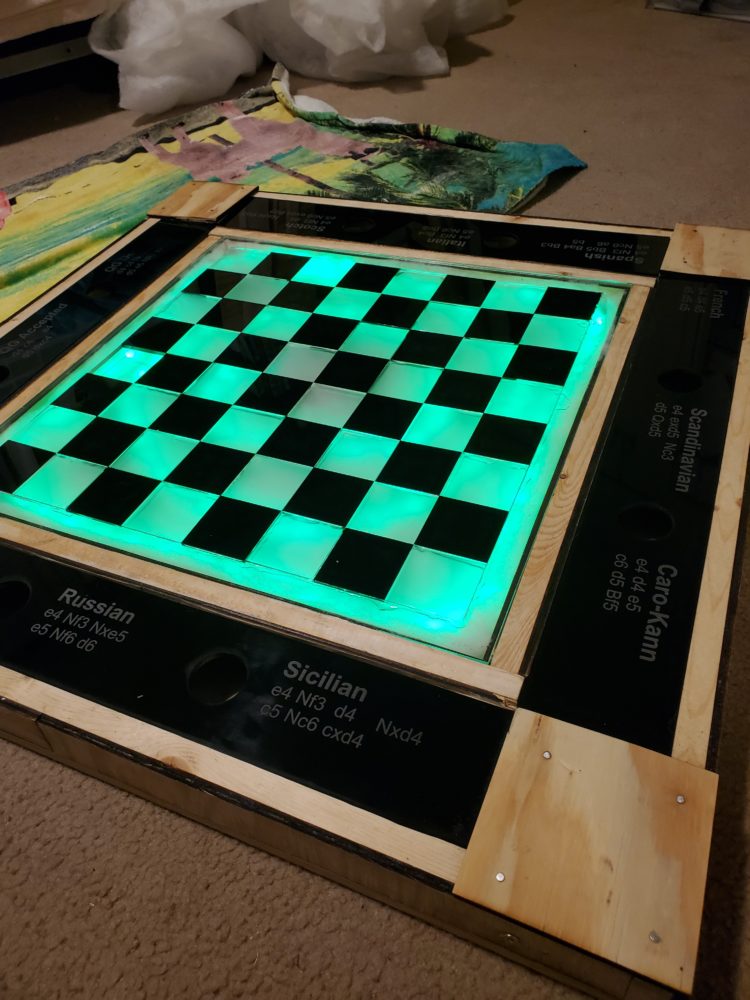
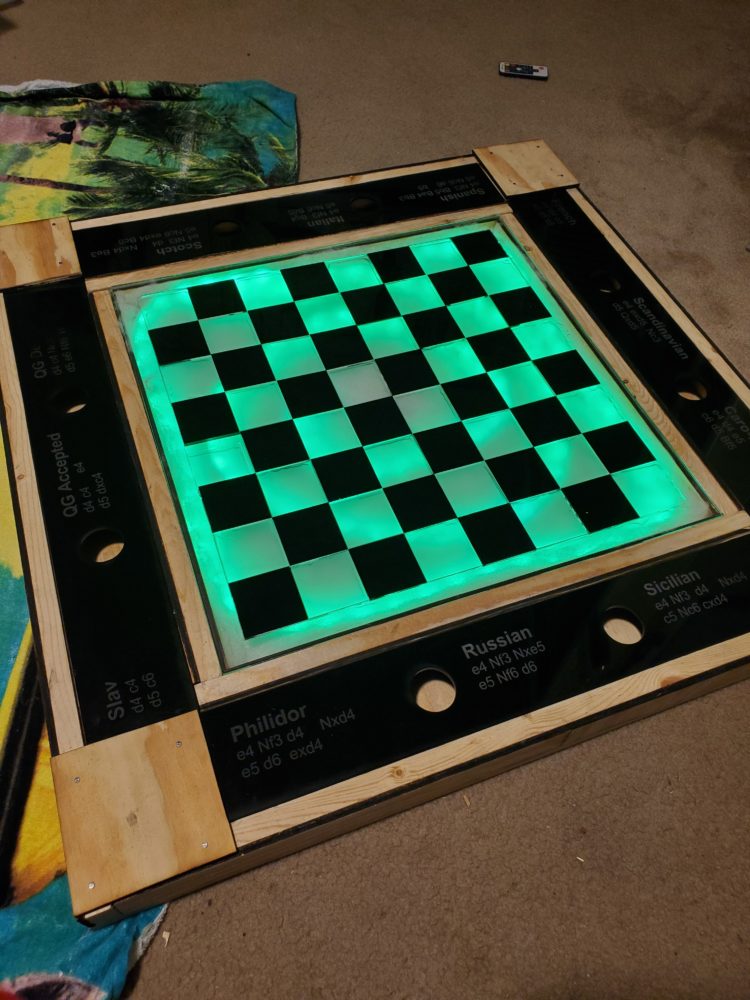
My plans at the start of my project ended up being very similar to the final plans that I had with just a few modifications. Some things I wish I had done differently were to measure the 1″x2″ pieces of wood earlier so I could have adjusted my designs for the lack of 1/4″ on each side. Also, I would’ve made the board portion of the project out of a single piece of acrylic with rastered squares rather than trying to cement multiple pieces together. The board ended up breaking so I am currently in the process of getting a single piece of acrylic to serve as the board. Other than that I believe my project turned out very well. Now that the project is done I would like to refine it a little bit and add some finishing touches. I would like to add some color to the wood and sand everything down so that it is nice and smooth.
Video
Unfortunately some components of the project broke and due to delays in fabricating the project will remain unfinished until Monday. I will include a link to the video once the project has been repaired.
2 Comments. Leave new
Callum what a super cool project! I am impressed with its finished form, and as with my own project its hard to finally call something done. I think adding a nice stain to the wood components could go a far way in the overall look. That being said i am very impressed!
Hi Callum, it looks like this project came out really well. It definitely hit the aesthetic that you initially wanted, and visually it looks great. Hopefully the single acrylic piece will turn out well, because I could see this as a nice piece that you can add to your living space and create a good talking piece that you can use to show off your chess skills. Good work!