

Presentation: https://youtu.be/MZqY-Pv0UXo
To recap, my project is inspired by a high school physics project. I wanted to apply the skills I’ve acquired as an engineering student to build a better mousetrap car than the one I made in high school and see how much longer my new mousetrap car can go.
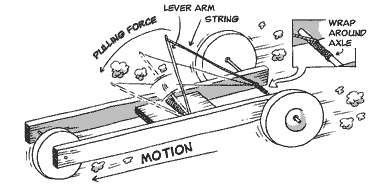
So to briefly explain the science behind this project. A set mousetrap is full of potential energy which, when released, is converted to kinetic energy. And with some clever designing, we can transfer this kinetic energy to the axle make the wheels turn. So basically, When the trap snaps closed, it yanks the string forward. As the string is pulled, friction between it and the axle causes the axle to rotate, spinning the wheels and moving the car forward.
VISION
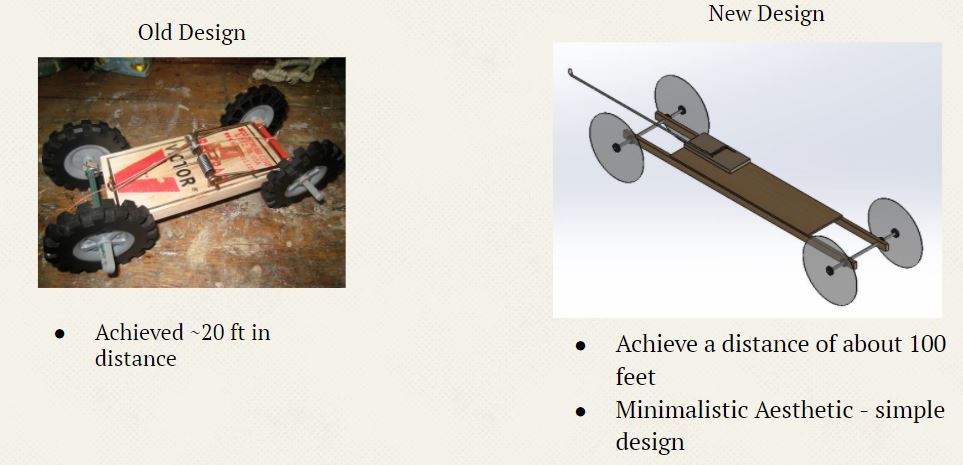
So when I decided that I want to redesign a project from high school, I wanted to see how much my engineering skills improved and so the goal I set for myself was to significantly improve the travel distance of the vehicle, while also maintaining a simple design to portray the Minimalistic aesthetic. I had 100 feet as my distance goal because it is five times what my old design was able to achieve, and because it is and achievable distance based on my research.
Before I start ordering material, I set several specifications for the new design that would make the car go longer:
- Increase mechanical advantage by making lever arm longer.
- Reduce friction between: wheels and ground, wheels and axle.
- Make the car as lightweight as possible
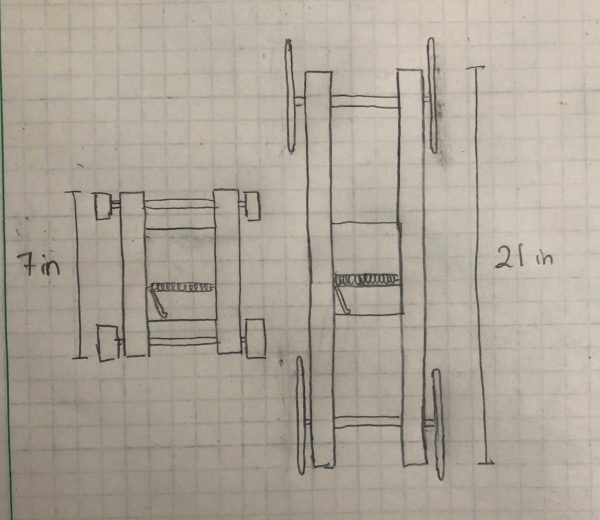
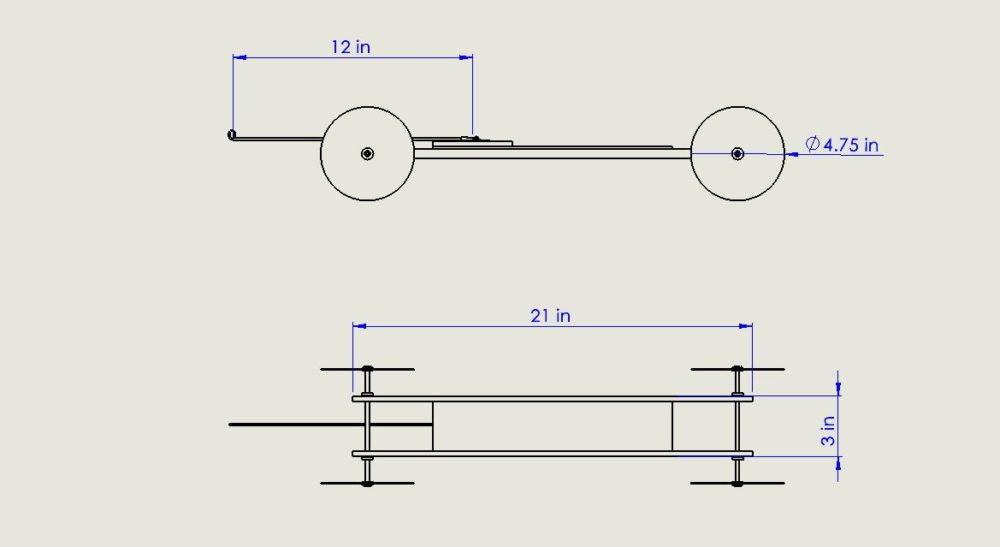
In the beginning of this project, I had a very rough sketch of what my new design would look like compared to my old one based on the specifications that I had, and then later on, I used SolidWorks to create a 3D model and a dimensioned drawing of the car for me to use when I order materials and during the fabrication process.
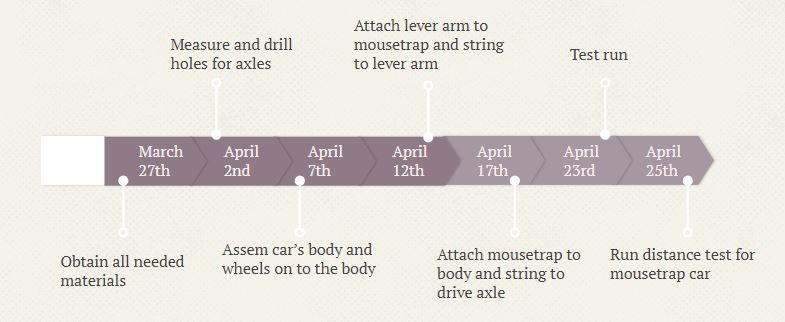
TIMELINE
This is a timeline that I set for my project, most of it were fabrication, and the distance test for the final product was the last thing I had on here.
DESIGN AND FABRICATION
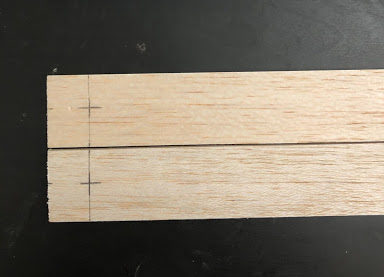
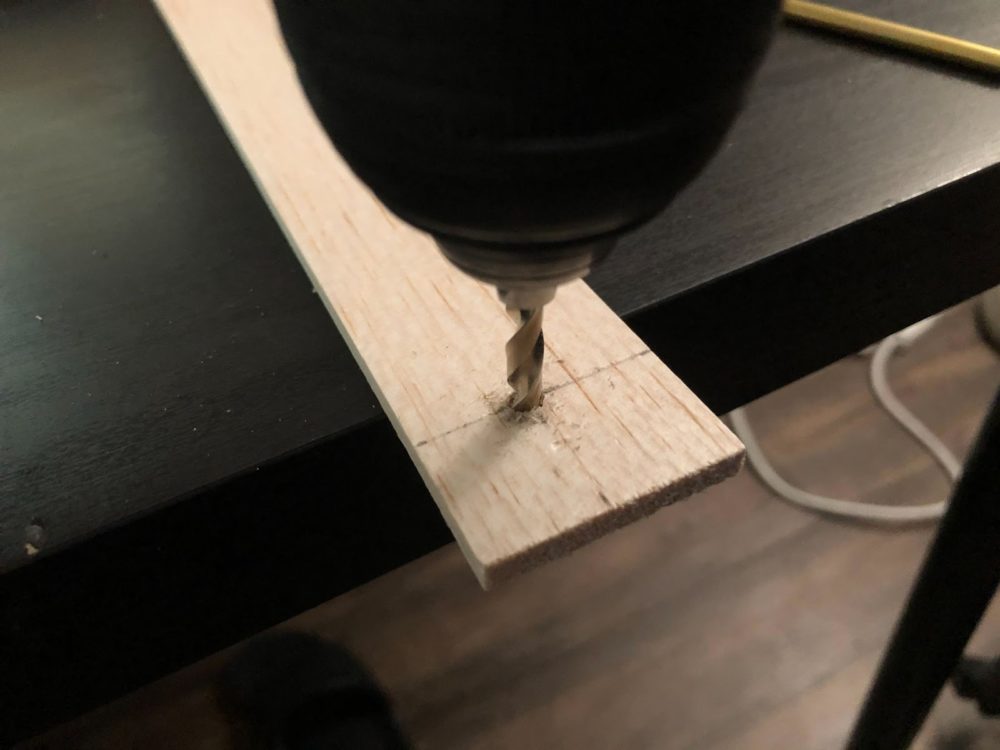
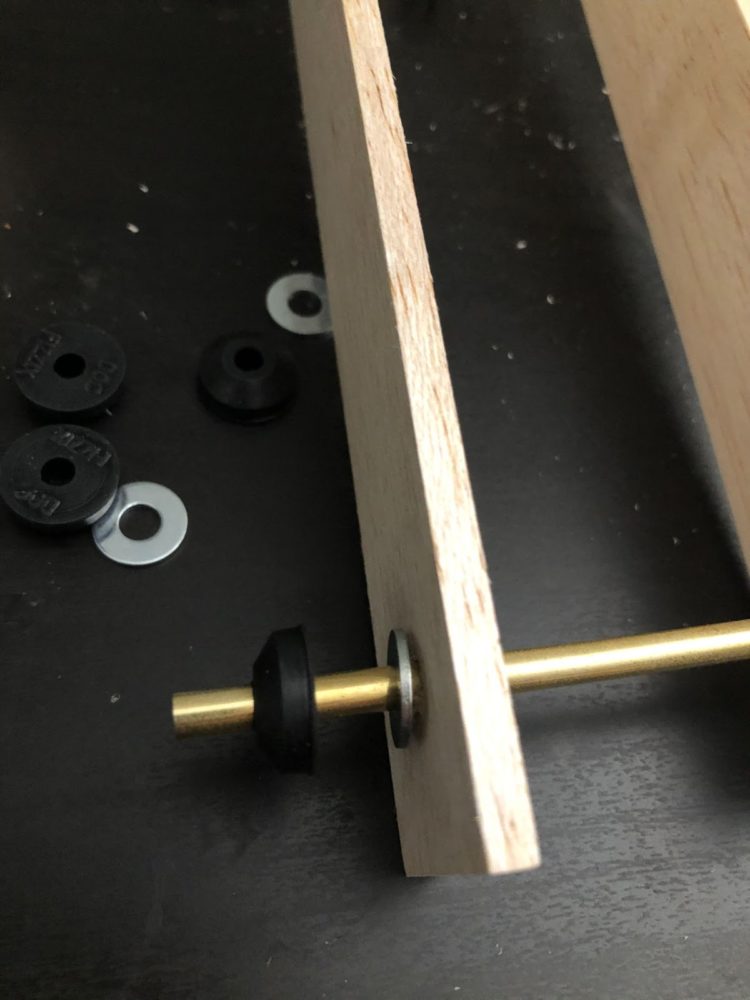
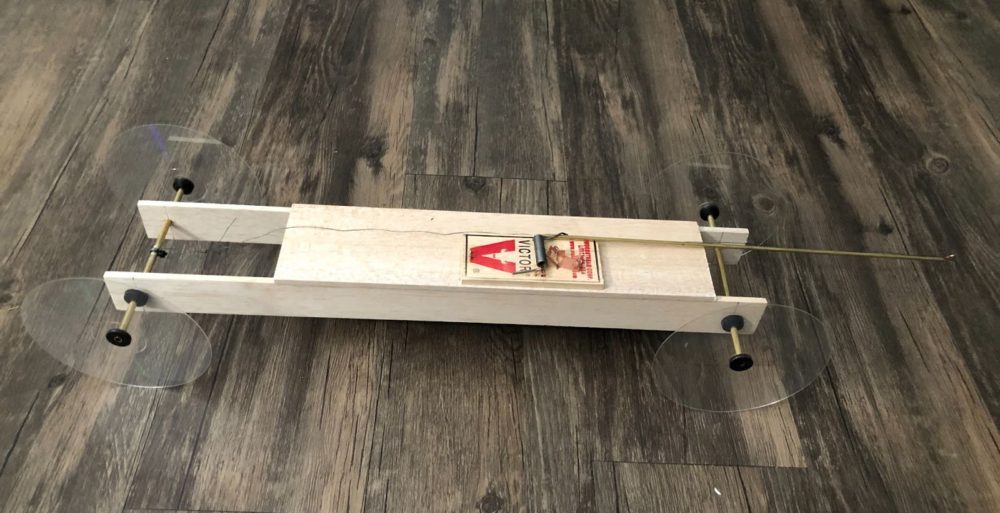
The body of the car is made of three balsa wood strips. These pictures are showing me marking and drilling the holes on the two strips on the sides for the axles to go through. I needed to make sure the holes positions are the same to make the car symmetrical. I used a quarter inch drill bit to make sure that the axle has enough clearance to rotate
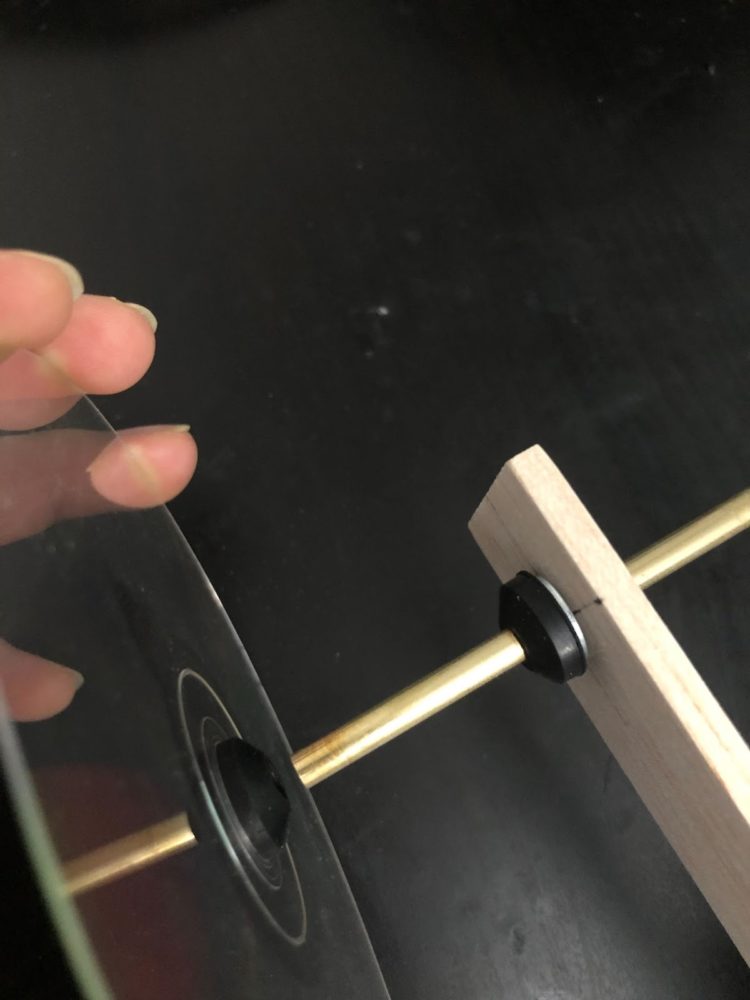
next, I moved on to mounting the axles. I used the metal washers and the rubber spacers to secure the axles in place. Then, I put spacers on each of the CDs and mounted them straight on to the axles.
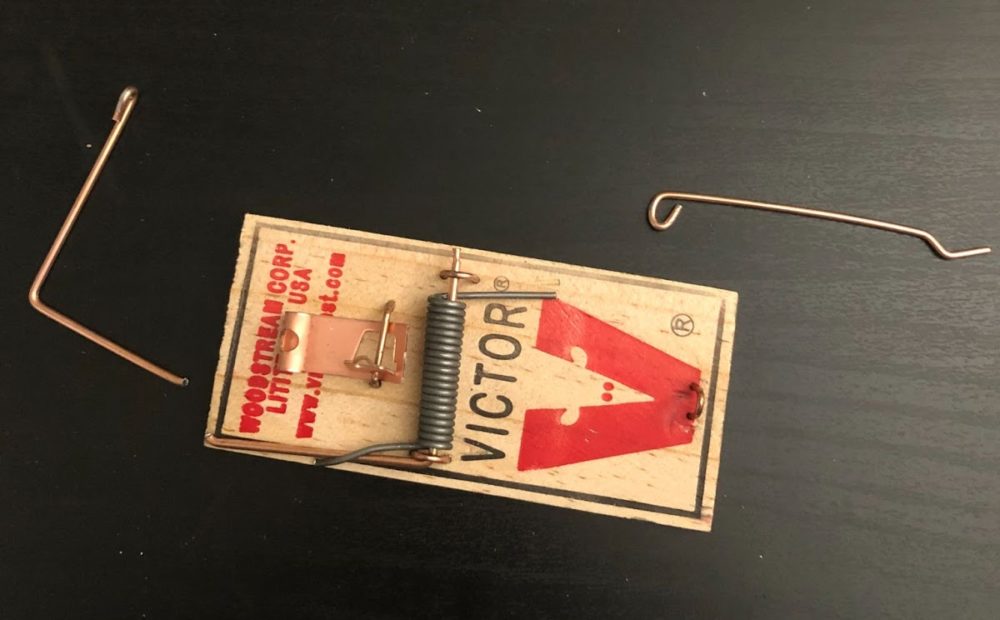
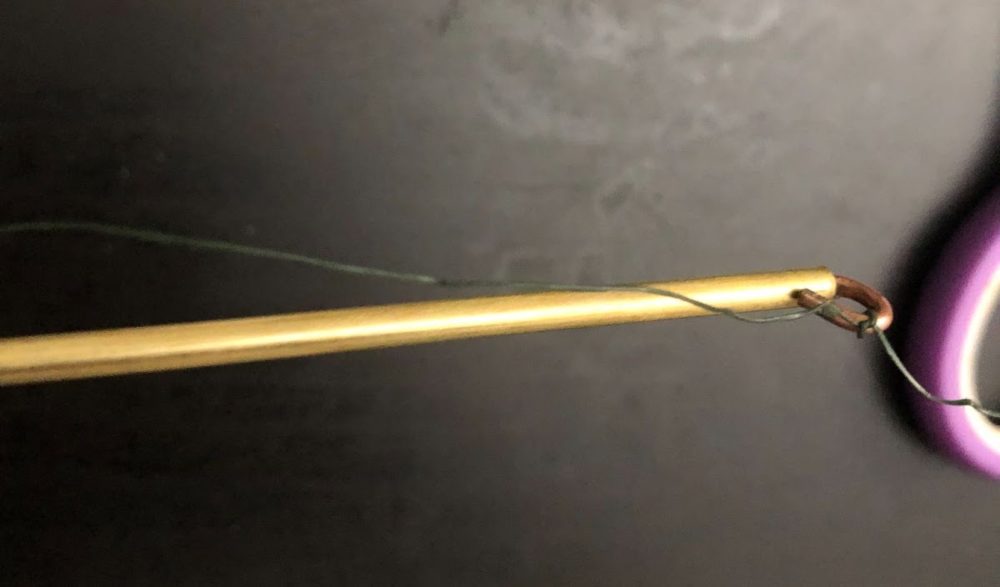
I then moved on to modifying the mousetrap. I used a wire cutter to cut the snapper arm leaving only the part that is pushed down by the spring. Then I removed the locking bar and used it to make a hook for the lever arm.
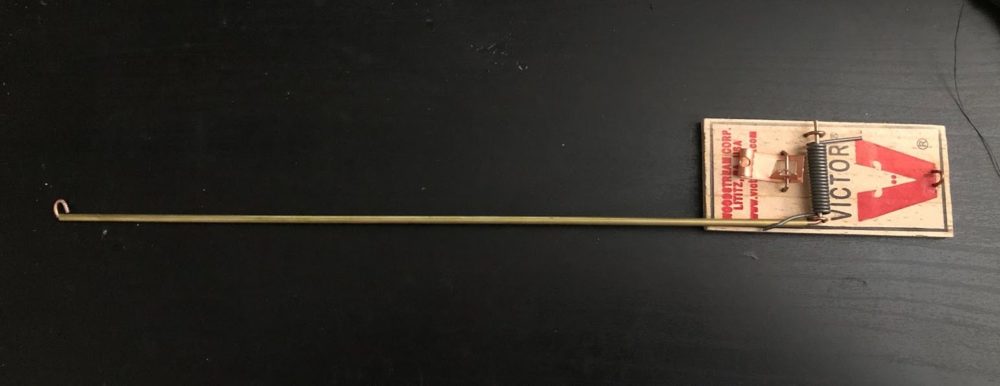
The last step was to set up the string. To help winding up the car, I tied a loop knot on one end of the string and I tightened a zip tie in the middle of the drive axle to catch the loop of the string. Then, I attached the other end of the string to the hook on the lever arm.

MATERIALS AND TOTAL COST:
This was a pretty cheap project to make. Below are everything that I bought for this project and their total cost:
- Balsa wood strips
- Brass Axles and lever arm
- CD wheels
- Mousetrap
- Kevlar string
- Spacers and washers
- Zip lock
Total cost = $16
Everything else that I used like: super glue, hand drill, wire cutter were stuff that I already owned.
FINAL ARTIFACT AND CONCLUSION
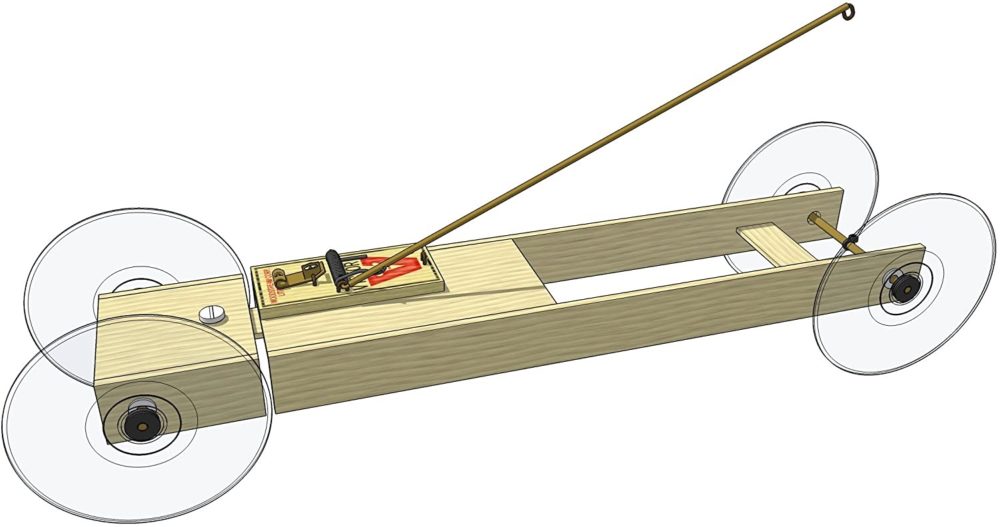
The final mousetrap car weighs only 0.2 lbs, it is 16.5 inches long, 6 inches wide, and has a 12 inches lever arm. The final product looks simple and clean which was is consistent with my minimalistic aesthetic goal. It also looks much better than my old mousetrap car so that’s already an improvement.
typically, mousetrap cars are tested for distance on smooth surfaces like vinyl and wood, but I could not find a place with a smooth surface that is long enough for the test so I ended up just testing on a cement road outside of my apartment, which was very rough and bumpy. I also had to do this test in the middle of the night so that there’s no cars around to run over my project. The video of the test is shown below
The car ended up running for 50 feet which was only half of my goal, but that goal was also based on tests that were ran on smooth surfaces, so I think that I definitely could have achieve more distance if I tested my mousetrap car on a smoother surface. In addition, if I wanted to improve the minimalistic aesthetic of the project, I could have painted the mousetrap the same color as the rest of the car.
Sources:
https://www.real-world-physics-problems.com/mousetrap-car-physics.html#:~:text=A%20mousetrap%20car%20uses%20the,traveled%20on%20both%20these%20surfaces.
https://www.amazon.com/DOC-FIZZIX-Basic-Mousetrap-Distance/dp/B016470D6
5 Comments. Leave new
Where did you get the material at?
sooo goood. helped me load. thz
A great post without any doubt.
https://www.fiverr.com/share/BWPA5k
HI Thuc, I think the car came out very well, and you definitely achieved your goal of improving on your previous design. I think having it go 50 feet is very impressive, and I was wondering what color or designs you would have put on the car if you had time?
Nice project! It’s cool that you played off of the concept of a previous project you did to make an improved version. It’s awesome that you were able to improve some of the technical and functional aspects of the design from the car you made in high school. I like the minimalistic approach you took, and the clear CDs add a cool design element to the overall look. Given that the purpose of this class is on aesthetics, it would have been nice if you paid a little more attention to this aspect of the project. You could have implemented some cool design features through colors and patterns without affecting the car’s function. You still did a nice job!