
Part 1: What
For my project, my main goal was to create a table to fill both a need for a functional piece of furniture in my living space, and a desire to have something more aesthetically pleasing than the current coffee table that we had. More specifically, in terms of functionality, our old table was too low to the ground, it was extremely heavy for the size, and very unstable as the legs were cracking. My idea to solve this problem was to make a much lighter design, have the table be adjustable height, and choose sturdier table legs. For aesthetics, I wanted to create something interesting and thought provoking, that would match the overall fun aesthetic of our current living space, and that also looked complete and thought out. This is where my design changed a lot over time, I had the overarching idea pretty set in stone, but what I did for the artistic aspect of the tabletop changed a lot over the design process.
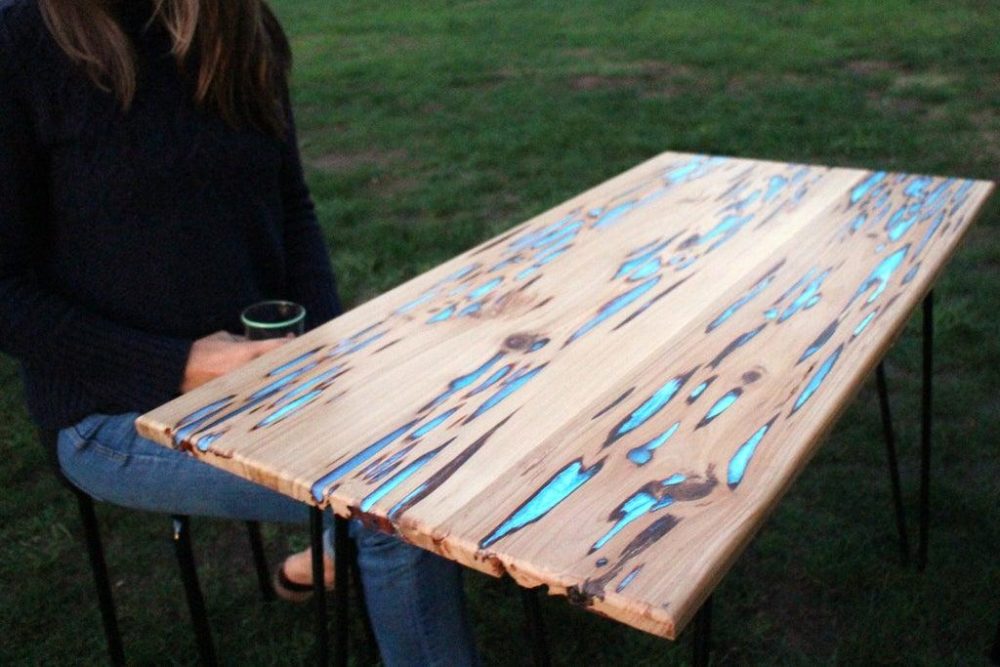
Initially, I planned for the tabletop to be made from reclaimed wood filled with glowing epoxy resin. I chose this look because I really liked the aesthetic of the reclaimed wood, it gives a sort of rustic meets modern look that I thought would be really interesting. However, when it came to actually buying materials and figuring out the details of the build, I ended up moving away from this idea. The main reasons for this being that reclaimed wood was extremely expensive, joining planks is a difficult process, epoxy can be difficult to work with, the glow powder wouldn’t necessarily glow without being charged by light, and that style of tabletop would end up being quite heavy.
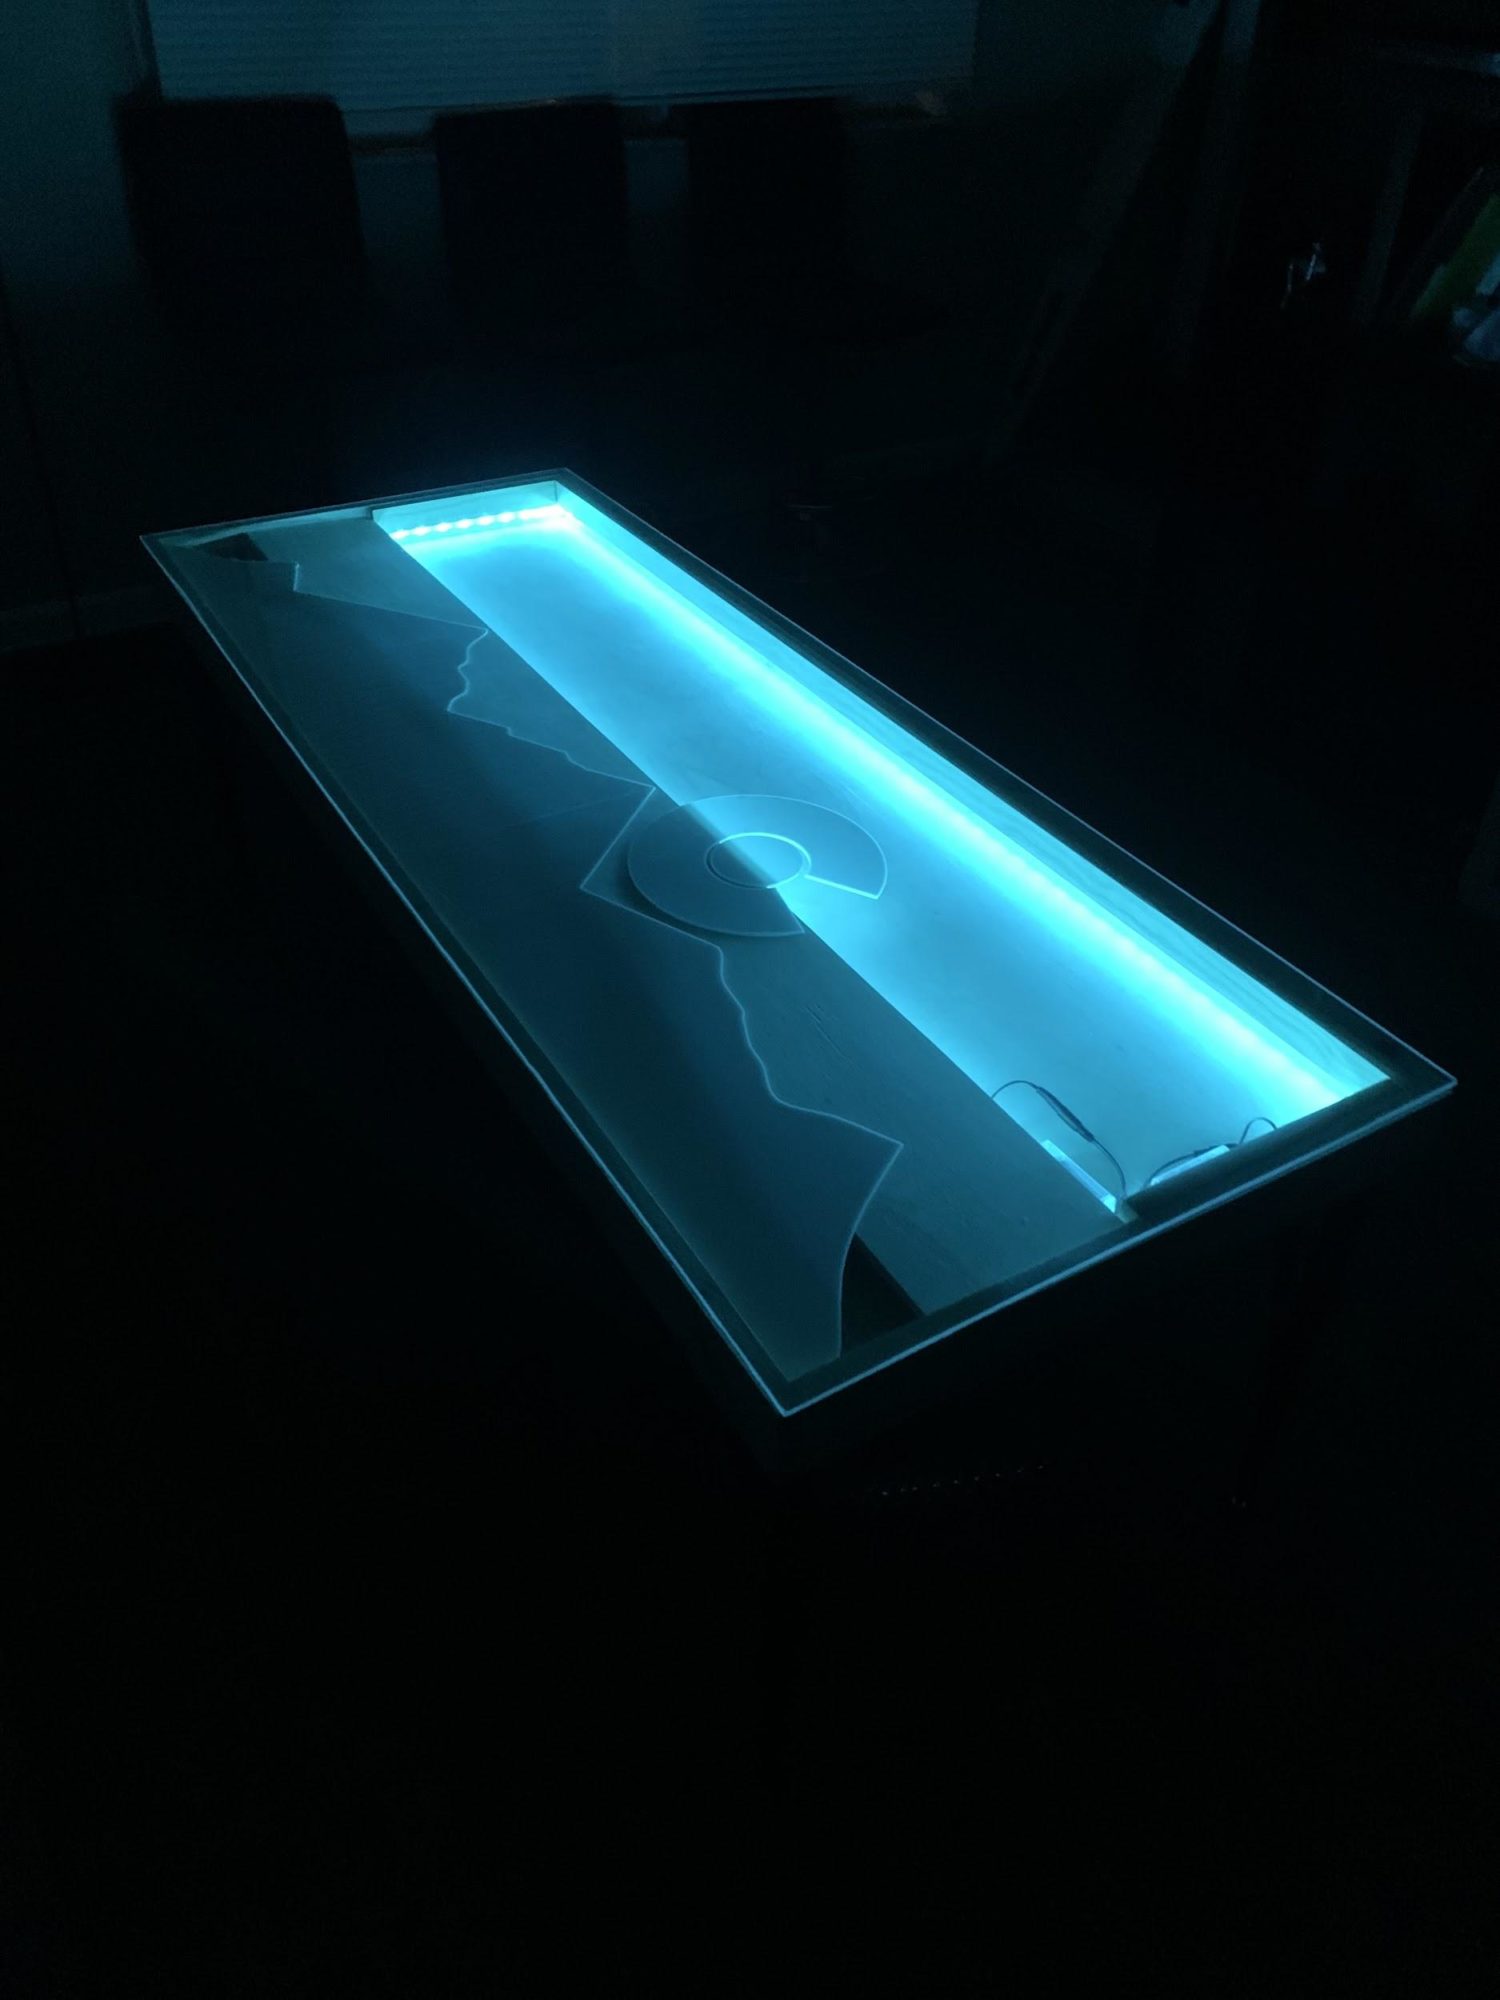
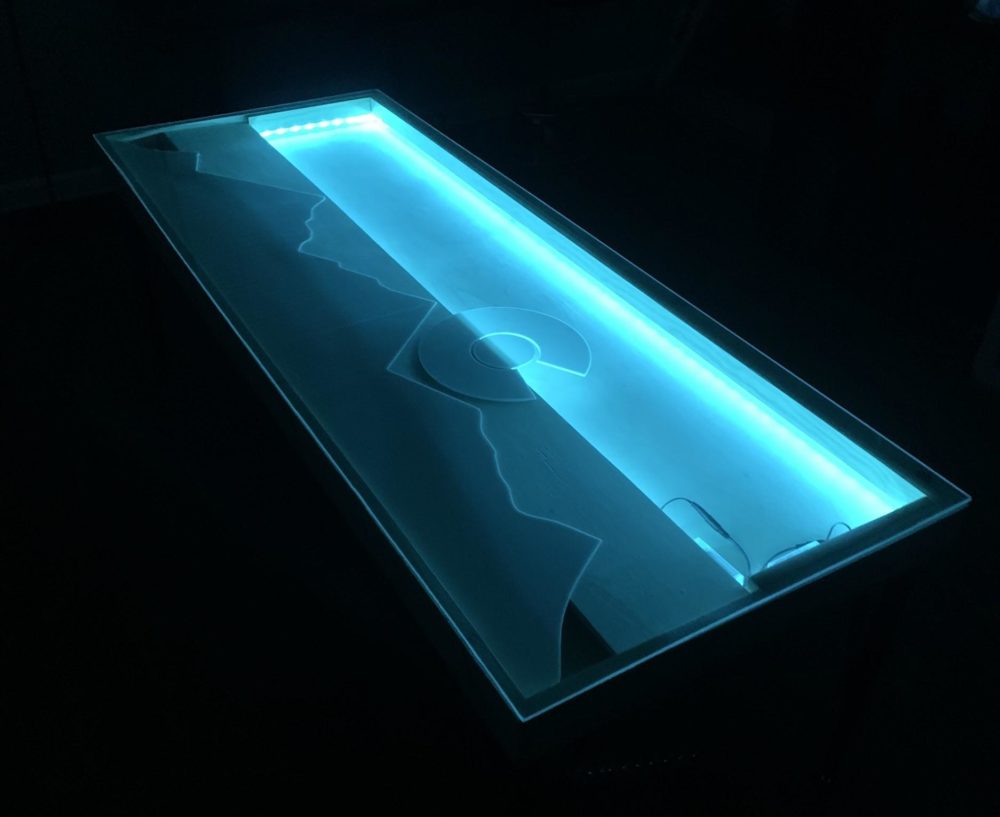
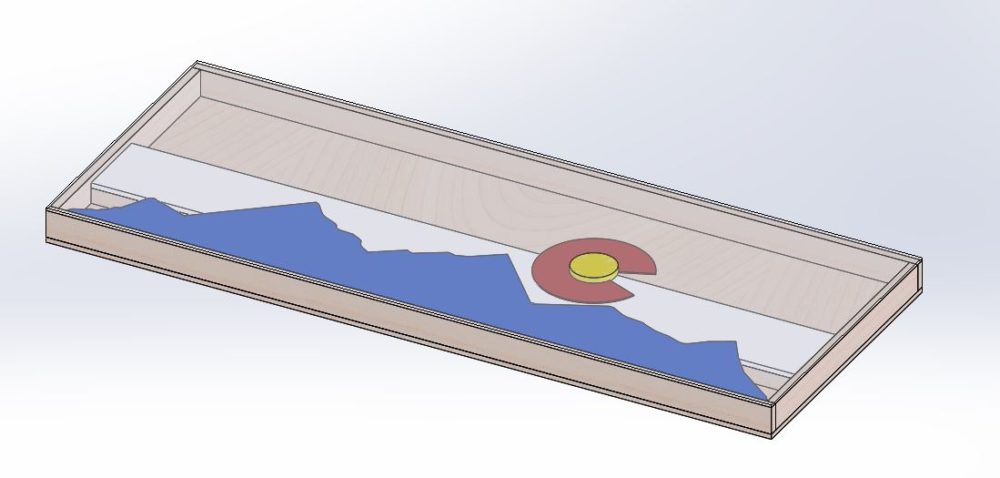
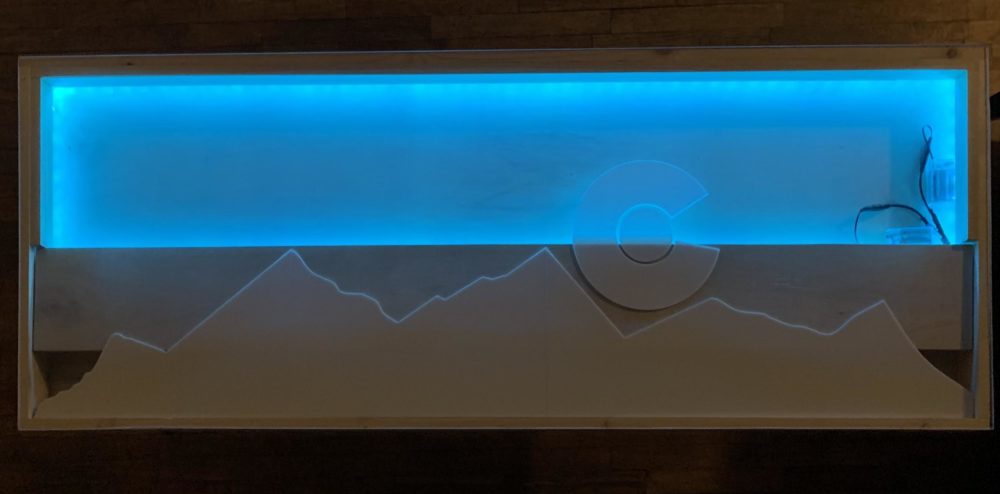
These were obviously plenty of reasons for me to move away from that design, so I started brainstorming new ideas for the artistic tabletop aspect of the piece. I ended up deciding on a design that would be much simpler to fabricate and that would be a nod to the iconic design of the Colorado flag. I designed a plywood and common board sort of shadowbox, that would house a few layers of decorative wood and acrylic and LEDs, that would be encased in a tabletop layer of plexiglass. This design was definitely a lot simpler and more affordable, so it made a lot more sense to move forward with. I did however go through a few iterations with this design, as initially I planned to paint the wood and acrylic to match the Colorado flag, but after cutting everything, I actually really liked the look of the white acrylic and natural wood, especially when paired with the LEDs. So, I figured that I could always add paint but I can’t take it off, and felt that the Colorado flag design was still recognizable enough even in all white, so I decided to keep everything natural/white for now. I also really liked the color palette of the matte black table legs, natural pine wood, and white acrylic; I felt that it created a really nice simplistic sort of sleek modern aesthetic. Below is my CAD assembly; I made sure to take a lot of time on this to both be able to really realistically envision how the table would turn out when complete, and to make sure that the fabrication process ran smoothly.
Part 2: How
For the actual design and fabrication process, I made sure to take a lot of time so that the final product actually turned out really well. It was important to me that it did since I would actually be using it in my living space. The first steps were locking down exact details on everything and ordering some things from online. I ordered the adjustable table legs ASAP since I knew that they would take a while to ship, and then also ordered the LEDs from amazon so that I would have them on hand for when I needed them. Then, I went to a reclaimed wood center so that I could take some time to talk to people there and choose wood. It was that day after going to the reclaimed wood place that I decided that it was no longer feasible to go with that tabletop design for the reason explained in Part 1. From there, once I decided on a new tabletop design, I took a lot of time mocking everything up on CAD, so that I could visualize everything and make exact drawings. I also made a very specific list of the remaining materials needed, including vendors and exact sizes/cuts. This was all super helpful for keeping track of everything and making sure to keep with the “measure twice cut once” mentality for efficiency.

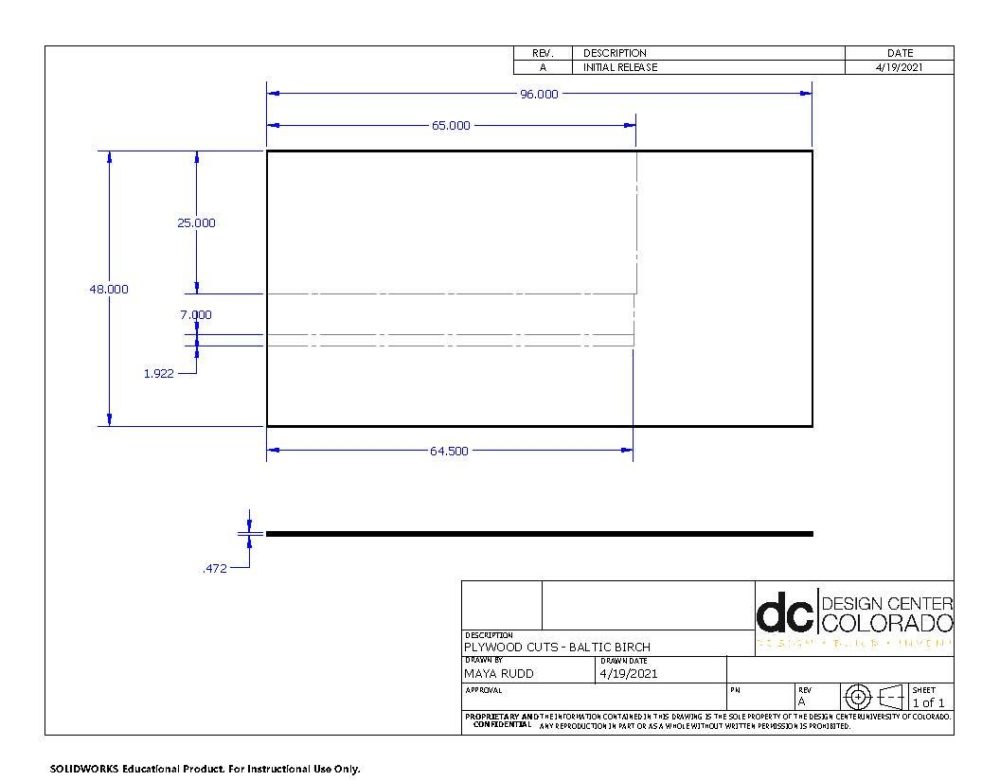
For the actual fabrication, the process can be split up into 3 main sub-processes. Firstly, the woodworking portion of the project. This process was the most time consuming, as woodworking can be tedious. However, I do believe that the fabrication was streamlined by the level of accuracy and details from my drawings. See below for an example of some of the wood working drawings, shown is the plywood cuts.
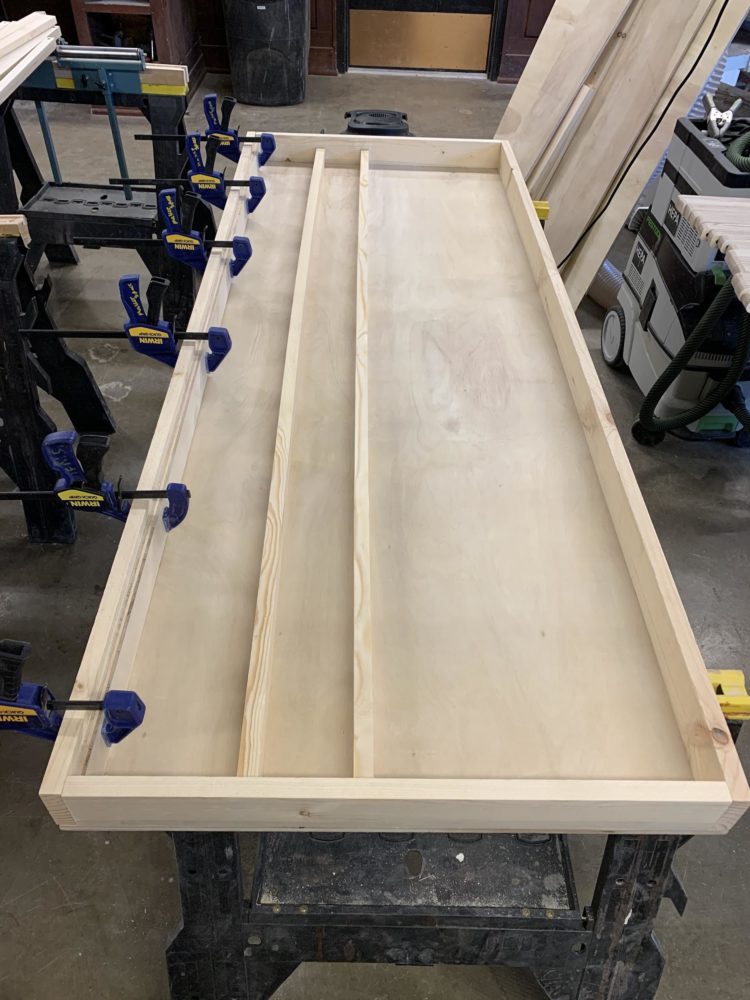
I used 1 x 3” common board for the sides of the box, 1 x 2” common board for the supports for the main plywood stripe, and plywood for the base, acrylic mountains support, and stripe. See below for the wood table “box” towards the end of fabrication in the woodshop.
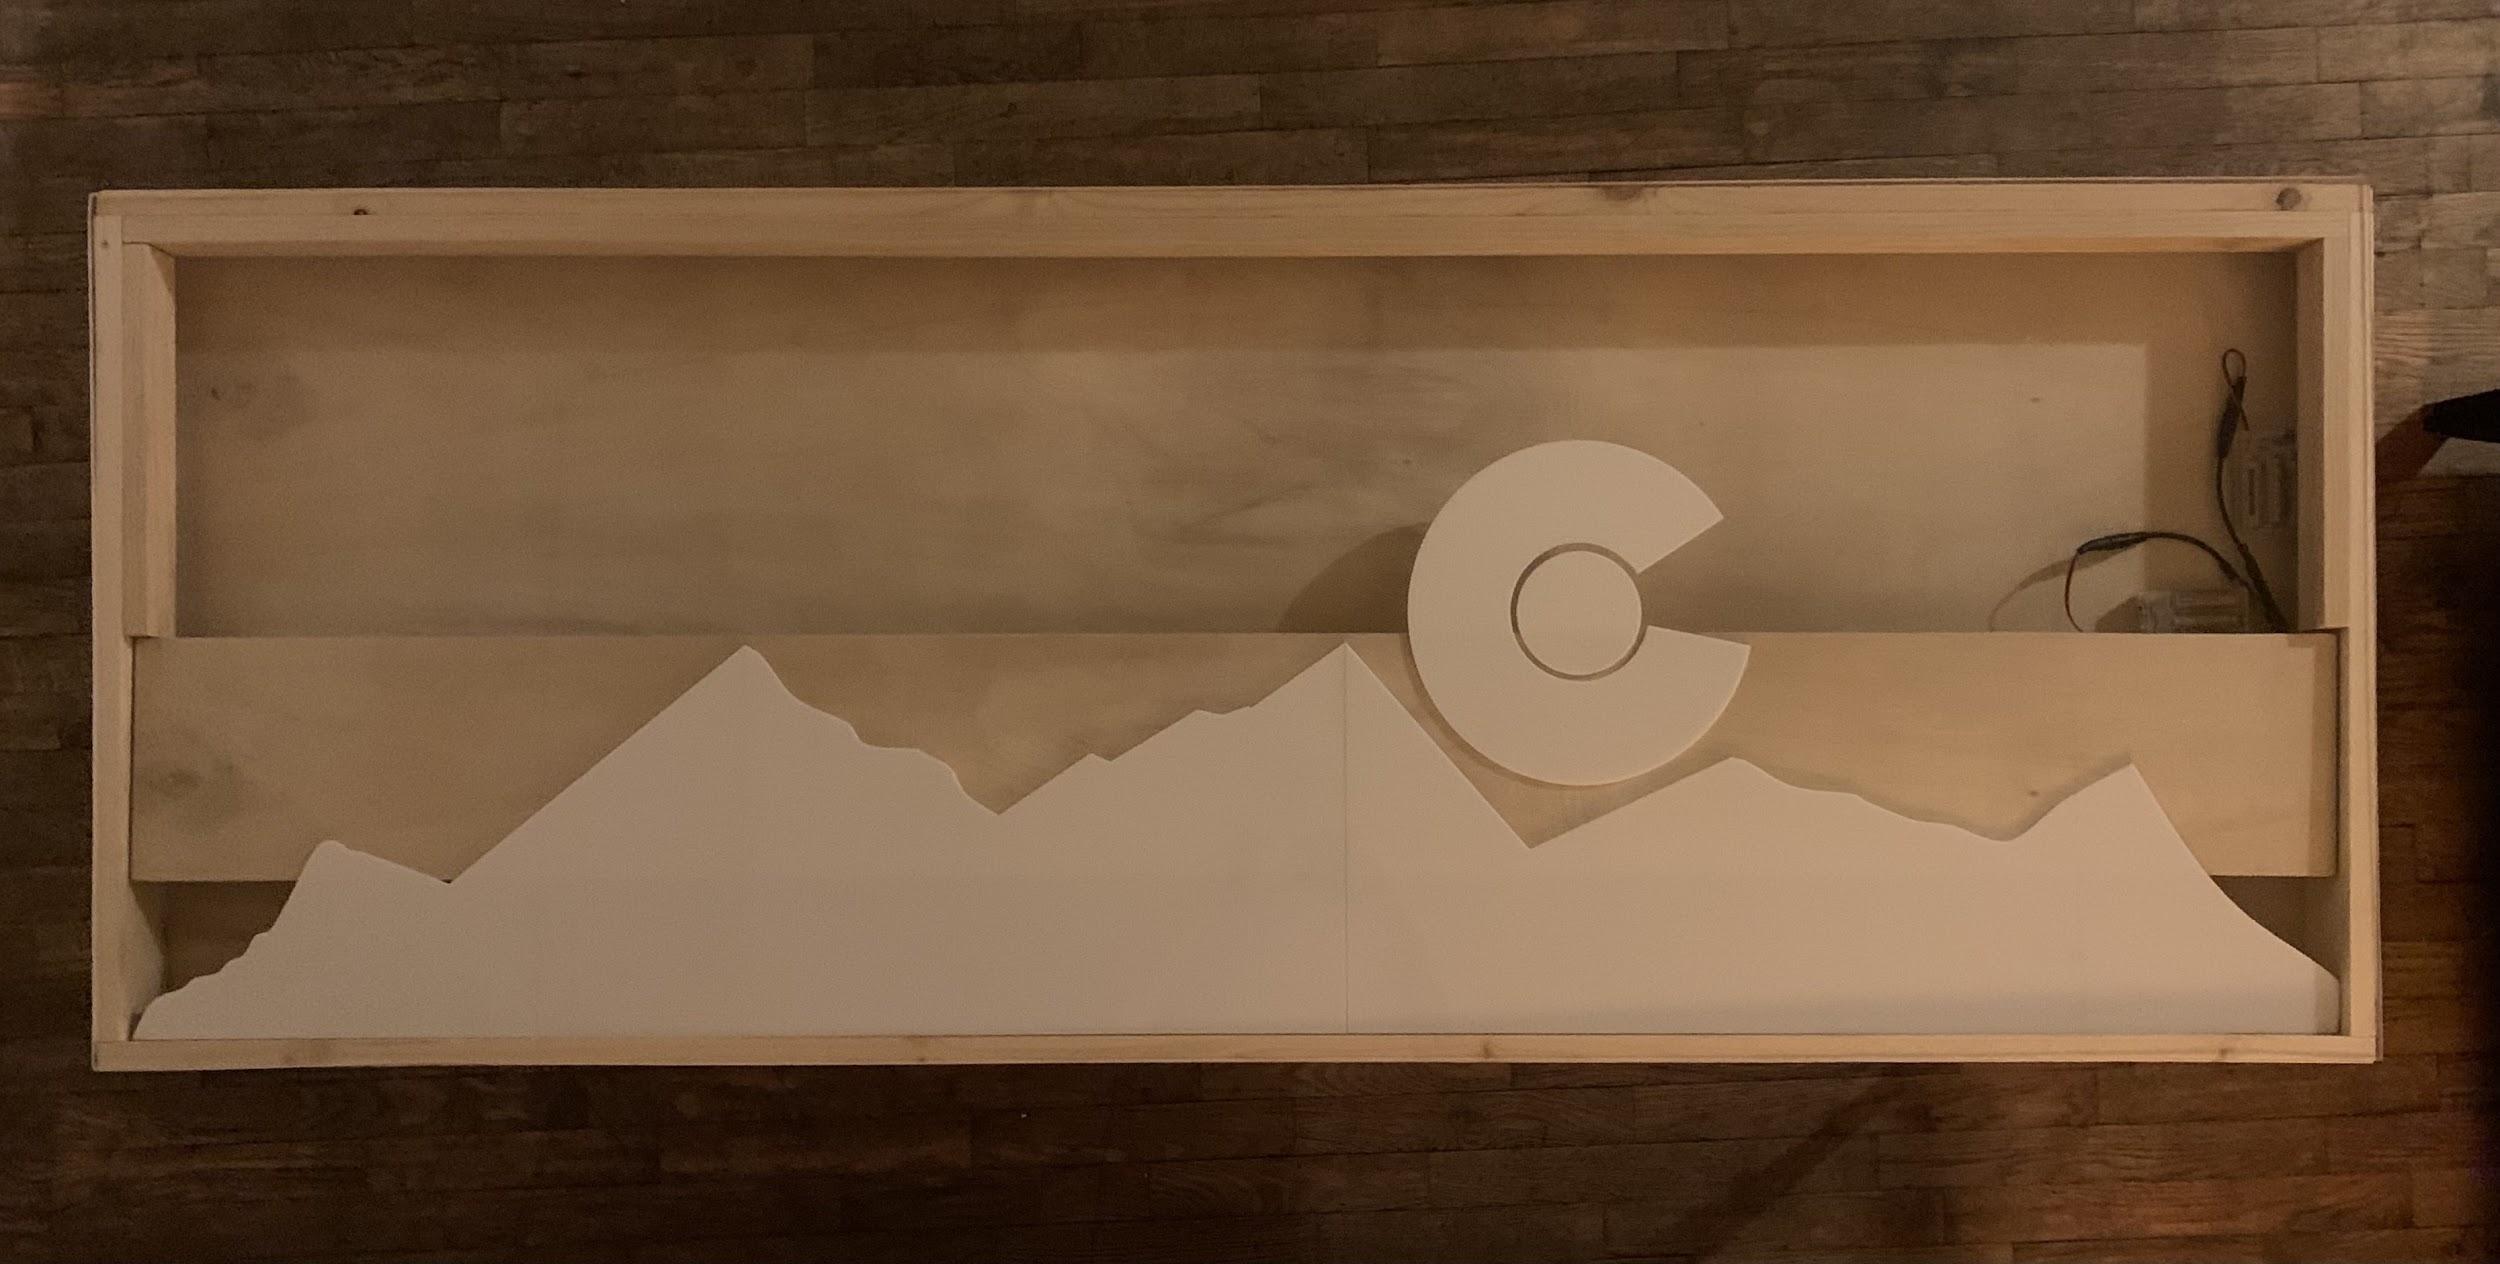
Then, the main other portion of the project fabrication process was the acrylic cutting. I was lucky to find some nice white scrap acrylic in the Idea Forge rapid lab to use for my Colorado flag design. I used the trace photo feature on Solidworks for the sketch of the mountains, by importing a mountain design from the internet that I liked. Then, for the C and the circle, I just made the sketches myself on Solidworks and converted them to .dxf files for laser cutting. Then, I took the large sheet of acrylic to the machine shop and cut it down into oversize pieces on the band saw for the laser cuts. I had to do this since the laser cutting bed is only 20” x 32”, and with the size of the acrylic sheet and the desired cuts for the table, it wouldn’t all fit. I also split up the mountains cut into three sections and used double sided tape to join them together.

The final process was bringing everything together to finish it off. This included installing the table legs, adding in the LEDs, adhering the acrylic into the box, and laying the plexiglass over the top. This part of the process was all super straightforward and easy. The table legs came with the necessary hardware/fasteners needed and went on super easily, they look really nice and feel super sturdy. The LEDs had adhesive on the back so they were super easy to stick on, however one of the strips pretty much broke as soon as I took it out of the box so that’s fairly disappointing and I’ll have to replace it at some point, but it still looks complete. I used strong double sided tape to keep the white acrylic in place, and I picked up the plexiglass cut to exact size from a glass cutting place in Boulder and just laid it over the top for now. I am considering sealing it somehow or doing some sort of magnetic closure. I am also considering adding some sort of protective seal to the wood, as I’m a bit concerned about staining the wood with spills.
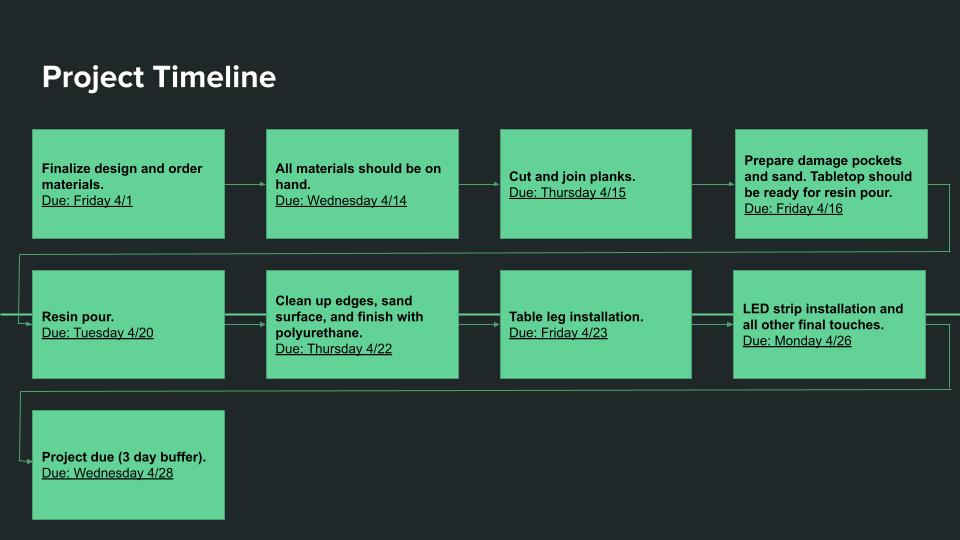
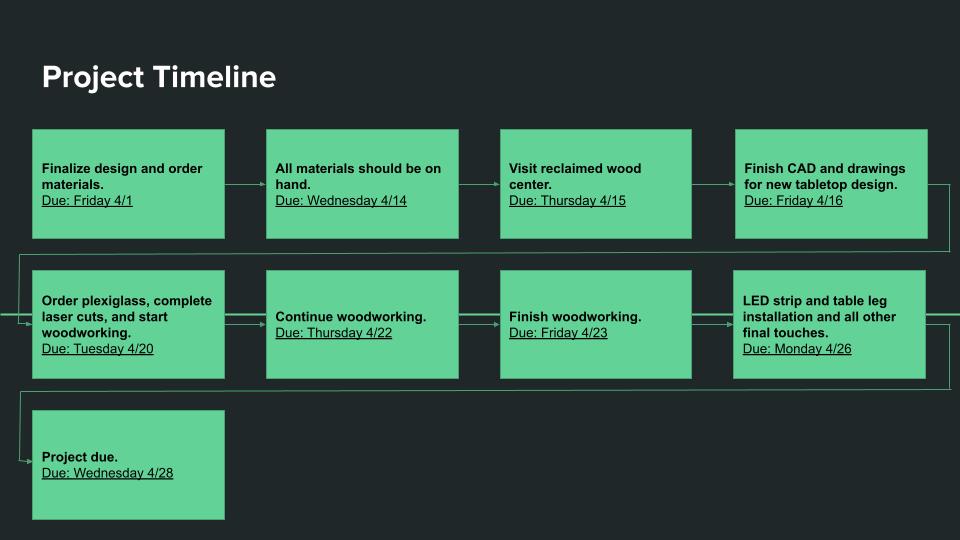
Below is also both my initial timeline, and the timeline that I actually followed. It ended up being fairly different since I changed the design so much.
Overall, I am extremely happy with how the table turned out. I really tried my best to make something that I would be proud to have in my living space, and I think I definitely accomplished that goal. I am glad that I was able to still build a table after I realized that my initial plans were too ambitious and expensive. I was definitely nervous that I would have to scrap the whole thing and come up with something else to do. Now, the table is all completed and sitting in my living room. I think it looks really well made, see below for example of high quality woodworking on the table corner. Having to move it in and out of the Idea Forge, I am also really happy with the weight and size of it; it’s a lot lighter than the old glass table that was in my living room. Since these photos were taken, I have also added a hole for the LED strip ends to go through so that the battery pack is hidden, it’s now command-stripped to the bottom of the table. The main thing that I’m considering for future is how to seal the table from spills/stains.
I feel like I learned/reinforced the idea of planning and preparation, as coming into fabricating I felt like I had a really clear idea of the steps I needed to take for fabrication since I spent so much time on CAD/drawings. I will say also though that I wish that I didn’t have to rush as much, because there were a few mistakes that I made that caused me either some extra time with redoing cuts or cosmetic blemishes on the final table. Overall I am very excited about my new table and am super happy with how it turned out!
2 Comments. Leave new
Hi Maya, this table turned out seriously well, especially with the lights on and in the dark. I also really like the natural contrast between the wood and the acrylic, but if you had infinite time/resources, would you have colored the acrylic?
Hi Maya,
This is an insanely cool final project! I think it’s great that you were able to pivot early on enough in the process to make something completely different but still have it turn out really well. I loved how many of the Idea Forge resources you were able to use to complete this as well. I also had a thought that perhaps if you left the top plexiglass cover removeable it could serve as one of those display tables where you can lift up the top and put objects in the table which are then still visible. In this way you could put photos or any other memorabilia or small objects in the table and remove them at any time. All in all this is super cool and turned out really well!