
Introduction
This post will be an in-depth analysis of what my final project was and how it was constructed. Renewable energy is quickly becoming a household term used by a significant portion of the world’s population due to its hopeful impact on the future of humanity. Out of all the renewable energy generators, I would argue that Wind Turbines are on the top of the list as one of the most incredible engineering machines created by humanity. The sheer size and power of these machines make it impossible for us to not marvel at them as we drive past a wind farm. In my project, I wanted to explore the power they are capable of harnessing by building a small-scale version.
The What
As I mentioned throughout my posts, I wanted to achieve the minimalist aesthetic of a wind turbine. This restricted a lot of materials I could use. Going for a similar style as an actual turbine was quite difficult as they use steel and fiberglass, both materials that are quite tough to use in a small-scale project such as this. The initial ideas I had included designs of both vertical axis and horizontal axis wind turbines. The difference in these obviously stems from the fact that one rotates vertically in constant to horizontally. I did consider fabricating a vertical axis wind turbine(VAWT) but after doing some research on how they are made, it quickly became clear that the scope of this project was not enough to make a VAWT because of their complex curved blades and their motor attachment methods. All of this warranted my decision to go with horizontal axis wind turbines(HAWT) which are the turbines we generally imagine. These turbines are not as complex in nature since the blades don’t have to have an overly curved shape, and mounting the motor is much more straightforward. After doing a significant amount of research into the shapes needed for the blades to work with the wind, I realized that in order to have one that was functional, I would need to fabricate the blades myself. This added a lot of constraints for the project solely based on what materials I could buy and use. The material needed to be sturdy enough for the wind to hit and deflect it, but simple enough for me to cut without too much heavy equipment. This is the main reason why I chose to use a PVC pipe as the base for the turbine blades. For the tower/base of the turbine, I initially had ideas of using a wooden structure, but quickly realized that this was going to be pretty hard to mold into the precise shape I needed. Without much forethought, I actually went to home depot to buy the wood and start the construction aspect, but as I was browsing the PVC I needed to buy for the blades, I stumbled upon some small PVC linkages that would be much simpler to integrate into a final tower structure which is why I chose to make my tower and base using this. As for my motor attachment, after figuring out the tower design, I wanted this motor attachment to have a similar aesthetic so I decided I would find a linkage that would fit into the pipe I had at the top of the structure and I would insert my motor into that linkage.
The How
Materials I used through the project:
- PVC pipe (3/4 in diameter for tower)
- PVC pipe( 6 in diameter for blades)
- permanent magnet DC motor
- Circular central hub
- Nuts/bolts to attach blades to central hub
Structure Process:
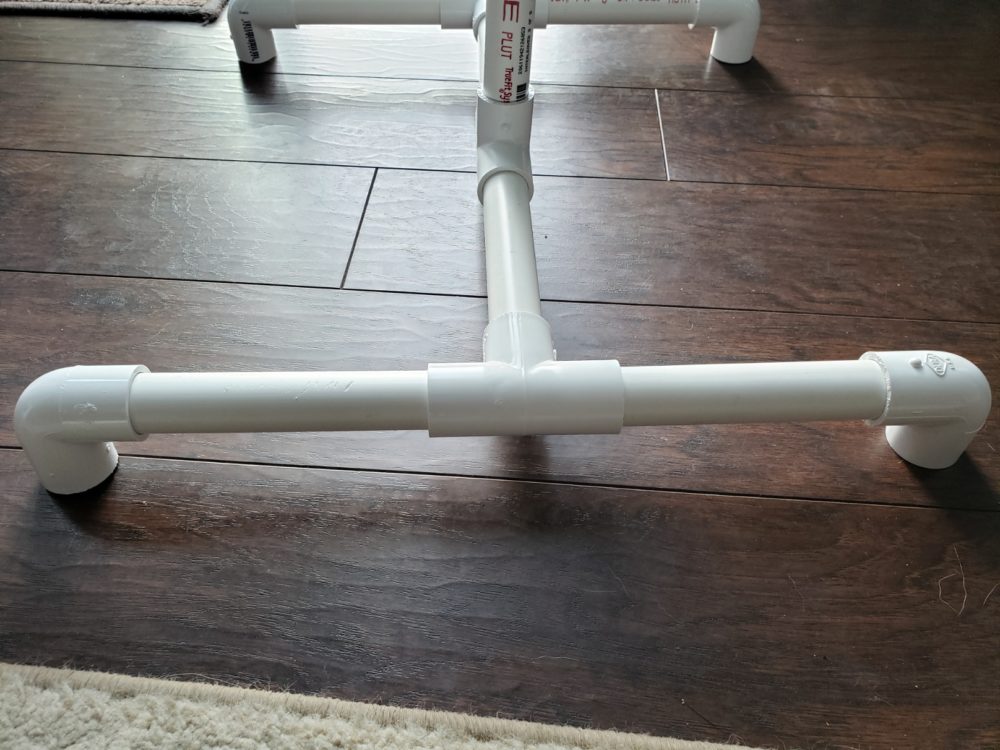
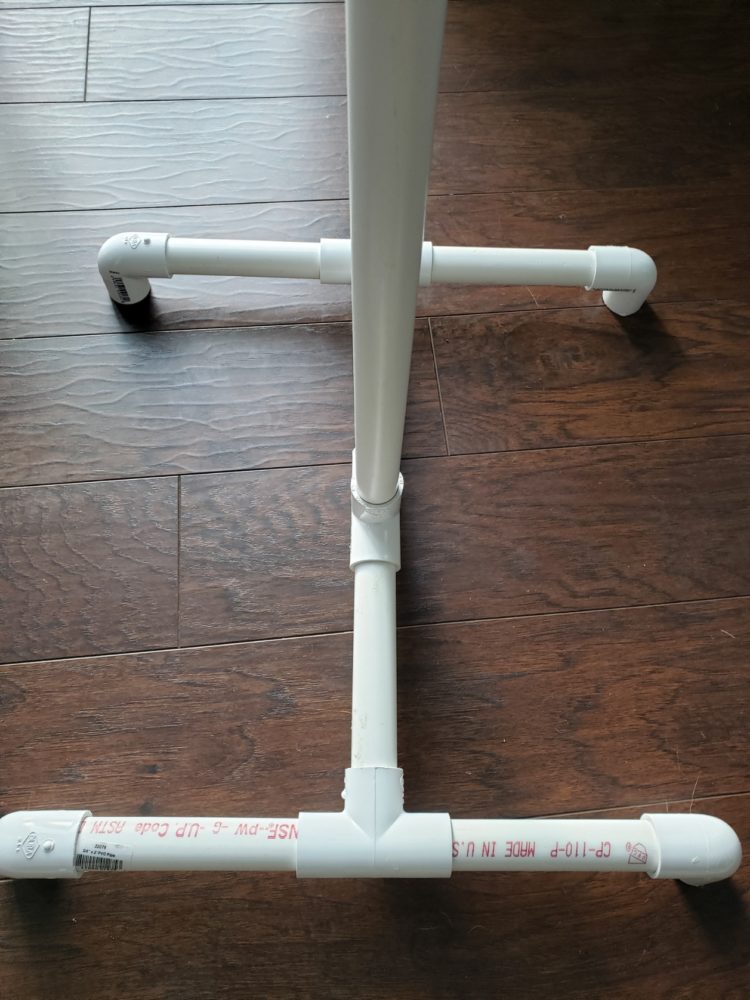
Like I stated in The What section, after switching my idea from using a wooden structure into linkages, the entire process became much more manageable. Initially, I had to figure out how many linkages of each type I need to build the whole structure. I knew I needed 4 90 degree bends for the 4 legs I was going to have for the base. I also knew that I needed 3 T linkages to link the two legs and the tower together and finally, I knew I needed 6 6in pipes to connect everything together, 1 24in pipe for the tower, and one 12 in pipe for the motor assembly. Since home depot only carried 24in pipes, I had to cut all the 24in pieces into the 6in pieces I needed. After acquiring all the materials, the next step was just linking them together which was pretty straightforward.
Blades Process:
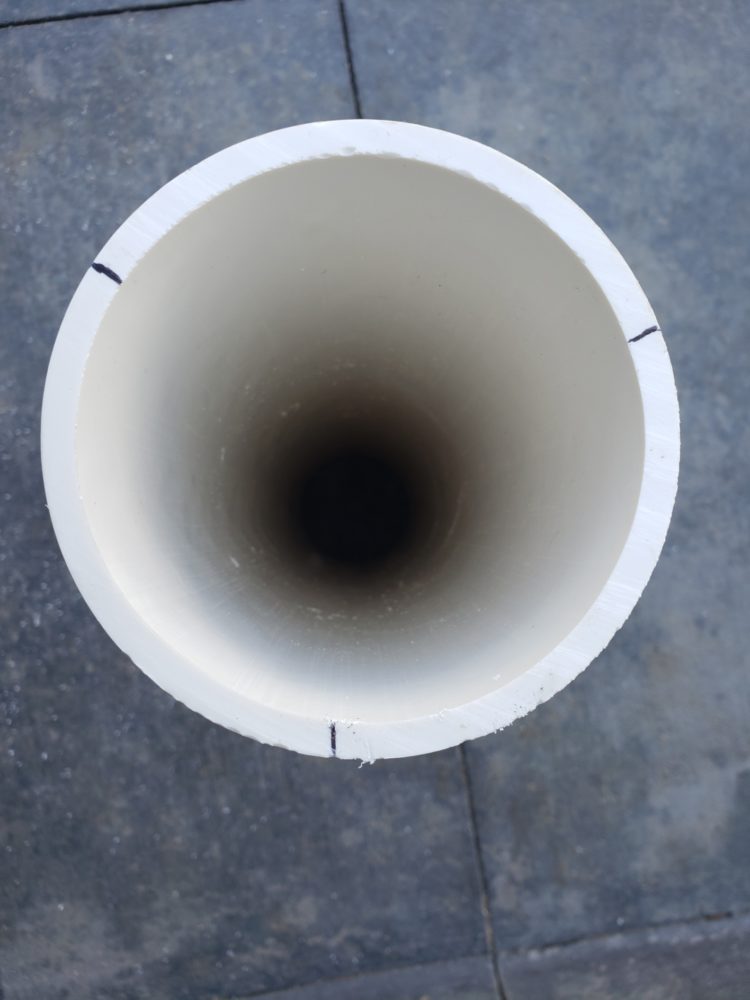
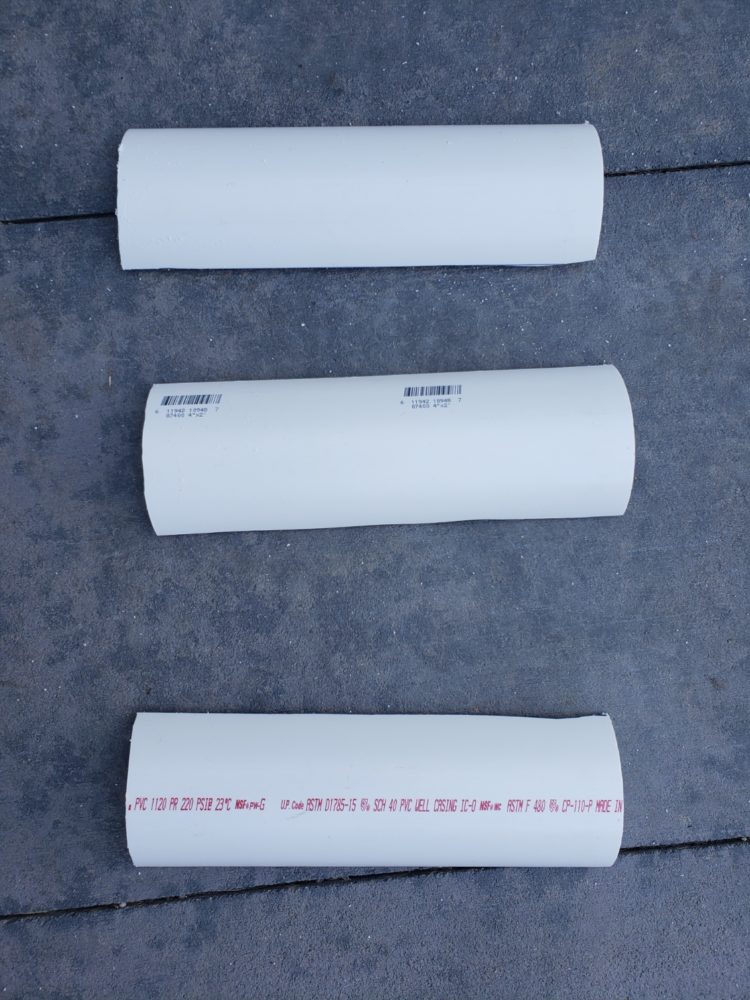

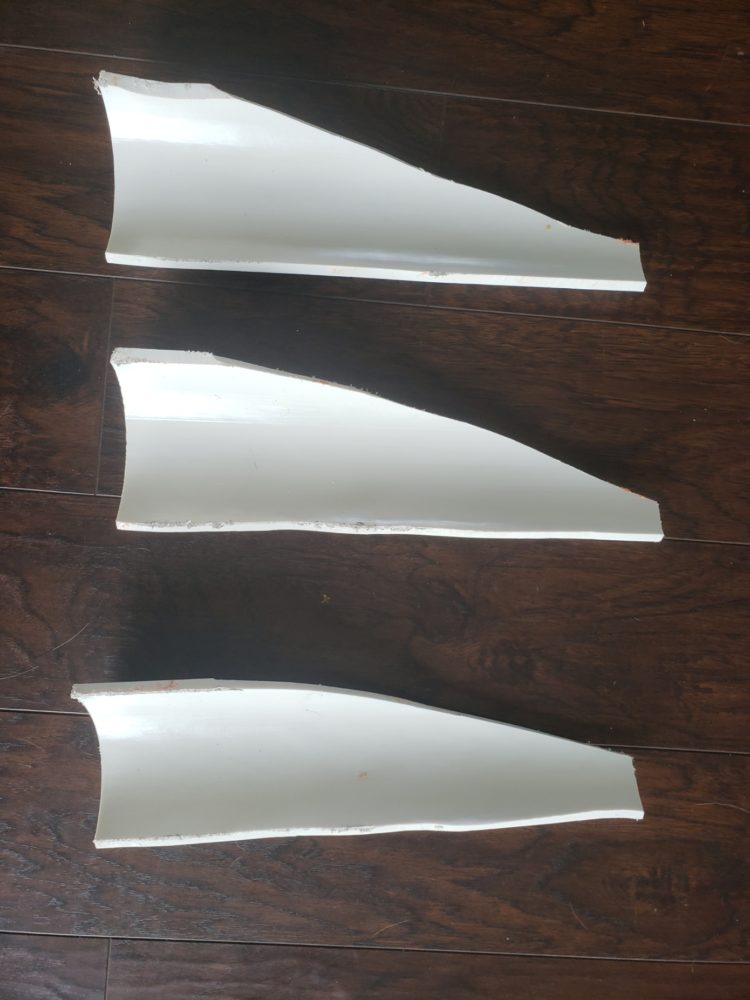
After getting the block of PVC piped I needed to make the blades, I had to cut them into three seconds for the respective blades. Next, I needed to cut them all into one blade design so that all of the blades had the same weight distributed throughout. This process was really tedious since I didn’t really have any specific tools I needed. If I had access to a table saw, cutting these would’ve been straightforward, but working with a simple hand saw made the process significantly more tedious and time-consuming.
Center hub Process:
Due to its circular design, with my limited tools, I wasn’t able to fabricate this myself. Shopping for this hub was fairly straightforward though. I roamed around home depot until I saw something that had a circular shape and was easy to drill into. After acquiring the hub, I had to drill three holes for the blades to attach to and one hole in the middle where the motor shaft would interact with the piece.
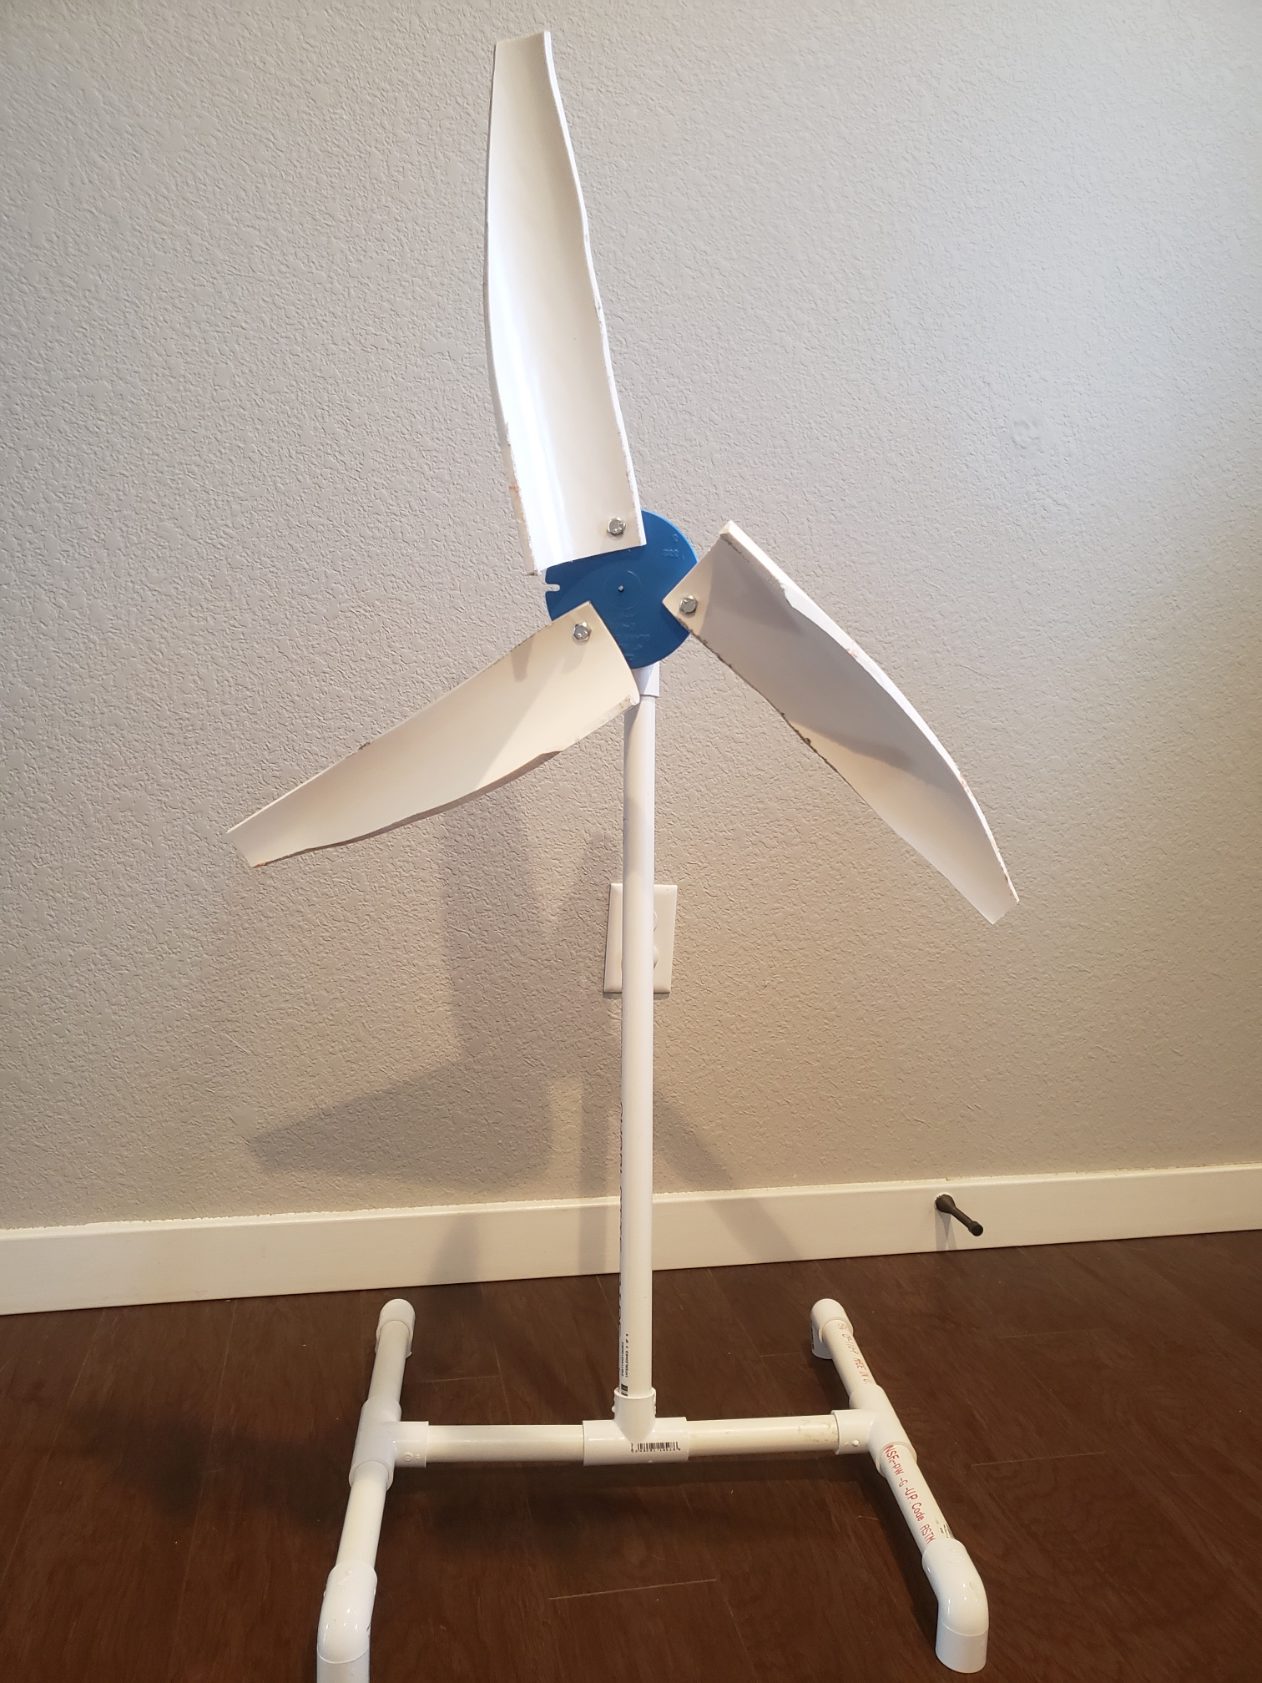
Final Product:
Conclusion
I believe with the given scope and time of the project, my final product turned out alright. I do believe I achieved my intended aesthetic, but functionality-wise, due to the lack of much structural support of the linked PVC pipes, the tower does wobble under significant wind. After doing some initial tests, the motor does peak out at 8 volts which could be improved by switching to a more powerful motor. Although the final product did not turn out exactly as I expected, It did help me learn a lot about how challenging it is to construct a wind turbine. Especially one that is over 800 feet in height and each blade over 100 feet in length.
Future Advancements
These are some future advancements I could make to improve my product even more:
- Include a better motor for a better peak voltage
- Sand down my blades to get a better weight distribution between the blades
- Better base structure, probably made of something more sturdy, to reduce the wobbling that occurs with high wind
- make either the tower taller or just attach the turbine to something on top of a tall structure like a house for better electricity generation
- Add an inverter so I can actually integrate lights and other electrical components to the power harnessed
- Add LEDs to the structure so I can have it light up during the nighttime
Presentation Video: https://youtu.be/94kmyZCKIt4
Sources:
1 Comment. Leave new
Hey Sohan! This is a sweet project and has inspired me! I recently got a 3D printer and am wondering how it would work to 3D print the parts. I was going to ask how many volts you could generate but you answered it! To help with the wobble maybe fill the base with rocks or cement or sand, just a thought. Good job!