
For my final design project, I decided to make a puzzle box in the shape of a model boat. I work at an escape room company, so puzzles are naturally a big part of my life. However, all of the puzzles I have worked with so far have been fairly large-scale (room vs small object), so I wasn’t quite sure of how to transfer what I have learned at work to the model ship design.
Originally, I had wanted to go for a maritime aesthetic, using lots of imagery of ships and maritime-related objects. This went well with the plan of buying a model ship from online to modify and put puzzles and electronics into. However, I wasn’t satisfied with this and instead decided to 3D print a ship on the small printer I have at home. This led to a lot more difficulties when making the boat, especially since the decision happened pretty last-minute, but I’ll talk more about that in my second post.
I also went away from deciding to make a sailing ship and instead chose to go with idea I had in the below sketch when we were making posts on alternative aesthetics.
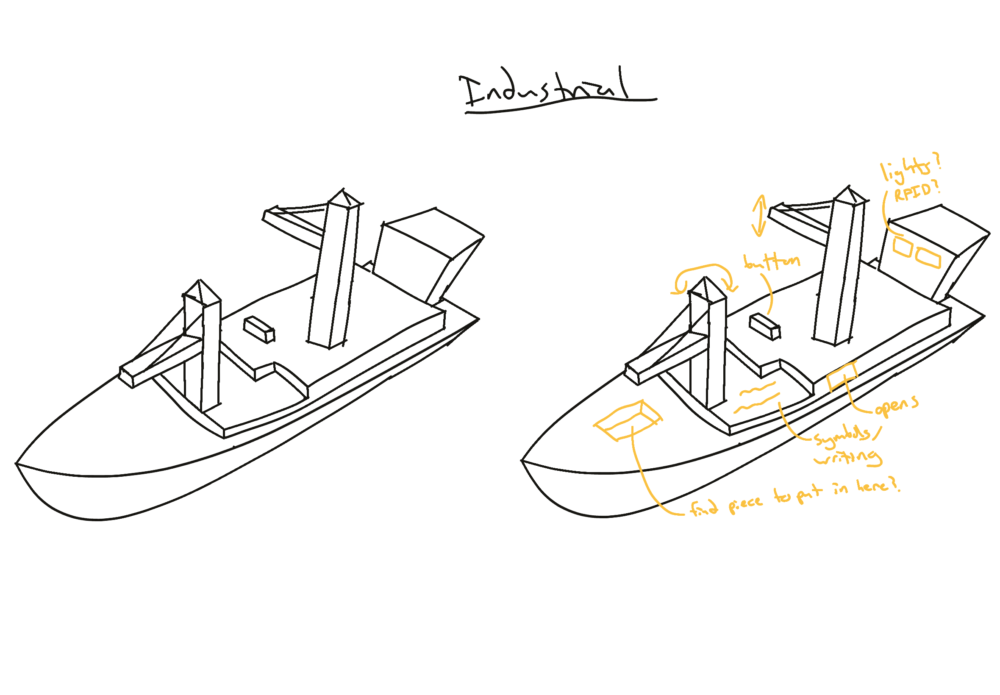
My final design is a cargo ship that is 3D printed and painted to give it an industrial aesthetic. I ended up having to throw away most of the ideas in the above sketch for space reasons, but I was still able to come up with a few puzzle ideas.
First of all, here are pictures of the CAD for the final piece:
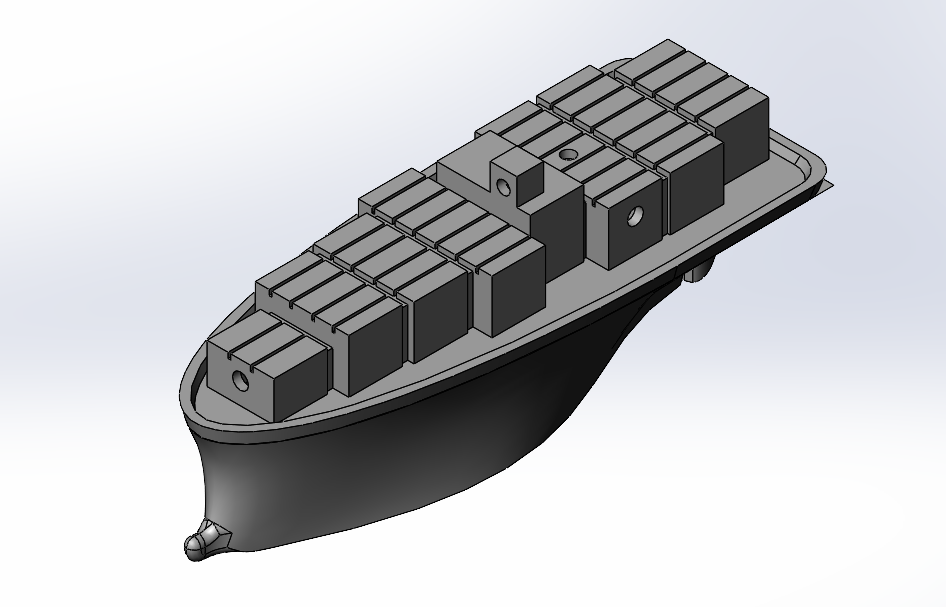
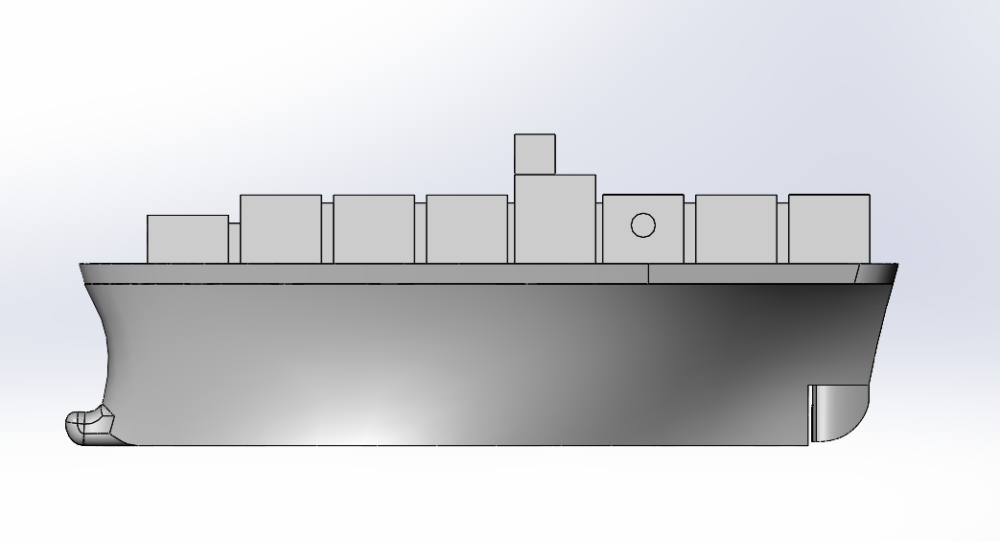
It’s difficult to show an industrial aesthetic in the CAD since I didn’t want to spend an unreasonable amount of time adding color to something I would have to paint all over again, but to me the shape of cargo ships as well as the shipping containers on top represent it fairly well. There are several holes in the design that electronics for puzzles will fit into, all being in the top piece since the bottom is mainly to house the Arduino board and wires. The shipping containers are also fairly simplistic in design, since I am working with the limitations of my 3D printer.
The puzzle flow will go like this:
- Players will remove the rudder, which is magnetically attached to the hull, and hold the magnet end up to a location on the ship. This will activate a Hall Effect sensor and turn on a weak laser that will shine out of the front hole.
- Players will then need to use a provided mirror to redirect the laser back into the hole in the helm. This will turn on a red LED that shines out of the top of some of the shipping containers.
- Finally, players will rotate a knob and adjust the color of the LED so it matches the color of the shipping containers around it. Upon pressing in the knob like a button, the light turns green and the puzzles are all solved.
The puzzles are pretty simple, and I wasn’t able to integrate any opening compartments on the boat without spending a lot more money than I wanted to, but I am pretty happy with how things turned out. Below is a preview of some of the timelapses I took when printing the boat. This one, unlike some of the others, didn’t fail or run out of material while printing.
1 Comment. Leave new
Your description of the puzzle sounds very interesting and I’m excited to see how you paint and add detail to it to complete the industrial aesthetic! I’ve never seen a puzzle powered by an Arduino or electronics like this before, cool idea with the laser and mirror. Do you think you’ll print a stand for it? Perhaps a place for the mirror on the stand?