
Fabrication Process
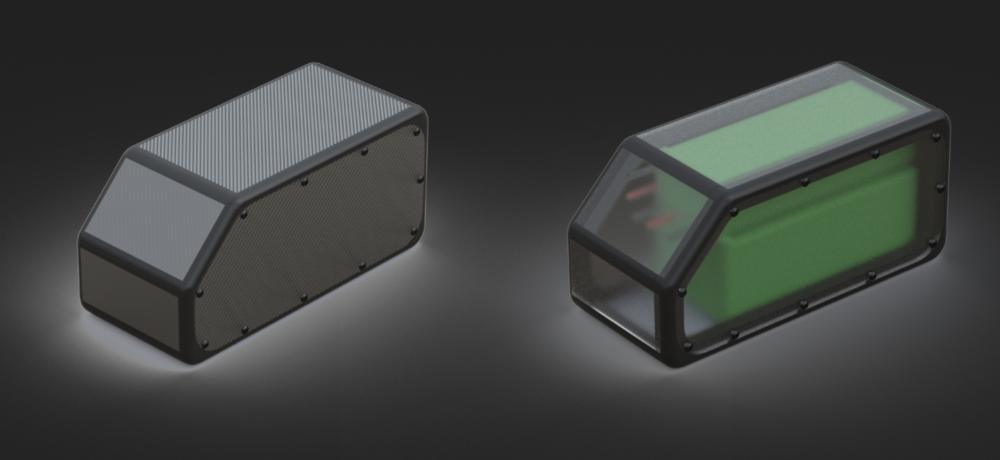
To begin fabricating this battery, I started with a CAD model. This was designed around the dimensions of three, 4 cell lithium polymer batteries and the battery management system (BMS). It was also designed with the size constrain of fitting on my existing ebike. This included where and how it was going to be mounted as well as preventing my legs from rubbing the battery as I was pedaling. Below are some views of the model of the enclosure I came up with.
Once I had my 3D model, I began fabricating the different components. This started with 3D printing the frame or trim of the enclosure out of black PLA. This print took several tries and ultimately took 37 hours for the final print. While those parts were printing, I started laser cutting the acrylic panels the actually encloses the batteries. I had originally panned to waterjet these out of 1/8″ aluminum but due too high demand, that machine was not available.
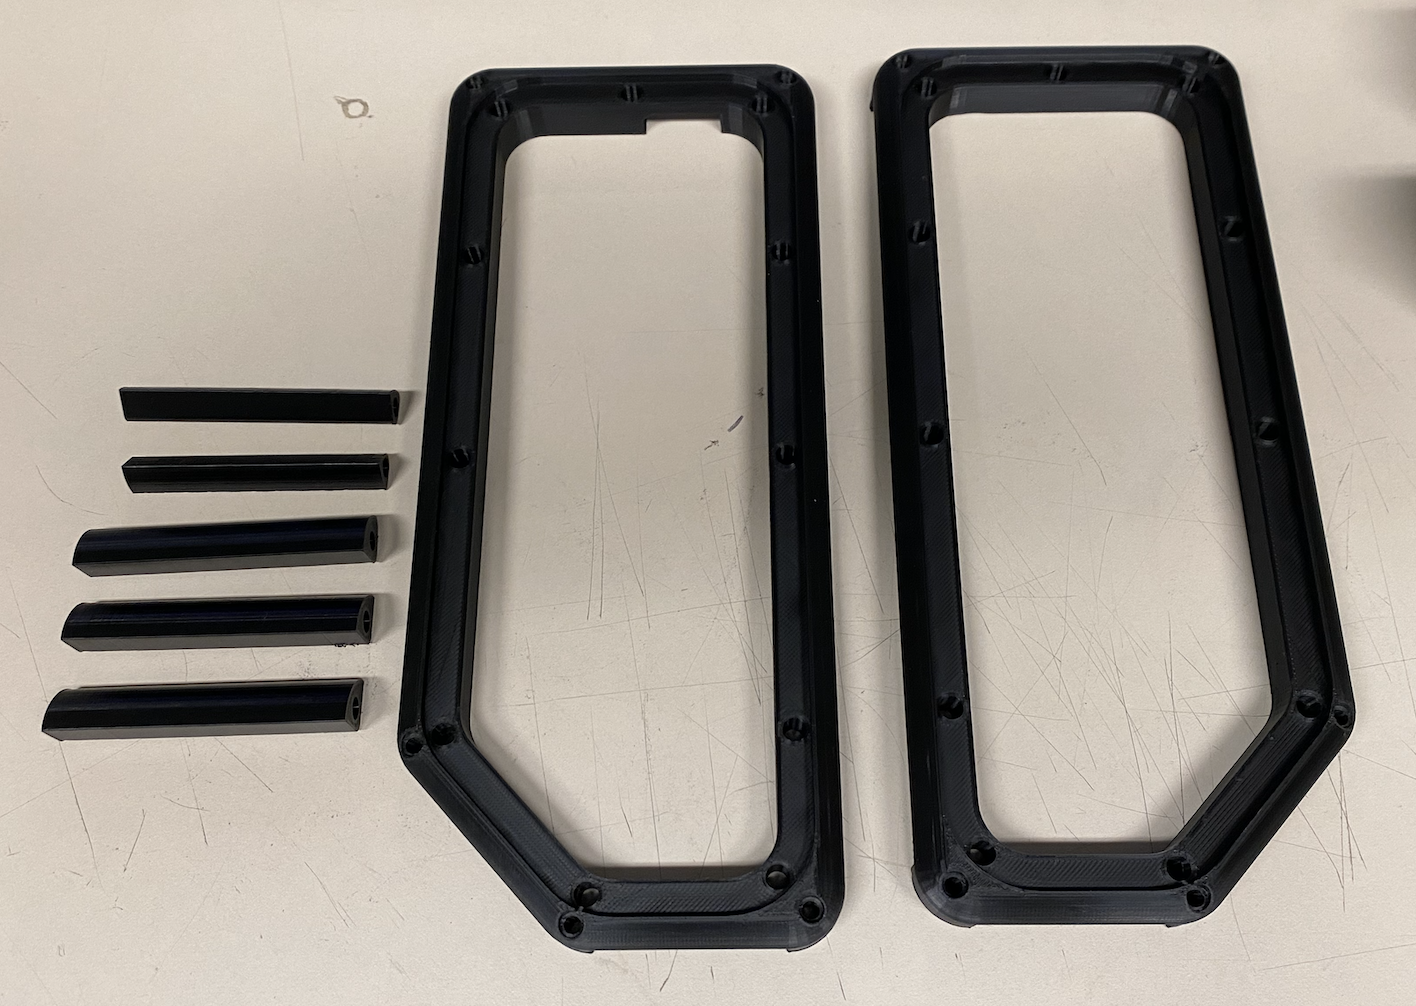
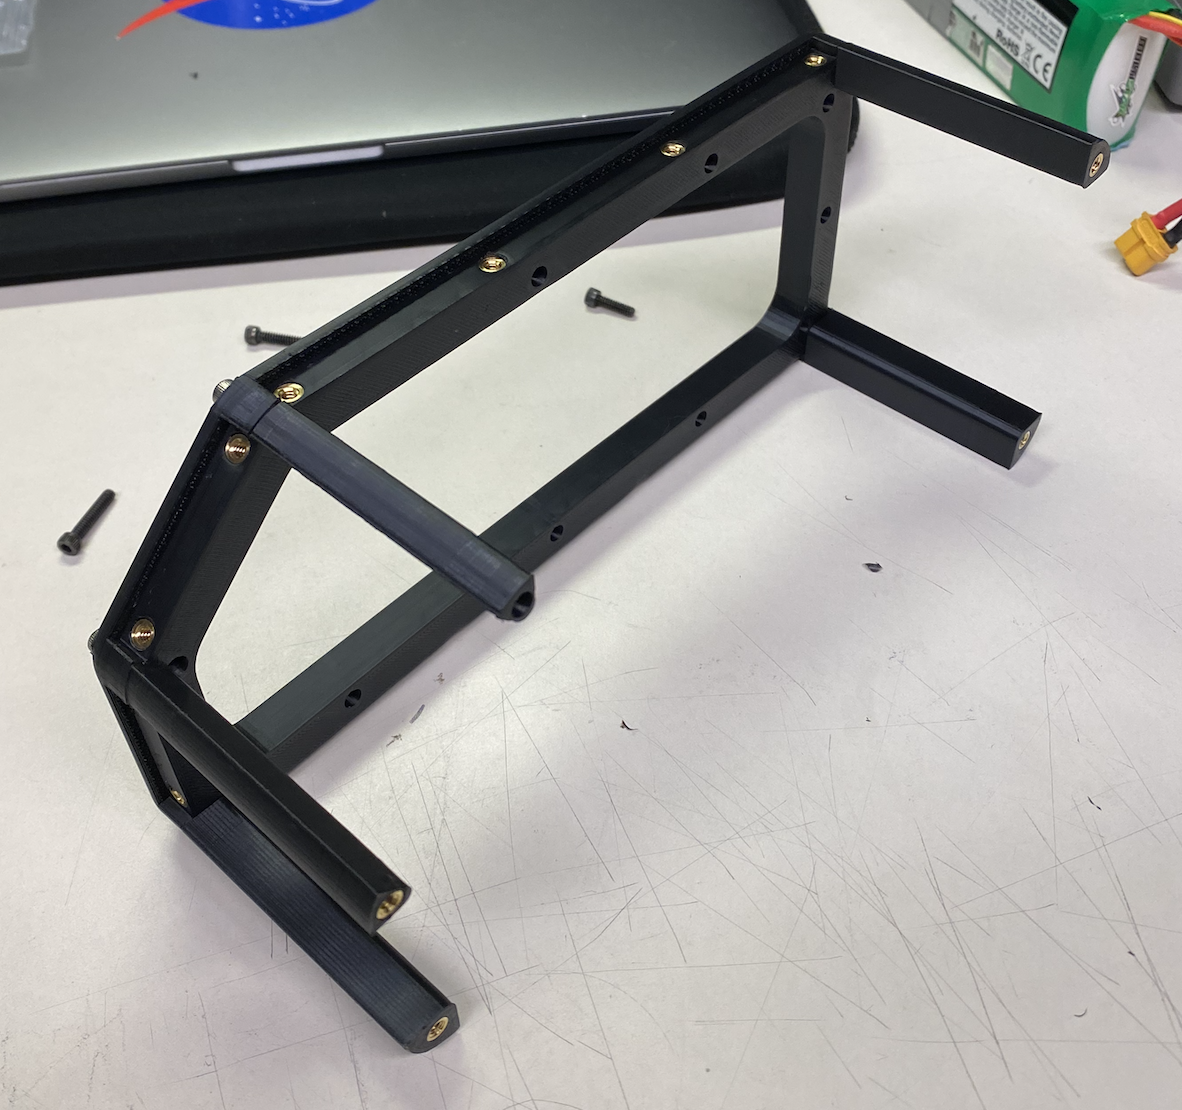
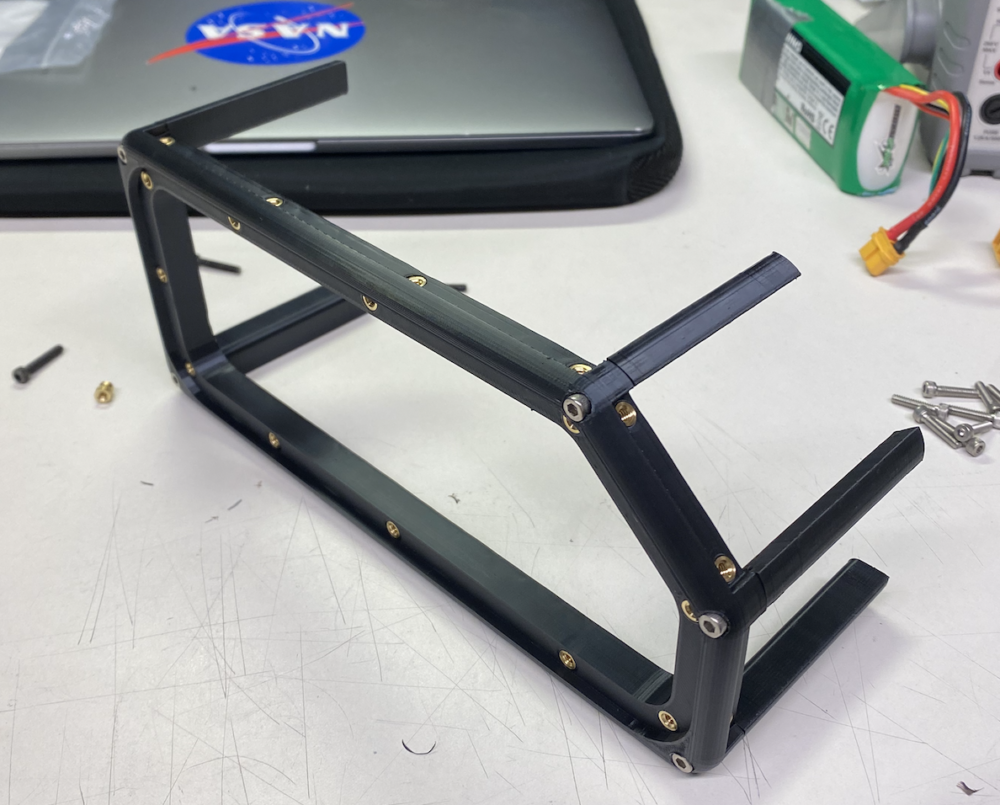
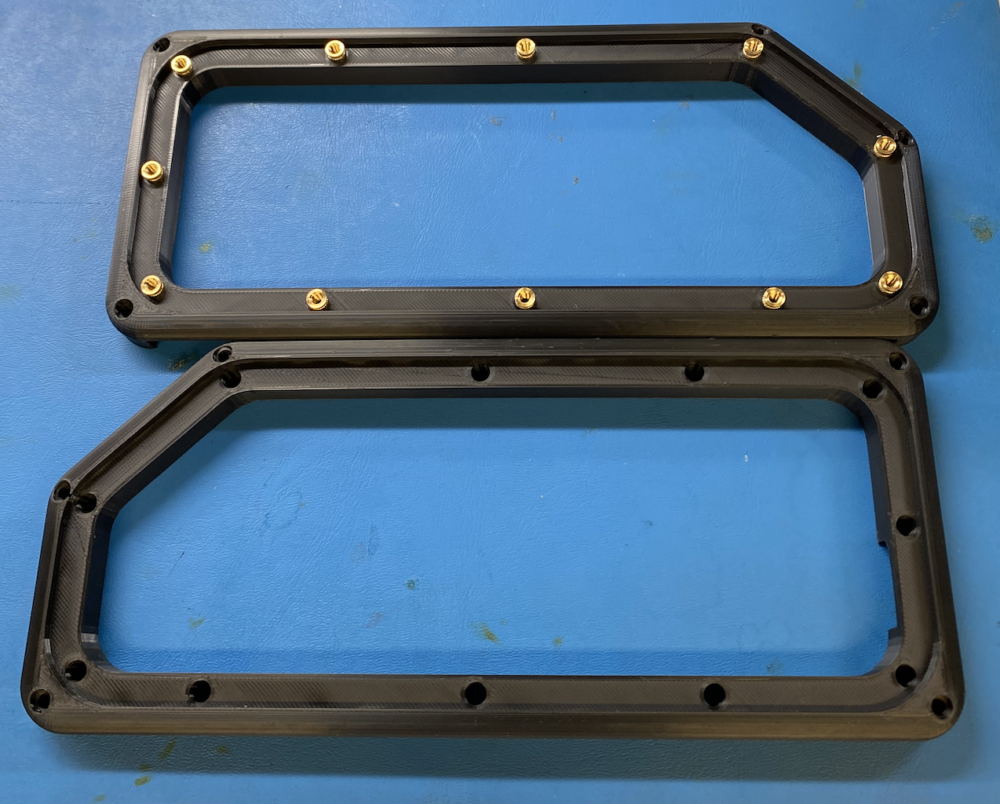
Once all these parts were done, I began installing the heatset threaded inserts. This was immensely satisfying and turned out way better than I expected. There is a video below showing what this process looks like. Once all 48 of these were installed, I started working on the electronics.
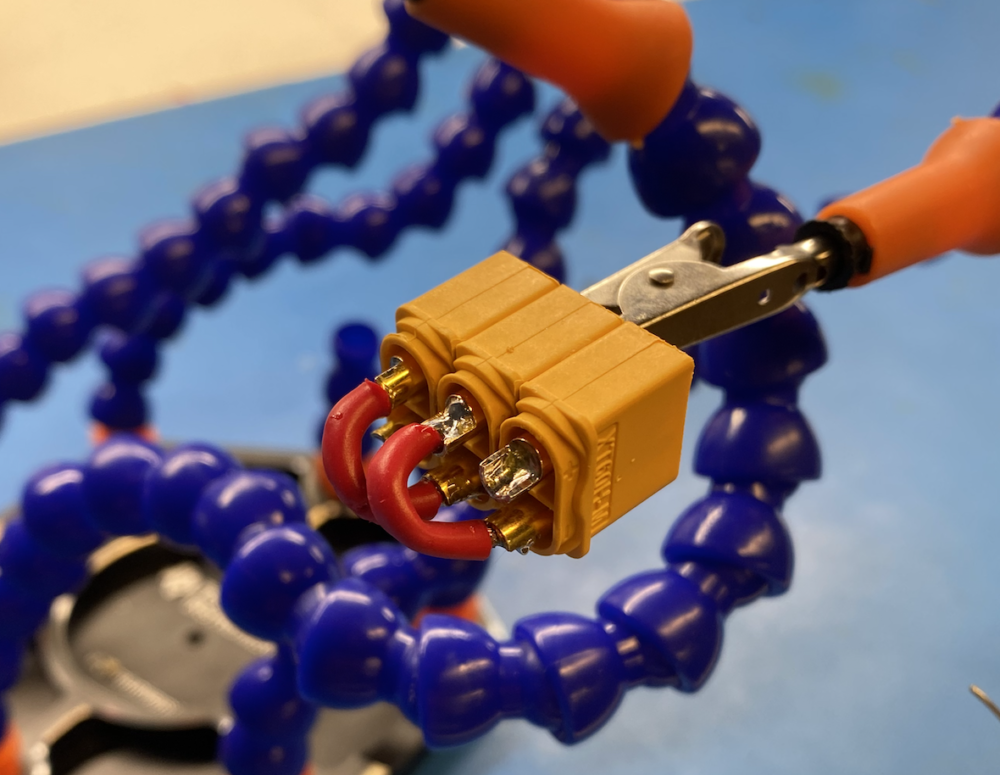
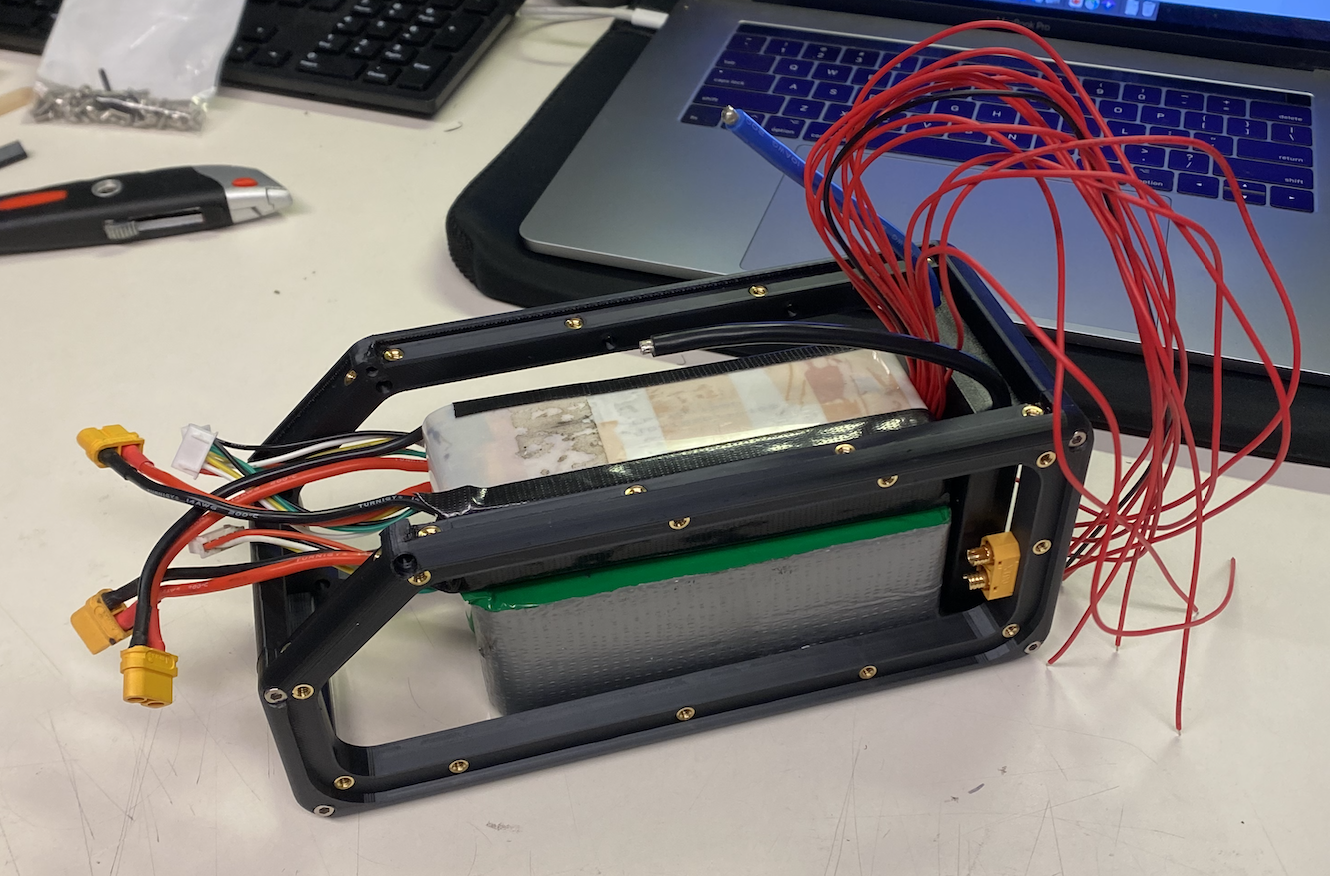
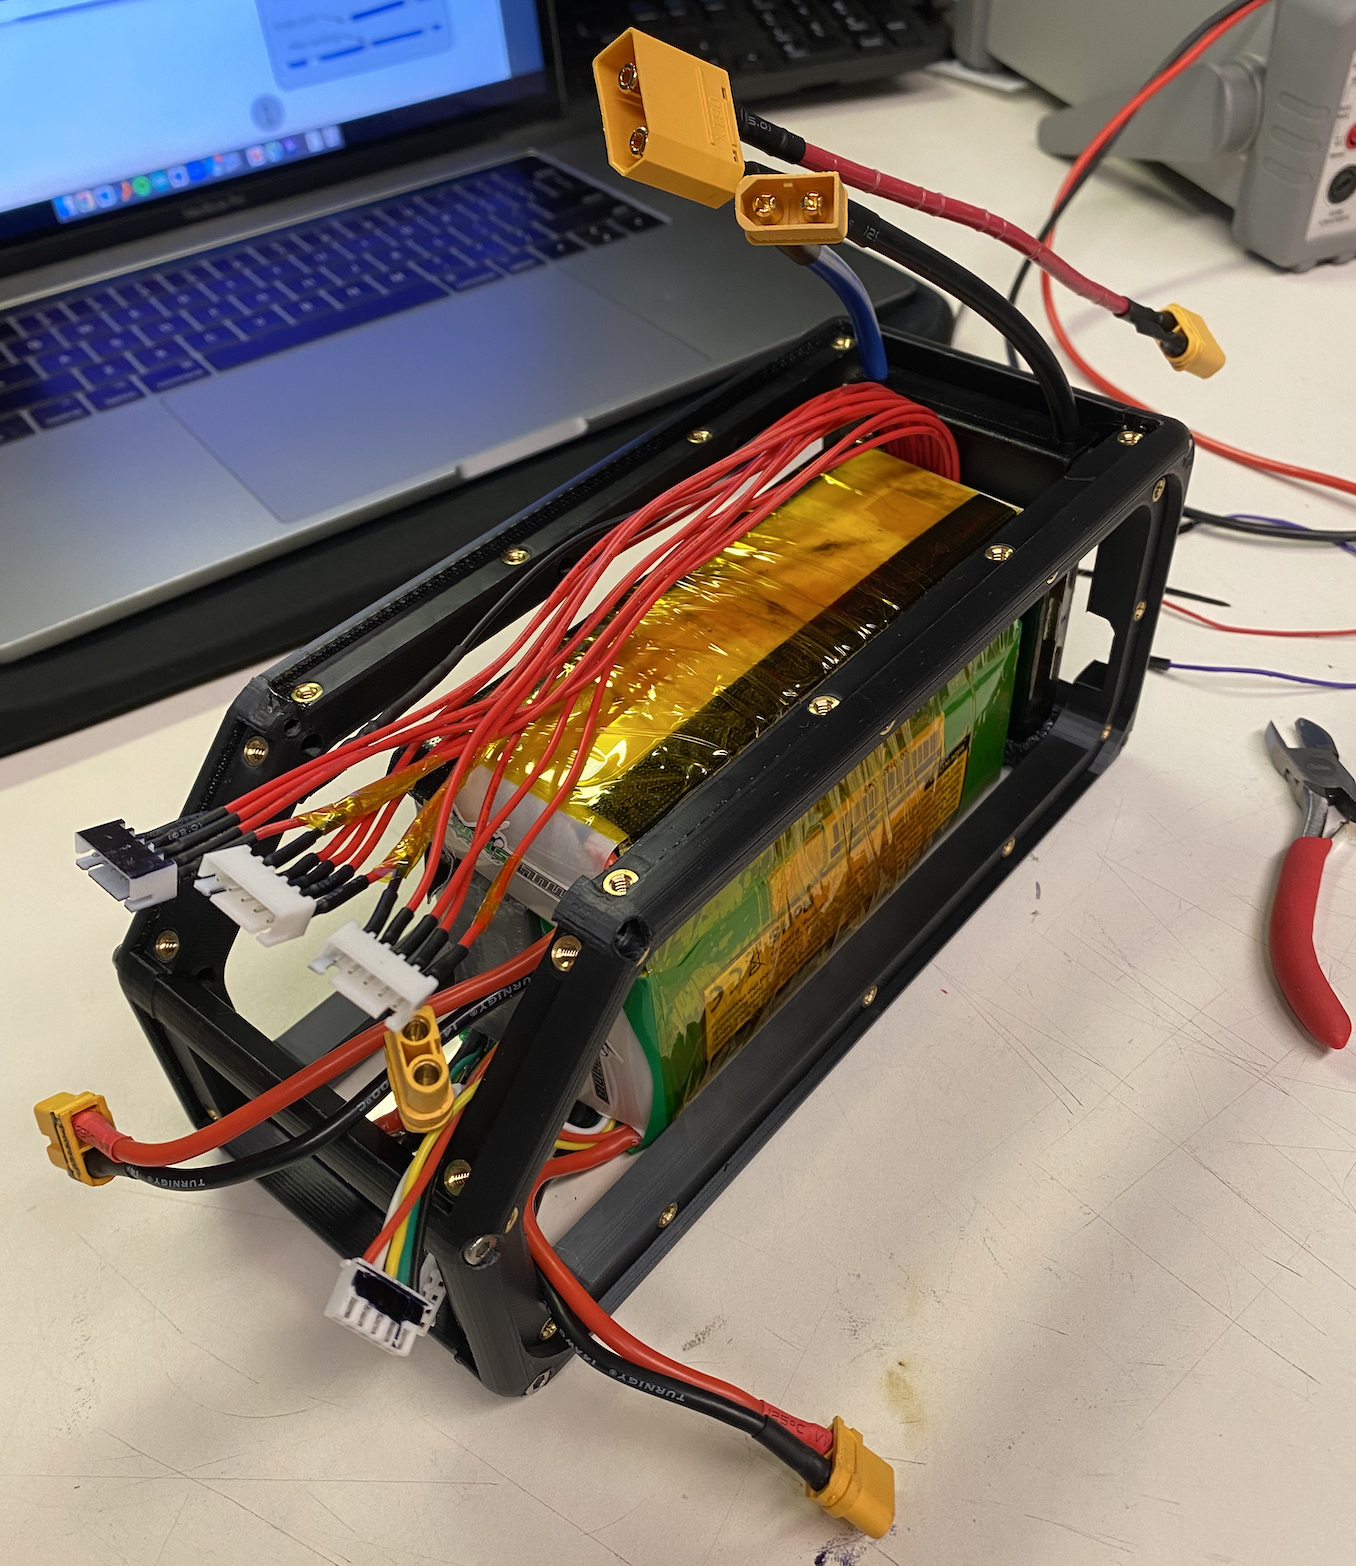
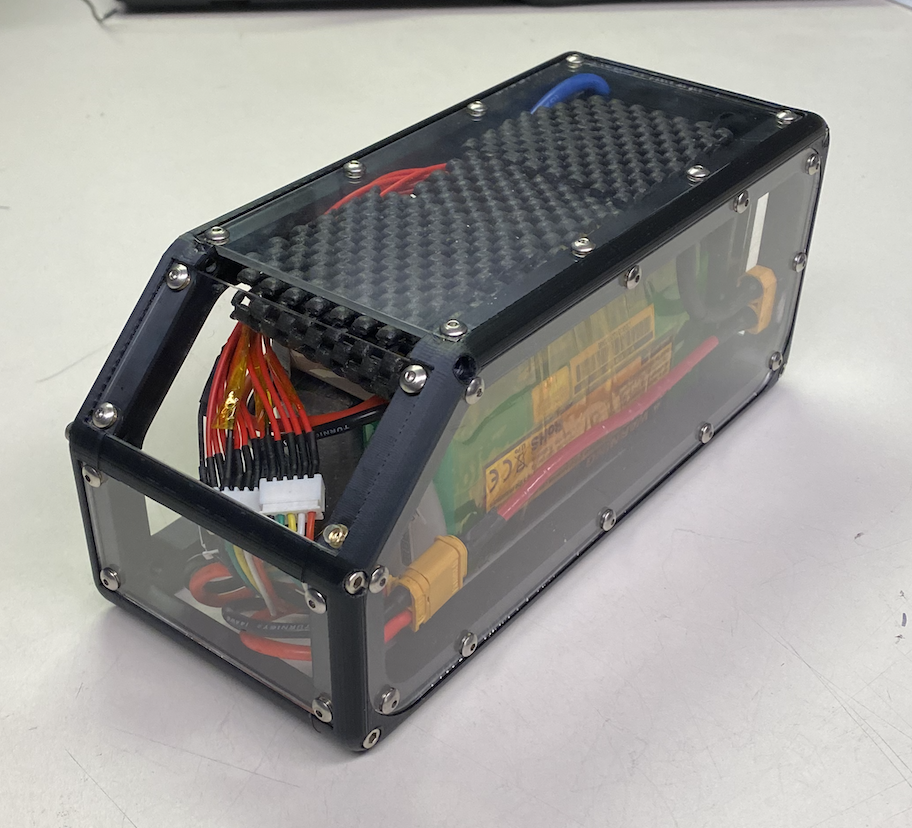
The electronics were by far the most difficult part of this project. This included wiring each battery cell to the BMS and connectorizing the input and output leads. Photos of this process can be seen below.
Once I had all the electronics wired up and installed, I began installing the acrylic panels. I also added some padding to the batteries for added shock resistance when riding. After the panels were installed, the project was complete! Below is the finished product.
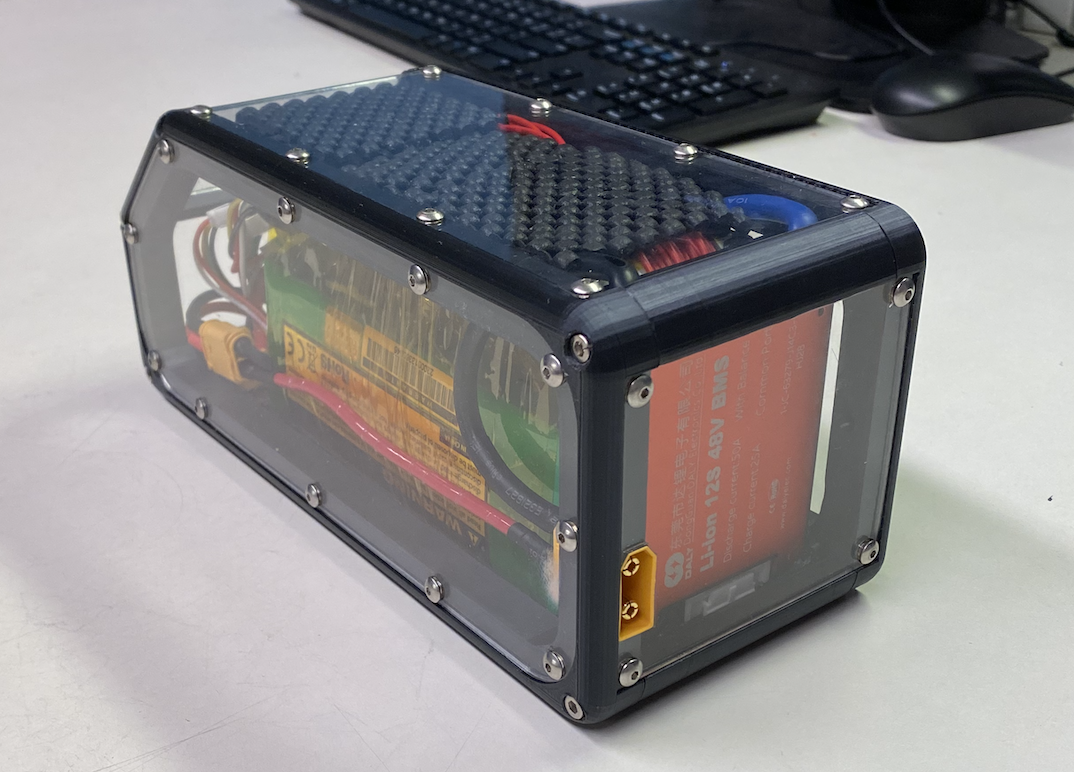
Overall, I am really happy how this turned out. It will be very useful for getting around on campus! In the future I would like to either machine the frame out of aluminum or delrin. If that doesn’t happen I would at least like to re-print this out of a more sturdy material like ABS or PETG.
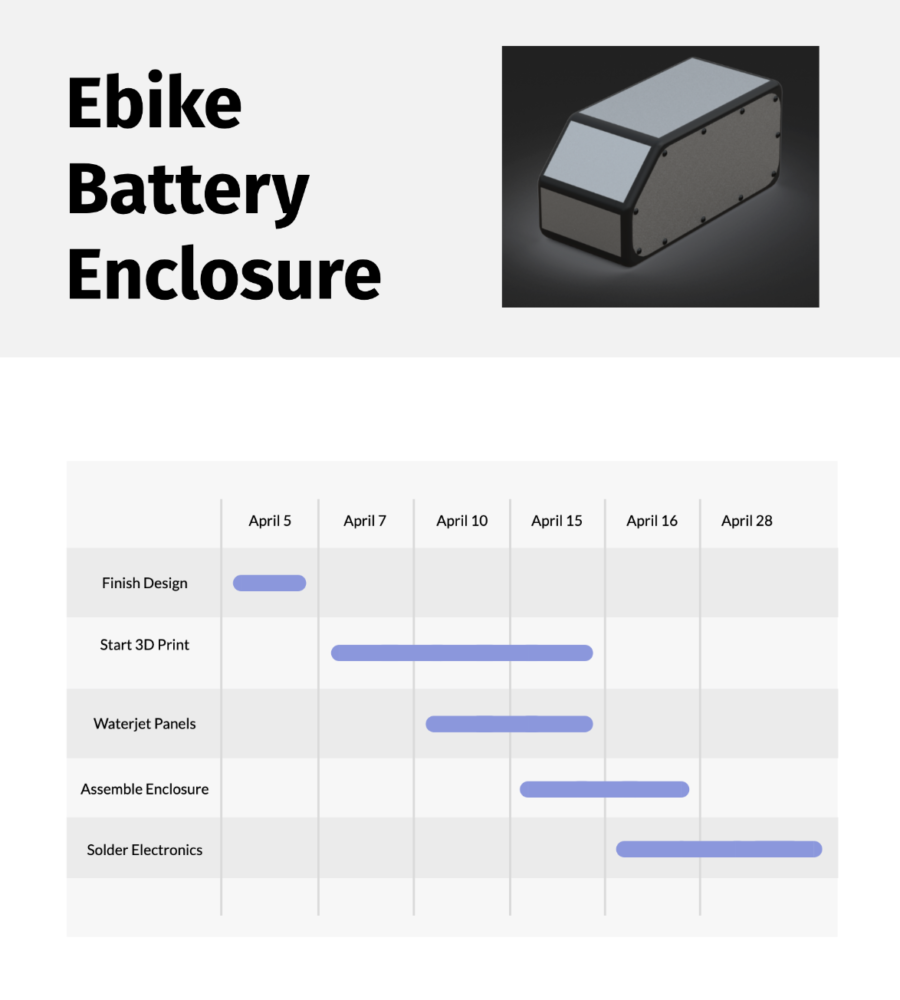
Timeline
1 Comment. Leave new
Good looking frame! A clear product like this relies on the organization of the visual complexity of the internals. Do you plan to neaten up the interior? (cable combs, evening out the top padding, hiding battery tape)