
When I first heard about the final project for this course I did not immediately have an idea for what I would like to make. I began thinking about how to make a dynamic work and what that would look like. Immediately I began think about how to create motion mechanically, I think this is because in school most of my previous projects have involved a lot of CAD and engineering. Most projects involve designing solid geometry that have a lot of precise holes and fasteners. I feel that woodworking is a very easy first step for engineers to step into a hobby as it shares a lot of similar qualities, which is where I began to brainstorm ideas about. I was originally contemplating on making a coffee table of some sort that had moving components. However I reflected on my previous project and realized how much fun i had by learning a new skill that I had always wanted to try in sewing. I began thinking about how I have always wanted to make a website and realizing that I could add movement into the images I wanted to display. I started by following a youtube tutorial for how to code a sliding track of images with an animation. I realized that i would not be as proud of a website as I would be with a physical object, however I did like the idea of expressing motion in a digital form. I then began to think of was I could implement digital motion, which is when I remembered that I have always wanted to learn how to use blender. I began to do some research on what kind of animations are possible in blender and the tutorials on youtube made it seem easy compared to coding a website. I watched videos on how to make oddly satisfying animations that would continuously loop over and over, which was an idea I really liked. This was the project could be dynamic forever in a way, however I did not want to submit just a couple of animations as my final project.
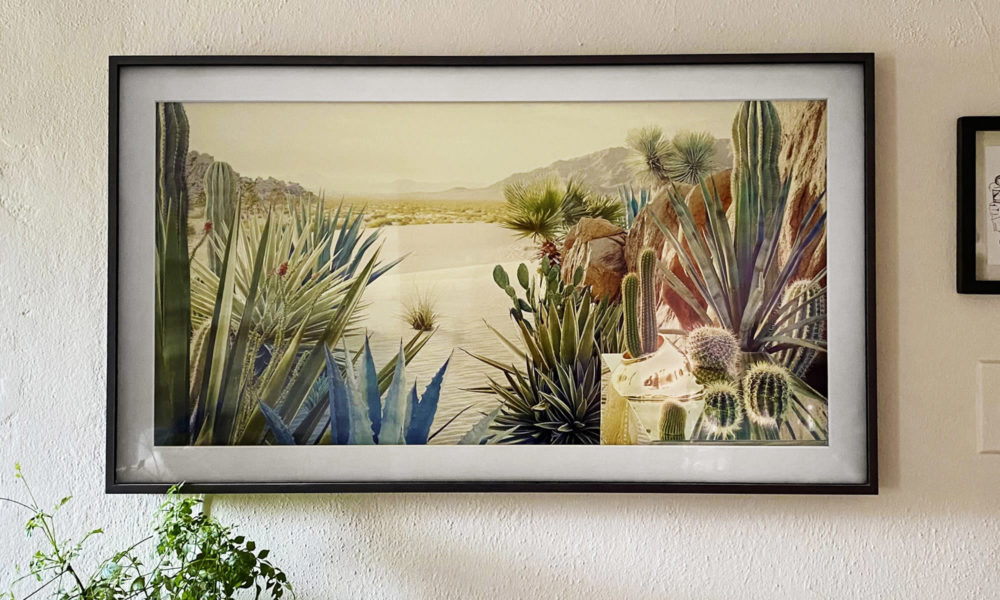
This is when I saw it. I watched a video explaining how the Samgsung frame TV worked and I thought it was the coolest product ever. I loved the idea of being able to change the art you can display in a frame, as I have a lot of paintings and prints that I have collected from going thrifting. At this point the gears were starting to turn as I realized I could display my digital animations on a product similar to the frame TV.
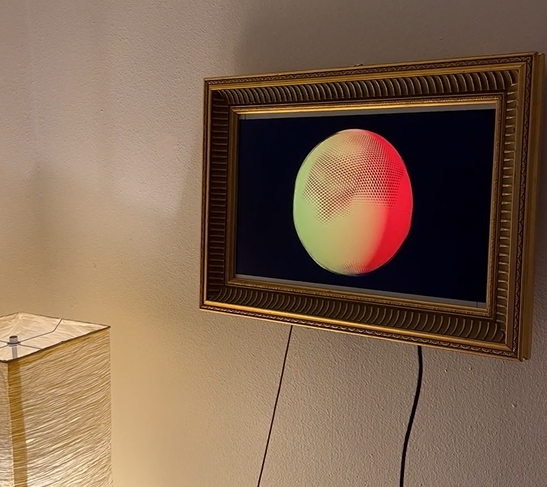
 I did some research about digital picture frames trying to see if I could buy a premade kit that would just need to be assembled. I then found another inspiration in the company infinite objects, where they make picture frames that display infinitely looping digital art such as NFTs.
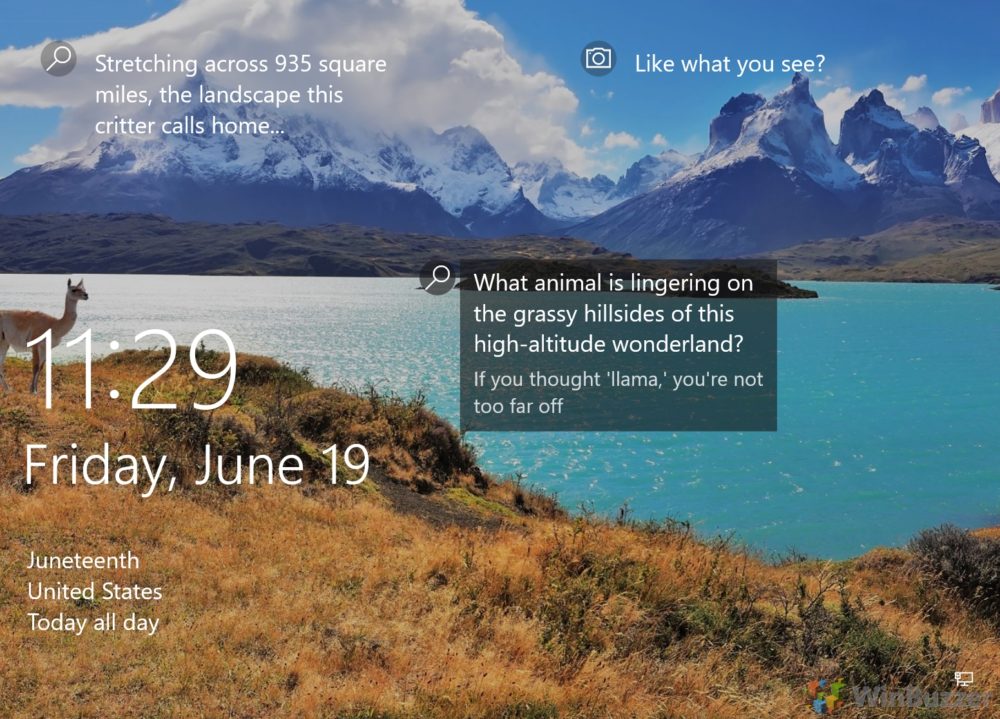
I also started to get really excited about this project as I could load high quality images of countries around the world. I was inspired to have this also be a feature because of Windows Spotlight, where my laptop shows me a new picture of nature or a city everyday from places all around the world.
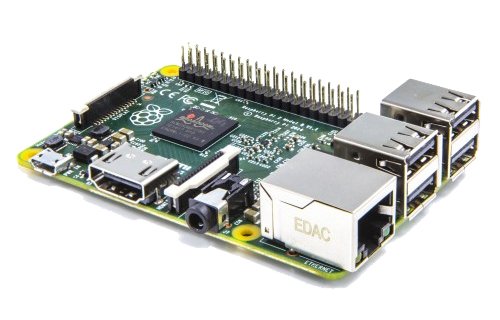
Because I wanted my project to display pictures and videos I knew I would need a controller of some sort, I did some research on other digital picture frame builds and saw that a Raspberry Pi would be a great choice. The Pi is a tiny computer and would be the most forgiving way for me to fit the device on the project and still have full capability. I found a prewritten script called DynaframePro, this would allow me to display pictures and videos with many features on how to fine tune exactly how I wanted everything to be displayed. However, to run DynaframePro I would need to get my hands on a Raspberry Pi 3 which are expensive now due to semiconductor shortages. I was able to get my hands on a Raspberry Pi 2, which was slightly older and did not have most of the bells and whistles, but it would work for what I needed it to do.
 I now knew that I wanted to make a digital picture frame that would display art, photos, and animations. Choosing the art and photos were relatively easy to do as I just had to create different folders of images I liked. As for the animations I needed to decide on what specifically I wanted to make. I wanted the animations I made to look like concert visuals, and most are repeating and could be looped. I began researching how to make concert visuals in Blender on youtube and was able to find great inspiration. I wanted to make animations similar to the video below.
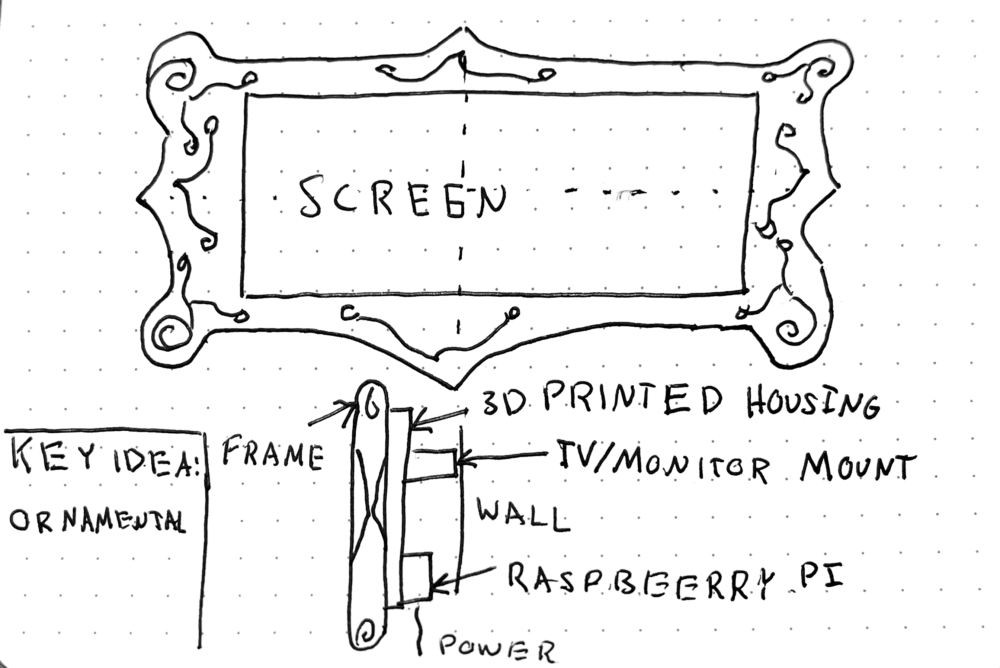
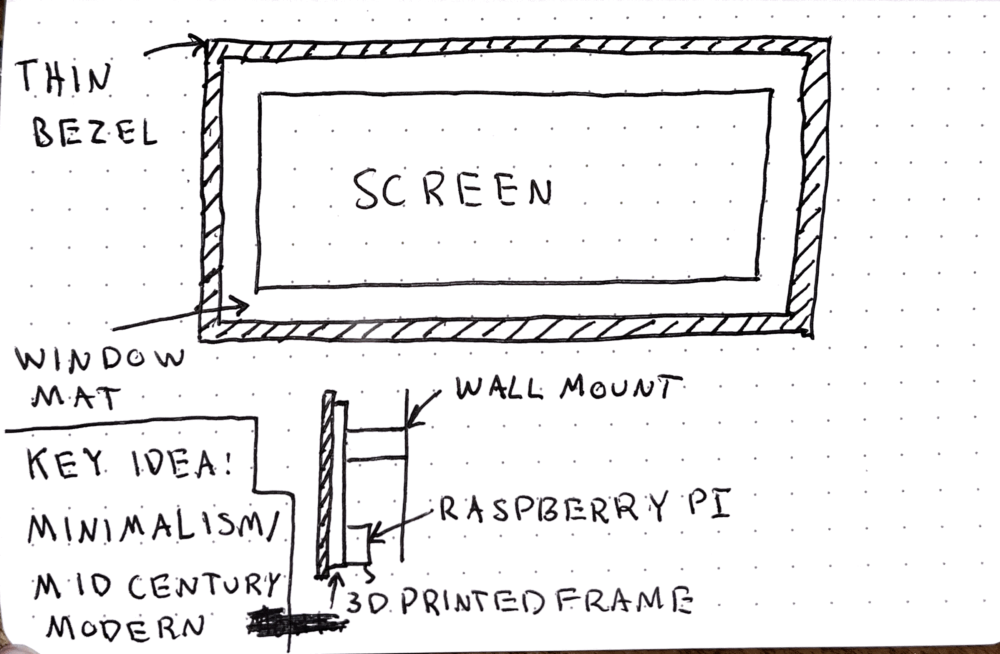
So, I knew what I wanted to display, how I wanted to display it, but I needed to design what I was going to display everything on. For starters the digital picture frame was going to involve a screen, but I needed to choose how large it was going to be. Initially my plan was going to be taking apart an old laptop and ordering a control board from China. I was weary of this idea as it needed soldering and I would have had to wait on shipping times. I then decided that I would take apart a monitor to use for my digital picture frame instead. After doing some research I found out I could take off the plastic bezel from a monitor and would be left with everything I would need for my picture frame. The next step was to decide what the aesthetic of my product would be. My first idea was to model after the samsung frame TV and be very minimalist in profile. This would work in almost any space I move into and would be a timeless piece, but I could also get bored of the design. I came up with the idea of using a very grand gold frame, and I really liked it. This would combine ornamental with modern technology which is a contrast I thought would work great with my project. I planned on getting a painting from goodwill that I could take apart and use parts of the frame, so that’s exactly what I did. I was able to find a very large painting with a wooden frame that had ornamental details. It is important that the frame is made of wood as I would be able to assemble it in the wood shop. Below are my two sketches for what the final product would look like.
 Overall the design process took many turns and I definitely did not end up with the result I thought I would, however I am very happy with the design that I came up with and think that my project is very unique. I think this is an object that I will keep and use for a very long time and I plan to make a better version in the future.

Citations:
[1] ‘Windows Spotlight’, Ryan Maskell, https://winbuzzer.com/2020/06/19/windows-spotlight-not-working-fix-it-with-a-reset-or-re-register-xcxwbt/
[2] ‘Samsung Frame TV’, Amy Skorheim, https://www.engadget.com/samsung-the-frame-tv-irl-153546368.html
[3] ‘Squish Screen’, Frank Guzzone, https://infiniteobjects.com/products/frank-guzzone
[4] Raspberry Pi 2 , Amazon, https://www.amazon.com/Raspberry-Pi-Model-Desktop-Linux/dp/B00T2U7R7I?th=1
[5] ‘Wall Art’, Instagram user @shehanbope, https://www.instagram.com/p/B9JZoeXhGQ2/
1 Comment. Leave new
Hi Luke
The combination of the vintage frame and the subject that is modern, abstract looped animation feels surreal and amazing.
Separating the monitor control board from the housing and mounting it within the frame might help you to make the photo frame slimmer and you could stick it to the wall.
Your test of the slow moving youtube video gave a really nice effect. More such videos that are vivid and slowly moving might also be a nice visual to view throughout the day.