
Introduction
This class project inspired me to branch out and try a new variation on an old skill. My final piece is a modular textile pattern, which can be used to make a variety of geometric textile designs. I’ve created 128 of these multi-colored pieces using yarns of a determined color palette to create a geometric art piece. The final sculpture is roughly 8 feet wide by 4 feet tall.
A big portion of my background is in creating soft objects and textiles. I’m a long-time practitioner of crochet, and it has been passed down in my family. I decided to try to create a design which uses types of stitches which are ubiquitous across the world and draw the design in a visual manner so that it will be understandable and reproducible by anyone who crochets regardless of language.
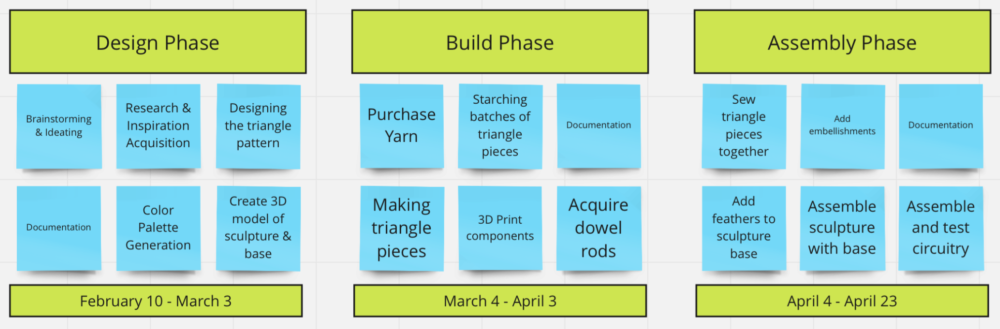
Project Timeline
Sketches & Design Plans
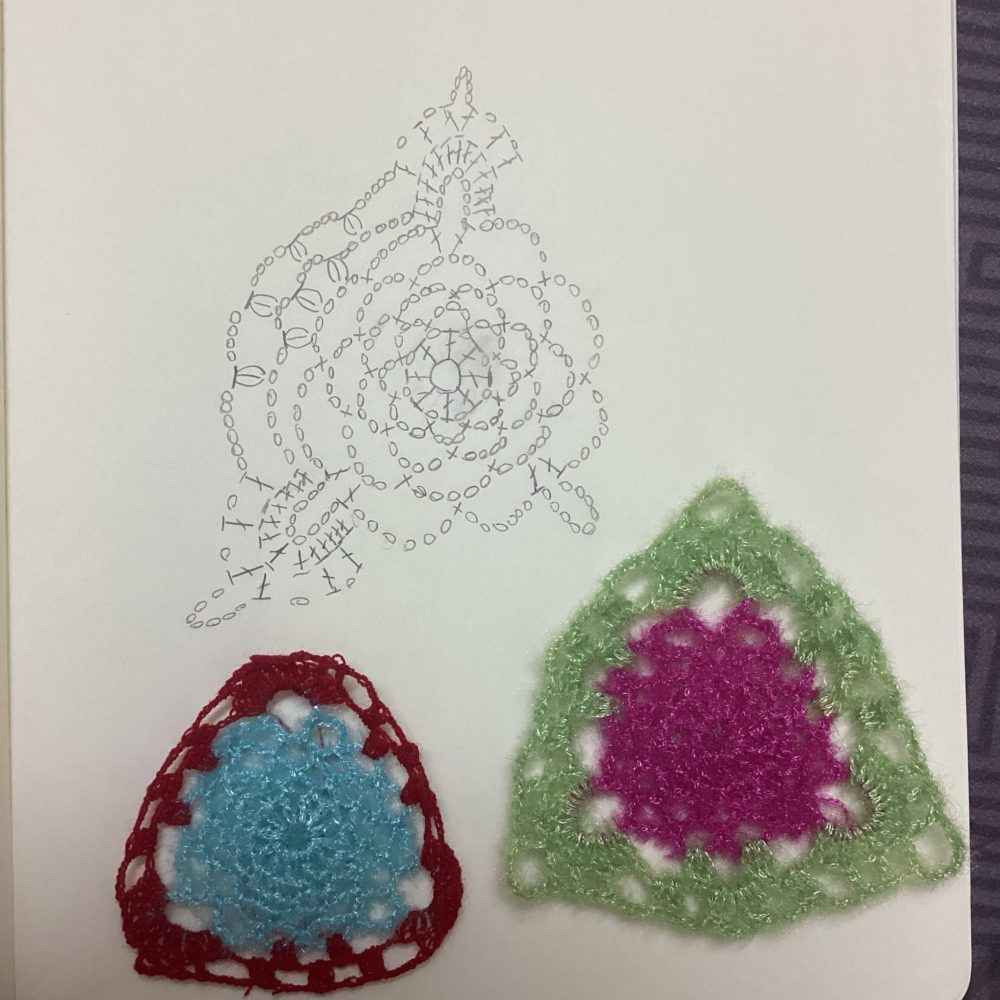
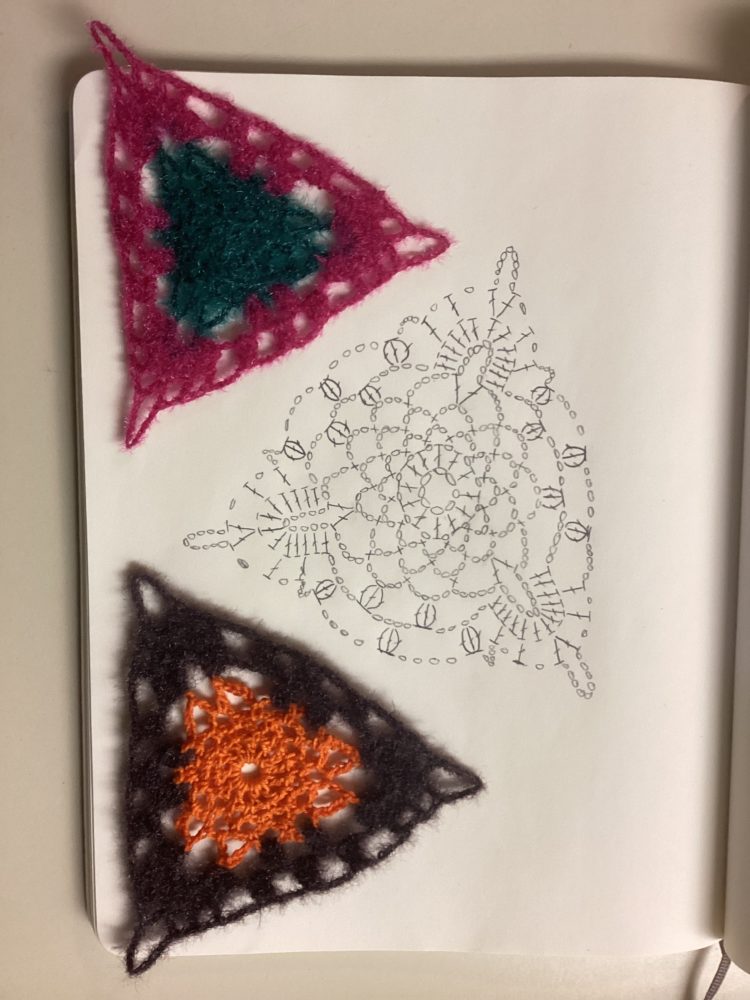
Creating the crochet design
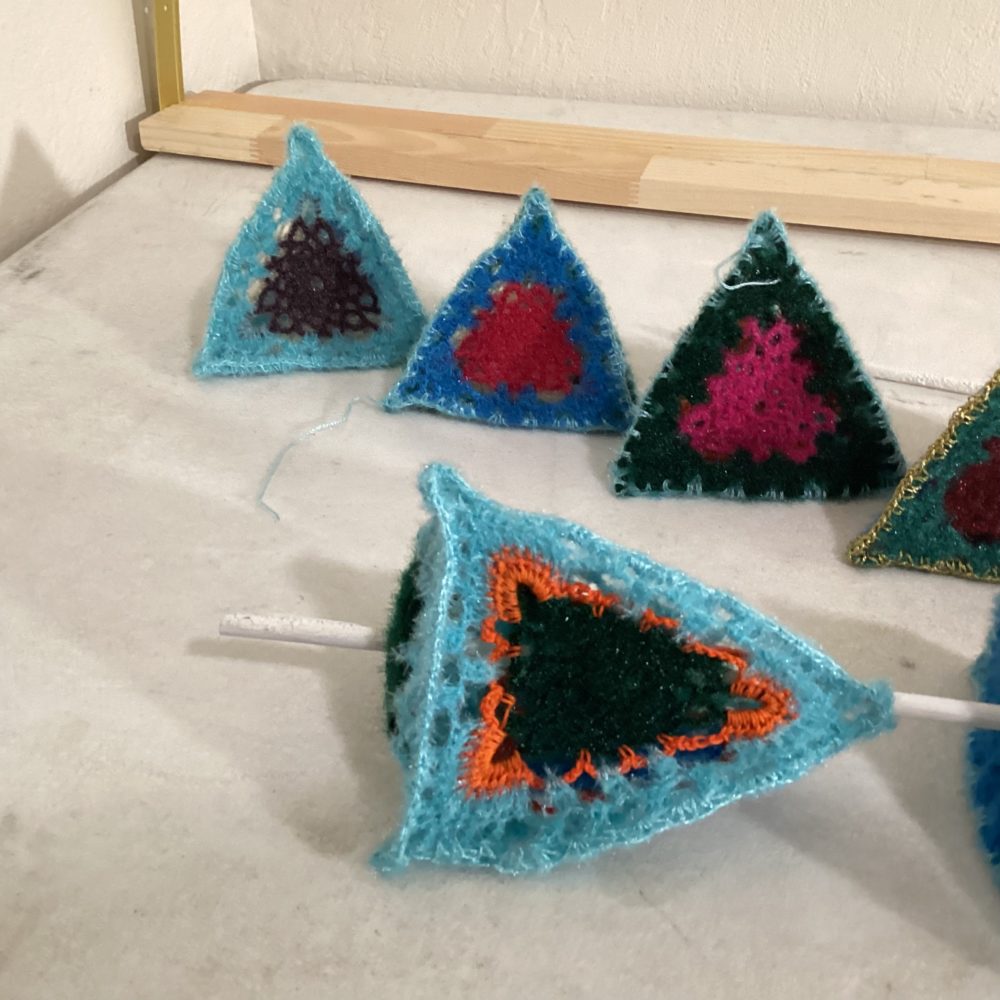
I first began by designing a new pattern for a small crocheted triangle. I find triangles to be an interesting shape, yet it’s not an easy one to create with cochet. I was inspired by the crochetkingdom pattern here (1), but this needed some adjustments for what I was looking for. The yarn I’m using is really thin, so I didn’t want to be working so many stitches inside other stitches. Instead, I designed an open pattern where the stitches went into chain loops, making the pattern go more quickly. And I made my design a little smaller. It took 2 iterations to land on a design that I really liked.
Choosing the yarn
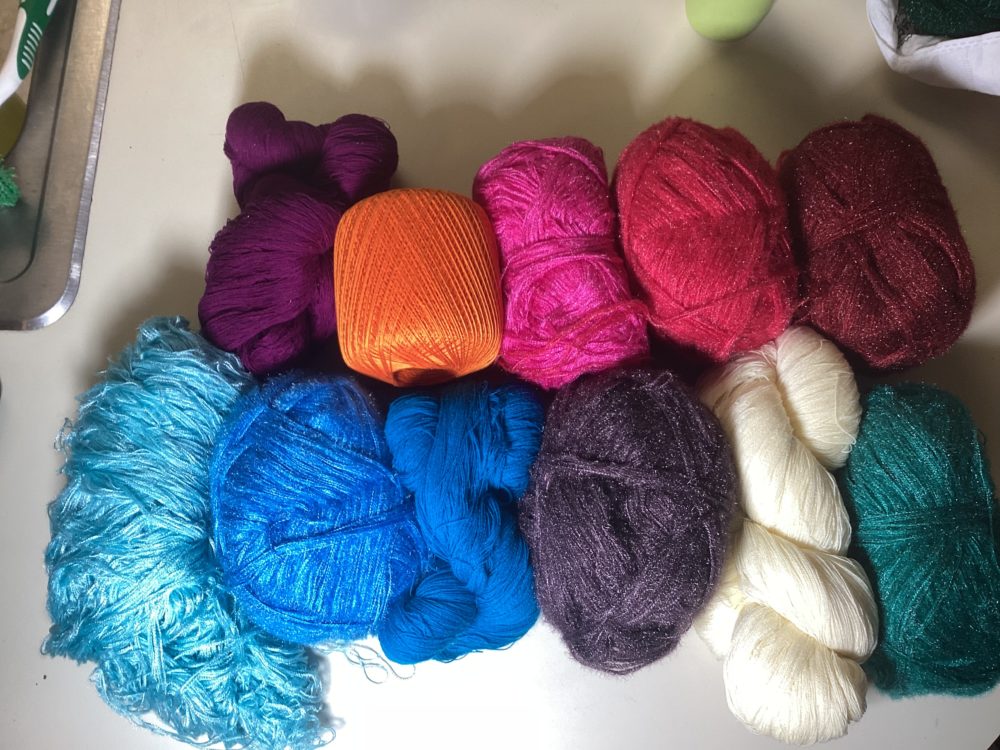
The yarn used for this project was sourced from shops in Kullu valley in India, and includes a combination of acrylic chenille yarn, thin acrylic yarn, and cotton thread. The chenille yarn is fuzzy, which adds to the texture of the pieces, while the cotton thread is thin and delicate and allows the pattern to be seen more easily. Using both types of yarn in the same piece was a stretch for me, but this was common in many pieces that I saw in the area so I decided to go for it.
I spent some time coming to a decision on the color palette to use for this project. Since it was one of my top design considerations and motivations for this project, I didn’t get started making anything until I was certain about the colors. I included orange and green for starters due to their inclusion in the Indian flag. Then, I added multiple shades of blue to help give a peacock feel. Then I mixed in some more rich colors like purple, dark green and dark red to set everything off. Later as an afterthought, I added gold trim and was really happy I did.
Making the pieces
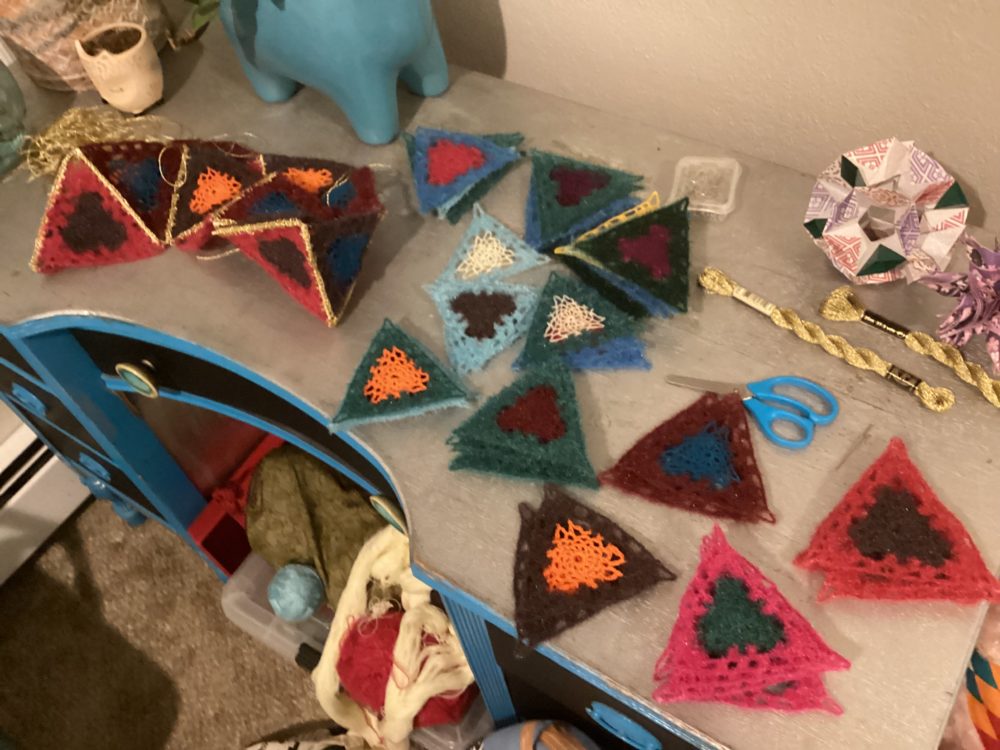
After creating the crochet pattern and choosing the colors, the next step was…Make a whole bunch of them! I was traveling in India during this time phase of the project, so it was a nice time to crochet while looking out the window of the train.
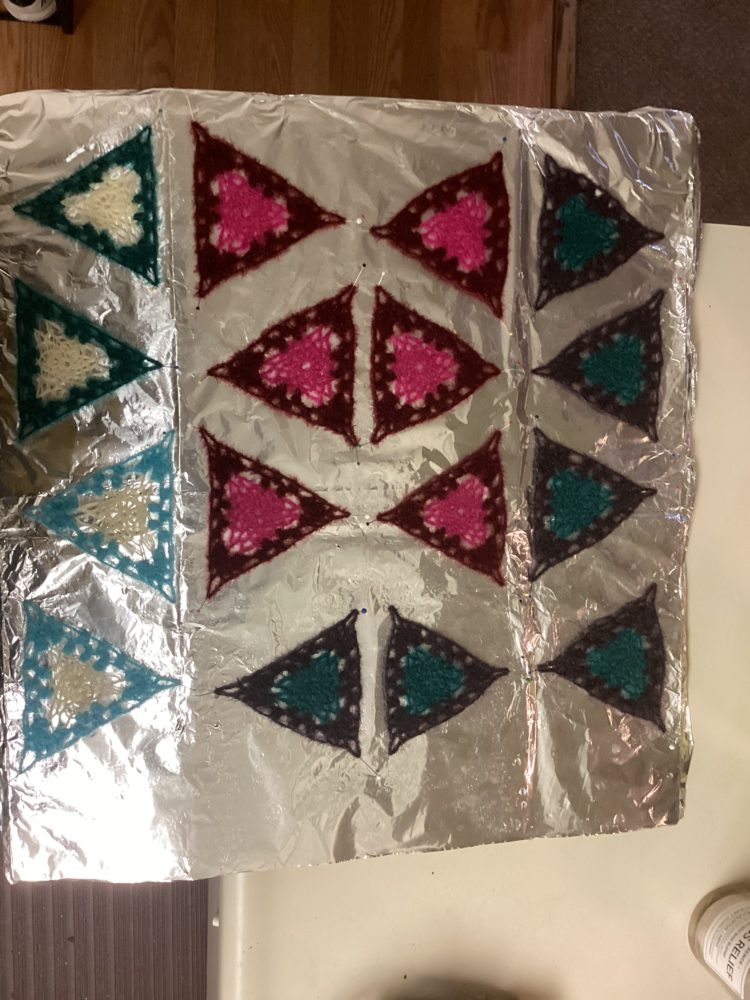
Each finished triangle was then stiffened to provide structure for the piece and make sure they hold shape. To accomplish this, a starch solution is made, composed of 1 part sugar and 2 parts water and brought to a boil while continuously stirring. Each triangle is soaked in the starch solution and then laid flat on tin foil using pins to stretch the triangle to a good size and shape.
Designing the sculpture
My vision for the sculpture was to create a large polygonal structure using stiffened triangles sewn together, resulting in a peacock body and long feathers attached to it. The concept involved primarily pink/purple/red colored pieces for the body and primarily blue/green pieces for the tail feathers.
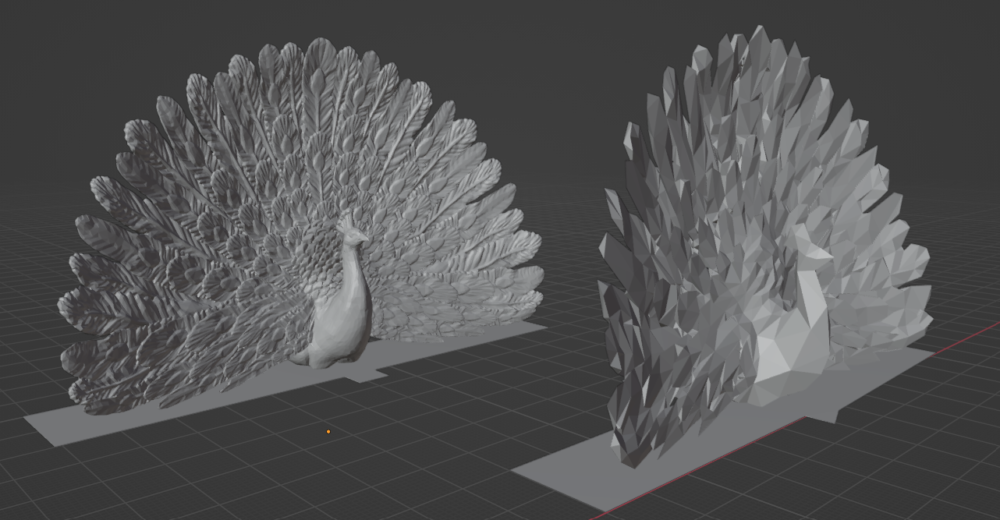
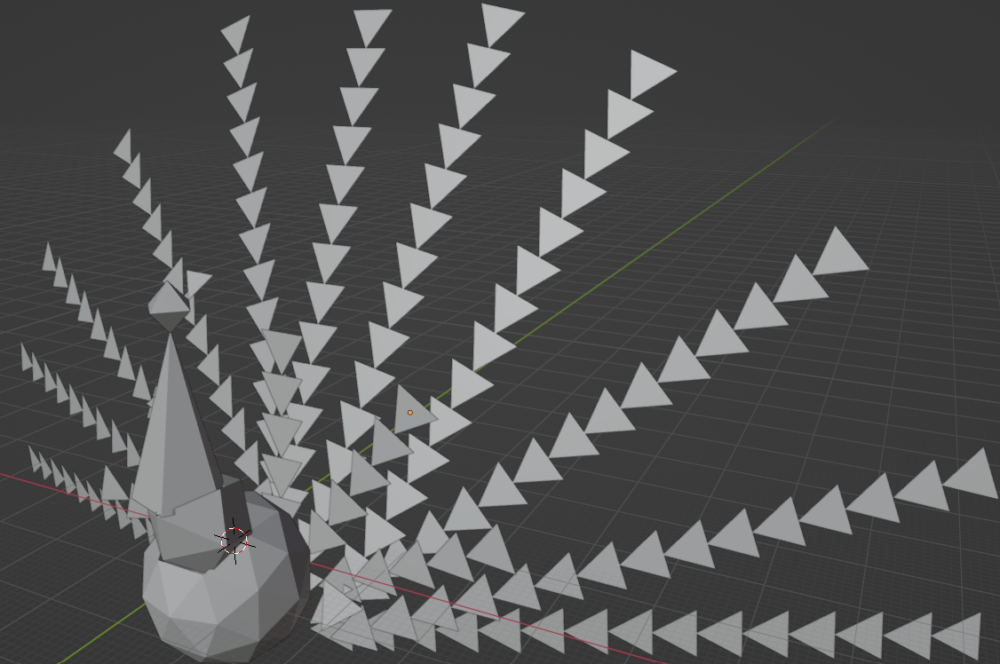
To get a visualization of the design, I used a peacock model from Thingiverse (2) and then used a decimate modifier to change the model to be a more low-poly design to accentuate the triangle planes. I used this low poly peacock as a reference to add an icosphere mesh to design the peacock body with only equilateral triangles. I formed the neck and head of the peacock by adding more mesh and guessing on the size. This digital model gave me an idea of the final size of the piece I wanted to make as well as a pattern to determine how many triangles of each color to make.
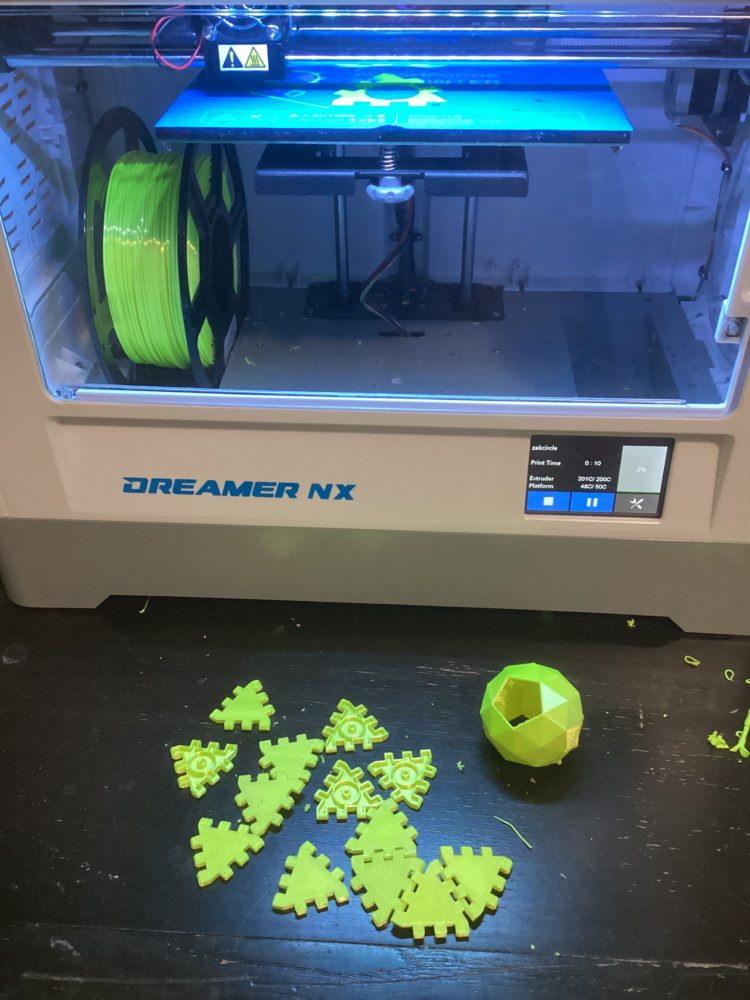
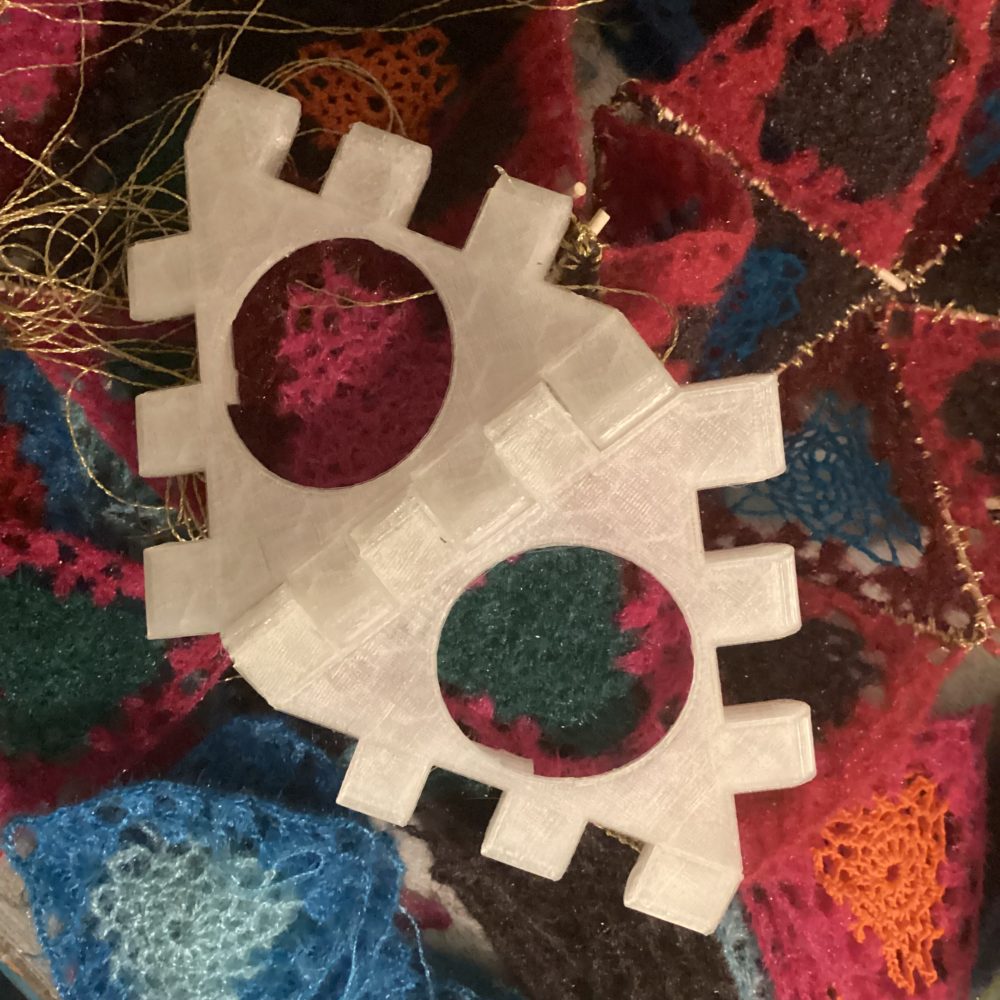
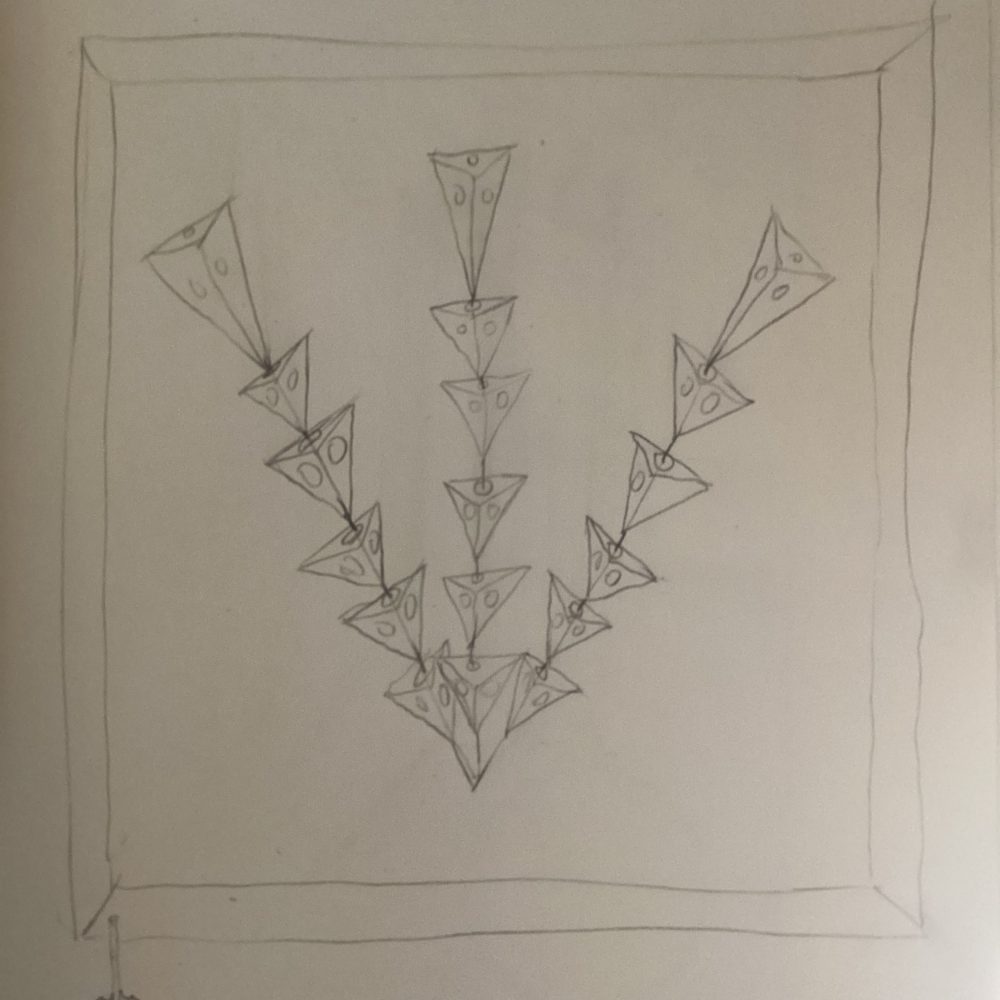
Unfortunately, the stiffened triangle pieces did not hold their shape well enough to support a large polygonal structure. I tried 3d printing some structural pieces for the sculpture, but didn’t like the way it looked. So I pivoted midway through creating the sculpture. I changed to smaller 3d pieces, tetrahedrons, which were more sturdy. I then went back to sketching more ideas for a final sculpture that would still give a peacock feel. From there, I improvised the final sculpture during the construction phase.
![]()
![]()
Building phase
The first iteration of building involved a binding technique where thin dowel rods were used in between each triangle. Single-crochet stitches were placed around the stick and into the space of one triangle, then back around the stick and into the space of another triangle, a method that binds the two triangles tightly together while providing support and color embellishment and hiding the stick at the same time.
Since the dowel rods ended up being not enough structure to hold the large polygon together, I scrapped this technique pretty early on. However, I continued using the binding technique without the dowels, in a method that looks similar to the binding on the socks and poncho from India which inspired this project. I used this method to fashion 32 tetrahedrons out of 128 multicolor triangle pieces.
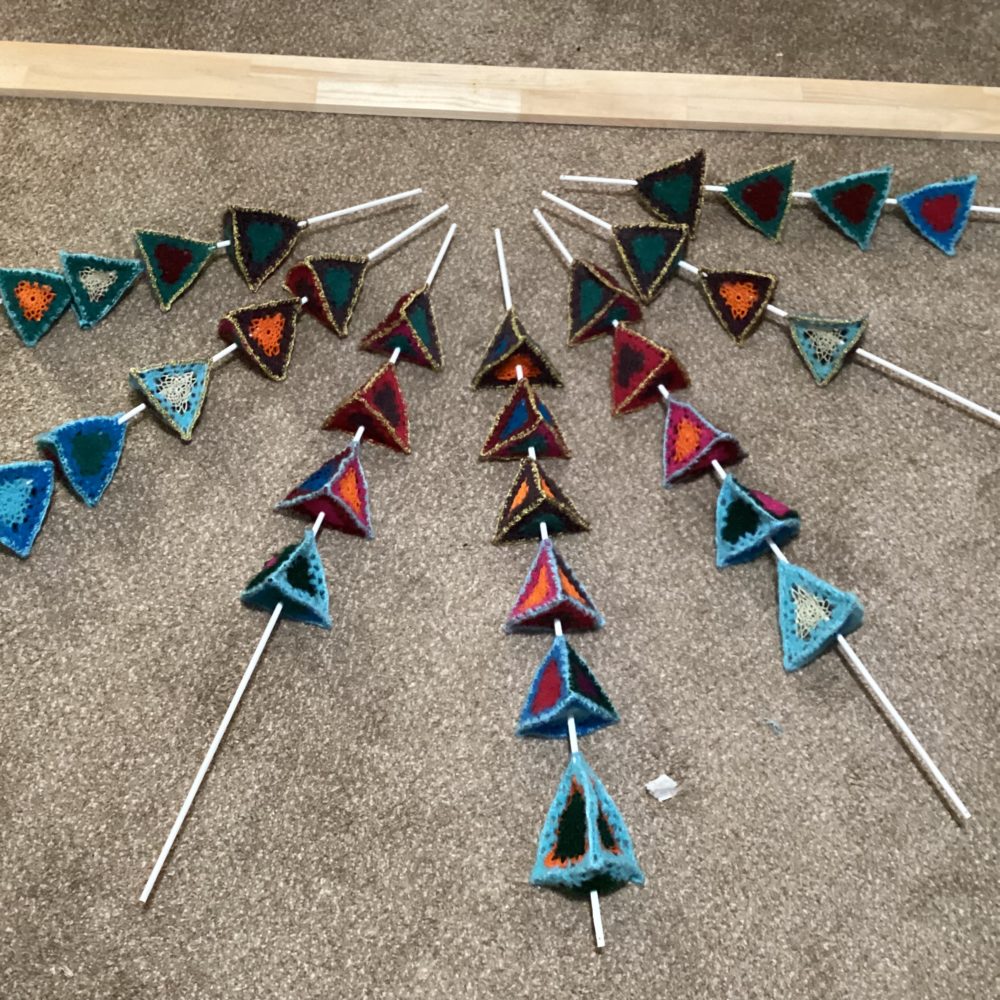
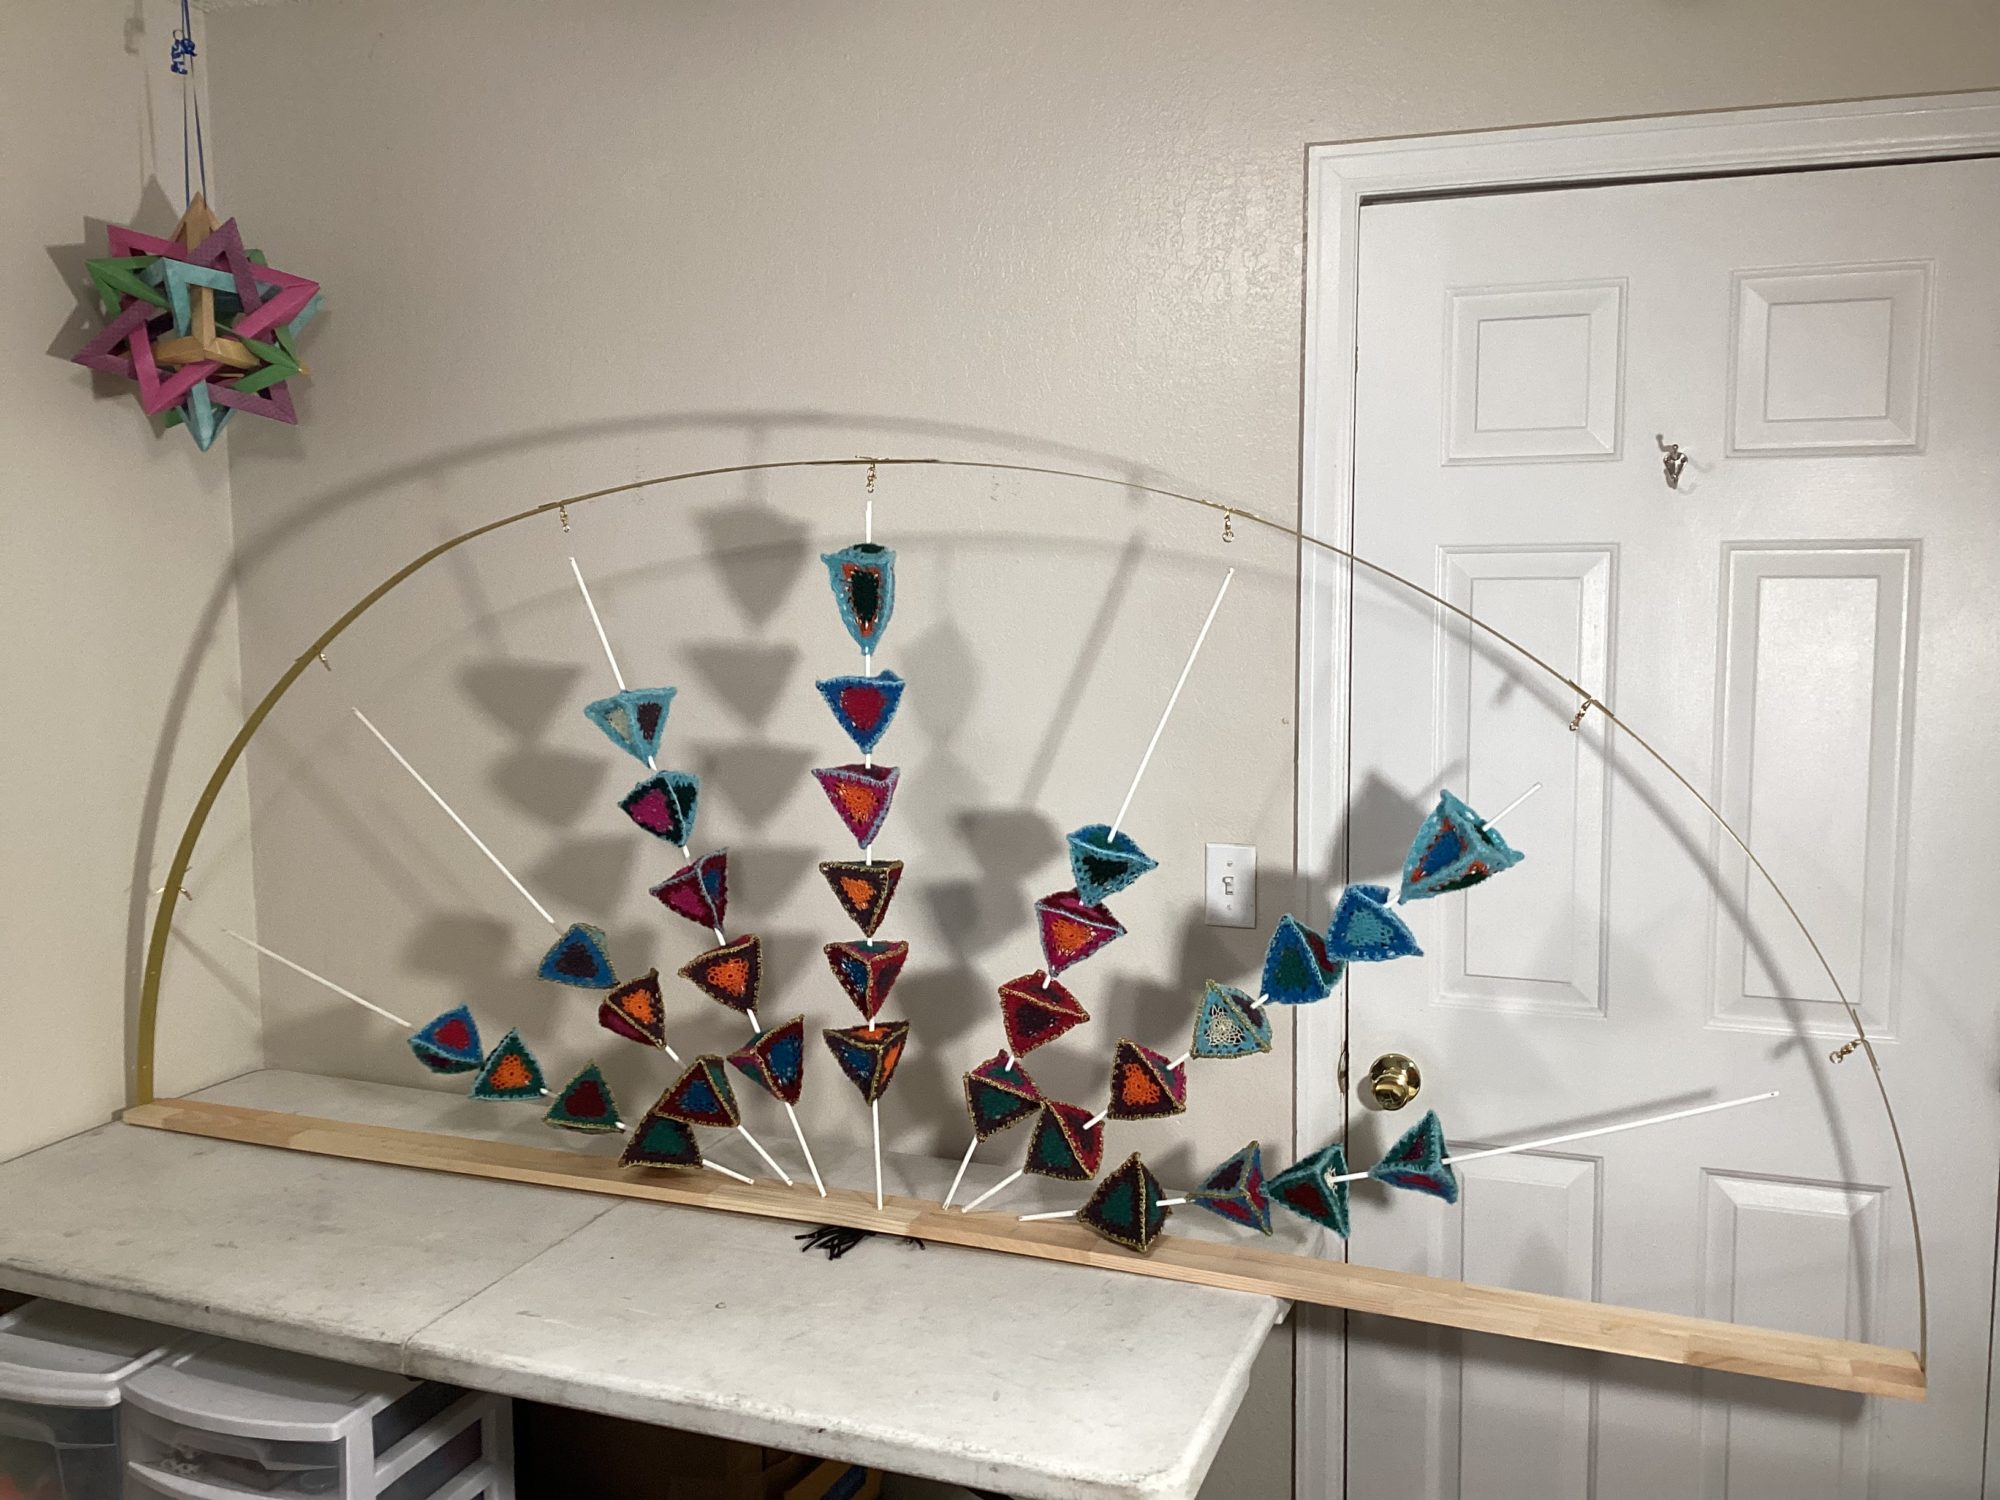
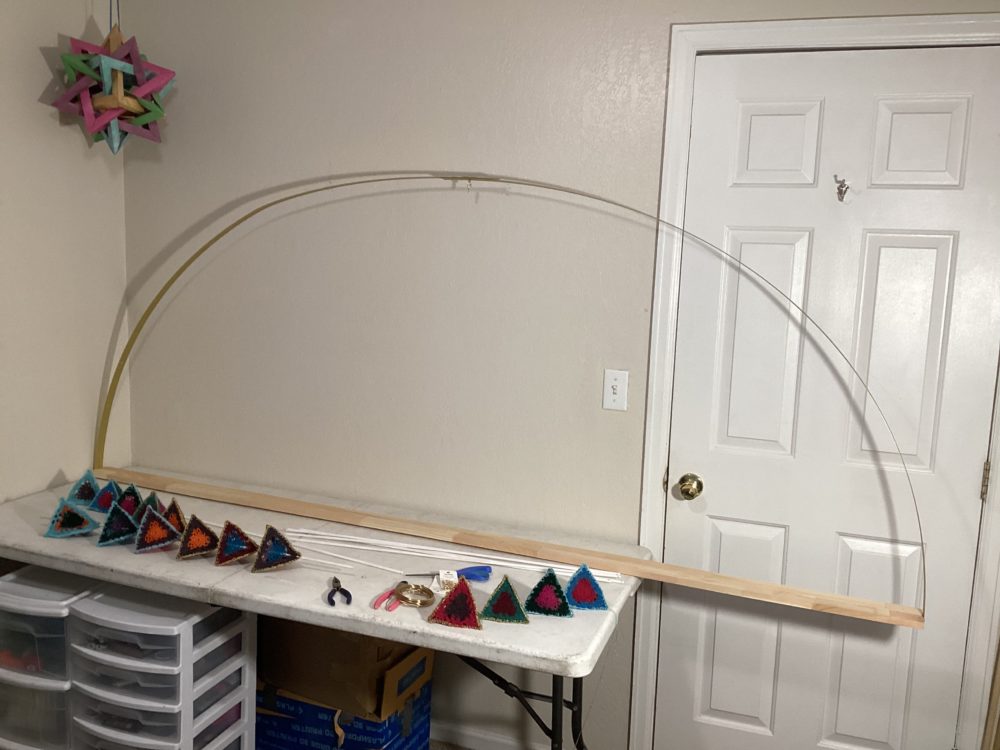
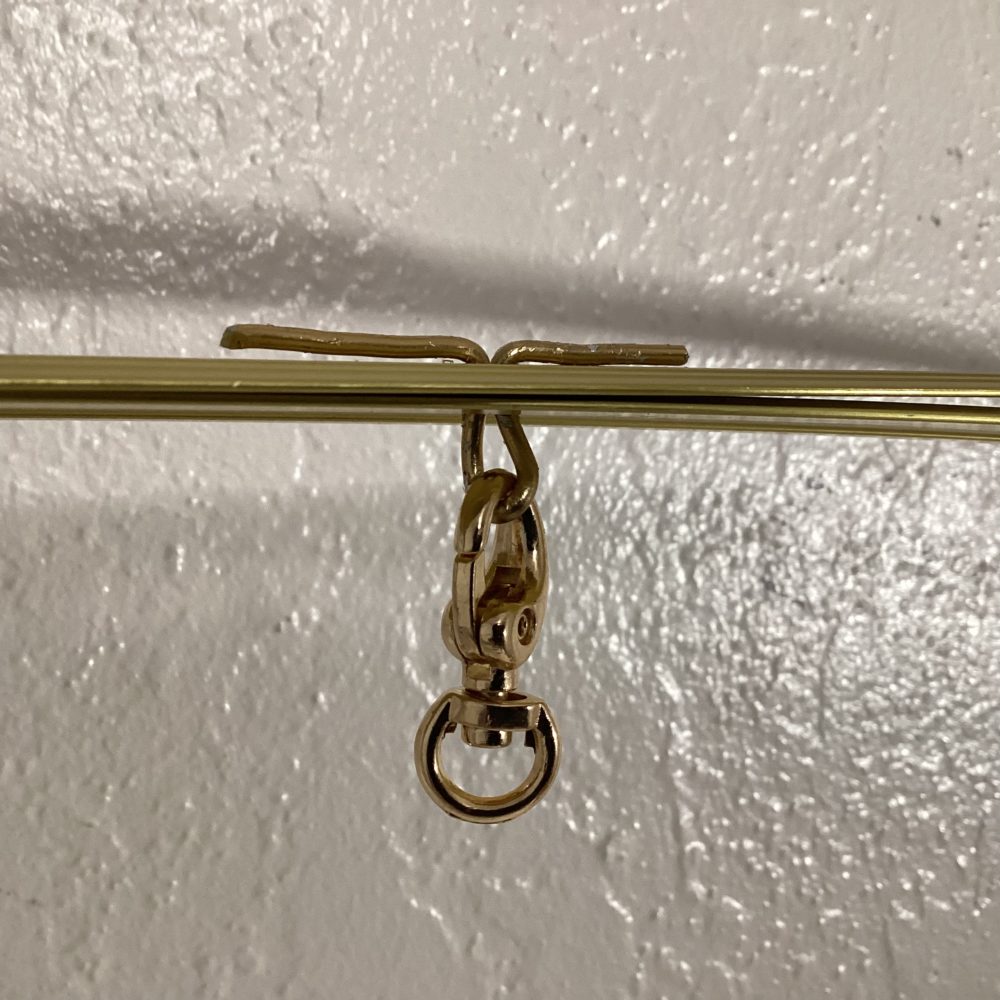
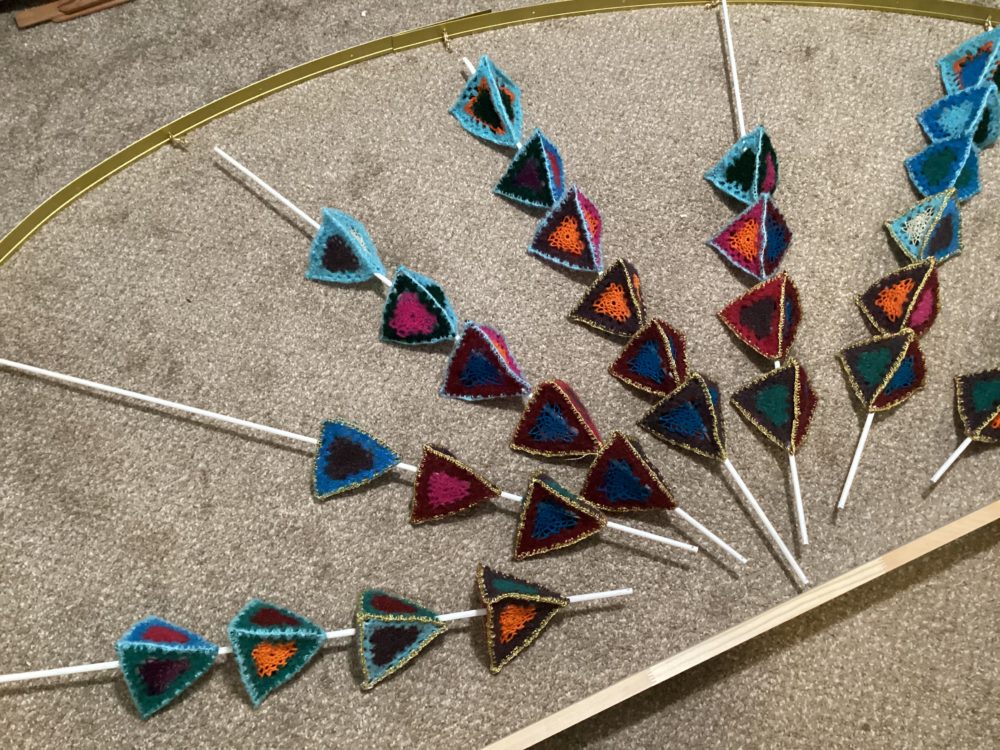
Creating the final sculpture involved painting ¼” dowels in an off-white color and then spearing the dried dowels through the centers of the completed tetrahedrons. I wanted the feathers to be able to twist and rotate freely, so I secured the feathers to the frame with gold jewelry swivels. These were attached to the outer frame, which was built out of wood on the bottom and a piece of gold carpet binding on top. The carpet binding piece already had evenly-spaced holes which I used to create a fan-like structure for the feathers. All feathers went though the same drilled hole in the center of the wood, where I plan to eventually create a motorized rotating mechanism.
Conclusion
I think that the triangular crochet design has turned out to be a great design! It works fast like I hoped it would, it holds its shape well and I like the size. It’s easy to extend the size by adding more layers. Inspired by the traditional Granny Square pattern, but with a center that looks like a classic pineapple doily or a Spirograph drawing, I’m excited to use this pattern for many types of shapes. Since triangles can tesselate as a flat design, or be used in many polygonal shapes such as tetrahedrons, icosahedrons and dodecahedrons, many types of items could be made.
My final sculpture looks quite a bit different than what I originally planned. I’m disappointed that the stiffened pieces don’t hold their shape well enough to create large structures, as I think this would have given a really neat lacy effect to a large geometric object. I think the resulting sculpture is interesting to view and has some potential. However I would not choose to make this type of design again.
The time commitment for this project was pretty huge. Each triangle took around 20 minutes to crochet. The stiffening phase took approximately 5 minutes per triangle of active work, and then these required around 48 hours to fully dry. The process of binding the 4 triangles together took around 45 minutes per tetrahedron. And the final process of building the frame for the sculpture and securing the dowels to the frame took another 2 days of work.
Overall I’m happy about the aesthetic of this project. I received excellent feedback about the colors used. And I’m happy with the texture of the project thanks to the chenille yarn. The final result does give the impression of a peacock without being overtly peacock shaped. I don’t think this iteration is worthy of completing or displaying, however I intend to continue exploring designs using this triangle pattern and I’m excited to see what else I can make.


1 Comment. Leave new
This is very cool! It definitely still reads peacock, though in a far more abstract way. I’m curious to know more about the stiffening process. Are you concerned the sugar will attract pests? It would be a shame if your beautiful sculpture got eaten or bug infested. On that note, I wonder if there are other methods of stiffening that could result in a more structural triangle. Epoxy might be overkill, but maybe there’s something between that and sugar?
It’s very cool to see crochet in geometric form. I’m not terribly familiar with it, but I know it lends itself to pliable, soft things. Seeing it form a tetrahedron is striking. It makes me curious to see how you could play up the geometric aspect even more. Maybe a group of floating tetrahedrons suspended with thread (or more yarn!) to form a giant pyramid could be cool. Or something in that vein. I think you’ve struck a really cool idea with a lot of potential.