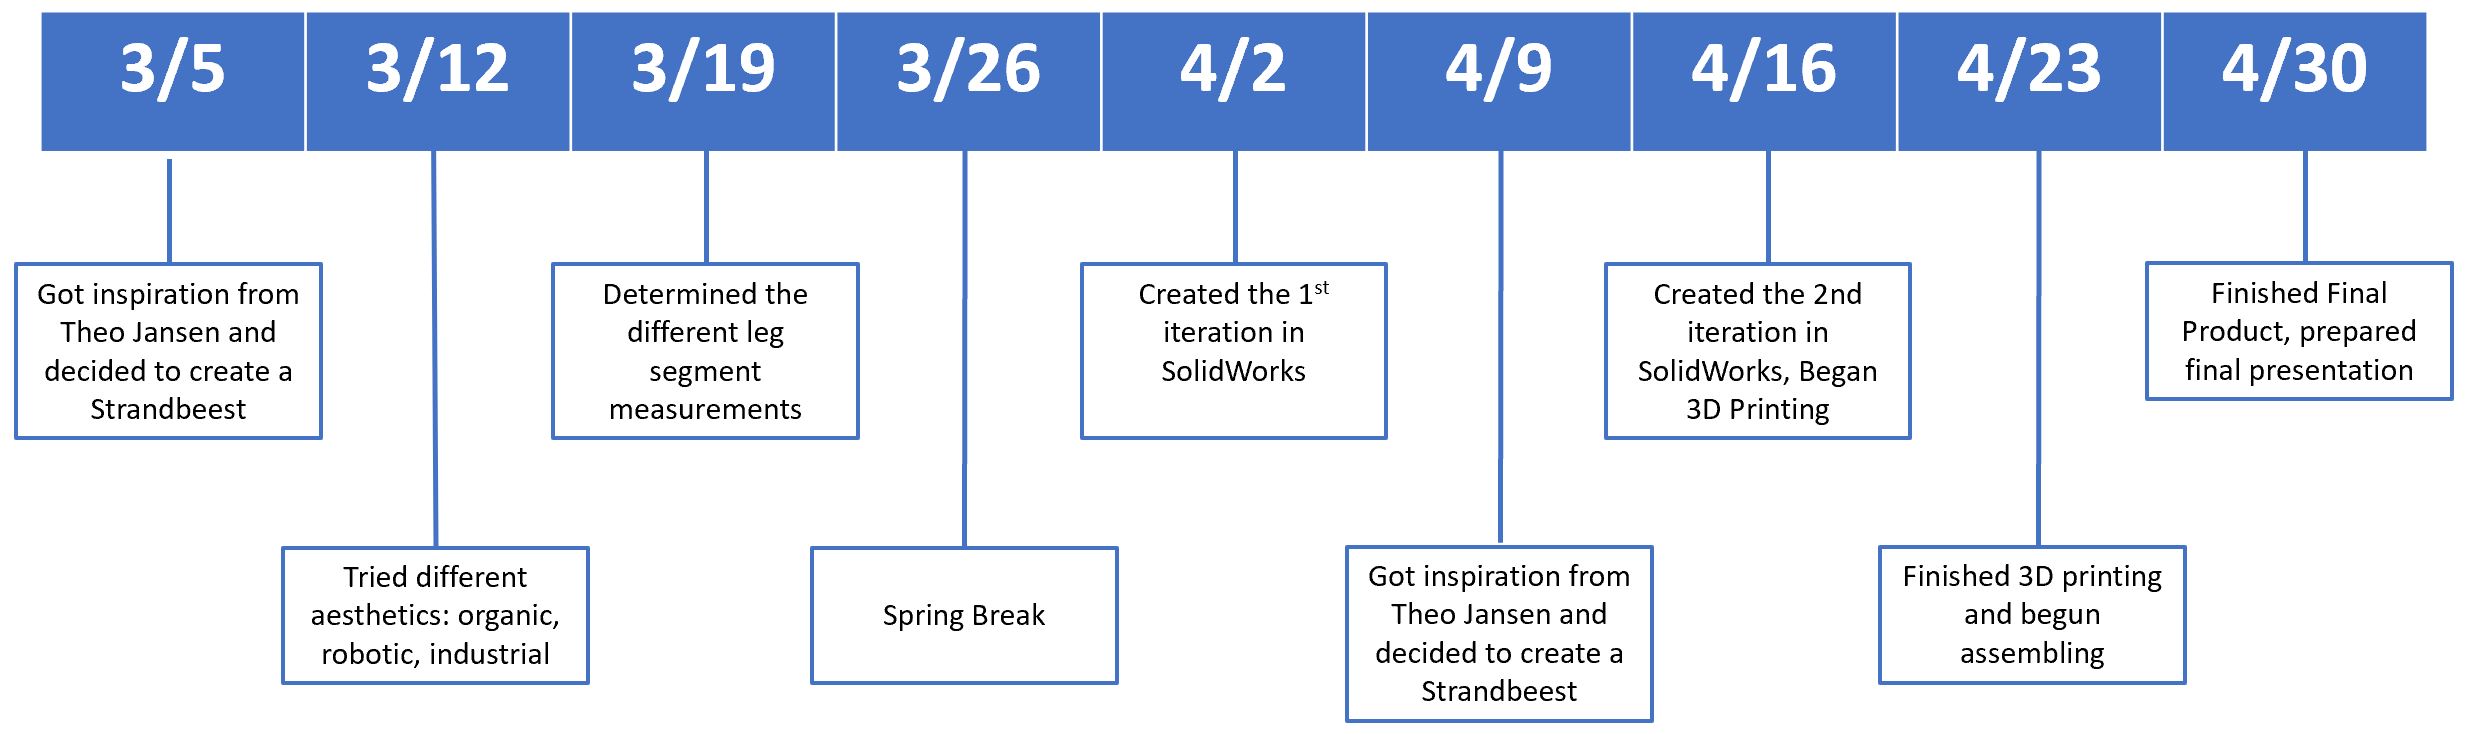
Following this timeline, I started this project by choosing strandbeest as my inspiration and goal. From there, I created multiple sketches to try out different aesthetics I wanted my strandbeest to conform to. Initially, I was planning to have my aesthetic be lifelike/organic; however, when I started my 2nd iteration, I changed it to minimalistic/industrial. After Spring Break was where I began making CAD models of my design. The 1st iteration focused on getting the 2D layout down and how the leg would move. After figuring out the movement, I created the 2nd iteration, which is the final iteration. The 2nd iteration was making a 3D layout and figuring out the connections. During this time, I made some test 3D prints to figure out tolerances and test movement. After the test prints, I made minor changes to the 2nd iteration and began creating my final product.
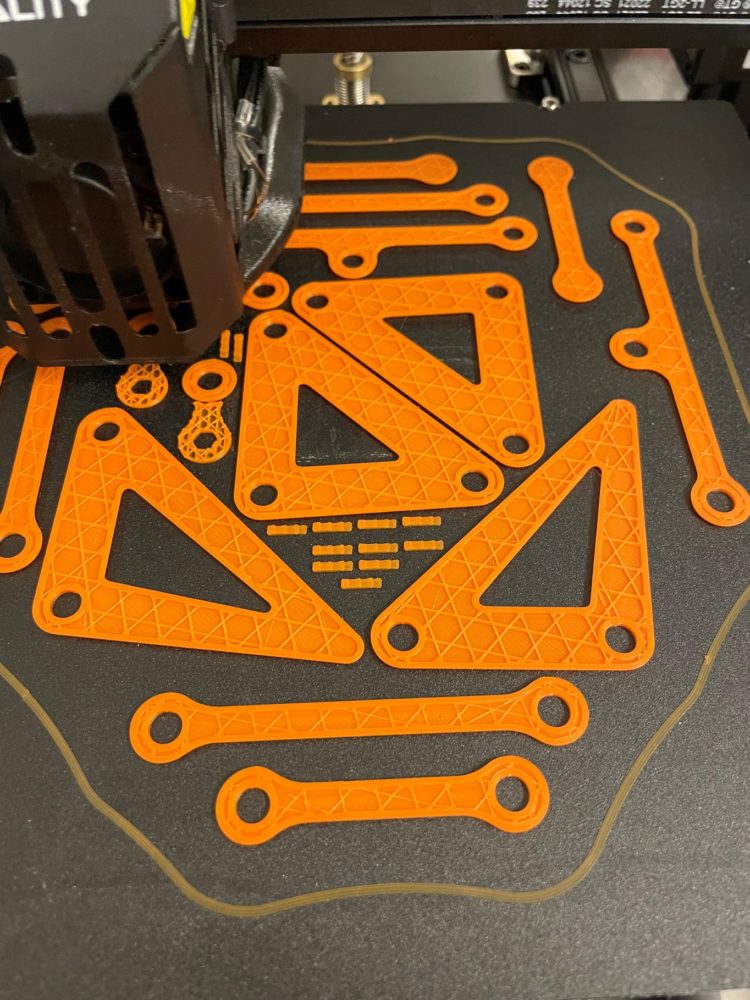
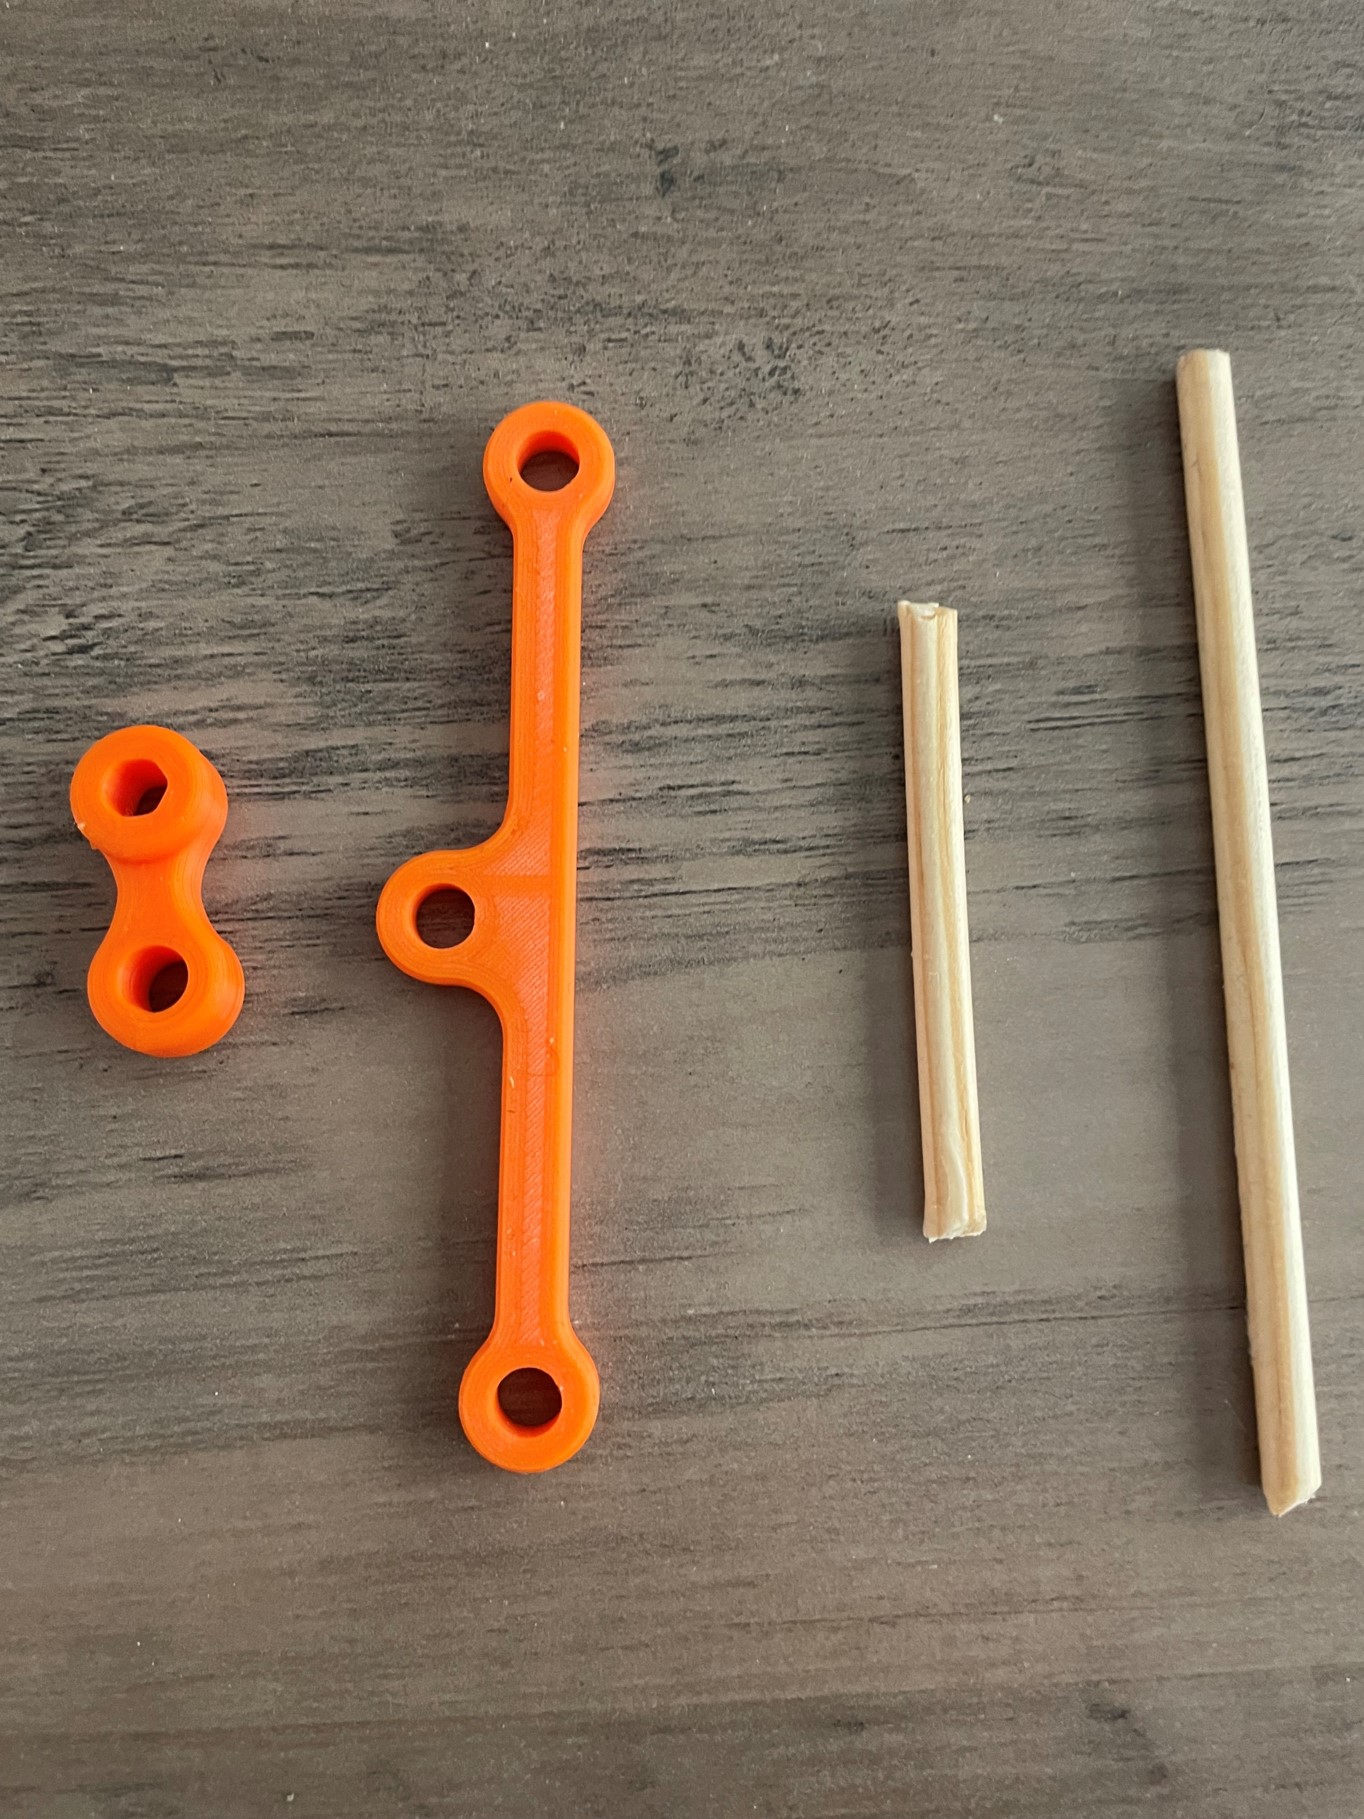
I used an Ender 5 S1 3D printer to create my final product. This was a printer that was available to me because my grad design team purchased it for that class. The material I used was PLA, which for this project was orange but can come in various colors if I wanted to ‘paint’ it differently. The way I printed was to take all the different parts from my SolidWorks CAD model for the leg assembly and throw them into a slicer program to create the code for 3D printing. As shown in Figure 1, an entire leg assembly could be printed in one go. For my Final product, I printed this a total of 4 times to get the whole structure. Each print took about 8 hours. Additionally, I was planning to do an additional print that would include the longer pin sections that hold the leg assemblies together; however, the printer broke down, and I had to improvise and use wooden dowels instead. Unfortunately these dowels were not stiff enough and would bend when I tried move so I made the decision to superglue everything together. This was to ensure that the entire structure stuck together, however this did make it so the strandbeest could not move. When I glued the strandbeest together I made sure to offset the leg so even though it does not move it looks like it is moving.
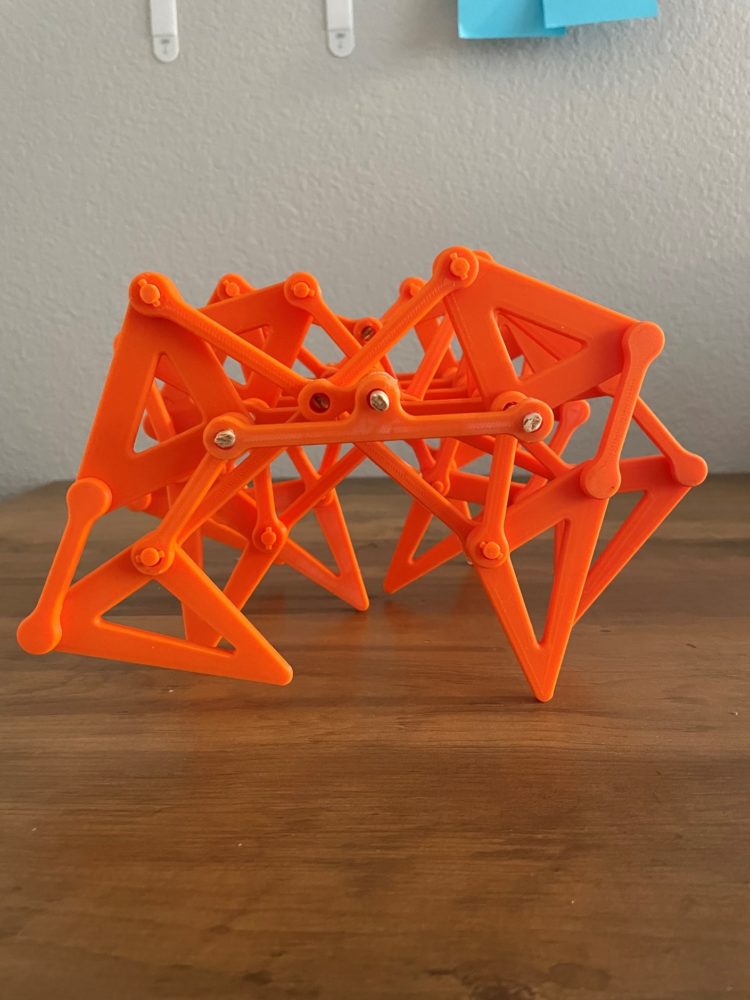
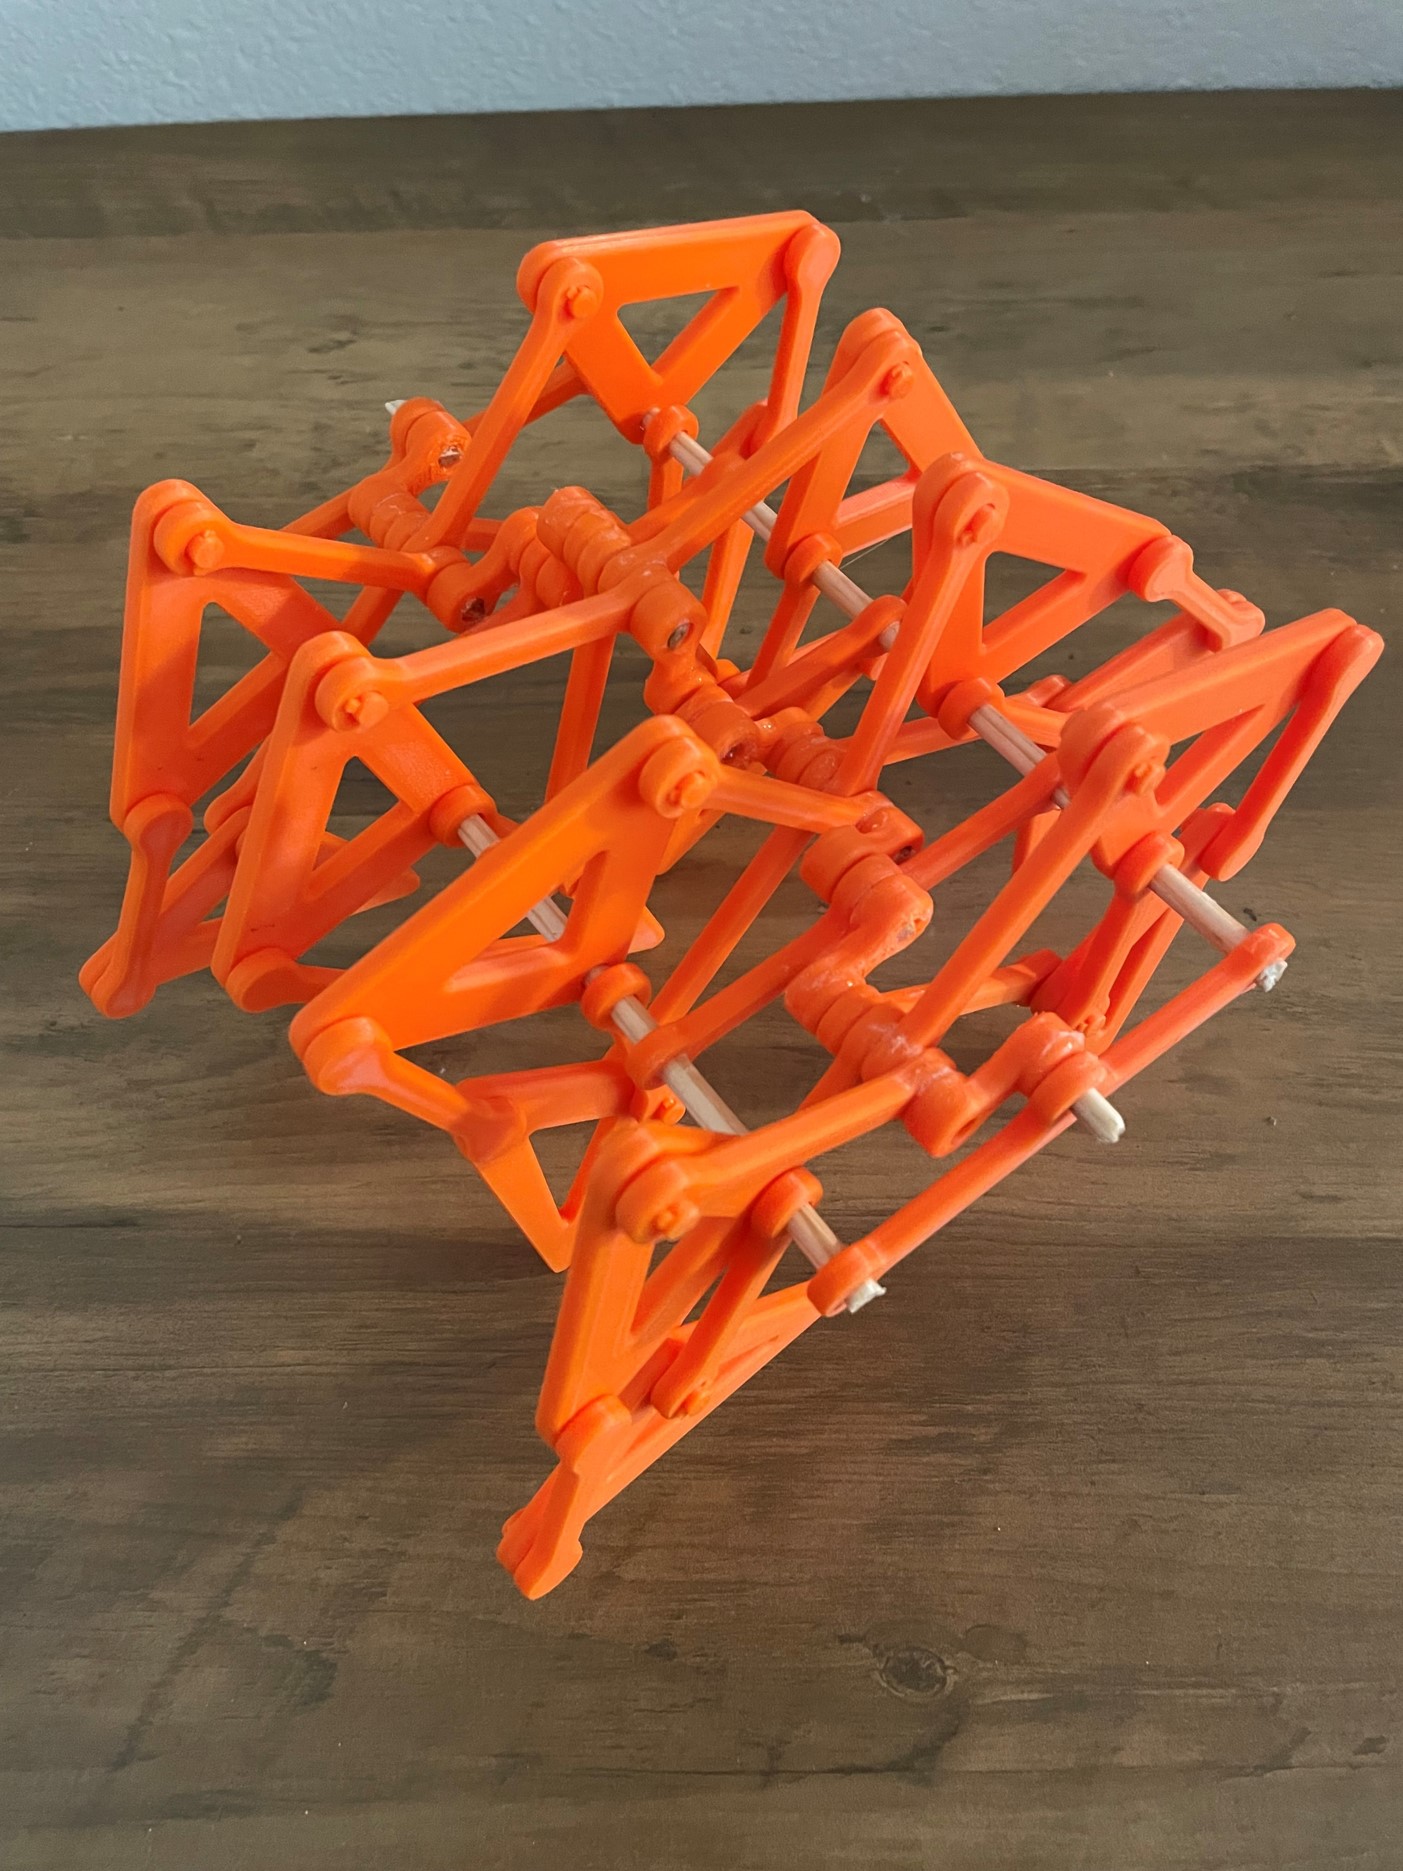
In conclusion, I originally did want the aesthetic of the project to be lifelike/organic but by the end of the project I changed it to minimalistic/ industrial. How my final product turned out I have it leaning more towards the minimalistic side. This might seem a little confusing because the mechanism of the strandbeest is not minimal but rather complex, but the individual segments are smooth and not detailed. I am not really satisfied with how my final product turned out because of the dowels and glue, but I do like the look of it and think it is a nice shelf display. However I plan to continue on a 3rd iteration outside of this class that is focused on making it be able to walk as well as change the aesthetic to more industrial. Maybe change the connectors to rivet look alike, change the leg segment to looking like wrenches, something like that.