
Goal
For my project, I wanted to create a decorative hanging art piece that I could display on my wall using materials that I upcycled.
Project Aesthetic
I have always really loved nature which has led to my interest in sustainability and helping our current environment be a cleaner place for future generations to live in. This is why I decided to create an upcycle project that would fit into the environmental aesthetic. This aesthetic incorporates depictions of nature with an environmentalism twist to add societal meaning to the piece. Many pieces of art that fit into the environmental aesthetic make a statement about what will happen if we do not address climate change sooner. They typically depict the future of the natural environment with lots of trees, plants, and landscapes included in the artwork. These pieces tend to serve as a warning about climate change and try to encourage people to take action. Environmental aesthetics also tend to depict what a greener future could potentially look like. These pieces of art also include a lot of elements from nature such as plants, animals, and landscapes. Along with this, they usually depict some type of technology that is creating a more sustainable future.
Inspiration
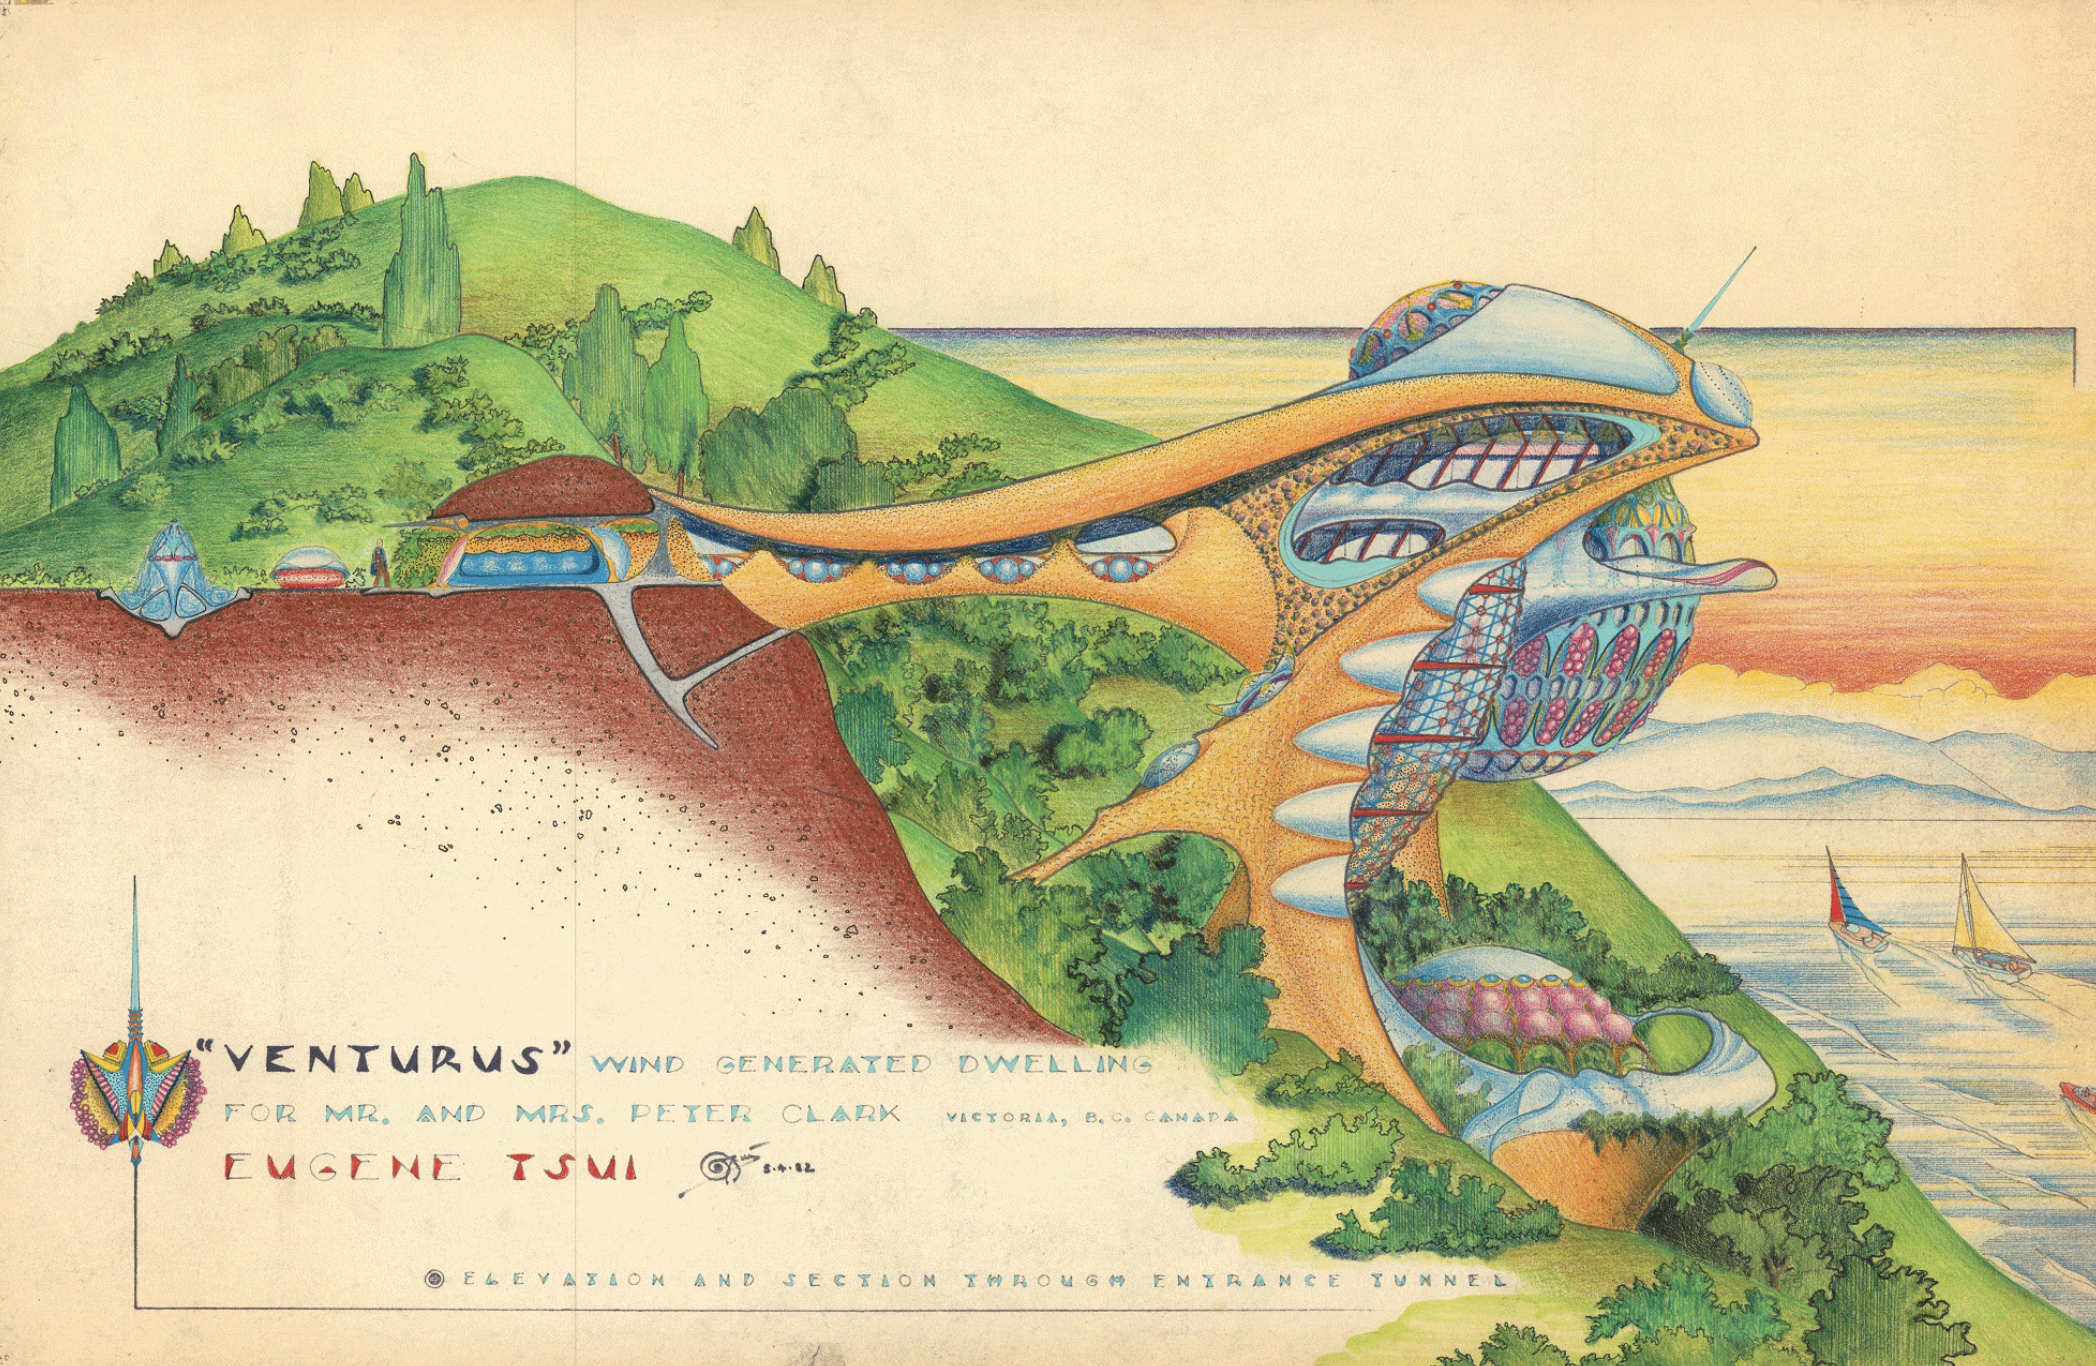
I had a couple of inspirations when deciding what I wanted to create for this project. I first saw this artwork, “Venturus” by Eugene Tssui below (1). He depicts a futuristic home shaped like a reptile that runs solely off of wind power and is built into the side of a cliff. I really liked the natural elements he added to the art and wanted to have some of that incorporated into my piece.
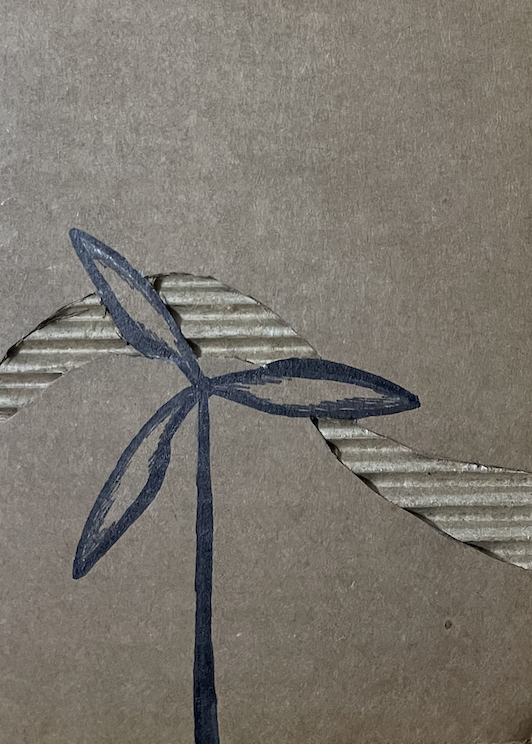
Another piece that I was inspired by was a piece I saw on Instagram by Reem Altwaim below (2).
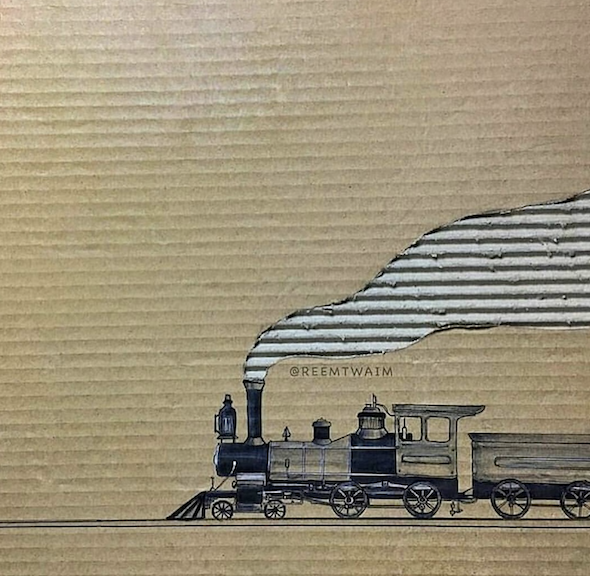
I thought her use of cardboard was really creative and I loved how the exposed corrugated texture created more movement and added interest to the piece. I wanted to recreate this by using the corrugations of the cardboard to create a sense of motion in my artwork.
Material Sourcing
By this point, I had decided my main upcycle material would be cardboard. I had been saving boxes I had received things in for a couple weeks so I could have a good selection of materials to use. Since cardboards have varying sizes of corrugations I was able to test a couple different ones to see which one I liked the best. I decided to use a cardboard piece that had slightly smaller corrugations than normal due to the size of my piece being about 6 in by 8 in.
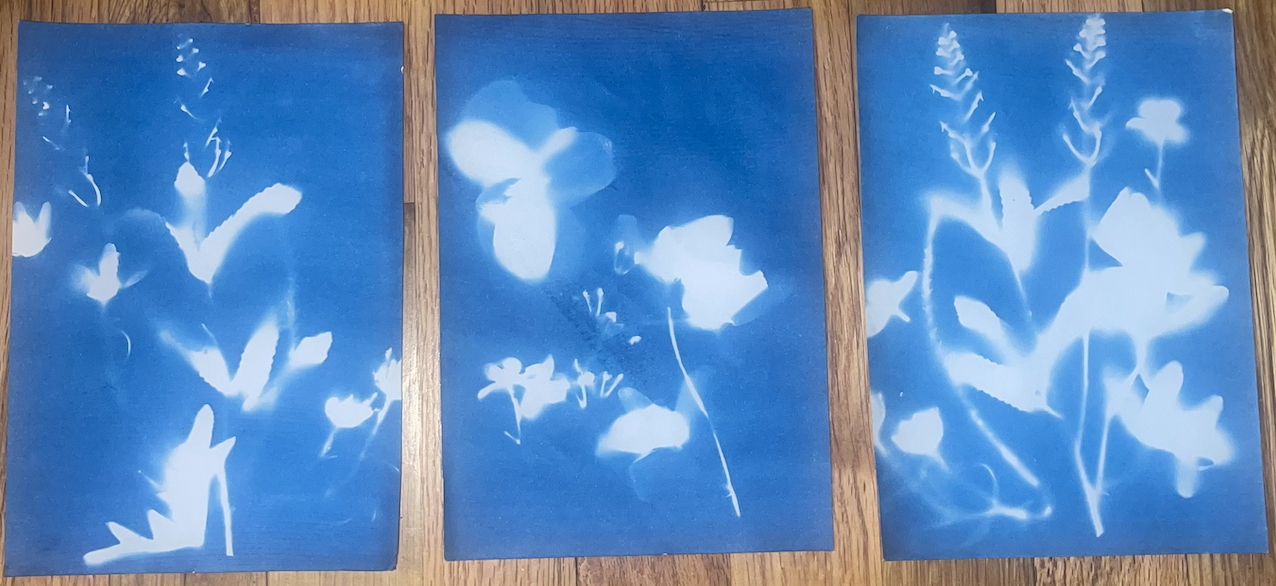
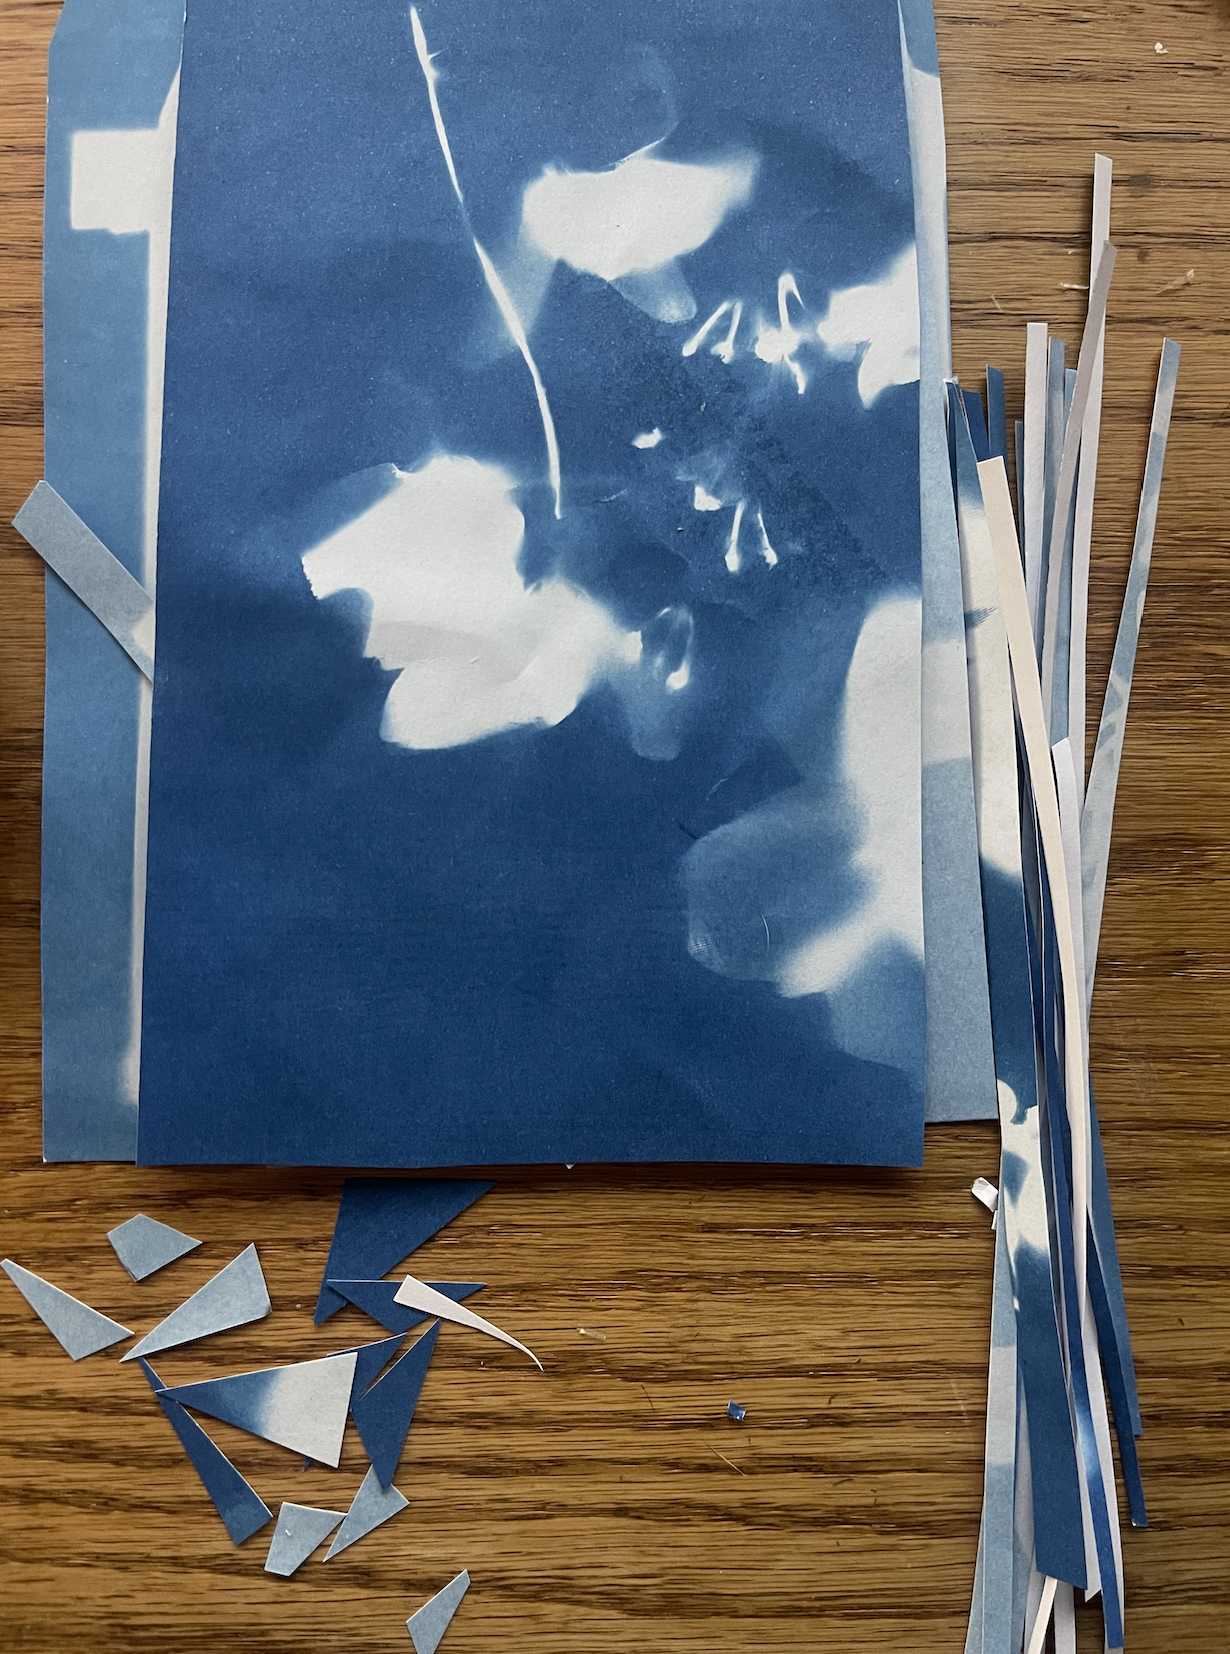
I also just recently had made some of my own cyanotype prints seen below. I didn’t like how a few of them came out so I didn’t have a use for them and wanted to make them into something new. I thought this would be the perfect project for them and decided to cut them up to make them into plants that are incorporated around the city. I also liked the idea of using the different shades of the cyanotype prints to add more color and dimension to the artwork.
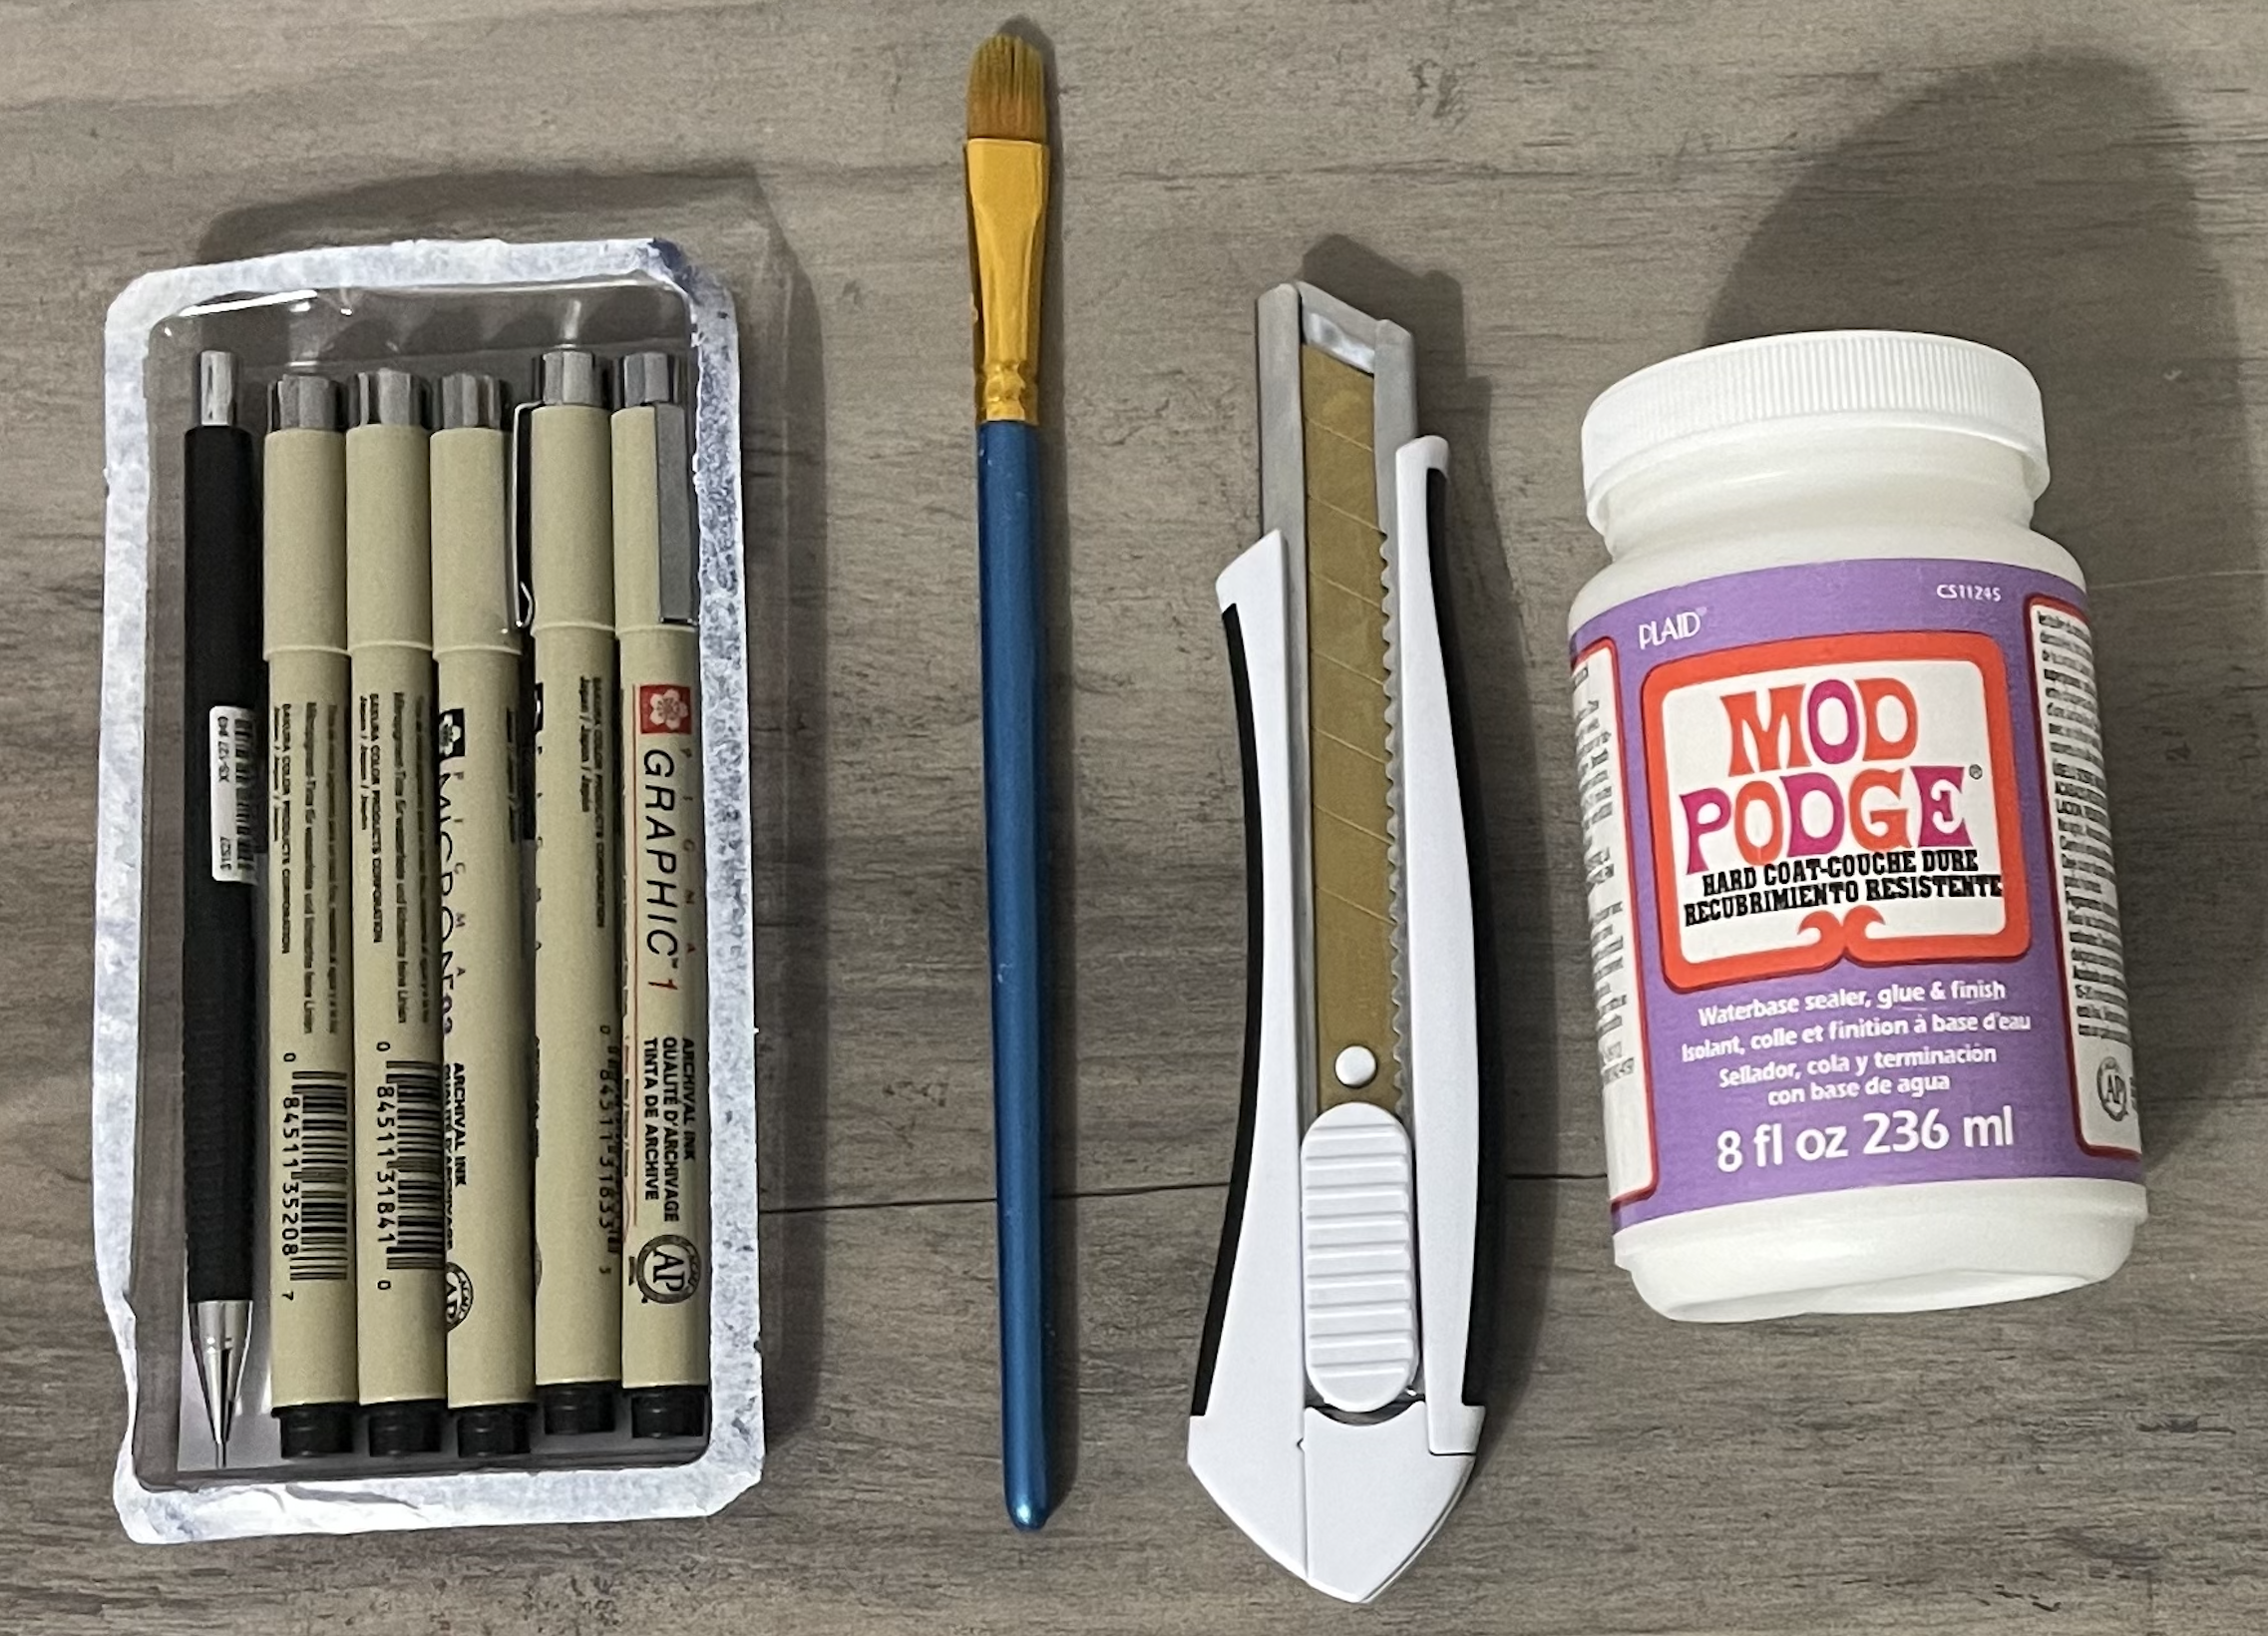
Additional materials I used were a box knife, scissors, Mod Podge, a paint brush, and artist markers which can be seen in the picture below.
Fabrication
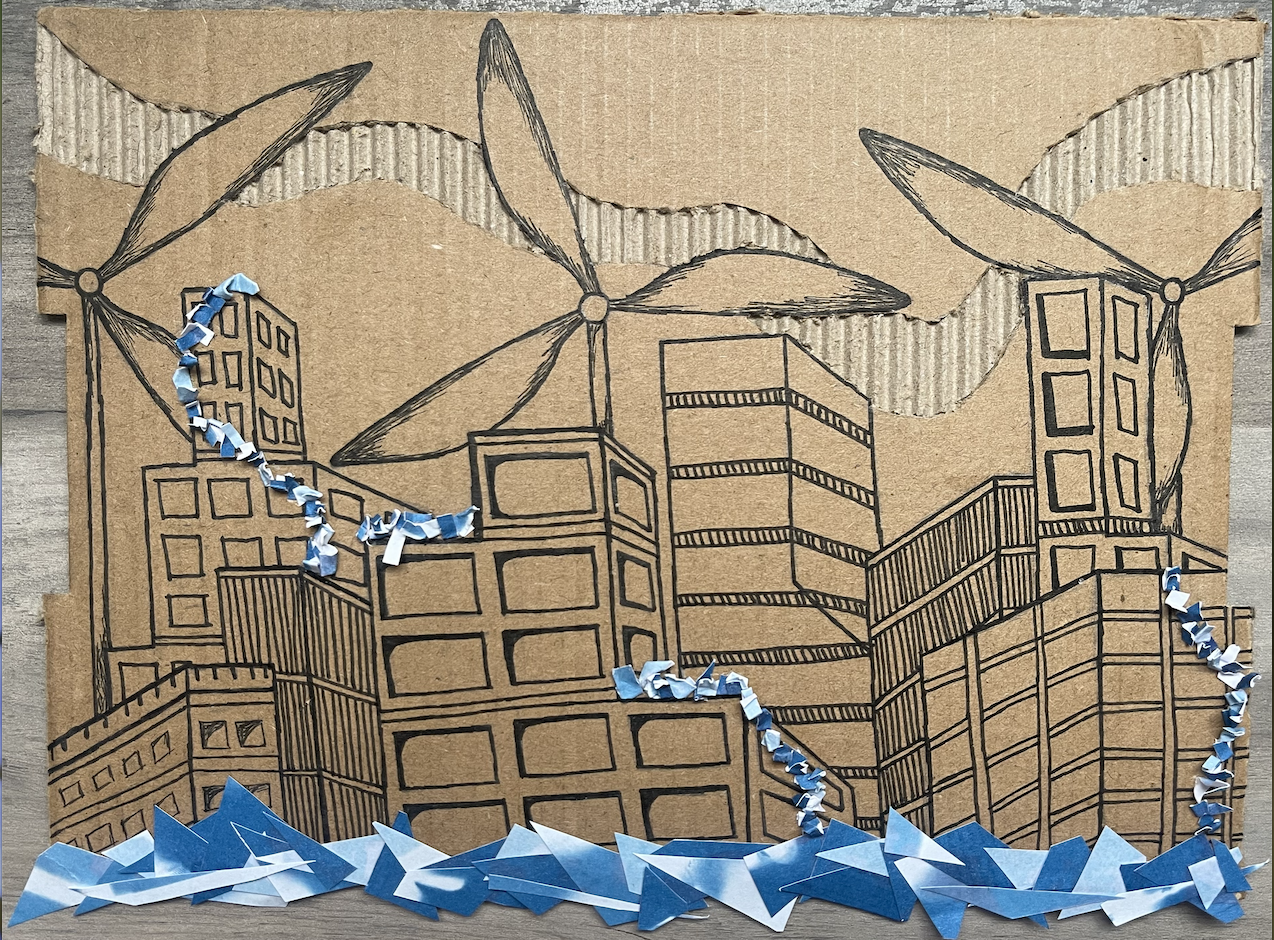
I first drew out a sketch of what I wanted the art piece to look like when it is on the cardboard. This sketch can be seen below.
In this sketch, the town would be in the forefront with the wind turbines in the back. The scattered blue lines are where I wanted to add the cyanotype paper cutouts to make it look like the town is being integrated into the nature around it. Then, the brown waves at the top were going to represent the wind that was turning the wind turbines. This would be made from the corrugations of the cardboard.
I then practiced exposing the corrugations in the cardboard with a scrap piece because this seemed like the hardest part. To do this, I drew an outline of where I wanted to cut out the top layer of the cardboard. Then, I lightly cut the outline I drew with a box knife so that it only cut through the top layer. I then carefully peeled back the top layer to make sure that none of the corrugations got indented or damaged. I did have to use the box cutter to get underneath some of the top layer of the cardboard to help peel some of the sections off. One of my practice cuts can be seen below.
Once I had that technique down, I started working on the piece of cardboard I wanted to use my final project. I first sketched out a rough draft of what I wanted it to look like on the cardboard in pencil which is in the picture below.
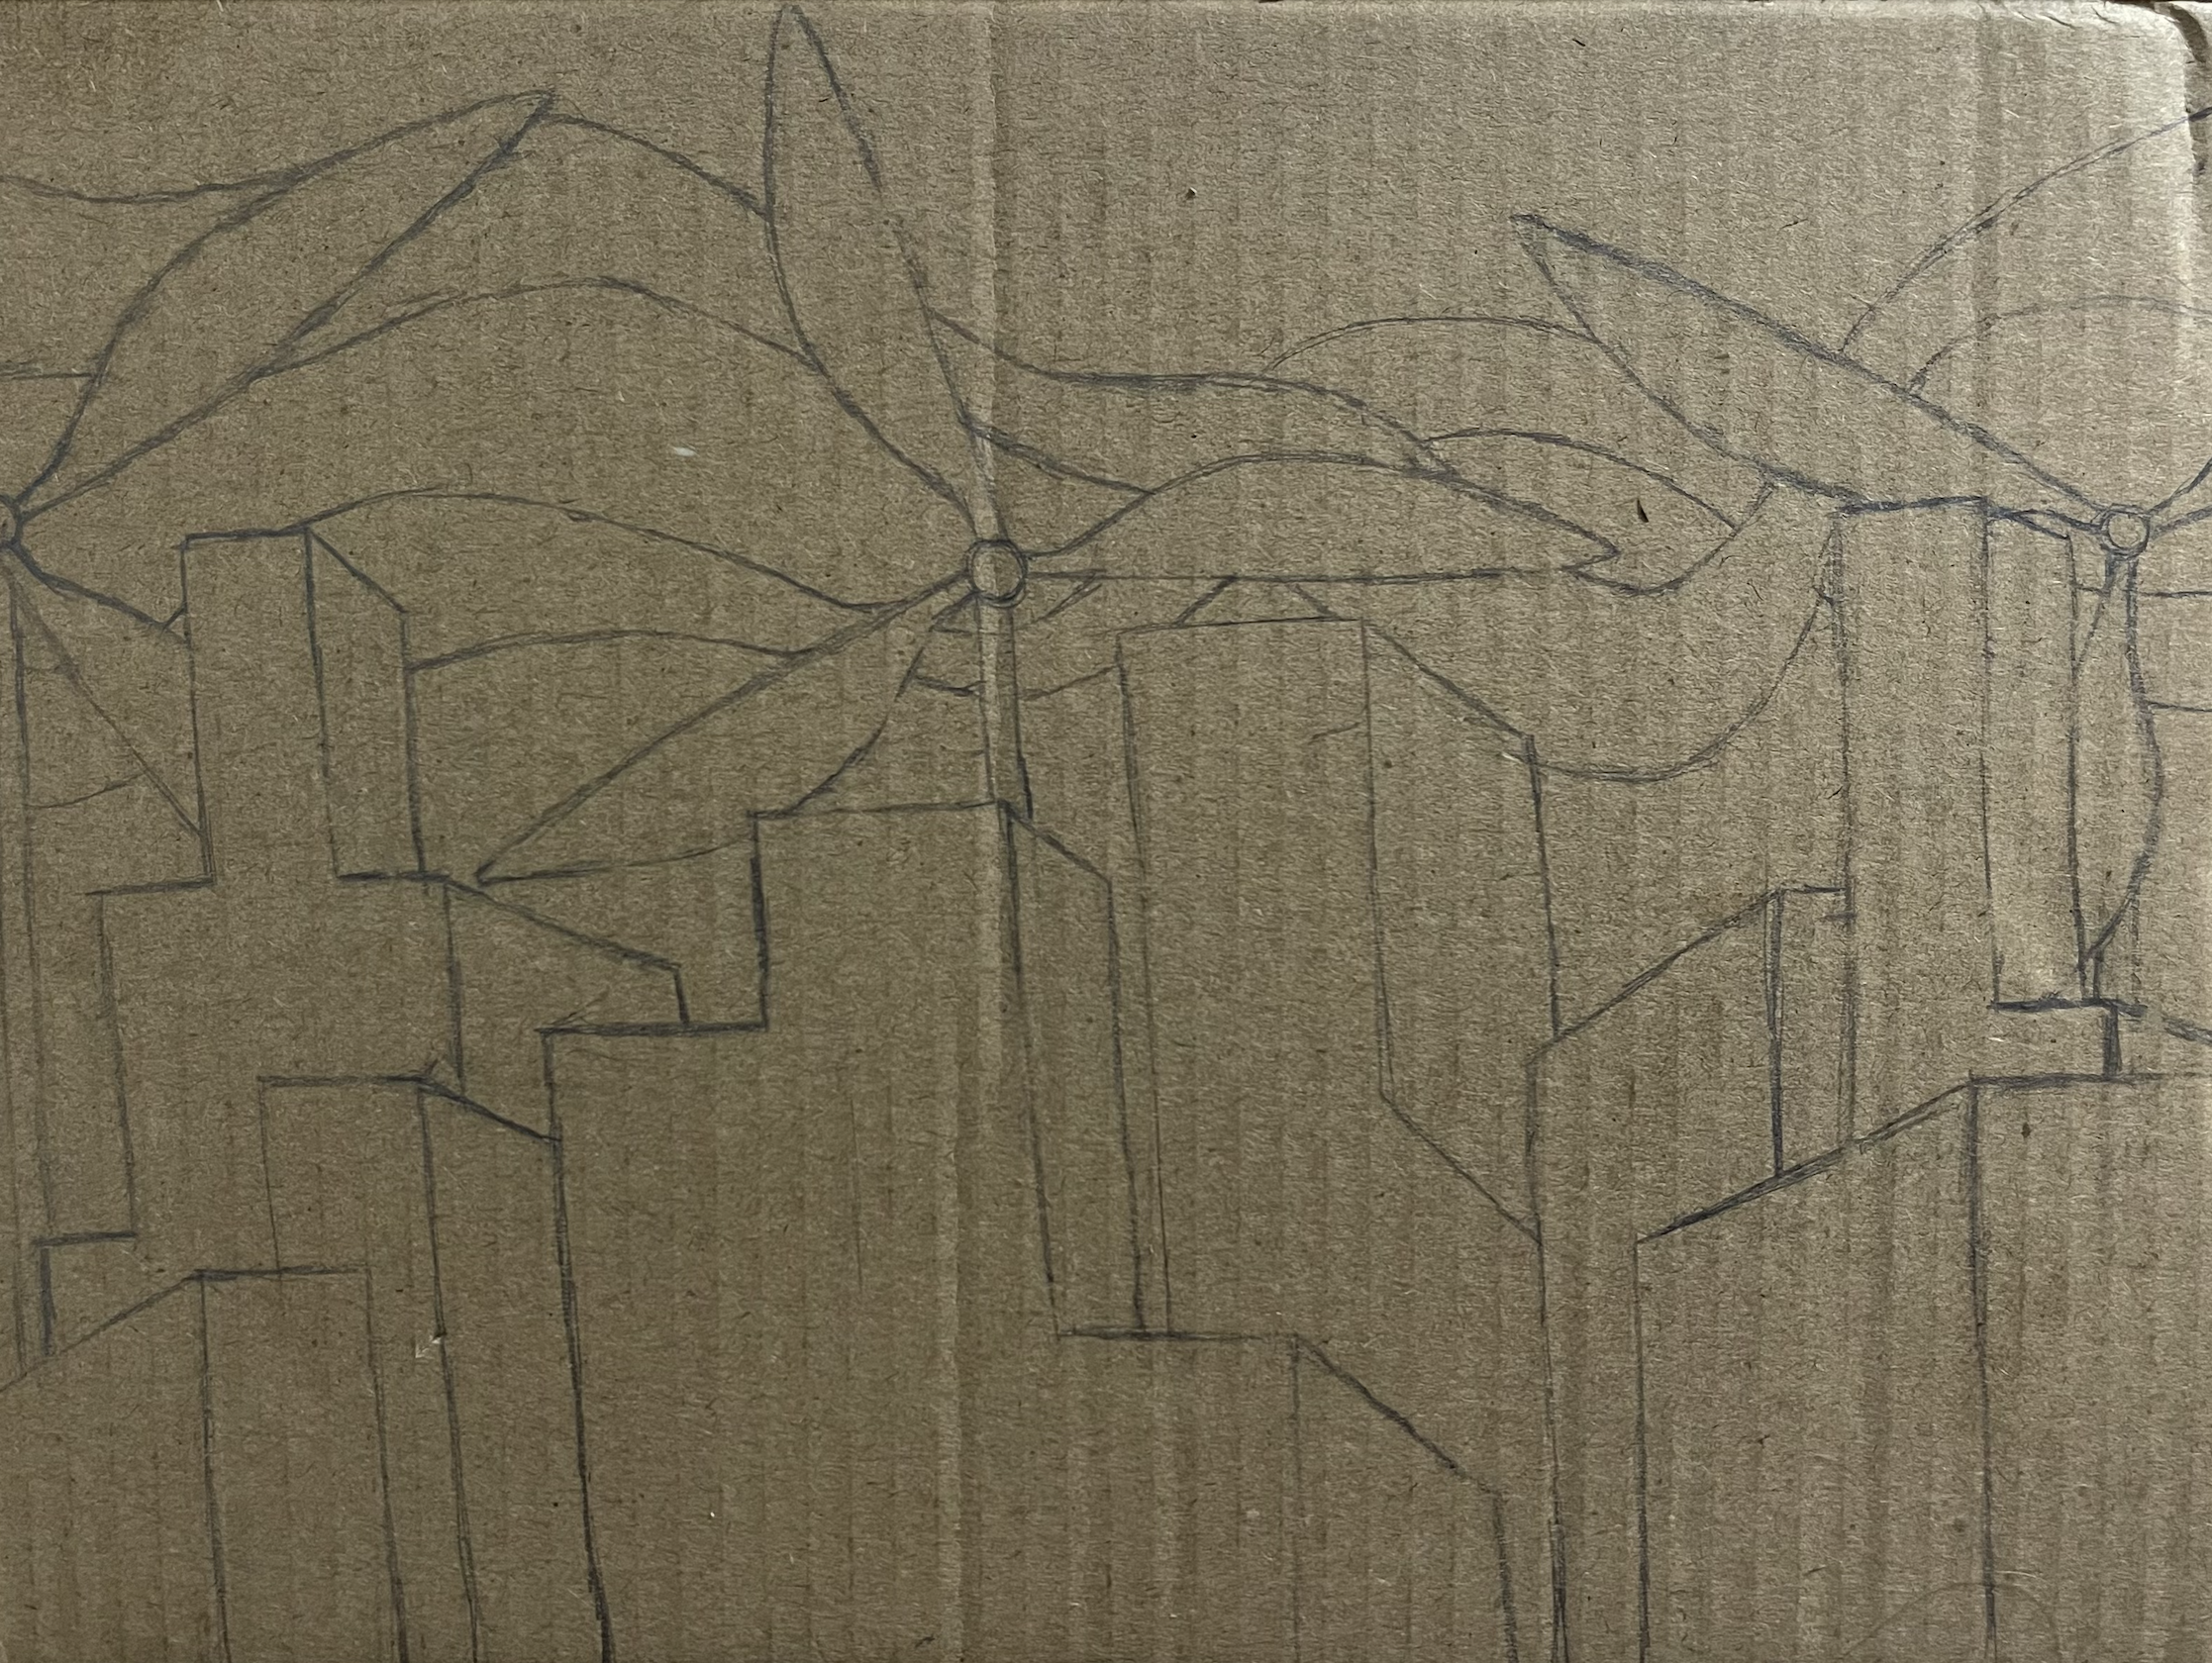
I then filled in the drawing with my black artist markers. I also added more detail to the wind turbines and the buildings to add more dimension and interest in the artwork. Then, I wanted to add in the cyanotype pieces for the illusion of nature. I first cut the cyanotypes into triangular shapes and really thin strips that are in the picture below.
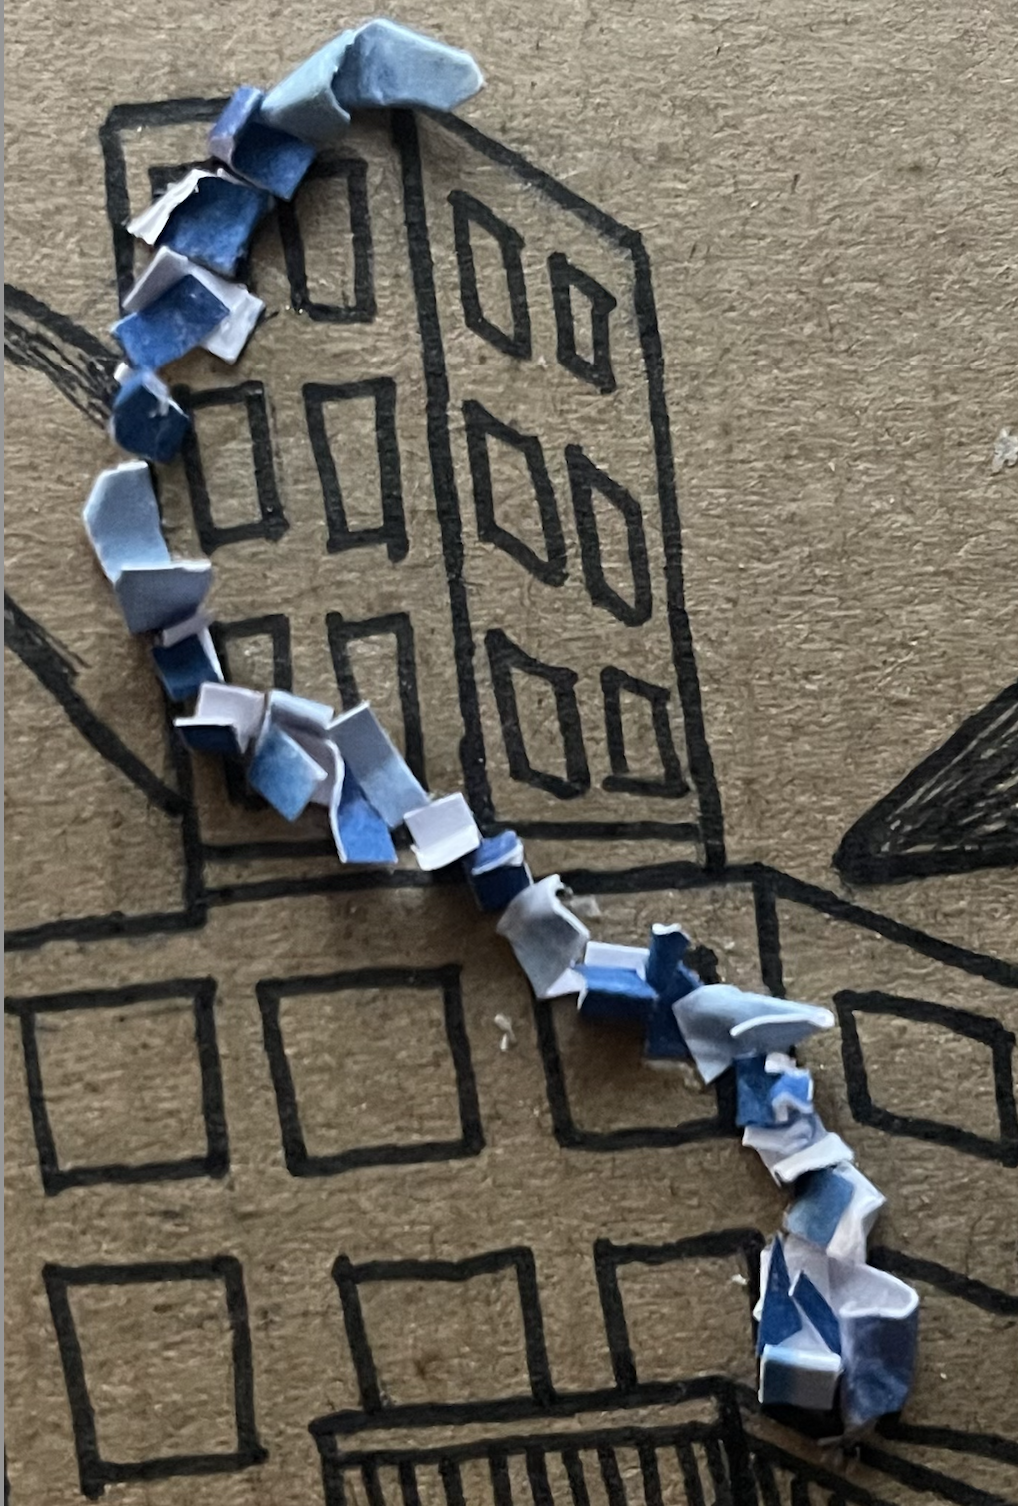
I used the Mod Podge to lay the triangular pieces onto the bottom of the piece creating a more abstract look of grass around the buildings. I then also cut the thin strips into really small pieces and curled them up to give them a three dimensional look. They all were slightly different shades, so I wanted to make sure different shades were adjacent to each other to create more color differences. Then, I used the Mod Podge to glue them onto the buildings. A close up of one of these can be seen below.
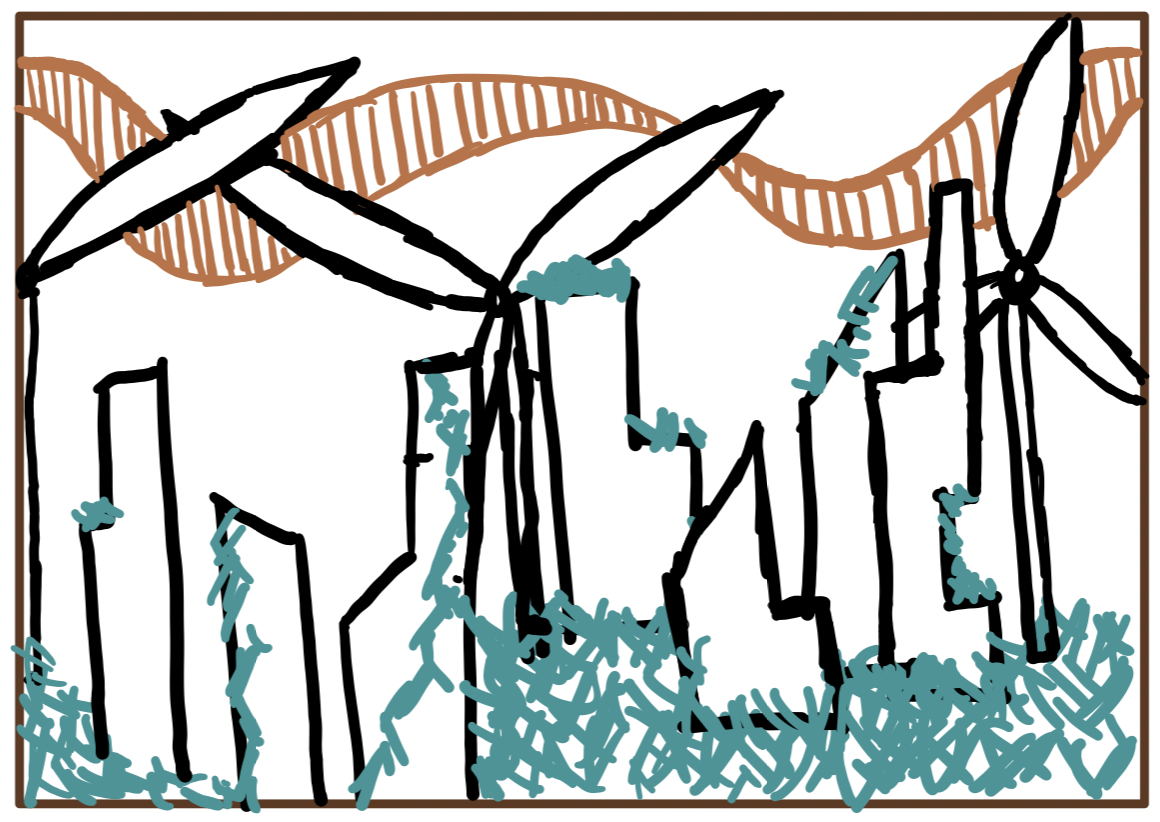
Final Project
My final project can be seen below.
This was supposed to function as a hanging decoration, but I didn’t ever add a hanging element to it. I could add another cardboard hanging element to the back or I may just use the velcro command strips to be able to hang it.
The artist function was to meet the environmental aesthetic. I think I’m happy with how I met this aesthetic by adding in the wind turbines to the background of the city and adding plants to the buildings. After thinking about it a bit more, if I could do it again, I would integrate the wind turbines more directly into the buildings somehow instead of being in the background. I would also have added more plant vines and rooftop plants to the buildings to make it look more full of plants. I also think that I would try to use a slightly larger piece of cardboard so that there was more empty space at the top. This way, I think the cut out corrugated part would stand out a bit more. Overall though, I’m fairly happy with how my upcycle project turned out. I’ll definitely keep it and I’ll try to find a good place to hang it up!
Sources:
- Eugene Tssui, 1982, https://placesjournal.org/article/aesthetic-environmentalism-review-emerging-ecologies-moma-exhibition/?cn-reloaded=1
- Reem Altwaim, 2017, https://www.instagram.com/reemtwaim/
3 Comments. Leave new
[…] To learn more about my upcycle project, you can visit my previous blog post here: https://www.aesdes.org/2024/02/21/50964/ […]
Wow this is a pretty cool way to use cardboard. Never thought to cut off the top layer and use the underlayer for texture. I also really like the way you did your shading on the blades. I was wondering what cyanotype is? It looks to be paper with water color but I looked it up and it seems like it’s used for photography. Not really sure though, regardless great work!
Hello,
I really like the dimension of your project through the half exposed card board and splash of color that almost look like shards! A question I had was if you were to do this project again would you consider using a laser cutter to cut out the buildings of the card board to add even more depth?