

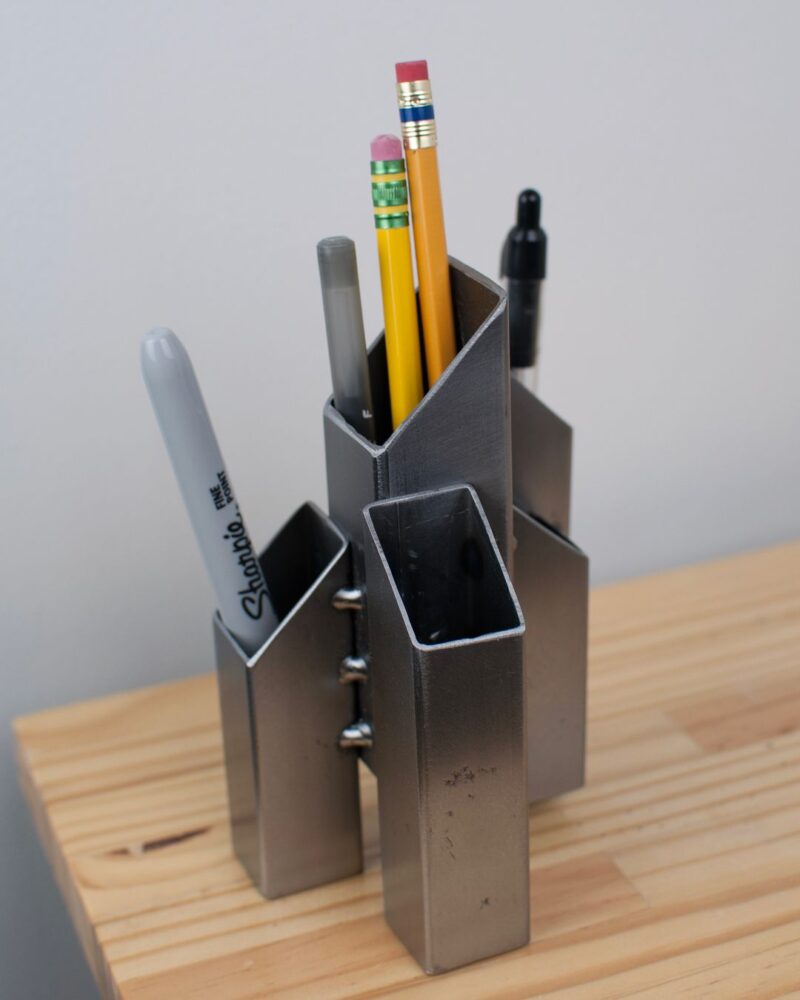

Pencil holder by Alan IV – https://in.pinterest.com/pin/1001769510848484571/
Pencil holder by Иван Прищепа – https://www.pinterest.com/016bkwm1r24nzs3/
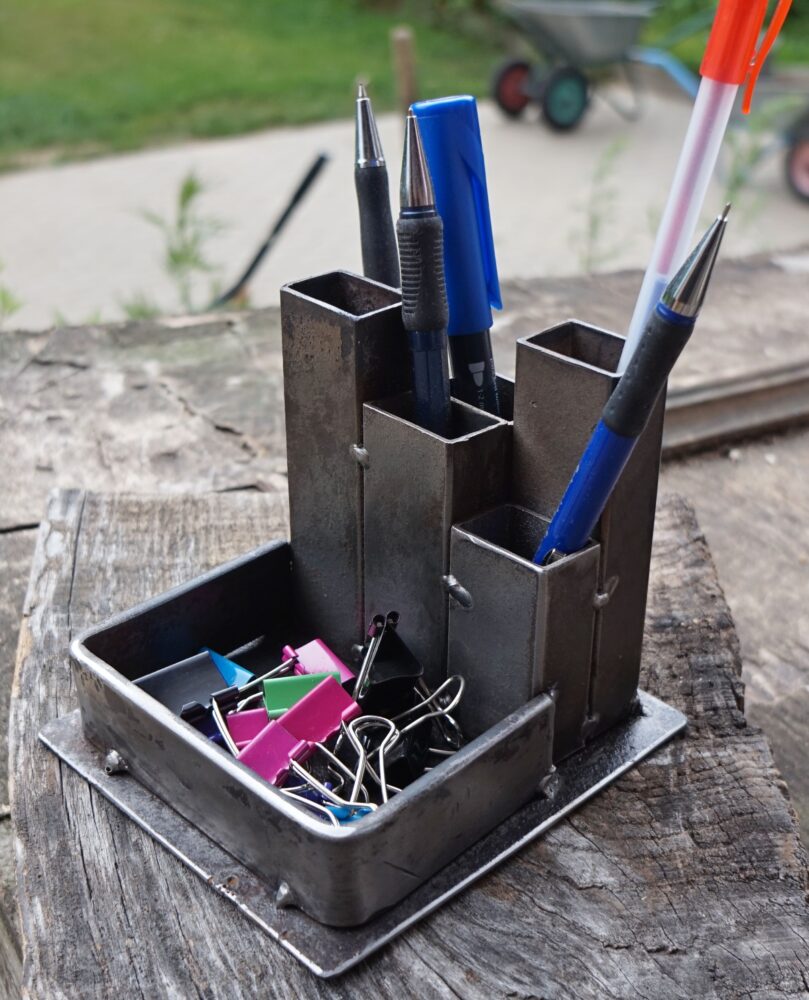
Pencil holder by MG3 – https://www.instructables.com/Simple-Industrial-Pencil-Holder/
For my Upcycling project I chose to make a brutalist pencil holder. I was originally going to go with a steampunk aesthetic and while looking for some inspiration I saw this project by Allan IV on Pinterest. I had hoped to incorporate welds into my project and this seemed like a good introductory welding project. The aesthetic I will be aiming to mimic is brutalism. The general rules for brutalism are angular, gray, imposing buildings. There were many variations of pencil holders online, however, the ones that caught my eye were made from square metal tubing, and to me looked like brutalist architecture. The image above on the left especially reminded me of the Engineering center on campus.
While I liked the idea of a simple pencil holder I wanted to expand on the idea and make it hold more use than just pencils. I planned to add a spot for my calculator and rulers etc. while emphasizing a brutalist aesthetic. To make this happen I designed the piece to mimic the general shape of the brutalist Engineering Center. I liked the idea of working primarily with the same shape tubing as many of these examples, the material is easily accessible and fits the brutalist theme. I also planned to polish the metal to remove as many blemishes as possible to distance the piece from other aesthetics like scrap metal.
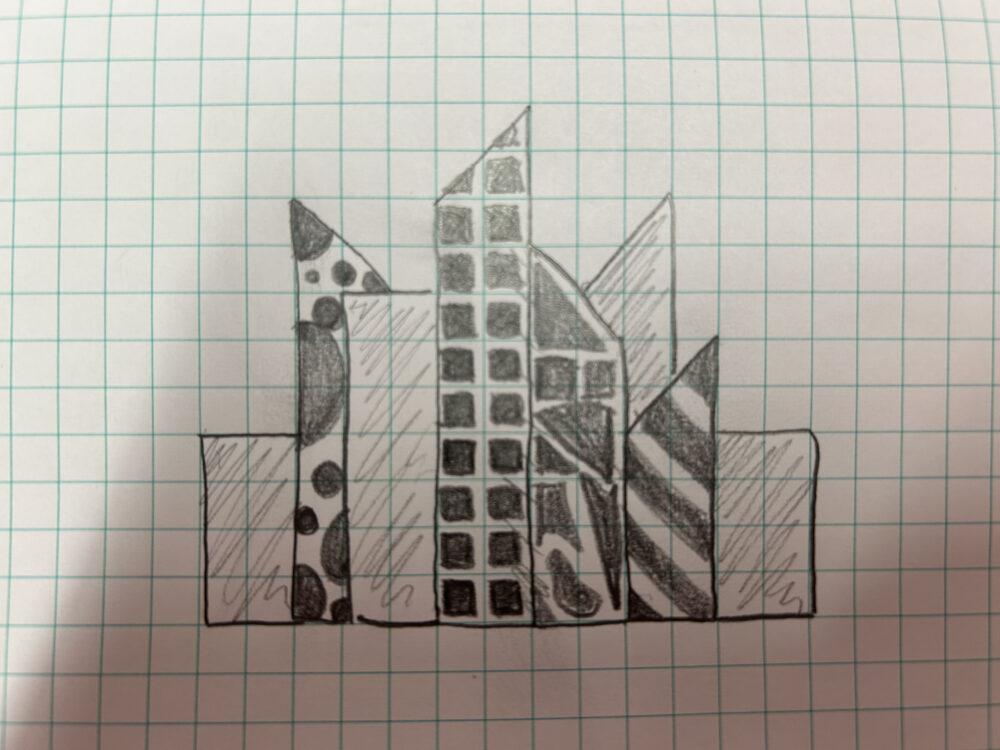
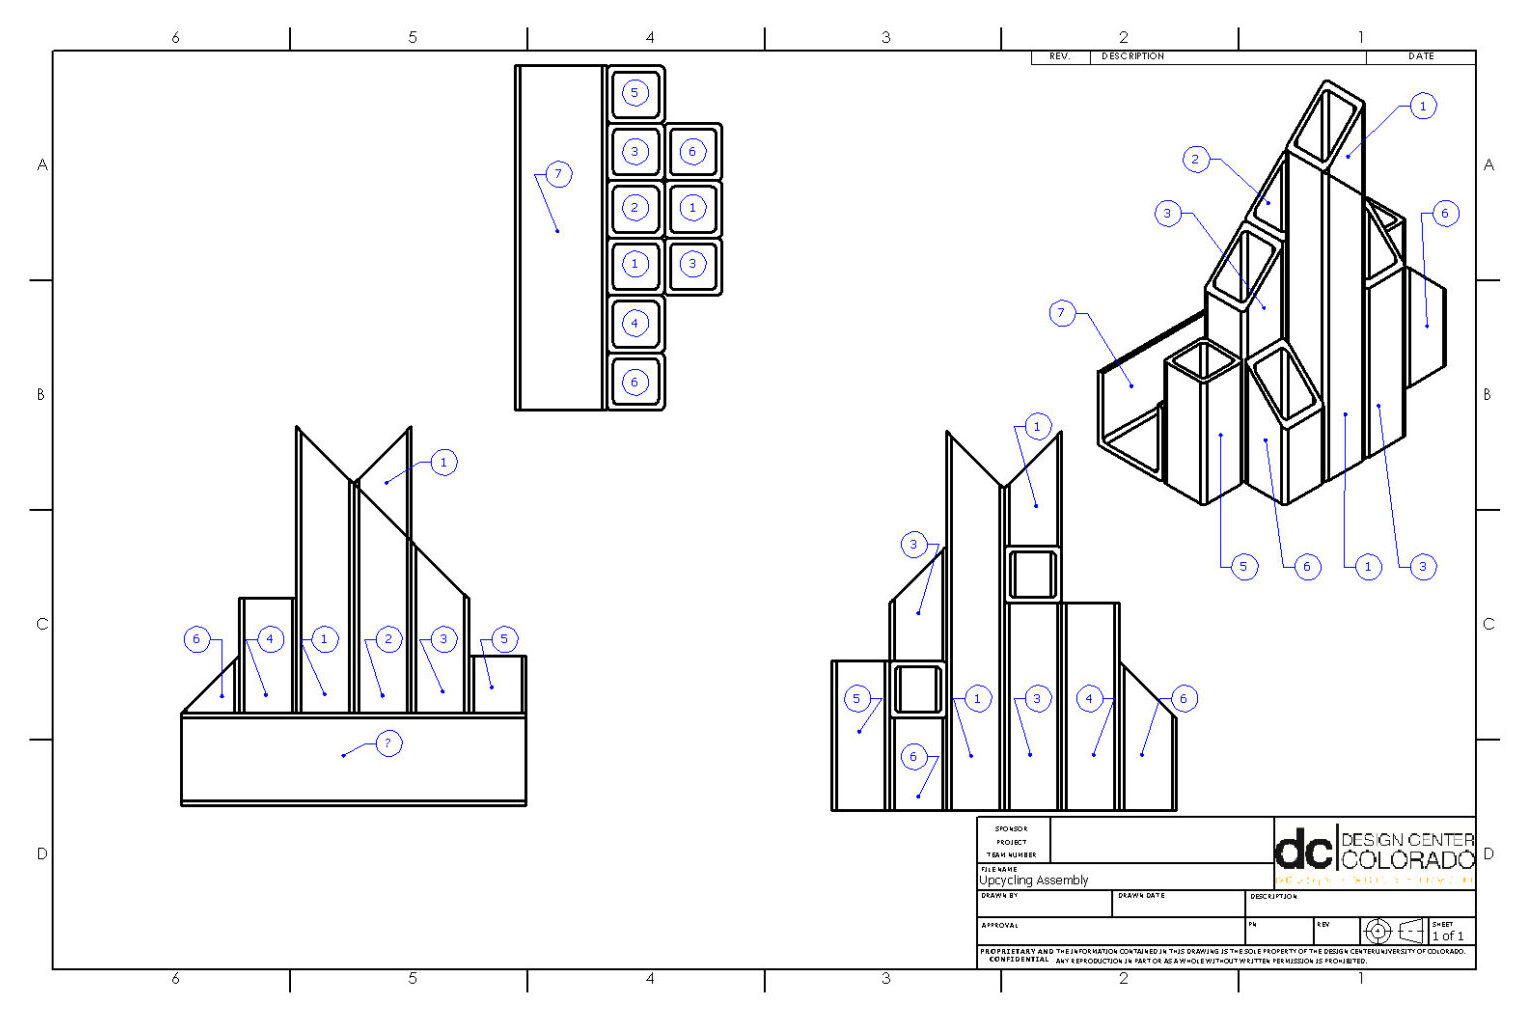
In order to bring the project to life I needed a design and materials. I started with some simple sketches in my design notebook for a general idea and ended up doodling all over it. With the general idea in mind I moved to SOLIDWORKS where I completed the design. The CAD modeling was super helpful for the spacial visualization of the project. I also modeled my calculator and pencils to check the heights and tolerances of my design. I also created drawings for every component so I wouldn’t get yelled at in the machine shop.
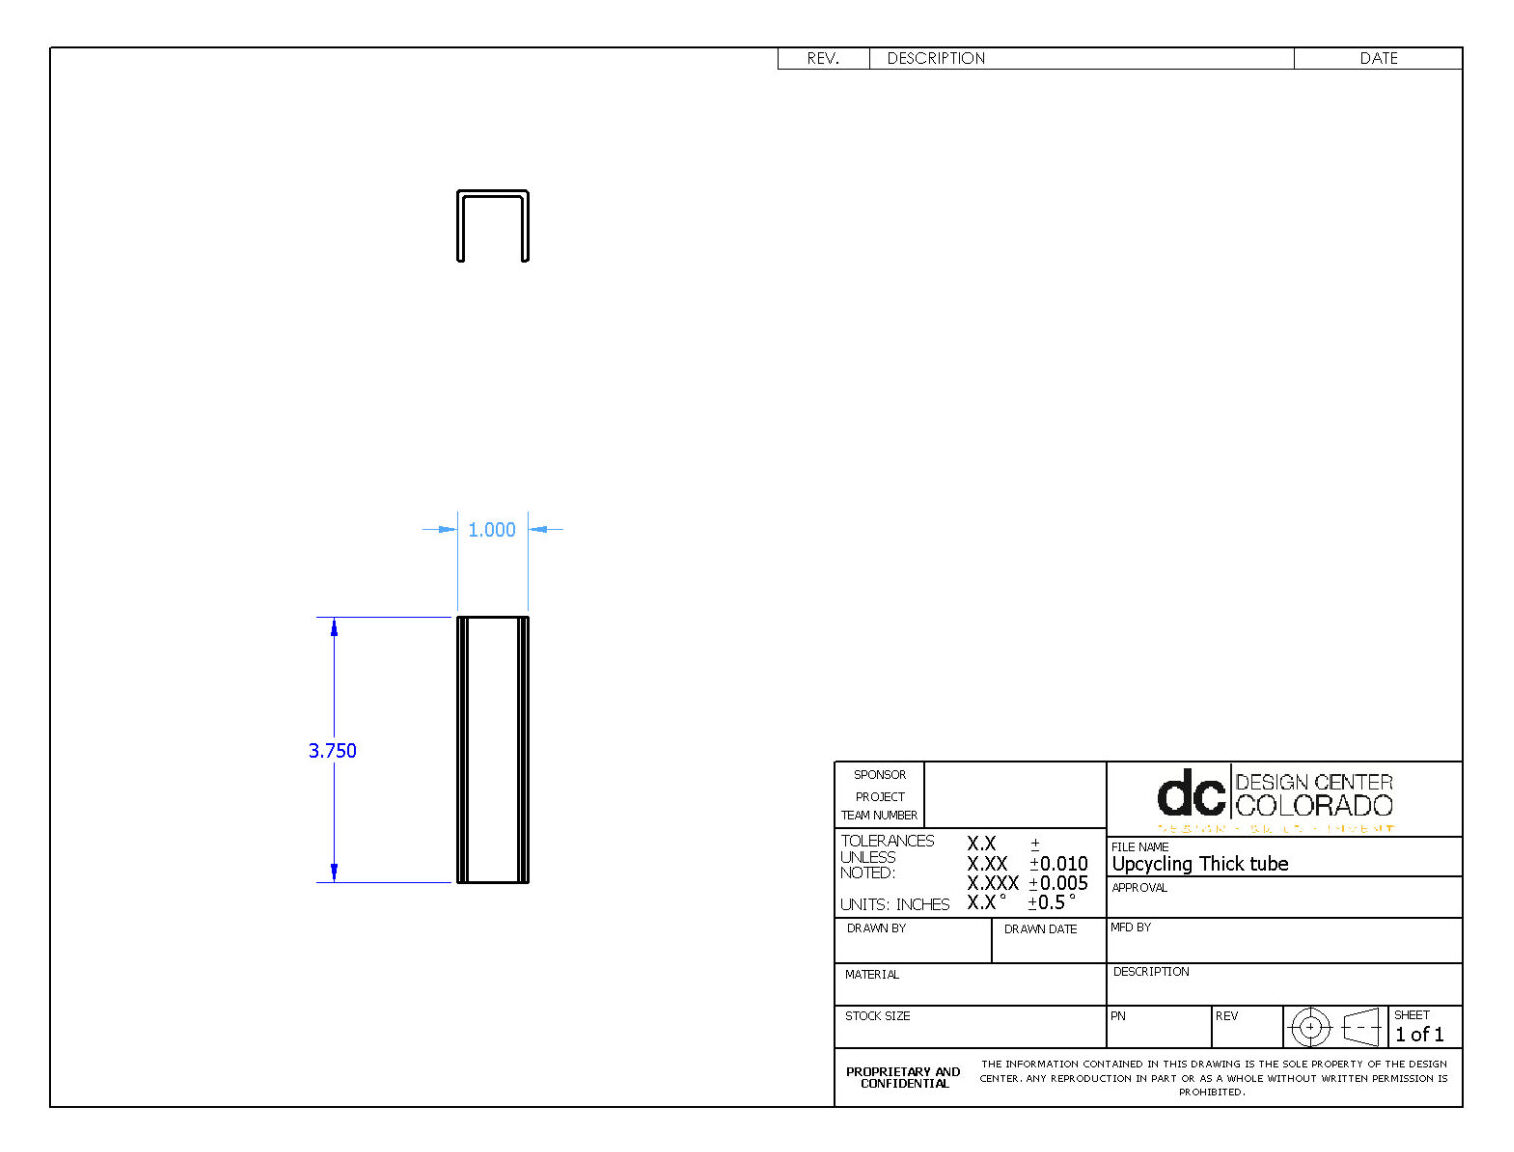
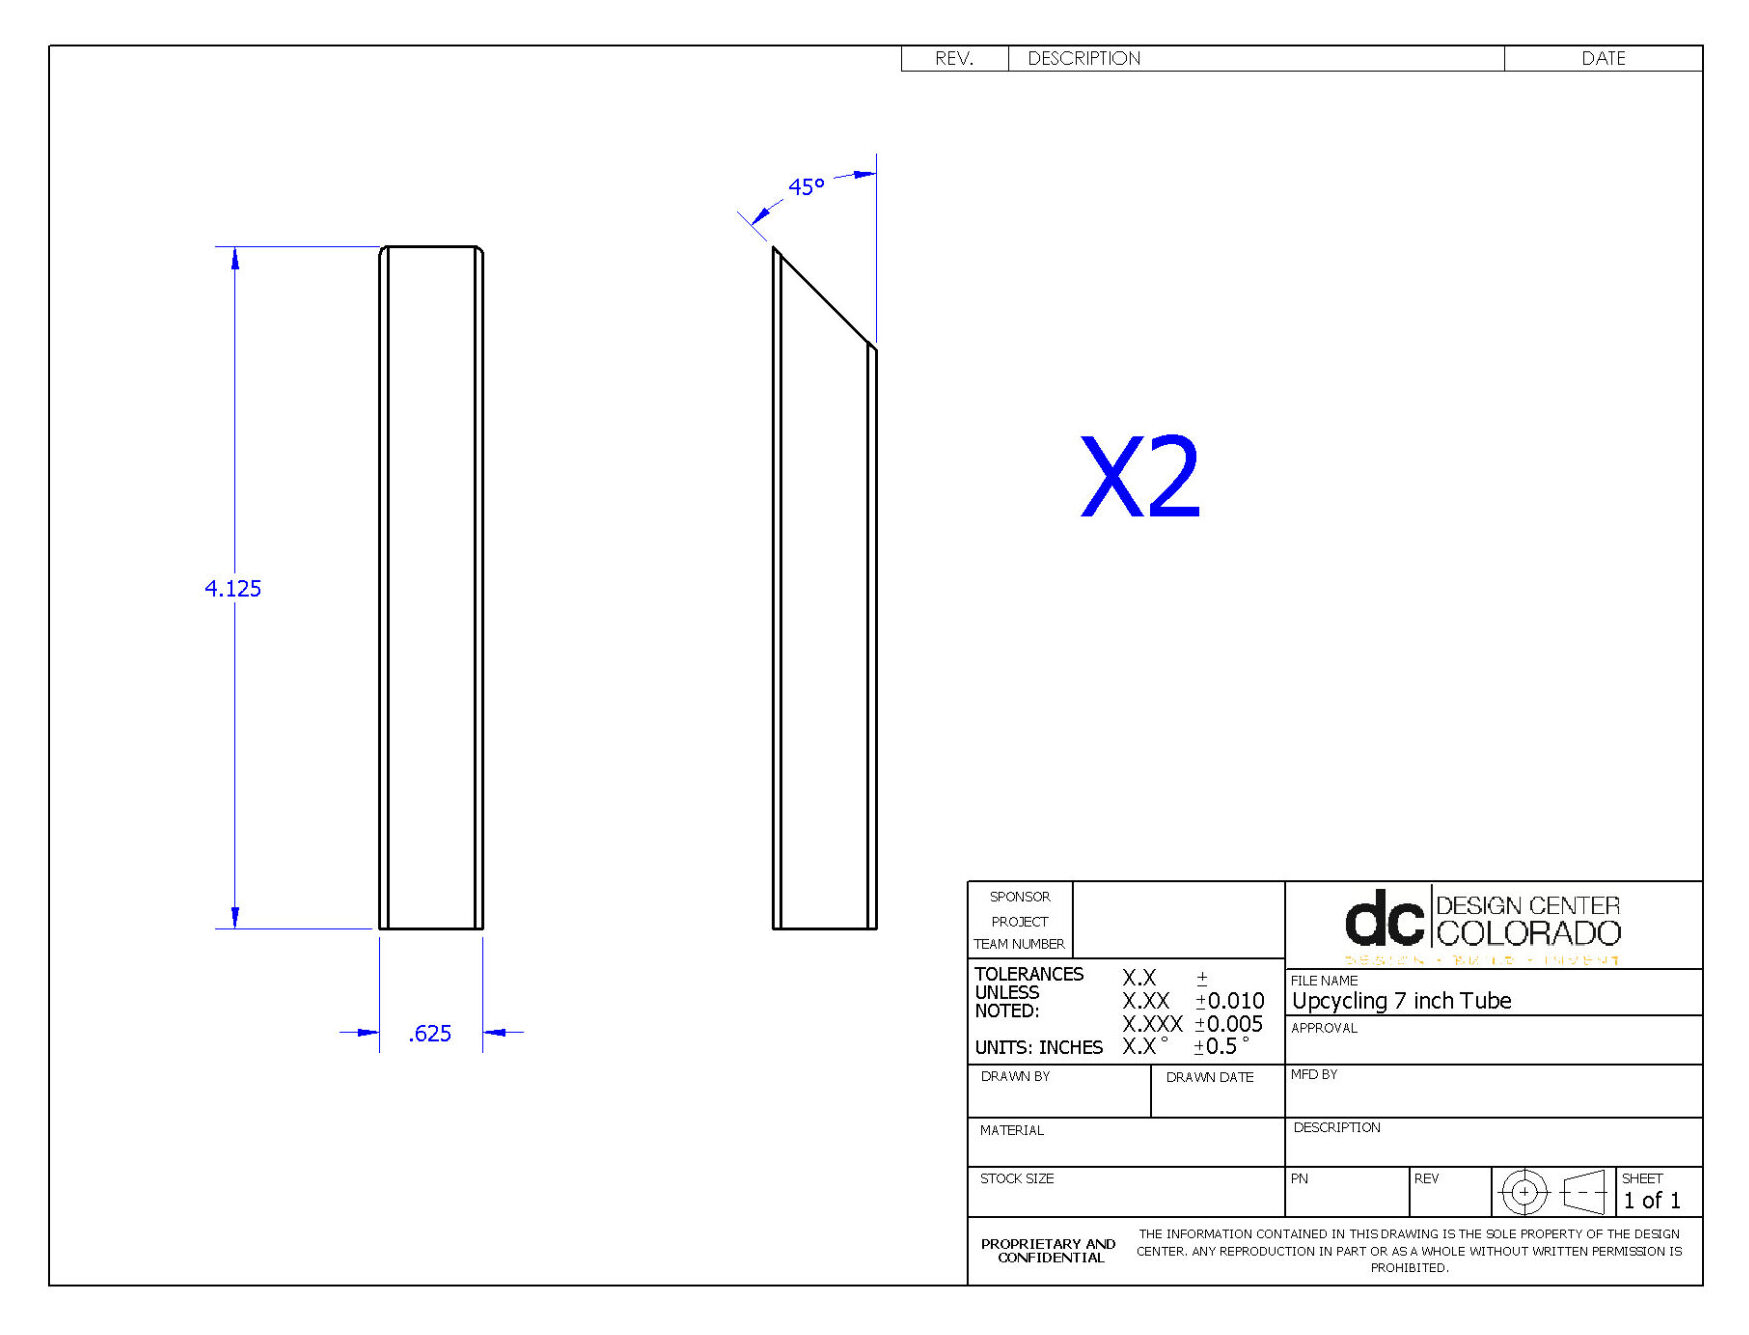

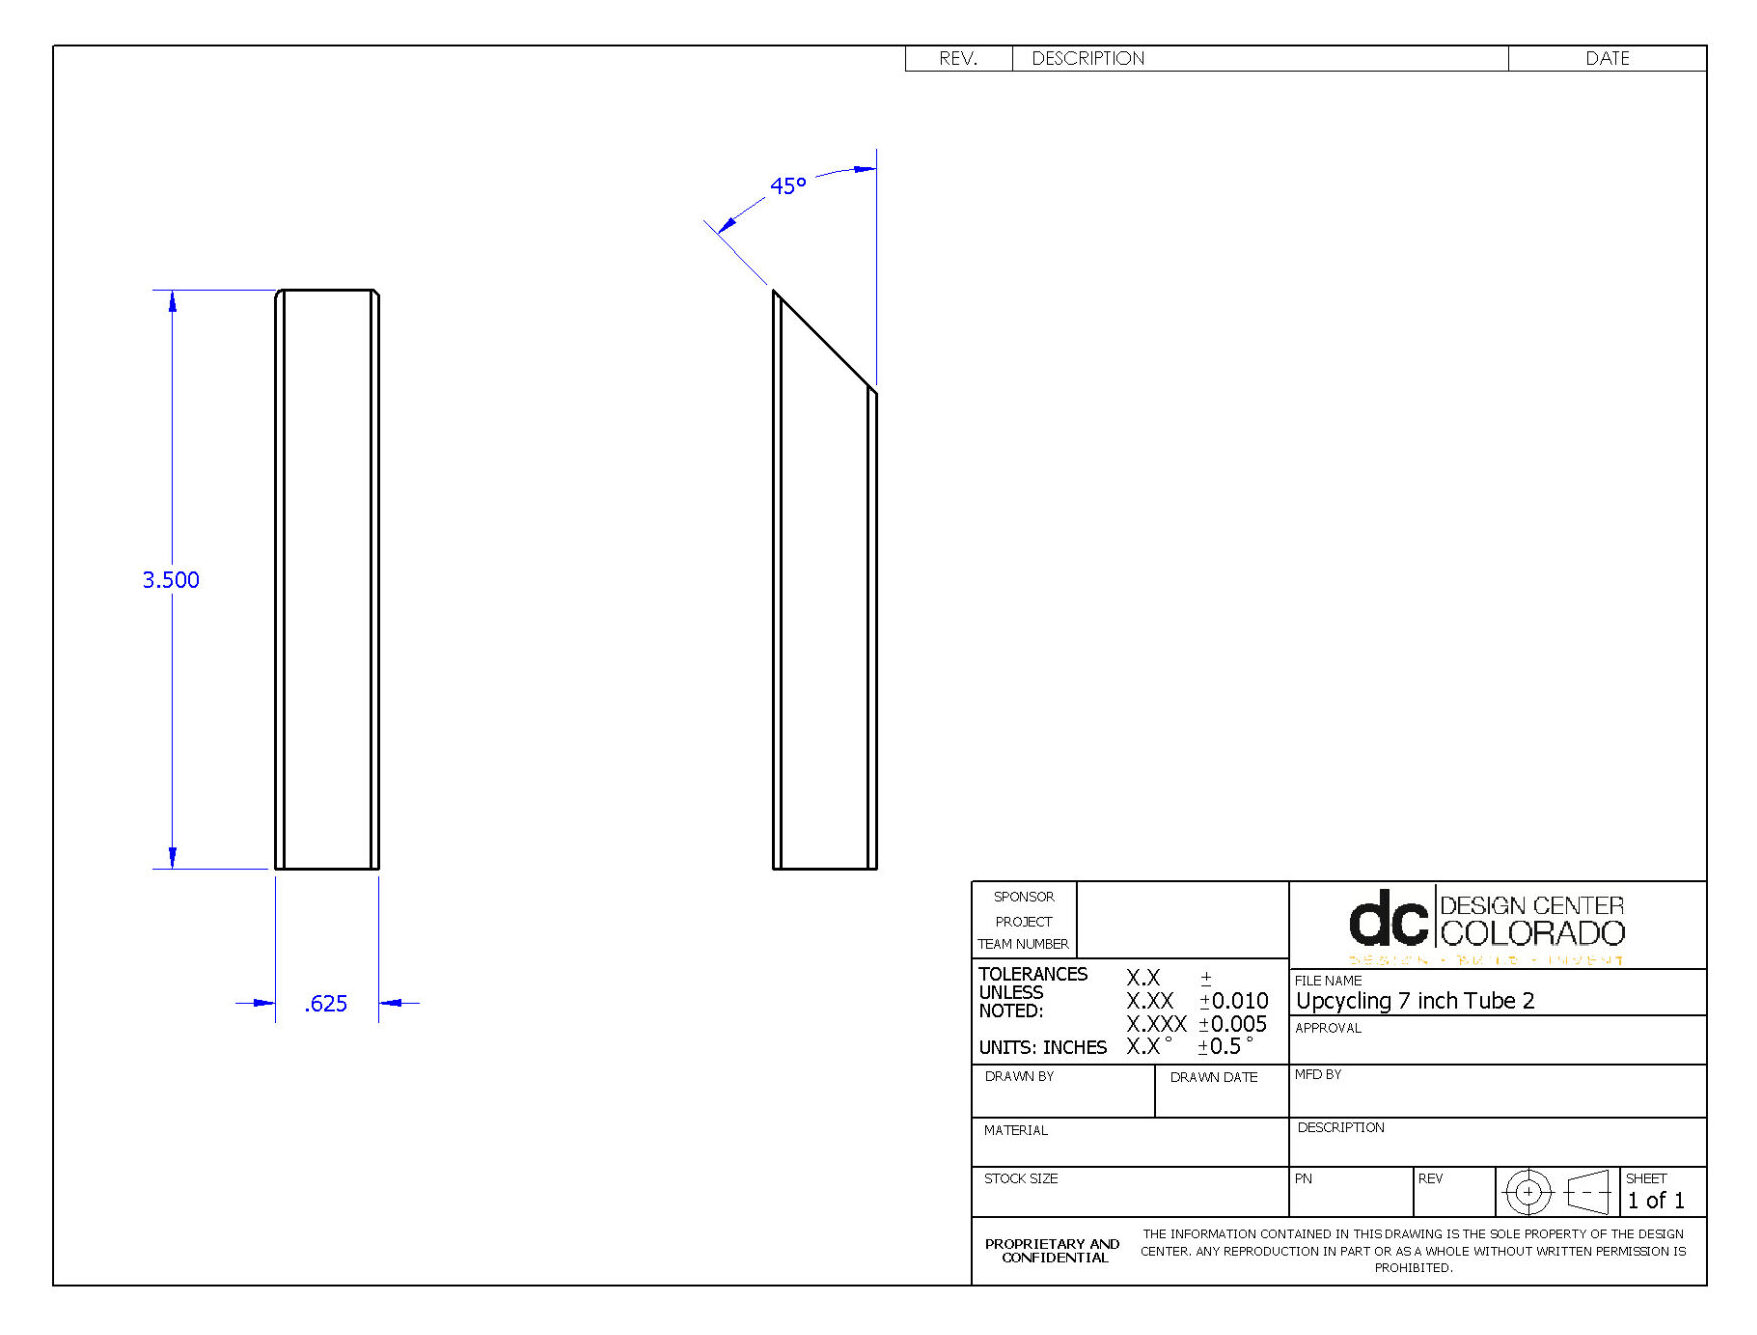
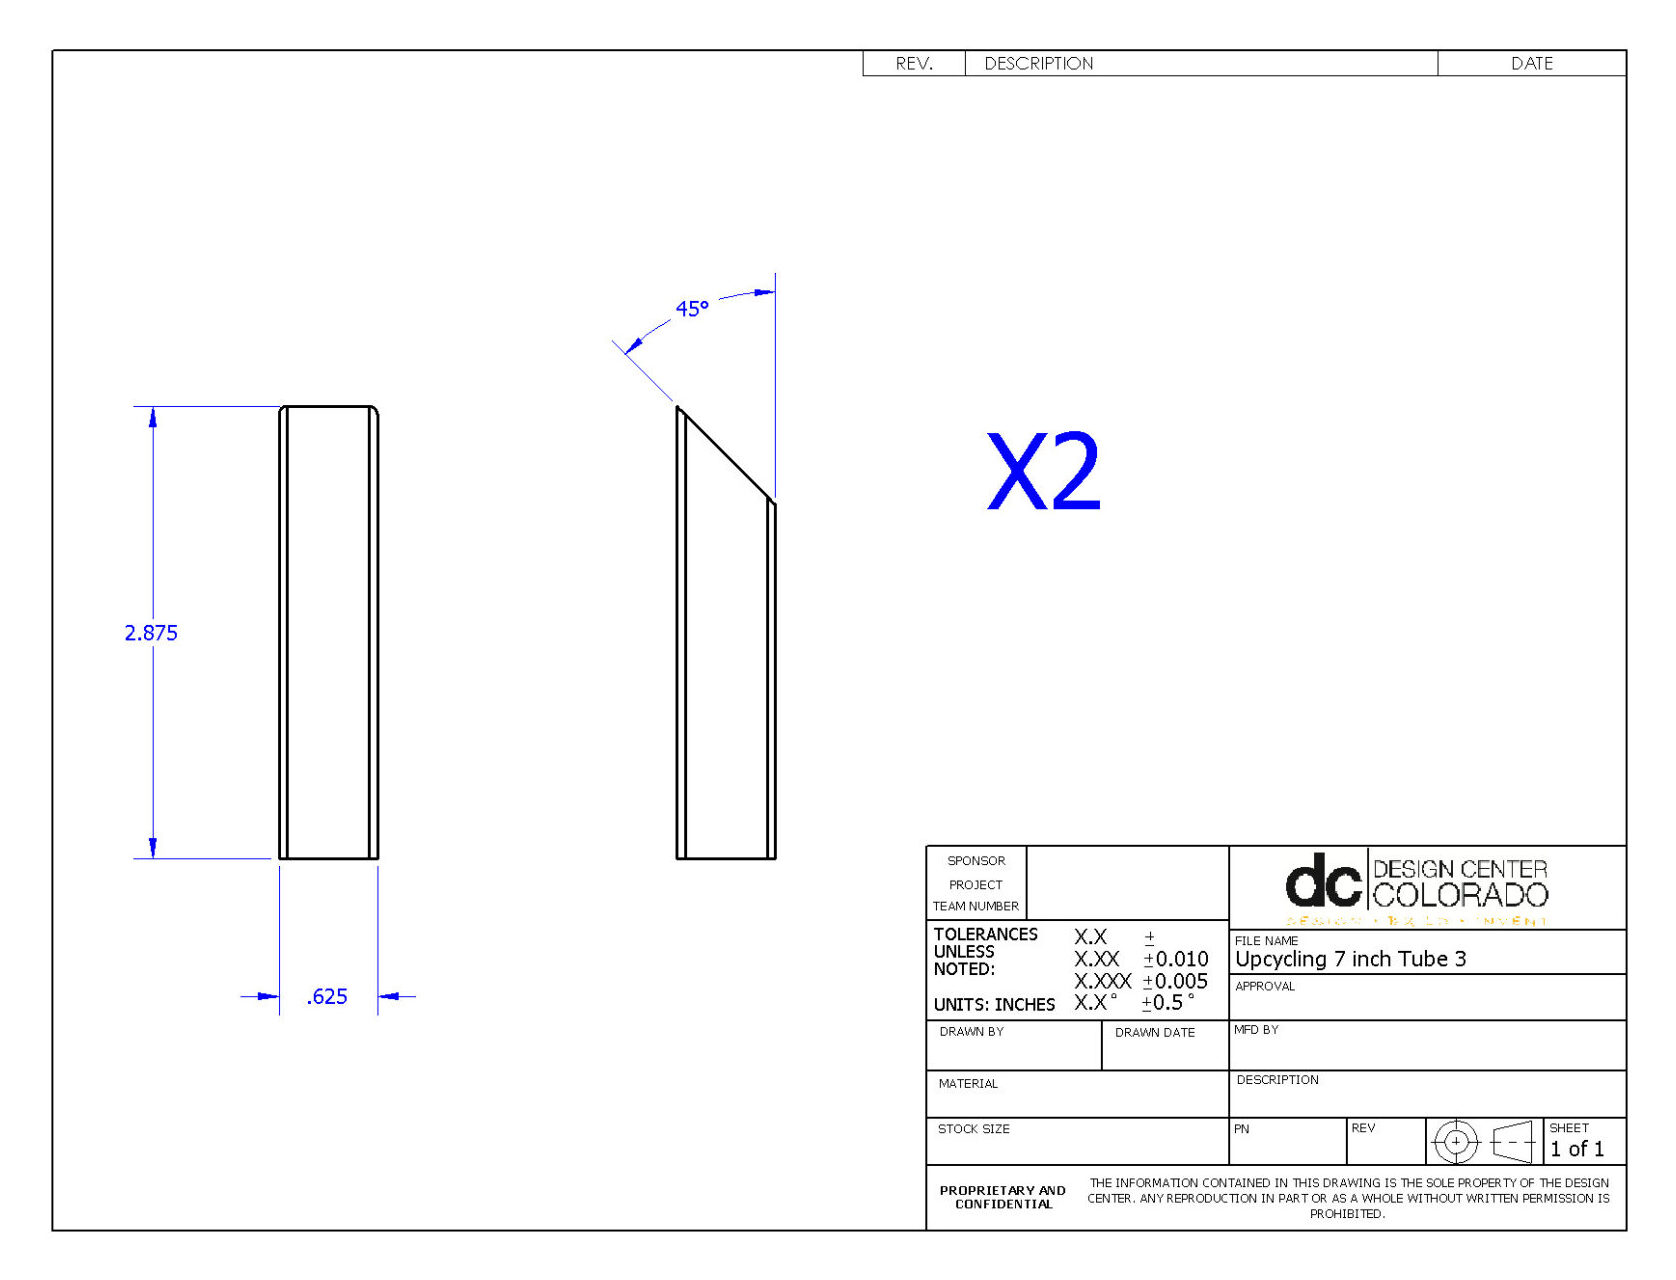
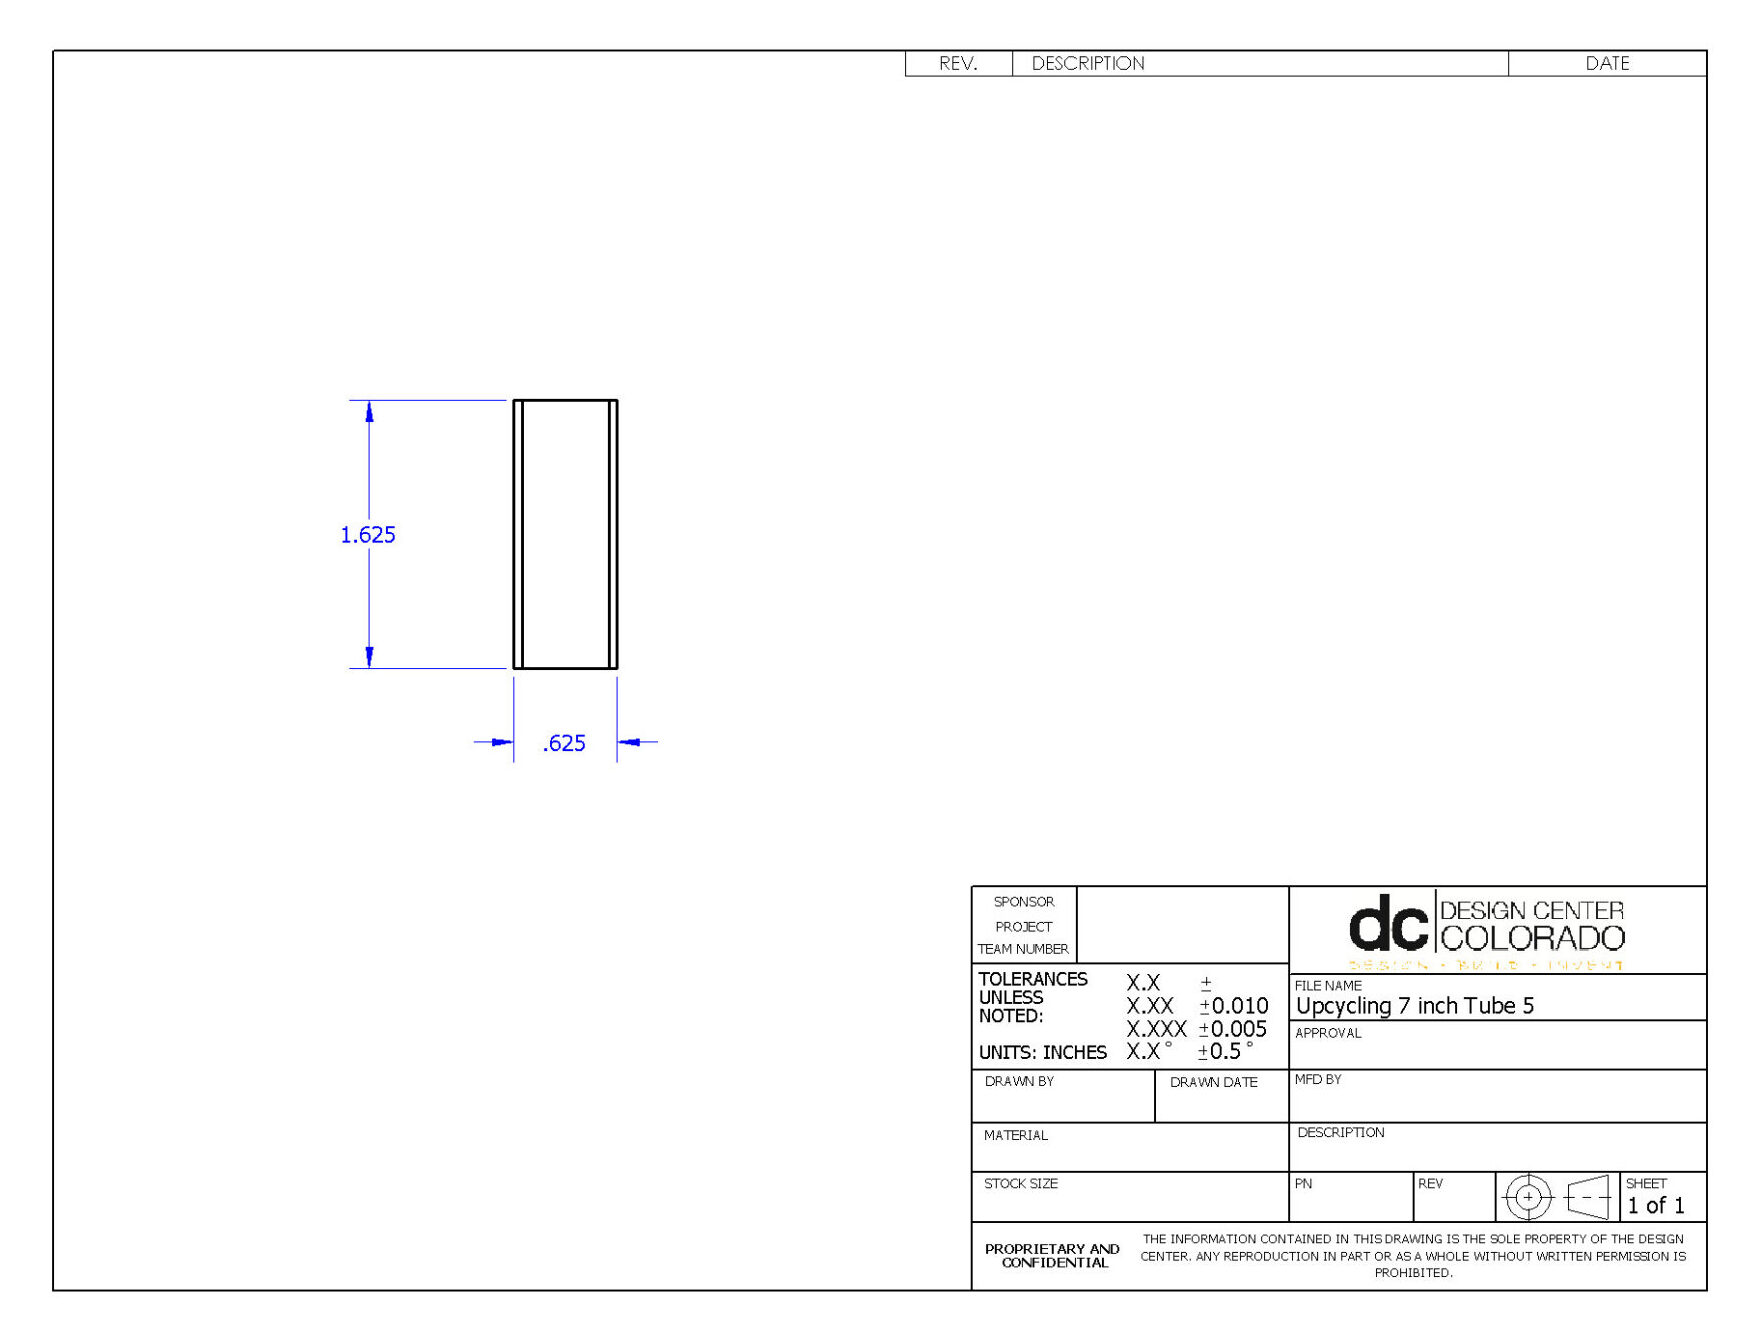
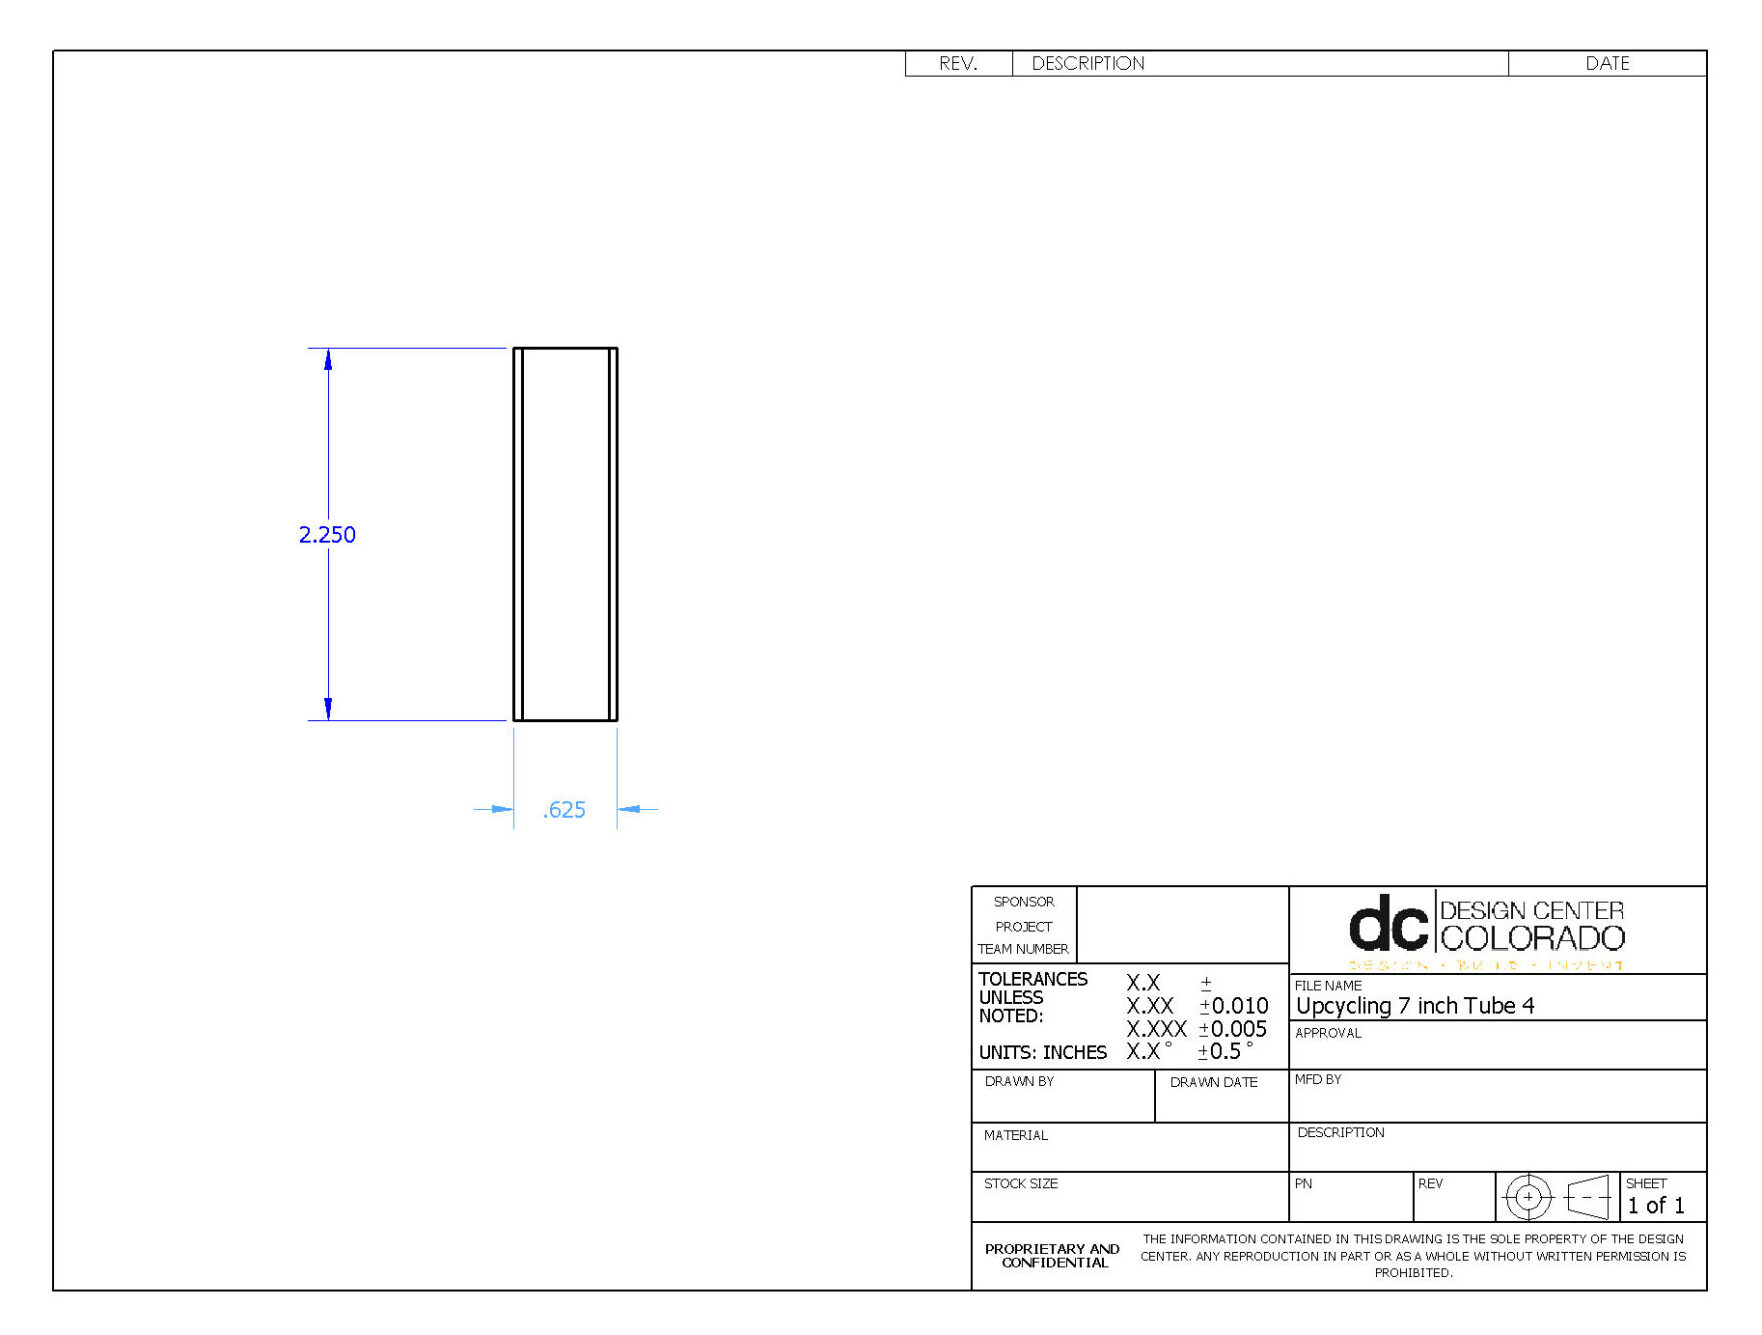


The material I ended up ordering was 3/8″ SS square tubing. The manufacturing of my components started off pretty well with some simple angled cuts on the vertical saw. I had all my angles at 45 degrees so I didn’t have to change the setup very much. Since there were 2 vertical saws I could use one for horizontal cuts and one for the angles which sped up the process significantly. An issue that I did not foresee In the design phase was that cutting material actually takes a fraction of an inch away from the total length every cut. This resulted in me making one less piece than originally planned.

I next used a grinder to clean up all of the cuts I had made. This was an important step as the burrs were large enough to prevent the pieces from sitting flush next to each-other. The next step after cleaning up all the edges was to sand blast the parts. This acts as a method of both cleaning the surface of the metal as well as prepping it for welding. The sandblasting was very difficult as the pieces were very small and I couldn’t see through the glass of the machine so it was mostly by feel. Inspecting the pieces I saw that I had gotten most of the important areas blasted and I could move on to welding. With the missing piece I reassembled the design and cut the calculator folder down by 3/8″. I also really liked the surface finish and thought it fit the brutalist aesthetic very well because it looked a lot like concrete.

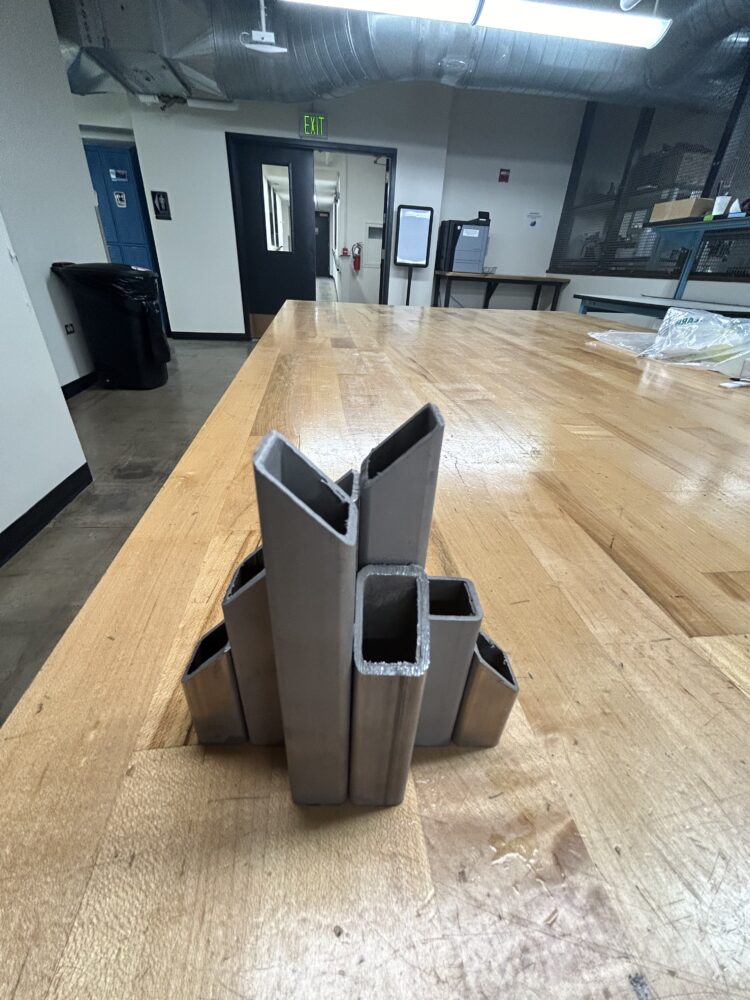
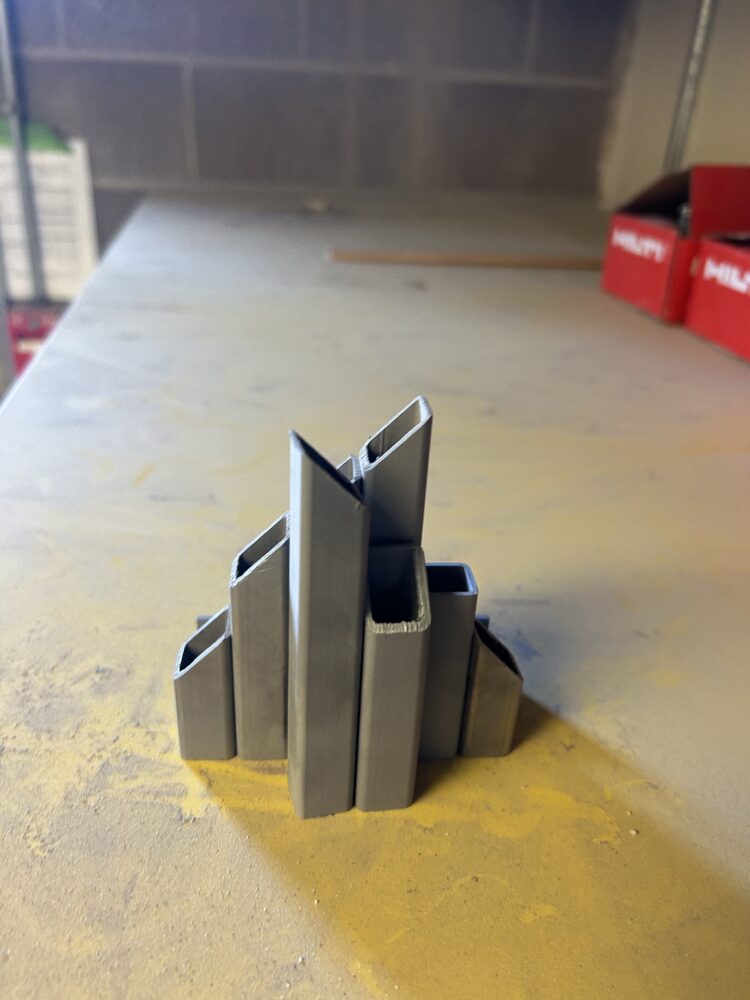
The next and final step in the manufacturing was the welding. I used some simple jigs to hold the pieces in place and started with some quick tac welds to hold them in place.
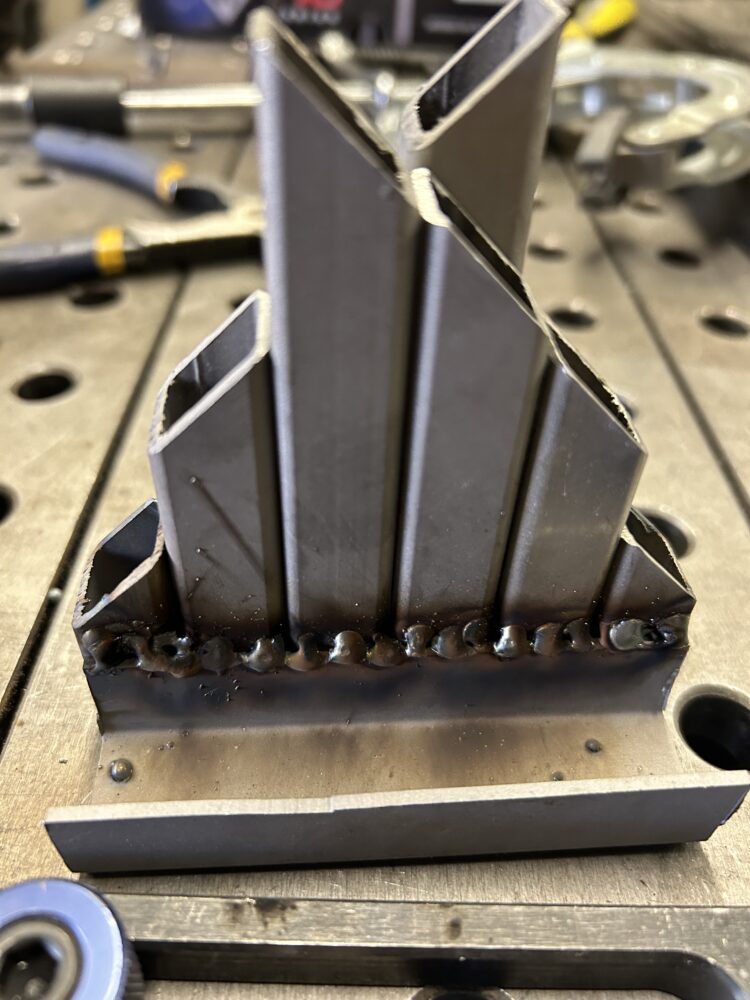
With the parts combined I tried to fill in the rest of the gaps with fillet welds. This did not turn out as I hoped and was quite disastrous. Part inexperience in welding and part incorrect settings I ended up leaving lots of burns and ugly welds across the piece. The machine also ran out of wire after a few welds which caused some major issues. After the welding was complete I put the piece back on the grinder to hide some of the more terrible welds and set it up with my pencils and calculator.
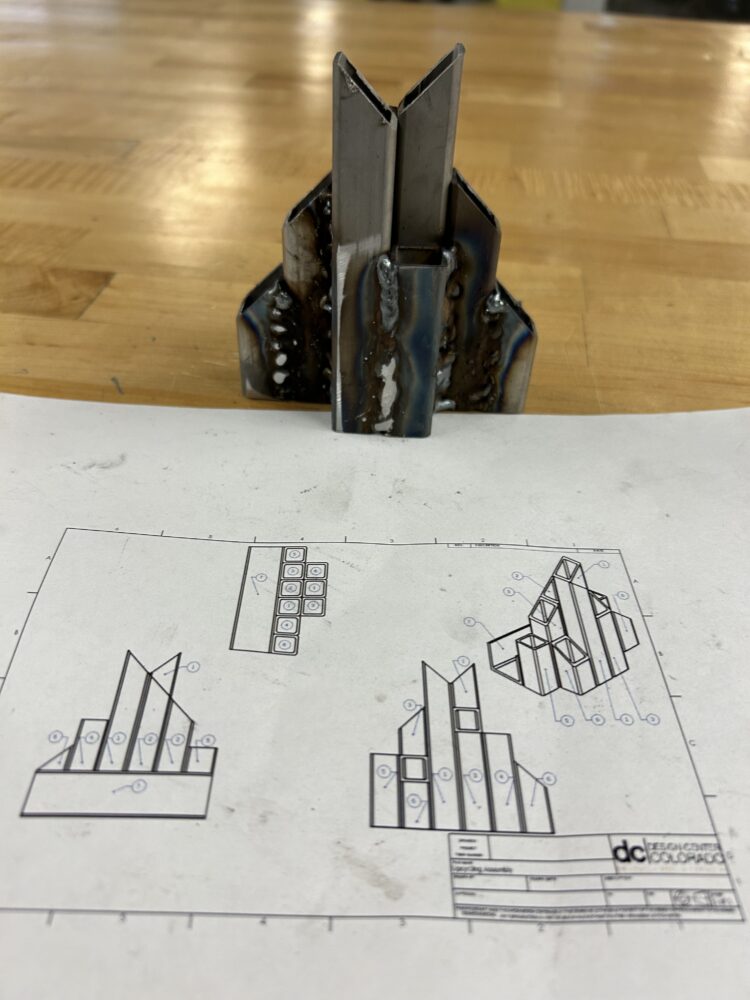
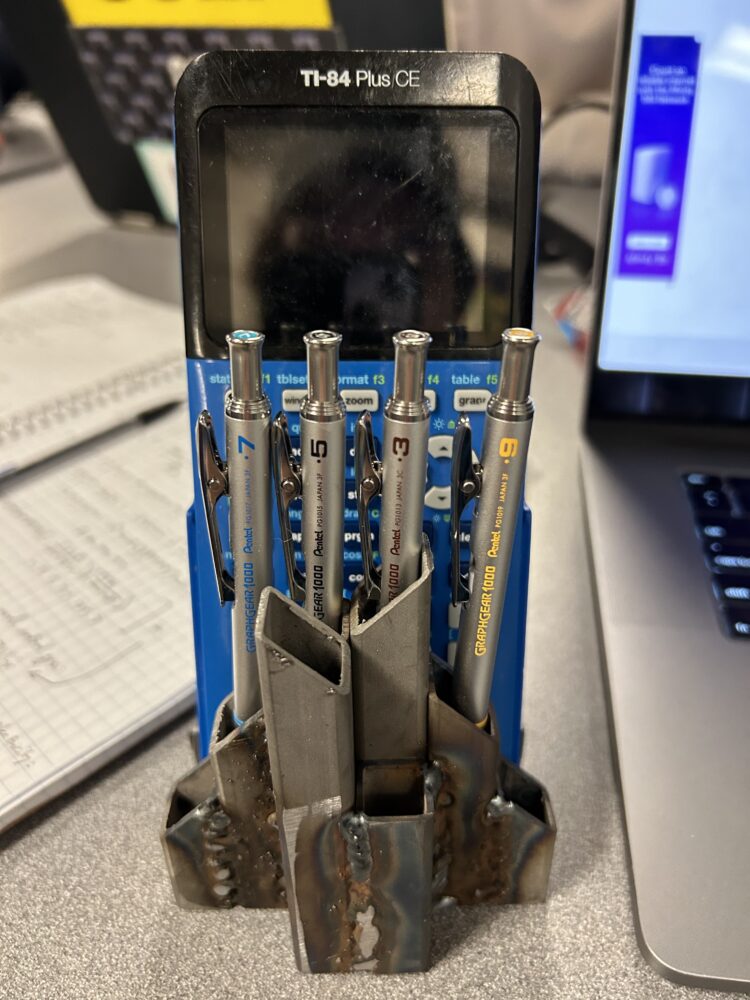
Comparing the final product to my functional goals I see it as a success. The pencil holder is nice and heavy so It holds the calculator from tipping over and fit the pencils perfectly. I also made sure to grind the bottom so that it sits flush on a desk. As for the artistic goals there is a lot to be desired. The welding process removed most of the intended brutalist texture and color, the shape is still correct and I think it is a nice homage to the EC but needs some cleaning up. In the future I hope to grind off all the welds and try to get a more uniform and aesthetic look. Potentially I will re-sandblast the piece to get the texture and color back to looking like concrete. Thanks for reading!
4 Comments. Leave new
Fin,
Great idea and awesome job documenting your project!
I completely see where you are coming from with your comment on the final aesthetic of the pencil holder. Personally, I think the aesthetic of your project is great despite the welds removing the originally desired features. I’m curious to know if you’ve considered running with the welding aesthetic, and converting the polished areas of the holder to a more brown, unfinished, weld-looking color.
Even though the welds are more exposed, I think they add a lot to the brutalist aesthetic of the project. In the future, it would be cool to make more desk accessories in the same style.
Yes, I am planning on making a more complex desk piece for the next project.
Yes I could defiantly try something like that. Maybe spray paint or force it to start rusting.