

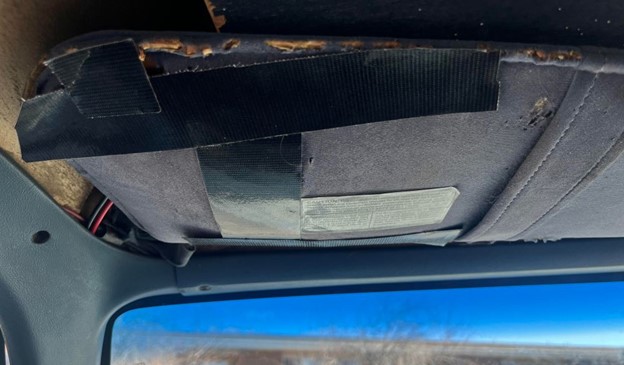
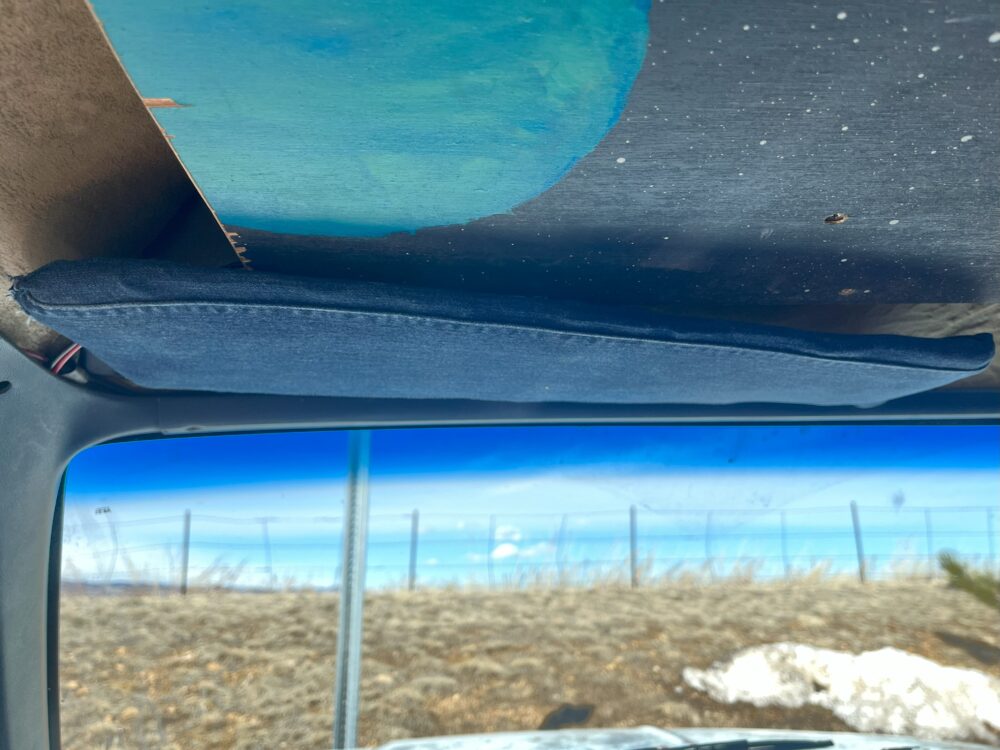
Overall, I’m very happy with the outcome of my upcycle project. I set out to both fix an ongoing problem with my daily driver and create an interesting art piece for this project, the problem being an old and dilapidated sun visor. I chose to essentially reupholster the entire piece since most of the original fabric was falling off the body of the visor (see image below for original state of visor). By wrapping the sun visor in a new piece of fabric, I can ease the eye sore caused by the old sun visor. I could have gone with any blue fabric, but I chose denim because it is a very rugged material and adds character to the piece. At first, I was a little worried by the thought of getting the construction to fit tight enough not to sag, but the sewing ended up being surprisingly easy. I essentially had to make a very custom pillowcase that could be machine sewed, inverted, and stretched over the body of the sun visor, then hand stitch the fourth side closed. Based on this simple construction and my plan to add no extraneous elements, my upcycle project follows the minimalist aesthetic. The minimalist aesthetic is defined by “neutral colors, clean spaces, few distractions, little to no clutter, and a calm vibe” (Weingus). I made the overall design as uniform and clean as possible to match the original, and therefore I believe I followed the minimalist aesthetic. According to the Britannica dictionary, minimalism originated in New York City in the 1960s, and is characterized by extremely simple form. In my opinion this definition is what makes this aesthetic timeless: there will always be an appeal for clean, simple designs that are pleasing to the eye.
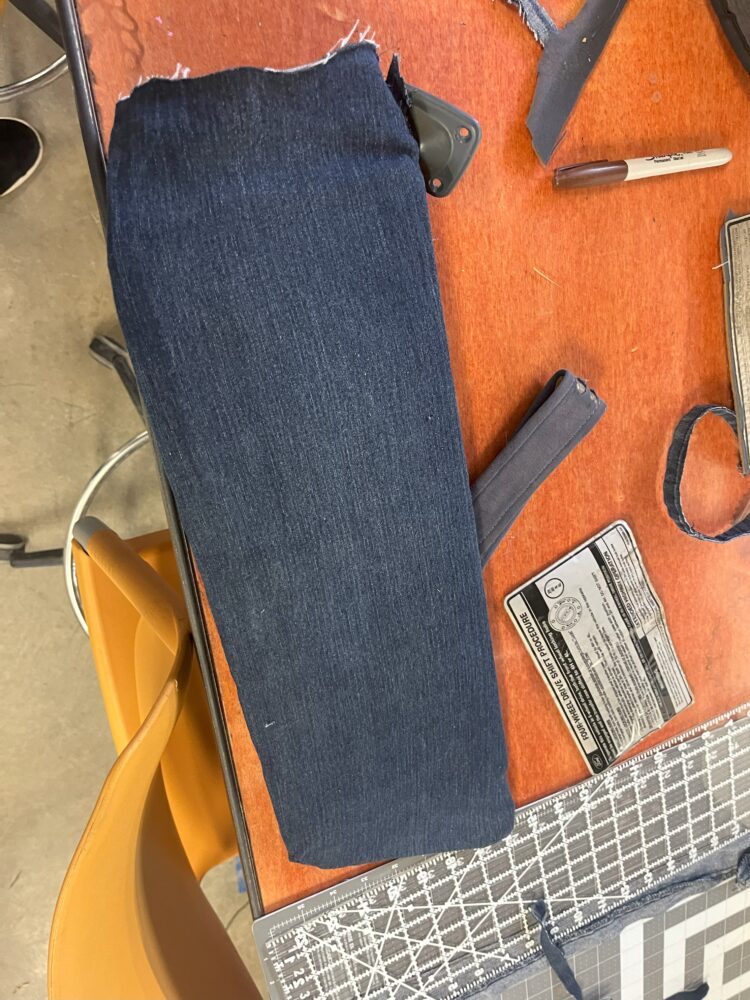
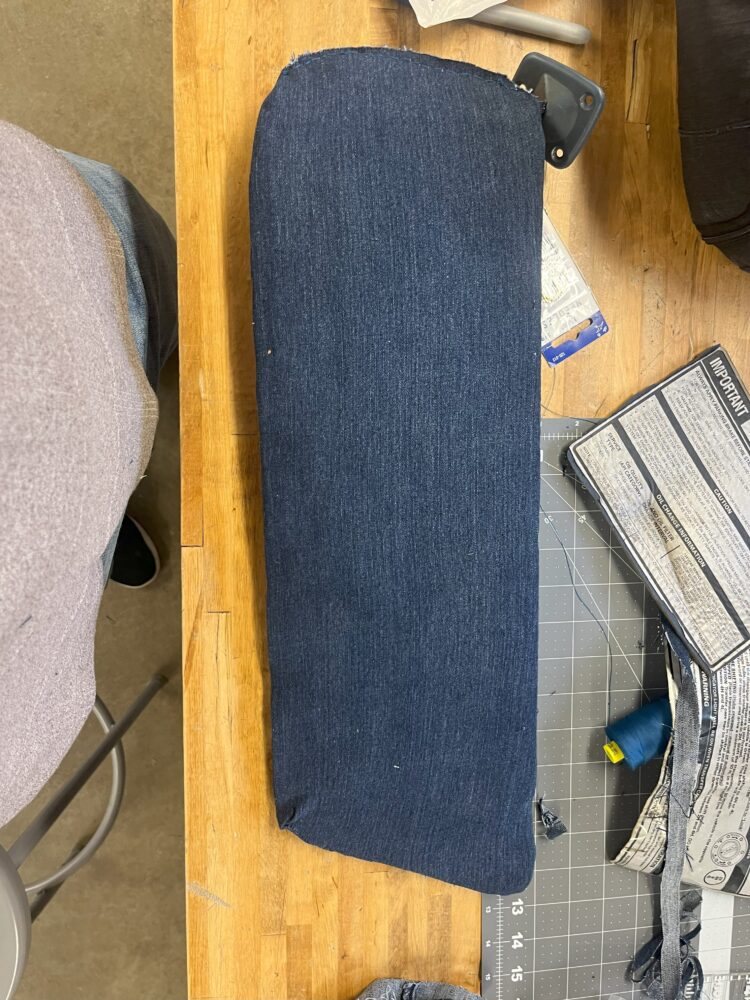
There’s only one real function that the visor serves, with two critical components that are needed to achieve this. The function is of course to block the sun from multiple angles while driving. The upholstery must accommodate the original pivot point of the sun visor to achieve this, which was done easily by having the open end of the fabric encasement be on the same side as the pivot. The hand stitching that occurs on this end of the case is very controllable and can be made precise more easily, in my opinion. This allowed the pivot column to be cleanly incorporated into the fabric case. Another critical component for the sun visor is simply the notch cut into the fabric to accept the latch that mounts the visor. Secondarily, the sun visor is what holds the information that the original one had, which is both useful and cool to have.
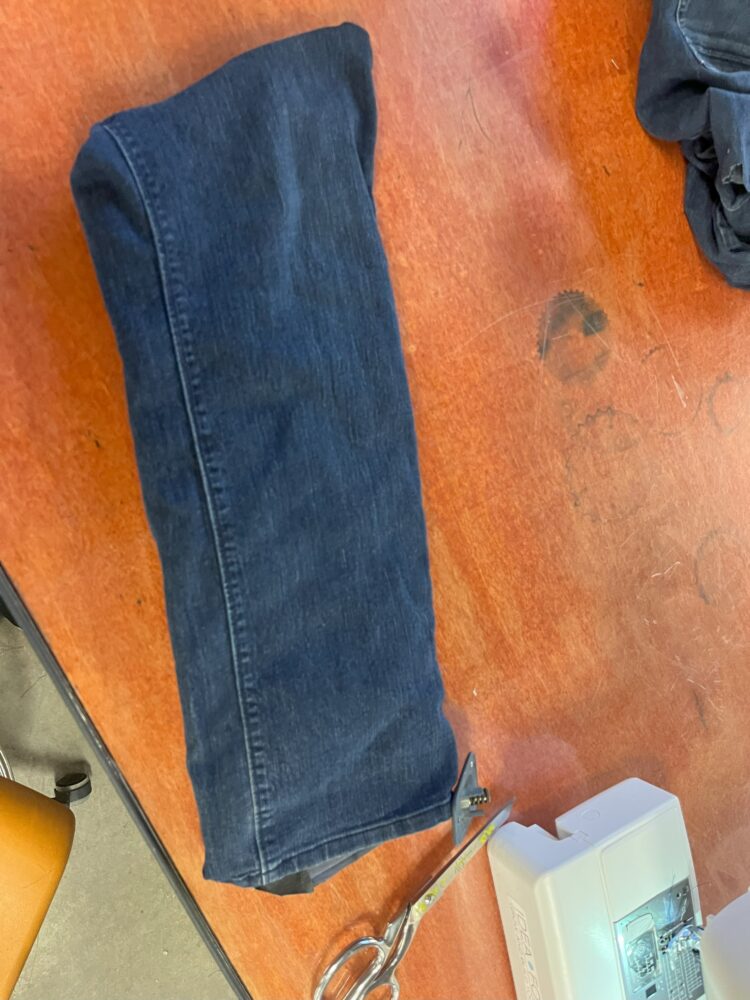
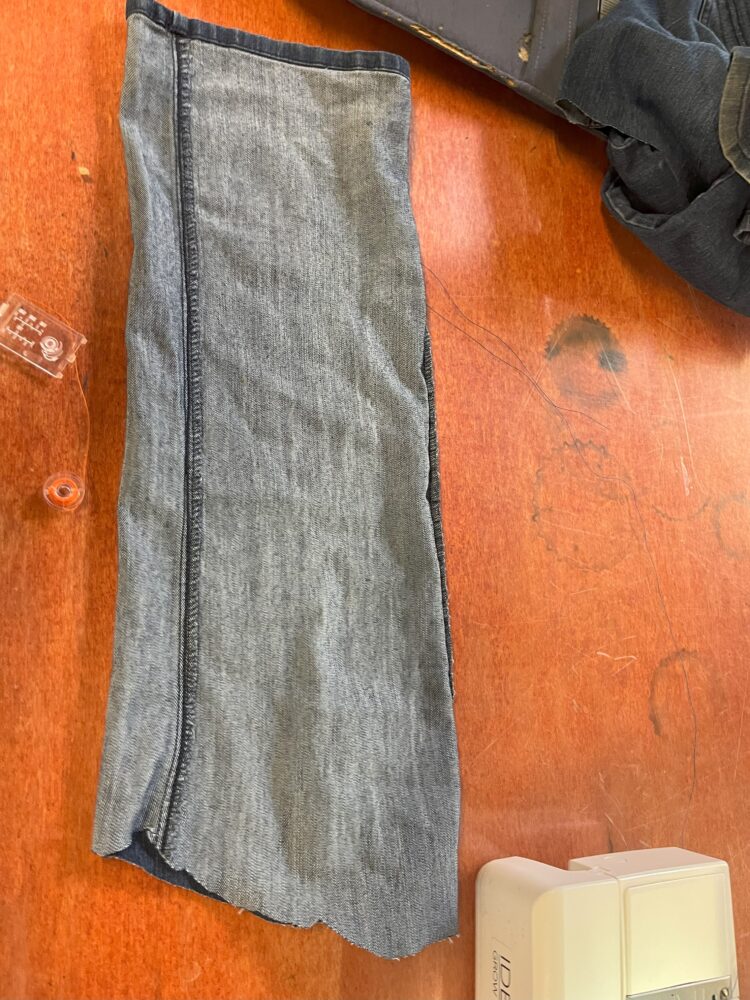
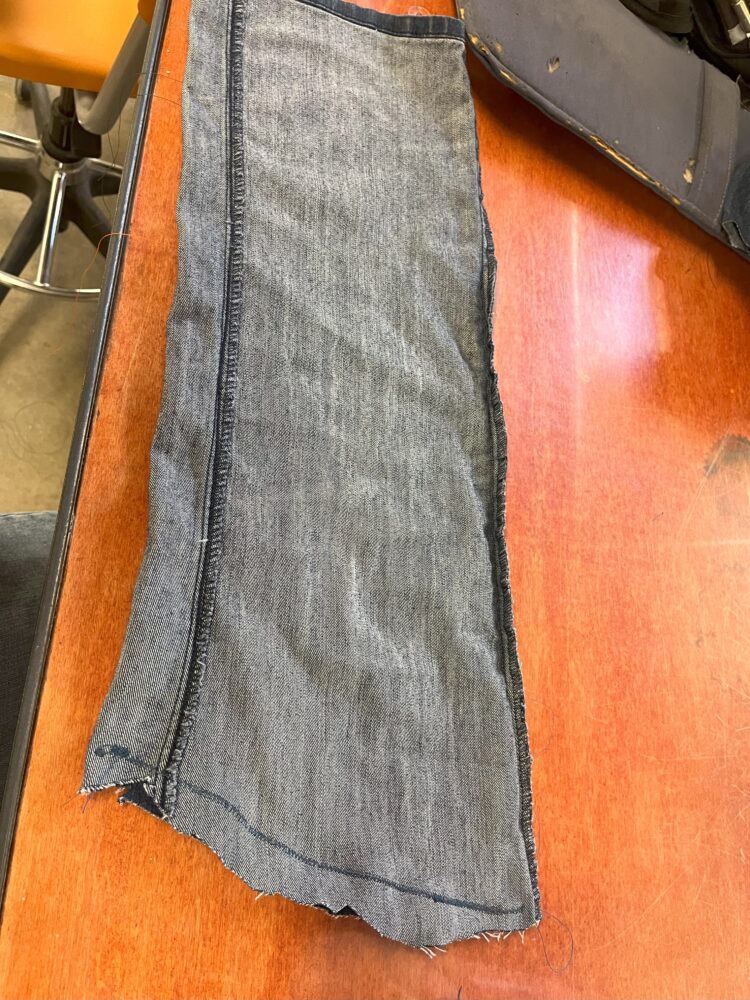
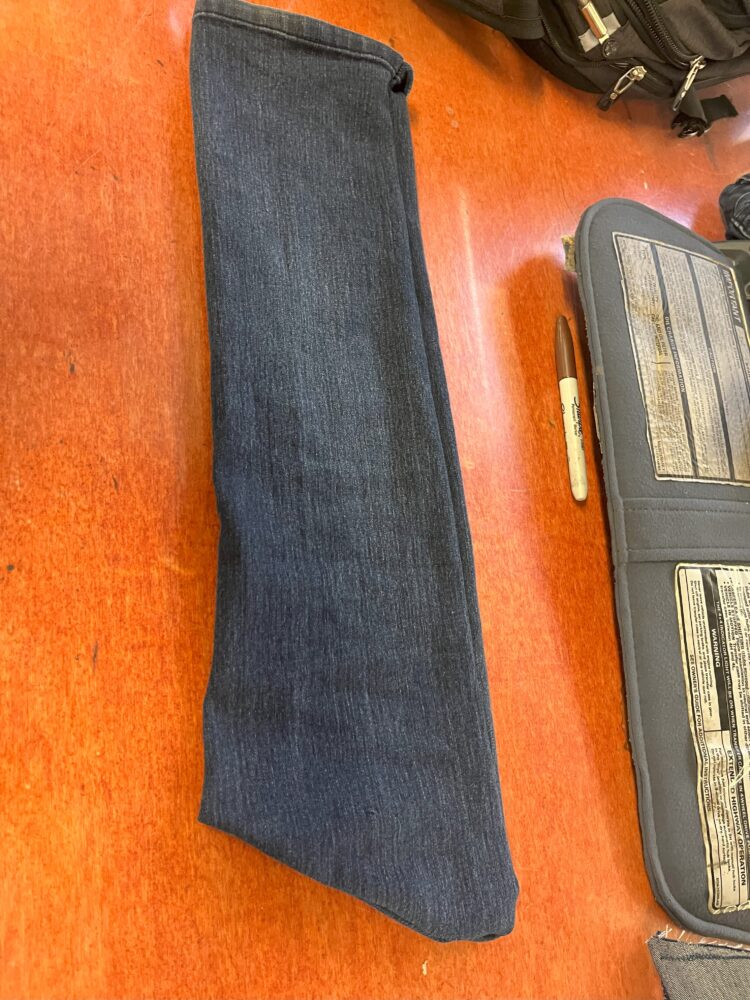
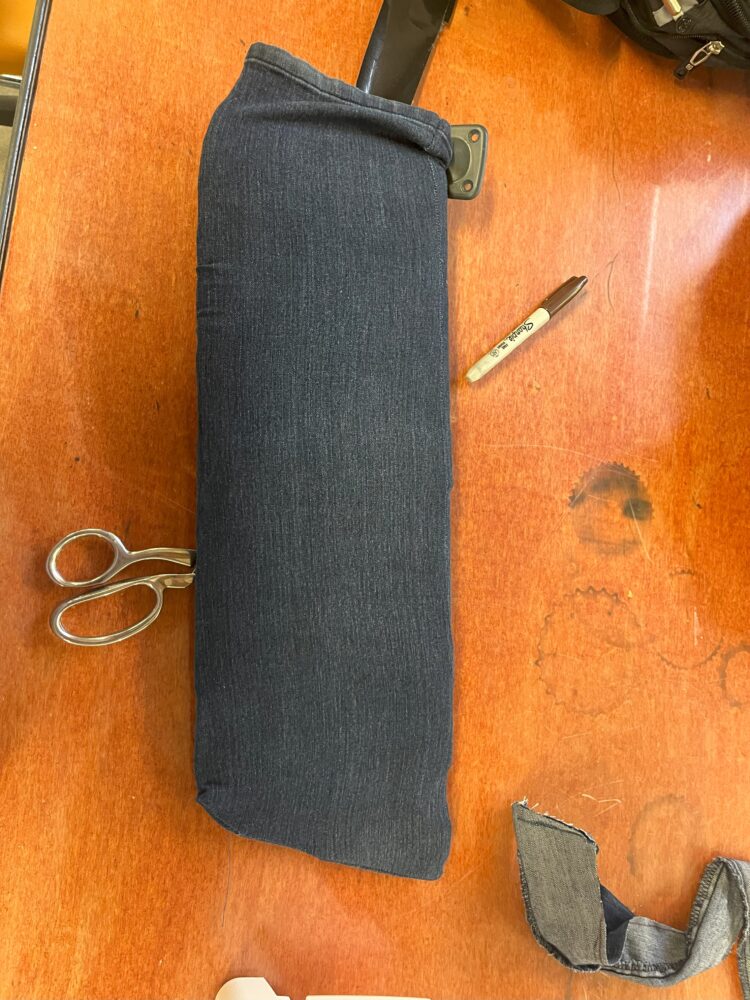
Most denim cannot be stretched, so I chose to use an old pair of jeans that is partially polyester to have a more lenient material to work with. This ended up working out great, since I could intentionally undersize the encasement, creating an even tighter fit than I think I could have achieved with traditional denim. This did take a few iterations; the first size of the encasement was much too large since I tried using the original tube of the jean leg. I had to re-sew and trim the encasement an additional two times to get a fit that I was satisfied with. Once I got there, I felt accomplished and at ease, since this was the main hardship I was expecting.
I took a sewing class in middle school, so machine stitching was easy, but I haven’t learned how to hand stitch before. Using the internet to learn how to backstitch and finish up the encasement was a highlight of this project, since it’s always great to learn such useful skills. At that point it was just a matter of attaching the informational stickers from the original sun visor. I managed to do this exactly like I planned earlier in the project: by using contact adhesive to stick the original sticker and foam-backed sticker to the new fabric. One of the stickers lacks a plastic coating and therefore was not intact, so I chose to take it with the thin foam it was glued to. This lead to rough edges on one of the stickers, which were easily covered by strips of denim. See the images below for the full construction process and final product when installed.


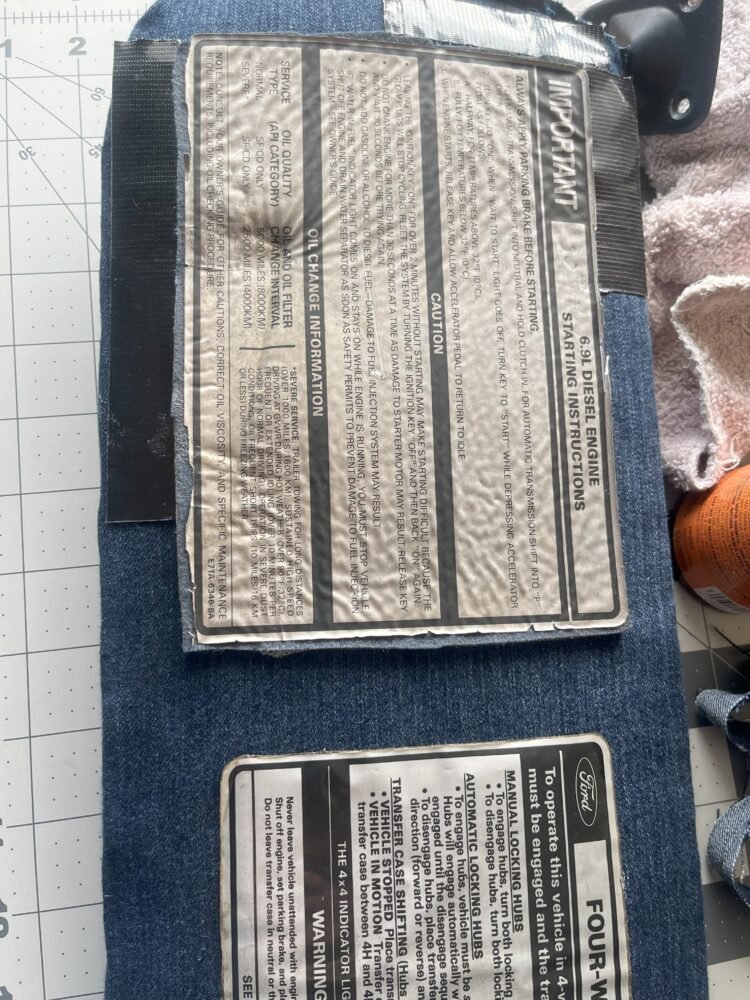

This leads me to my main area of improvement if/when I do this again (I did only one visor but had planned on doing both). The adhesive I chose wasn’t the contact cement Im used to, but rather a slightly weaker version of it. I still followed through with the proper clamping procedures and the stickers ended up attaching relatively fine and are holding up. However, when attaching the stickers, I could tell that the bond left quite a bit to be desired. Therefore, I expect them to potentially need reattachment in the future after experiencing many cycles between hot and cold temperatures. Additionally, the hand stitching did not come out to be the most aesthetically pleasing when observed up close, with exposed edges of denim that are slightly frayed. However, for its use case and the distance the viewer is normally looking at it, I’m still happy with how the curves and consistency of those edges came out, and the stitch itself is quite strong. When I eventually reupholster the passenger sun visor to match the driver’s side, I will take the advice I was given in the idea forge after completing the project, which is to employ the ladder type of hand stitch as opposed to the backstitch. The ladder stitch involves folding the seams inward then hand stitching laterally to the bends, creating a stitch that should look nearly the same as the inverted machine stitch used in the rest of the case.
With all that in mind, I believe that I met both my functional and artistic goals for this project. The visor fit great when I reinstalled it and the notch for the latching side of the visor works fine, allowing the visor to serve its main function of blocking the sun quite well. Aesthetically, the clean and simple design that recreates the original visor follows the minimalist aesthetic and therefore achieves my artistic goal; it turned out visually pleasing to at least my eye and that’s the most that I could ask for. In the future, I will recreate this process by reupholstering the passenger side sun visor, using the takeaways from this project to make the second iteration as aesthetic and strong as possible.
References
https://www.britannica.com/art/Minimalism
2 Comments. Leave new
[…] of conducting more aesthetic-based planning beforehand. A good example of this is my execution of the upcycle project for this class. For this project, I aimed to fix the driver side sun visor of my vehicle, since its […]
Hi Jadin, very cool project. I really love the denim look and it fits the minimalist aesthetic very well. Will you be considering expanding this aesthetic across the rest of you car?