

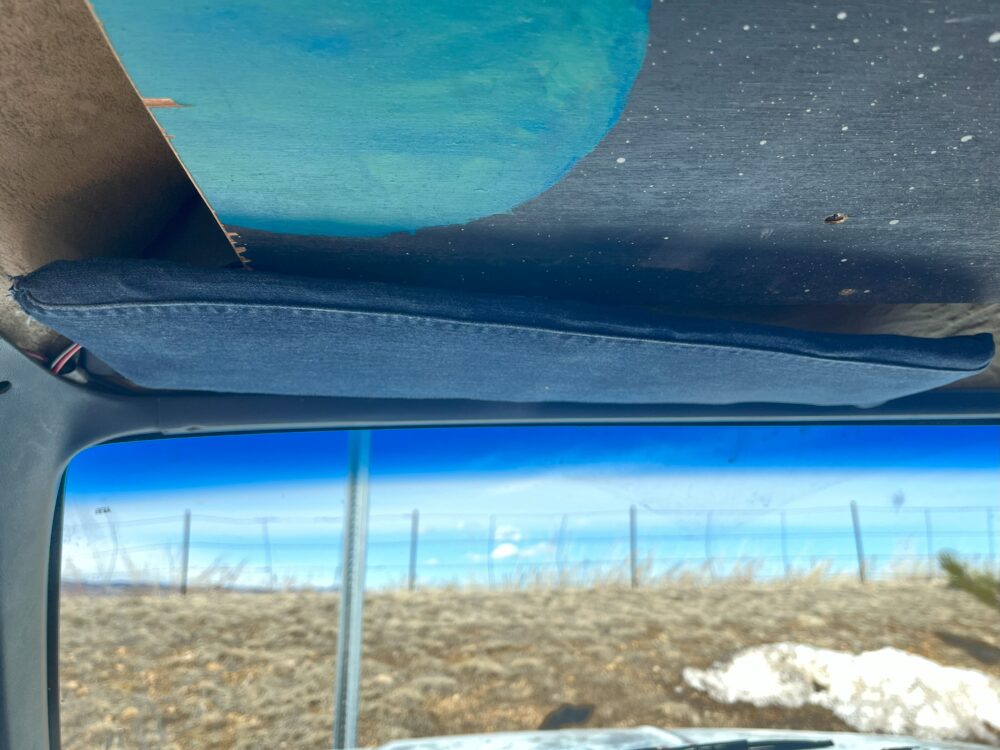
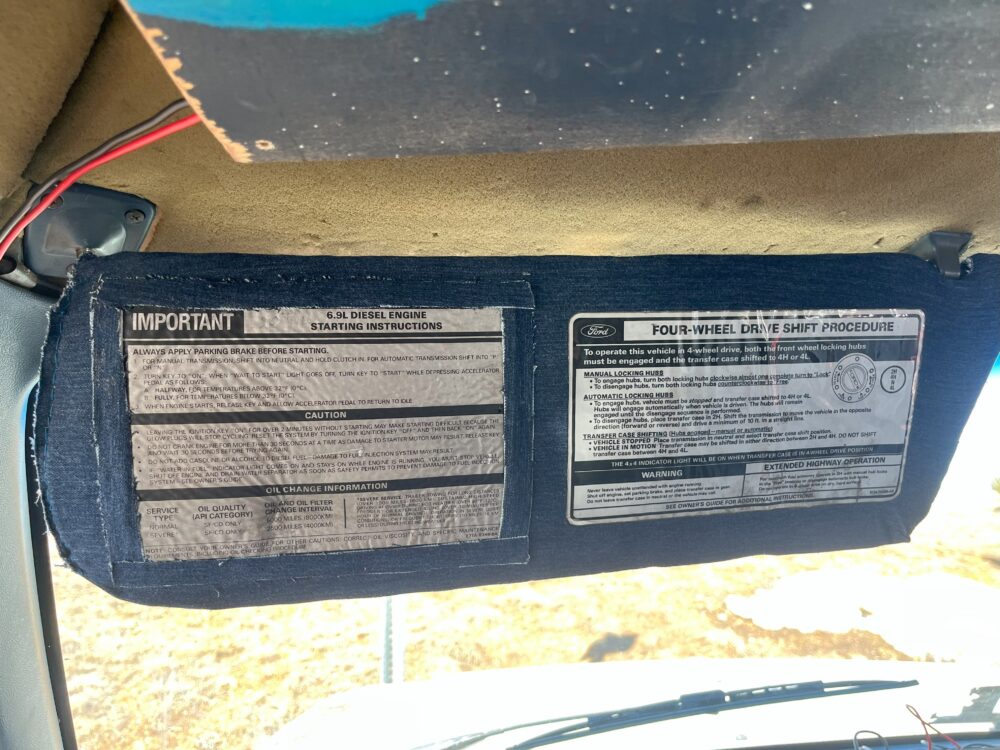
Aesthetics of design was one of the more enjoyable classes I’ve taken at CU. We discussed the development of various aesthetics and related principles over the course of history, as well as their applications throughout history. Through this process and the projects we did in the course, I have gained appreciation for the selection of an aesthetic before approaching an engineering, artistic, or similar design. Previously, when I set out to design something where the visual appeal is important, I went with a gut feeling as to what design elements would look best for the item and the environment it is in. This normally works well and yields a satisfactory result, but for most examples an even better product can come out of conducting more aesthetic-based planning beforehand. A good example of this is my execution of the upcycle project for this class. For this project, I aimed to fix the driver side sun visor of my vehicle, since its fabric encasement was peeling almost completely off and was very unappealing for something I see and use almost every day. My solution to this was to make a new fabric encasement, one that would tightly wrap around the body of the visor. Given that I typically like my things to have minimal clutter and look clean in a general sense, I figured that I would go with a minimalist design before I started the manufacturing process. I’m happy that I chose this aesthetic beforehand because it led to me keeping a clean aesthetic in mind while making the new encasement, therefore leading to me making several design choices that were clutter free and followed the minimalist aesthetic. For example, when attaching startup and other information that was on the stock visor to the new encasement, my choice to simply frame the text in fabric without additional features led to a clutter free, minimalist appearance. Lastly, I used denim with a small proportion of polyester for the encasement, which allowed it to stretch slightly. Because of this choice, the encasement could be made slightly undersized and stretched over the visor body. This eliminated any folds/ridges in the fabric, making the design cleaner overall. The main challenge I faced along the way was relearning how to sew. This ended up being relatively easy, especially with the plentiful resources of the internet and Idea Forge. I am very happy with how the visor turned out, and hopefully you will agree when you see the pictures below.
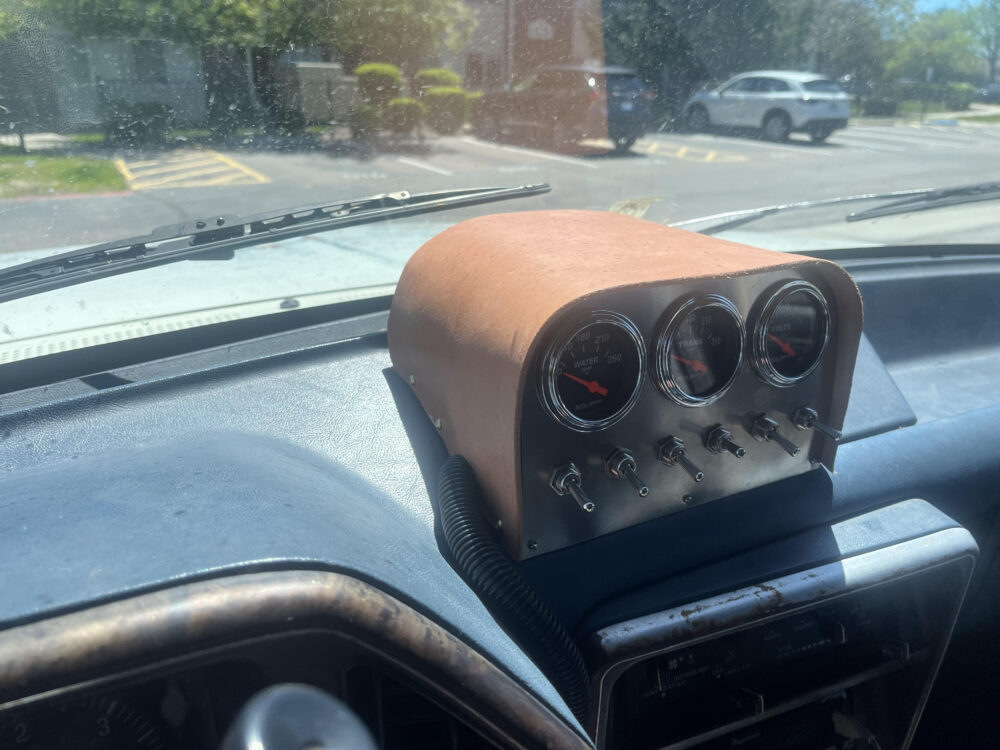
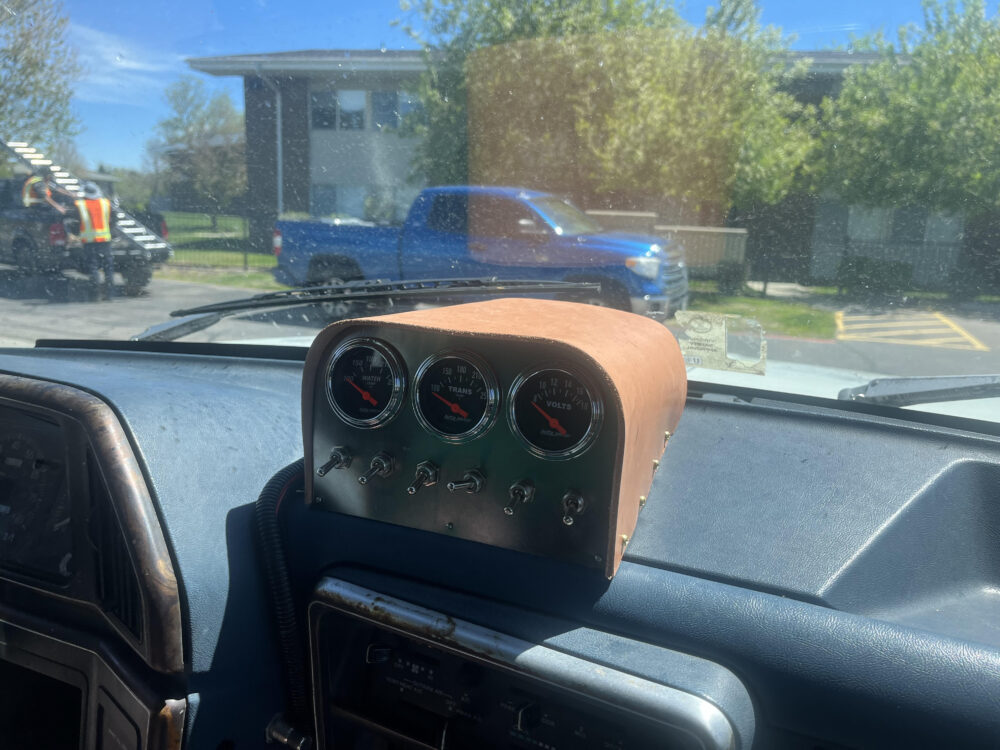
The main project for this class was another fun learning experience. Unlike the upcycle project, the main one had limited design requirements: we had to follow an aesthetic and ideally the project would serve a purpose. When choosing my project idea, I sought after fixing another problem with my vehicle. There are several gauges that I installed into my truck including an oil pressure gauge, water temperature gauge, transmission temperature gauge, and voltage gauge. The latter three of these gauges needed a dependable yet aesthetically pleasing way to mount them to the vehicle. Many truck owners achieve this by using an off-the-shelf vertical gauge cluster/pod, which mounts to the vehicle’s driver side A-pillar. This not only would not look great to me but would also hinder the driver’s visibility, especially when making left turns. Therefore, I chose to make a custom gauge cluster for the Aesthetics of Design main project, entirely from scratch. I started with a general design: a wooden base, hidden by a stainless-steel fascia which holds the gauges and a cover of some form to hide the wires. Once I had the general design in mind, I realized that the extra leather that I have from sheath making would be the perfect material to function as a cover, due to its durability and similar color to the existing brown dash components. Given the material choice of leather and stainless steel, in addition to an organic, smooth, filleted bend in the cover, I realized that my project would most closely follow the mid-century modern aesthetic. To me, this aesthetic will always stand the test of time due to its application of sleek lines, organic shapes, and minimal clutter.
When making the cover, the angle at which it sits along with the filleted bends which follow the fascia made its geometry quite challenging to get right. Even when I made a paper template to follow, the first leather cover I made was too narrow and left unsightly gaps on either side of the base of the cluster. I iterated to the next cover by using the first cover as a template, marking an appropriate offset to its width so that the cover would sit flush to the dash. Luckily, the angle of the cover at the base was right the first time, so extending the width was not exceedingly difficult. With the aesthetic of this project in mind and the cover made, I chose to use brass-colored screws to mount the cover; as seen in the pictures below. These brass screws are a nice, subtle highlight of the cluster, complementing the look of the leather and stainless steel quite well. I am extremely happy with how the cluster turned out; to me, the whole design matches the vehicles interior even with the leather being slightly lighter in color than the brown dashboard trim. I look forward to wiring in the transmission temperature sender and fixing the backlighting so that the project is fully complete.
3 Comments. Leave new
great content missmistykolkata.com
very informative content.
great content phonpegirl.in