
Part 1: Patchwork Aesthetic and Background
My immediate thought for what I wanted to do for the upcycle project was to make a shirt. I’ve wanted to get better at sewing for a long time, and I thought it would be a great idea to make one for this class. The only issue was that I had absolutely no idea what to make it out of, or what aesthetic to center it around. I considered making a shirt from cardboard or even scraps of vinyl wood flooring, until I finally had the idea to to patchwork.
My goal with this project was to create a shirt in the style of a patchwork quilt by using an assortment of fabric that I am hoping to find as scraps or from other garments, but ideally buying no new fabric. I will, however, need to buy a set of patterns for a shirt since I have never sewn a shirt and definitely cannot make the patterns for one freehand. Though I lack experience in sewing, I planned to first create a patchwork of different fabric pieces, then cut and stitch together the cutouts into a shirt. I had hoped to make a shirt that not only satisfies the definition of patchwork but also is something I would wear outside of this class, and that is (almost) exactly the result I got!
Part 2: Design Process
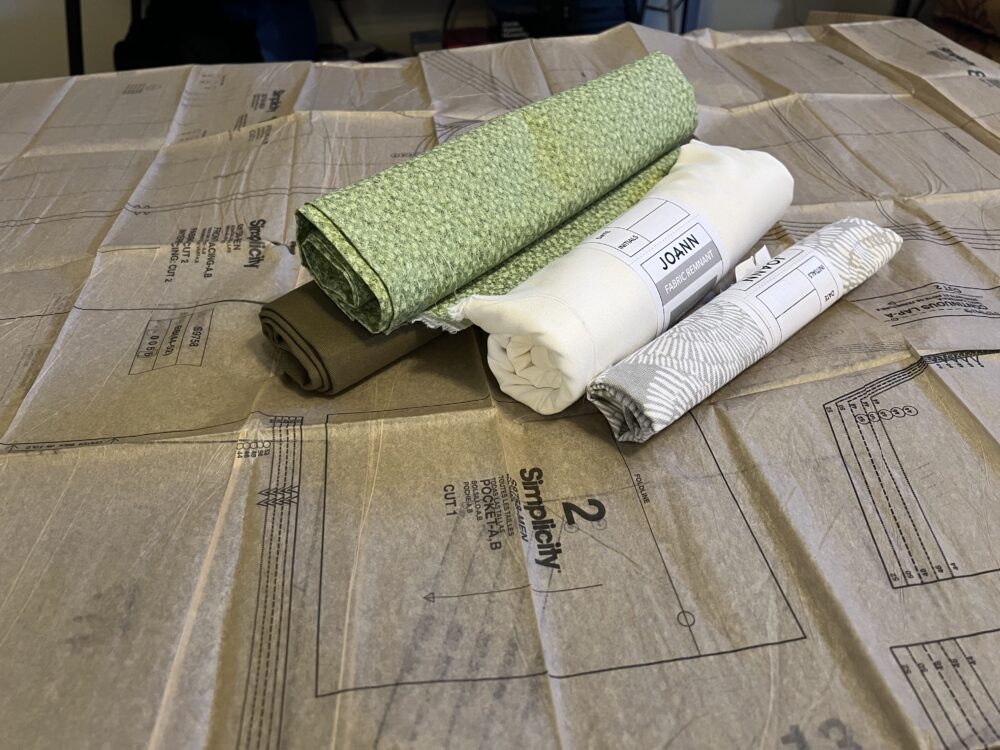
While the goal of this project was not to buy much (if anything) new, I did have to buy a pattern from Joann Fabrics to make the shirt as making one freehand would have been a disaster. I bought a Simplicity S9758 shirt pattern if anyone is interested, however I’m not totally satisfied with the pattern itself and I have already purchased some from a different brand that I think will work better in the future. I also purchased a couple fabric remnants destined for the garbage while I was at Joann’s (less than $10 total) which will also be plenty of material to make another garment (maybe a pair of shorts?) in the future. These remnants weren’t enough to make a shirt on their own. In total for the pattern and fabric, I spent around $30.
While I originally wanted to make a blue/white/gray shirt, I was limited by the materials at my disposal and could only find remnants in various shades of green. I think the end result is still quite nice to look at, and maybe I’ll try something like this again with blue fabric in the future.
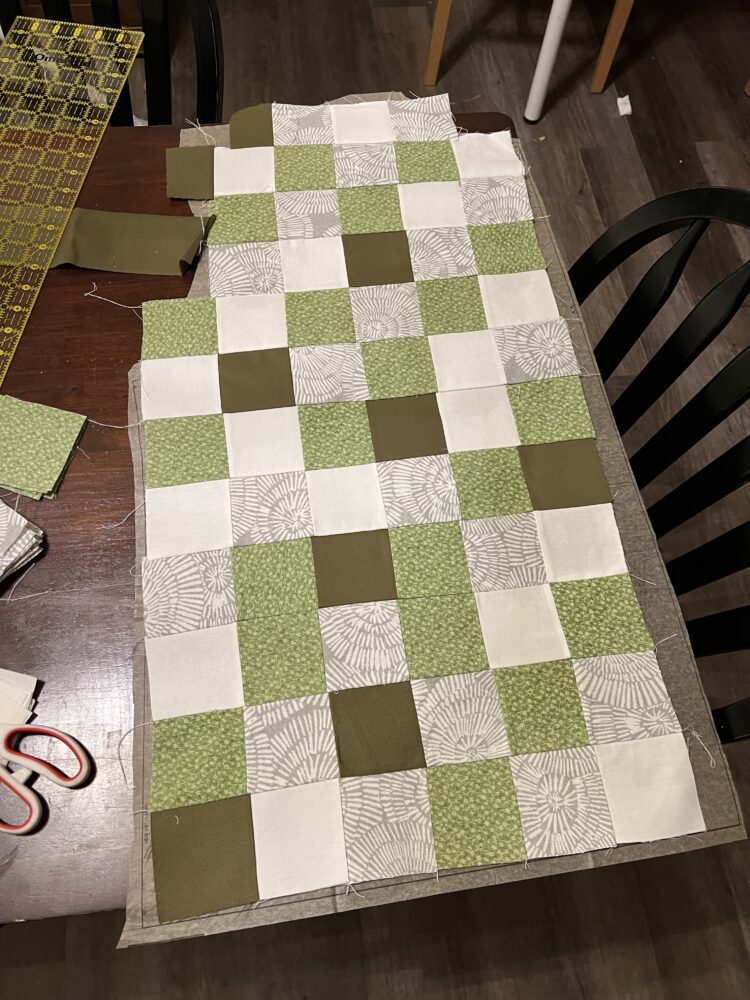
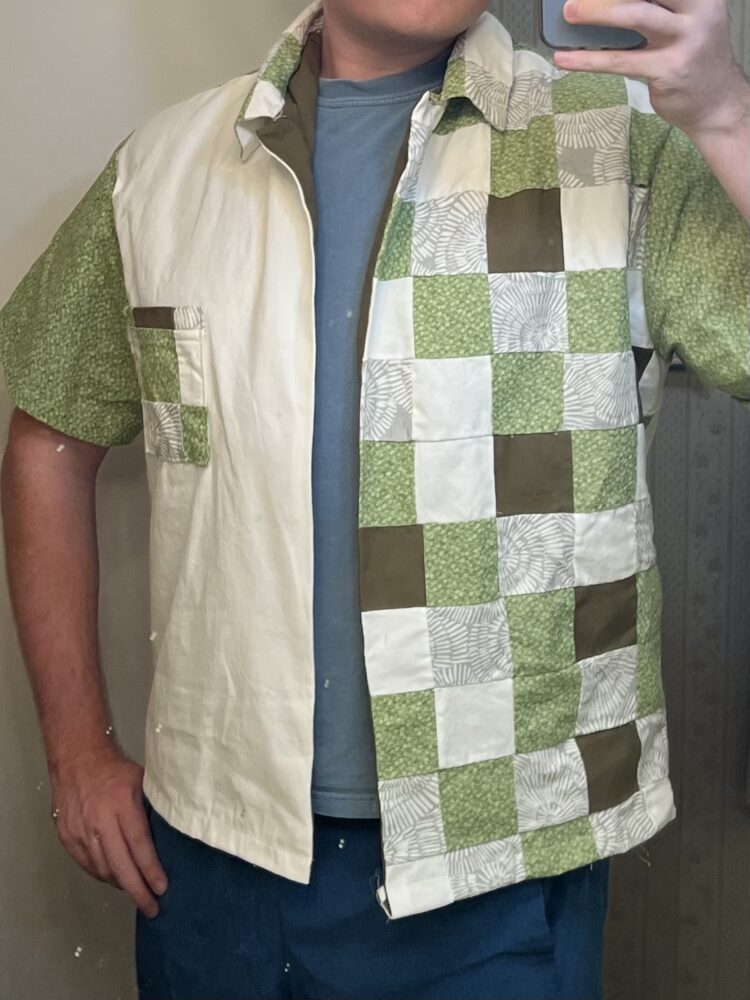
I started work on this project by first cutting the fabric into 3″x3″ squares. I originally planned to make the entire shirt out of patches, I quickly realized how many I would have had to cut out and decided to go with a more varied design. In the end, the right front face, pocket, and collar were made out of patches and the other pieces were cut from larger swaths of the solid colors. If I had gone with my original plan, I likely would have needed 250+ patches, while changing my design got me down to around 70. I thought about getting a pack of fabric squares designed for quilting, however that would have defeated the purpose of upcycling since it would be using new material for (almost) its intended purpose.
Once I had all my fabric squares, I laid them out in a random-ish grid and sewed them all together, using my mom’s trusty Singer sewing machine from the ’90s. I followed the standard method of making a patchwork by pressing all of the seams in one row to the left, then the next row to the right, and so on. Unfortunately, I don’t have a photo to describe this, but all it really did was serve to create a nice, flat finish on the front of the piece.
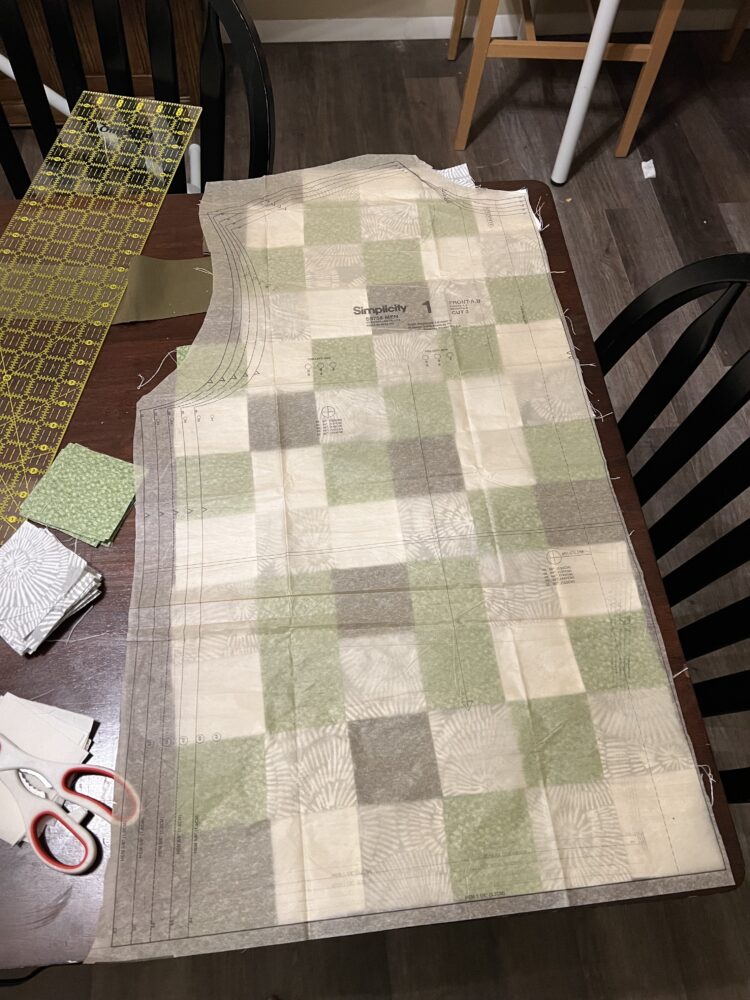
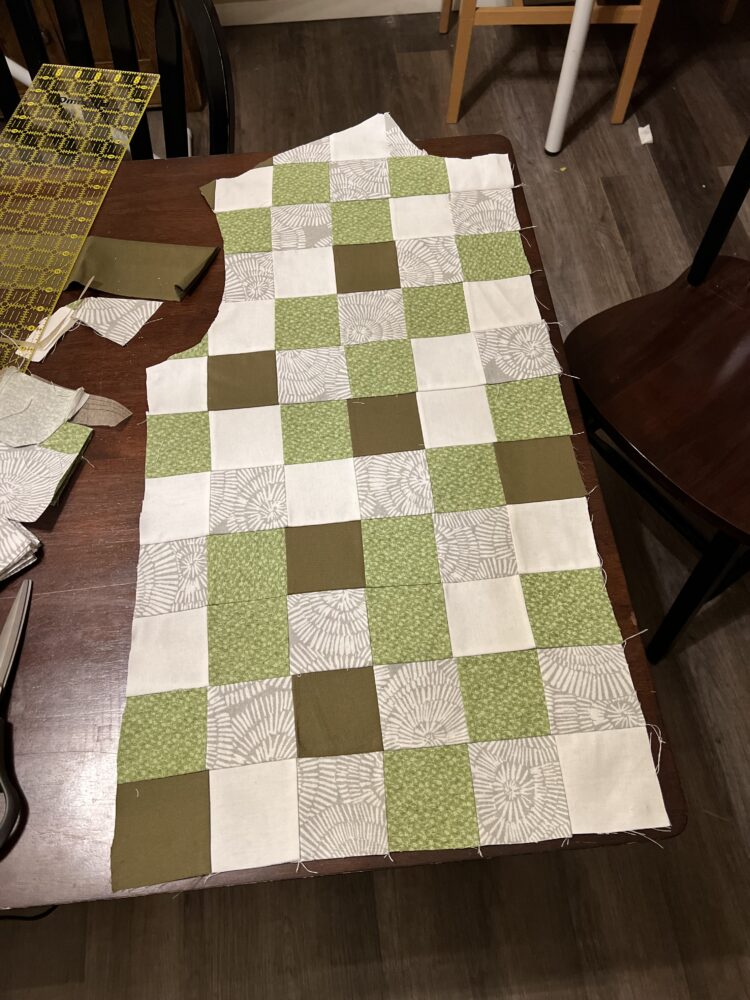
Above is how I created the shape of the front face using a grid of patches that were close to the actual shape.
The patchwork pieces were by far the most difficult to work with. The extra seams made the pieces extremely delicate and also much thicker (and therefore more difficult for the sewing machine to handle). As I started to cut out the 8 other pieces from solid colors, I felt so relieved that I didn’t have to sew any more patches together.
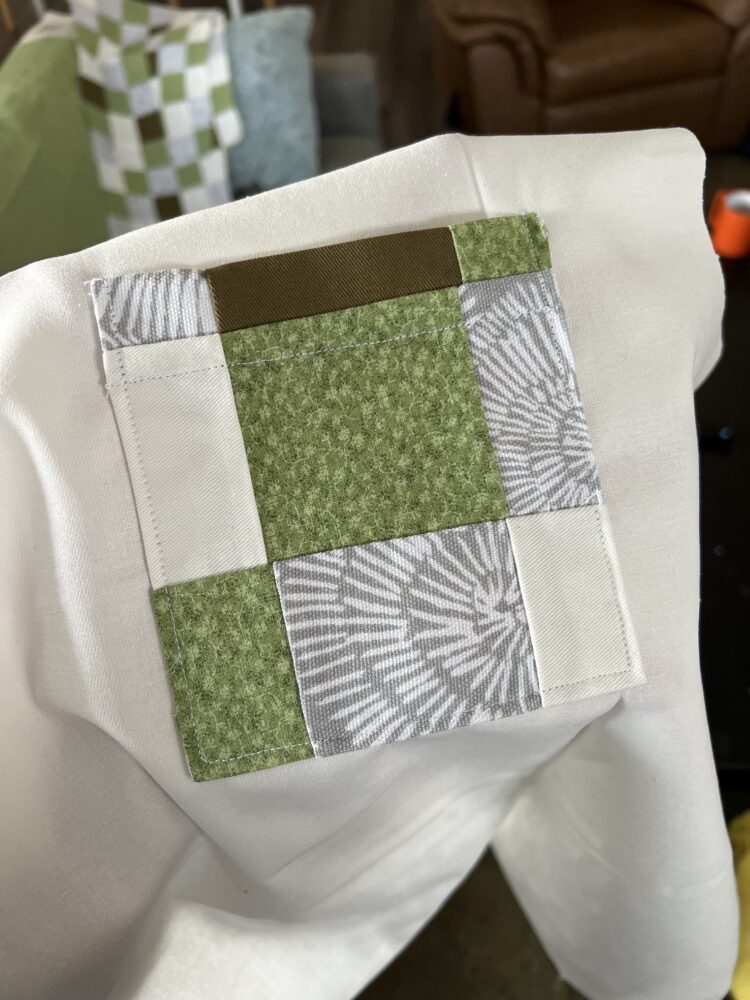
Once I had the pieces cut out (11 in total), it was time to sew them all together. I followed this video tutorial made by the shirt’s designer to sew everything together in the right order. Honestly, as someone who hasn’t touched a sewing machine in a very long time, it was pretty easy to follow. I did have a couple minor difficulties, mostly accidentally sewing over parts of the shirt I didn’t mean to when attaching the sleeves, and I also accidentally made the pocket inside-out at first. I wish I had a seam ripper for these, since cutting the stitches apart with scissors isn’t how I like to spend my weekends. After the shirt was together, I gave it a quick wash/dry, ironed it, and it was done!
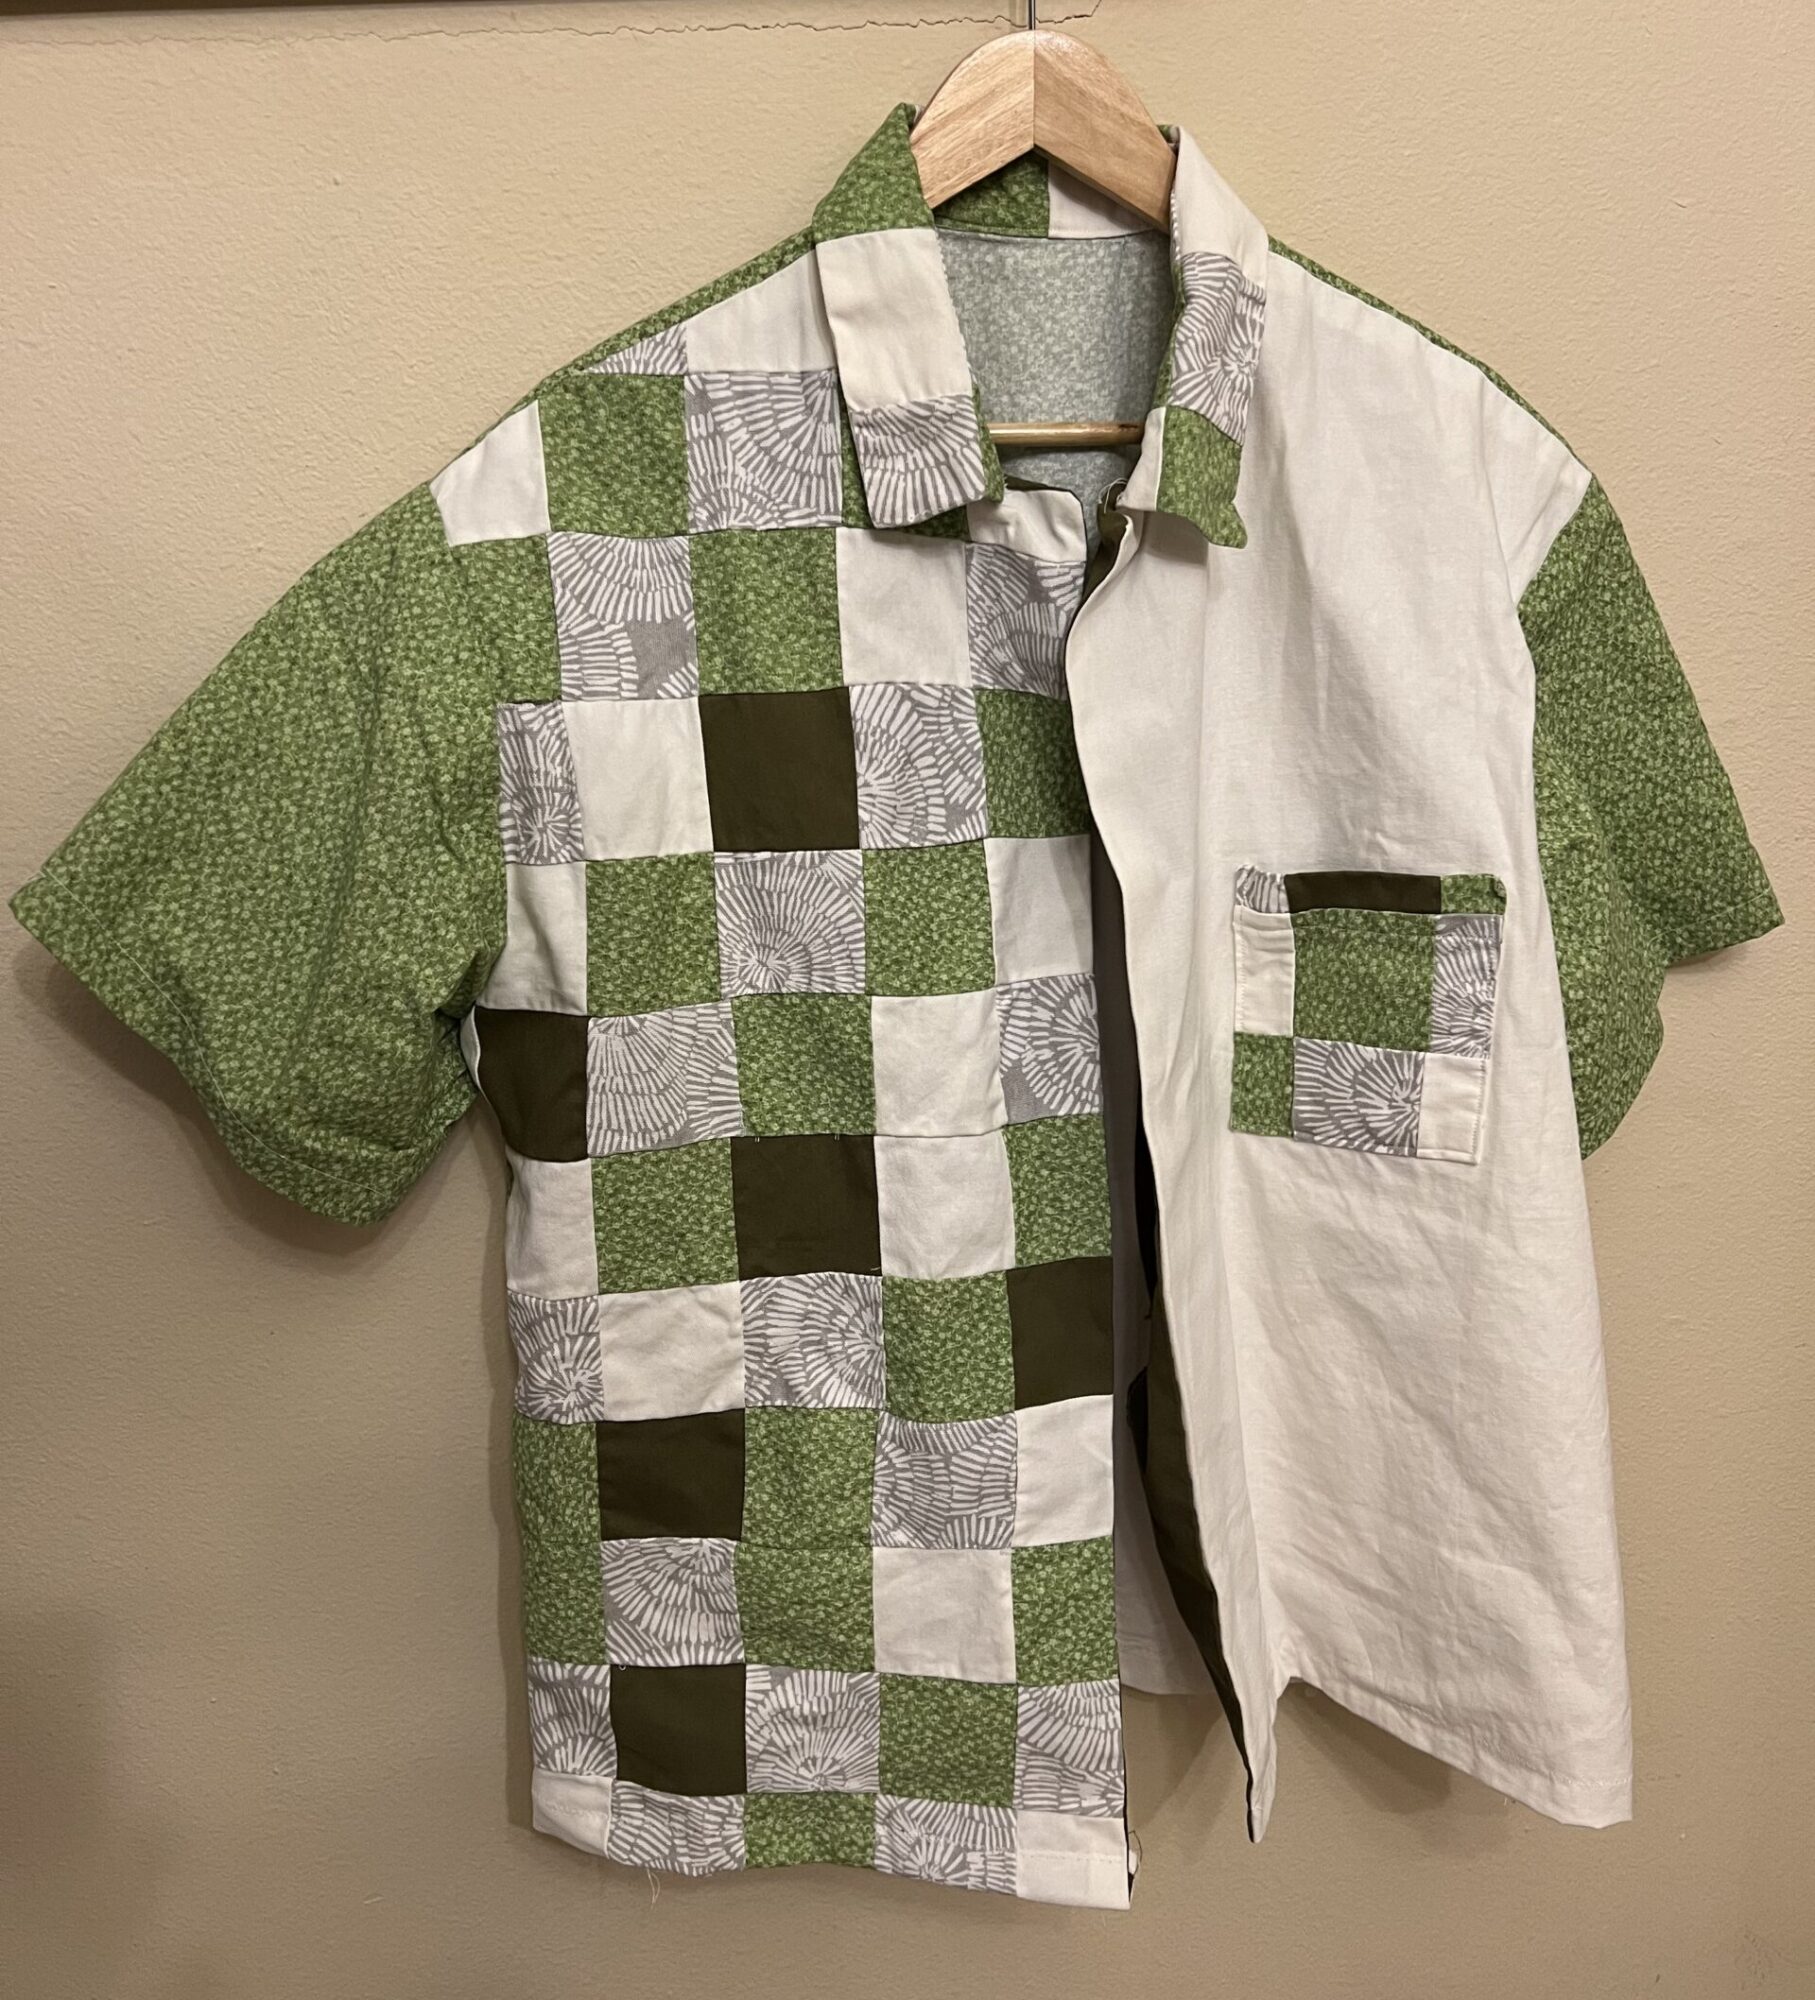
Part 3: Finished Product and Retrospective Thoughts

Overall, the final product turned out very cool and much better than I expected. I am already planning on making more shirts and other clothes for myself in the future. The artistic goal for this project has been satisfied. There are, however, some things that could be improved on my end and the pattern’s.
First, there’s no buttons! I couldn’t find any buttons to upcycle in time for the project, so I will probably get some new buttons from Joann’s and add them on later. Thankfully the two sides of the shirt are pretty even, so I’m hoping it will look symmetrical when it’s buttoned.
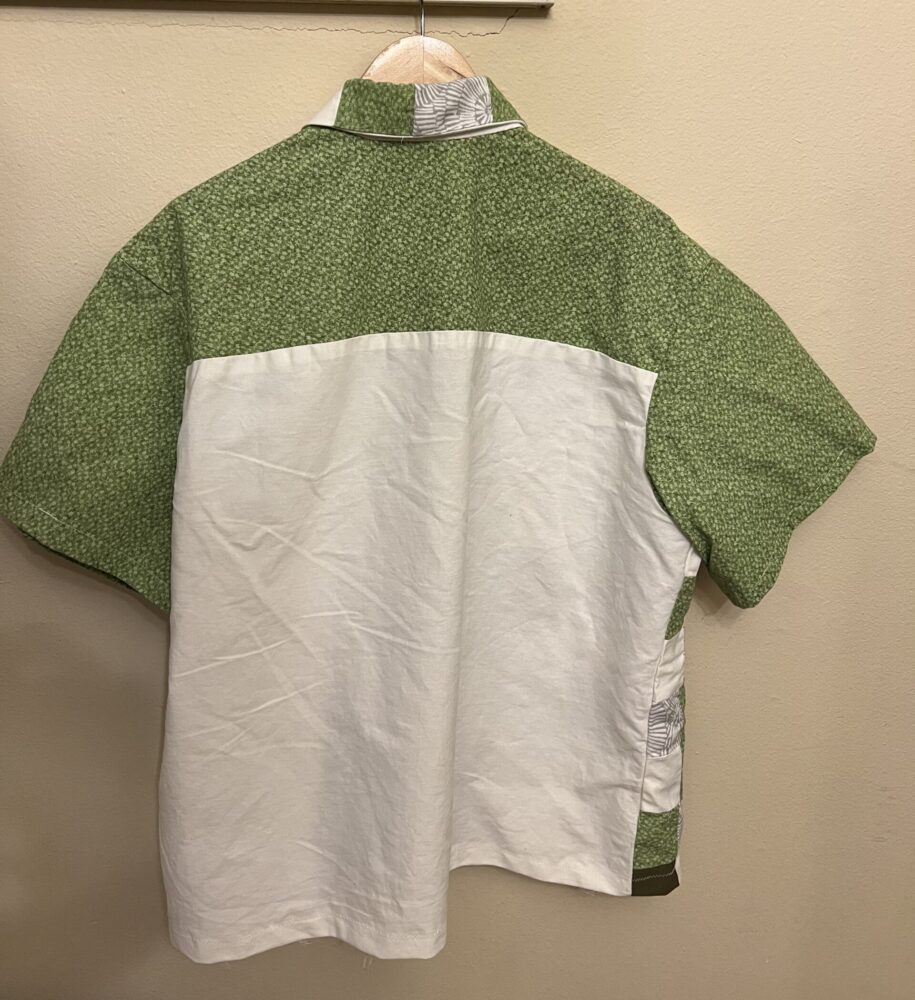
One of the issues I had with the pattern are the sleeves. They protrude upward off the arm quite a bit, and that’s purely because of the sleeve pattern. Notice how when it’s hanging on the hanger, there isn’t much of a change in angle from the shoulder to the sleeve. If I were to alter the shirt, I would definitely find a way to bring them down a little bit.
Lastly, the shirt is way too big for me. I measured myself at a 42, but I must have gotten the large-size patterns because the sizes ranged from 44-52 for the cutouts. I tried to play it safe and make it a size 46, but it’s just too big. It fits like a XXL shirt off the rack. I definitely need to bring in the sides if I’m going to wear this out, since it just looks silly. In the photo below, I tried to hide this by bunching up the excess fabric in the back, and it looks pretty good!
This shirt embodies an aesthetic that I appreciate very much, and it was a great experience getting to make something in this art style and also learn sewing skills in the process. The functionality of the shirt needs some minor adjustments, but as an article of clothing that has holes for an arm and a head (and a functioning pocket!), it ticks the boxes. Once I bring in the sides a little, this will probably be a shirt I wear pretty often—and for that, I’m happy.
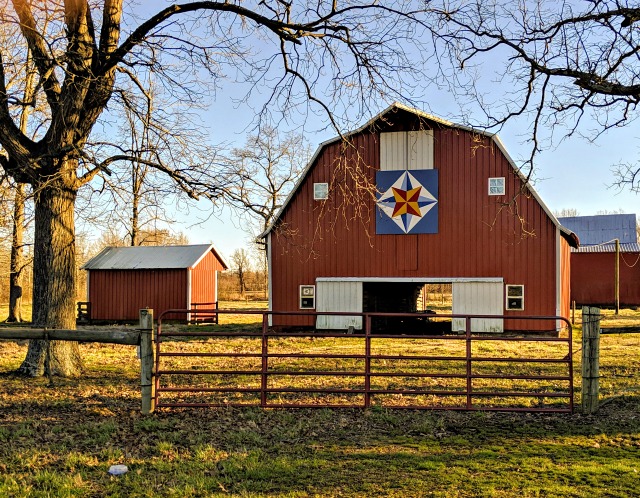
[2]. Barn with quilt pattern. Retrieved from https://aquilterstable.blogspot.com/2019/03/kentucky-barn-quilts.html
[3]. Upcycle Aesthetic: Patchwork. Joshua Sweeney. Retrieved from https://www.aesdes.org/2024/01/31/upcycle-aesthetic-patchwork-2/
[4]. Upcycle Progress: Patchwork Shirt. Joshua Sweeney. Retrieved from https://www.aesdes.org/2024/02/08/upcycle-progress-patchwork-shirt/
5 Comments. Leave new
As a hard core patch work quilter,I am impressed with your project. The collar looks great and it can be a real bear to. Sew. When you sew patch work the most important part is where the corners come together. Your corners look great for a first time quilter. In the old days people cut up the clothes that were worn out or outgrown and used this fabric to make quilts. Thus the varied fabrics in old quilts. Your pattern should have marks that show where the buttons and button holes go. Just lay the piece on the finished shirt and mark where they go. This will allow you to get it to hang correctly. Good luck and keep up the good work.
Hi Josh! I though your final project turned out amazing and I loved hearing about the backstory of how you decided on patchwork. I’m actually from Kentucky so I definitely relate to that aesthetic. I think that its cool you can wear it now too and that it is very practical! I was curious how long you have been sewing? Also how long did the project take you? It seemed like sewing all the patched together would have taken a long time.
Hi Kyra! I started sewing in 2020 when I tried to make myself some facemasks. I didn’t touch a sewing machine for a few years until I started this project, and it definitely took me a while to brush up on how to use the thing. From cutting the patches to sewing the whole front piece together, it took me probably 8-10 hours which is why I’m glad I decided against doing the whole shirt out of patches!
Your patchwork shirt project is truly impressive! Your journey from concept to creation showcases your creativity, resourcefulness, and commitment to sustainability in fashion. Drawing inspiration from patchwork quilting and personal memories, you embarked on a thoughtful and nostalgic endeavor.
I admire your dedication to upcycling, evident in your choice of materials and your meticulous crafting process. Despite facing challenges like delicate patchwork pieces and sizing issues, you persevered with skill and determination.
The final shirt is undeniably unique and visually striking. Its vibrant patchwork design and functional pocket are a testament to your vision and craftsmanship.
Overall, your project embodies the essence of creativity and sustainability in fashion. I commend your efforts and look forward to seeing more of your innovative creations in the future!
Nick, thank you for your kind words! I’m hoping once I add some buttons I can actually wear this shirt around. Shouldn’t be too big of a challenge.