
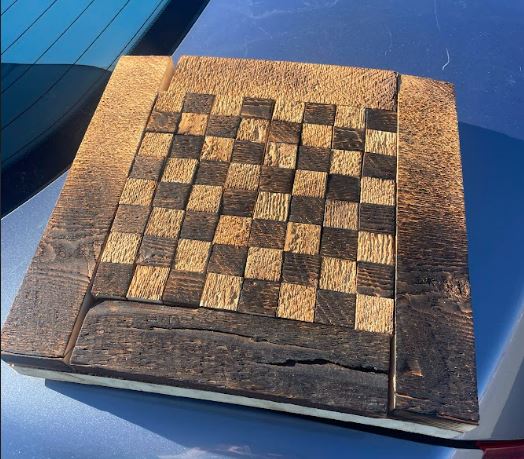
Hello everyone. For my upcycle project, I created a rustic shou sugi ban chess board. The rustic nature of this chess board gives way to a natural, stripped, and simple design. Shou sugi ban refers to charring wood to acquire new coloration, and also structural integrity. The burned wood grains turn black during charring, but also strengthen the wood as a whole. For this project, I used alternating levels of char on different components to achieve light and dark squares and borders. This allowed me to refrain from using any stains or paints to achieve my desired colors in the board, thereby adding to the rustic effect as well.
I took inspiration for this project from my fondness of chess, a game I played a lot last summer, and the love of the mountains and my friend’s ranch up in Kremmling, CO. I got into chess during the summer when I had a lot of time to fill throughout the weekdays. I became pretty adept at the game, but it becomes pretty meaningless when all of the opponents are random online players.
My friend Tyler has a family-owned ranch in the mountains, and although I have only been there once, it’s already had a pretty big impact on my life. My last woodshop project was a laser cut wooden board made from Tyler’s barn wood, and I used it to propose to my now fiancée Lexi! I also attended Tyler’s own wedding on the ranch, and plan to have my bachelor party there at their Air BnB as well! This chess board just feels like an extension of these connections, and it felt like an easy decision to utilize the barn wood from the ranch.
The first part of the design process was to dimension the board and cut the wood. Initially, I wanted to create a sixteen by sixteen inch board, including two inch borders around the squares, making a board of one square foot (1.5″ squares). The board I received was about three feet long and fifteen inches wide, and substantially bowed and cracked. Therefore, I had to shrink my overall dimension to a single square foot with an eight by eight inch square for the playing space. I then cut a twelve by twelve inch base board, two inch borders, and about 72 one inch squares.
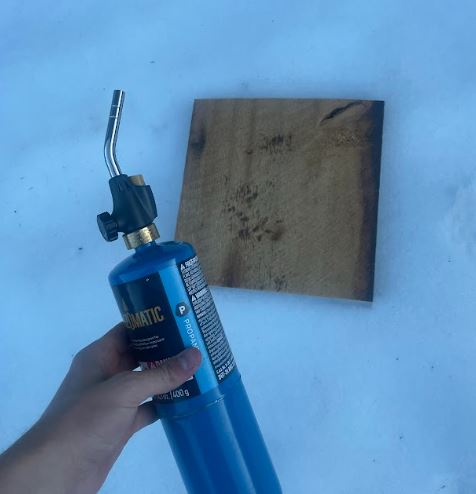
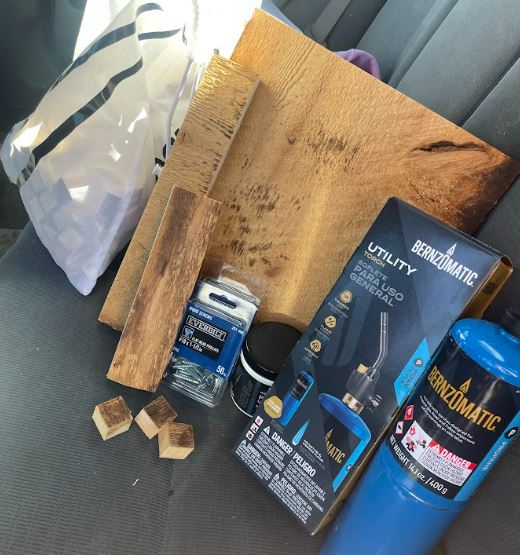
The next step was to char the wood in line with the shou sugi ban aesthetic. To do this, I purchased a simple blowtorch from Home Depot. I am aware that CU Boulder wood shops provide these, but this was a fun personal purchase. I then went outside into my snow-covered backyard, and began charring the dark pieces of wood to a deep black, and the light ones to a nice speckled grain pattern. This ended up being a rather difficult process to get my torch to light with the wind compounding the difficulty of the badly-built ignition, but I managed to get it working after about half an hour. I actually had a few issues where I set the wood on fire, rather than charring it, but it was always on the darker pieces, so the parts were not compromised.
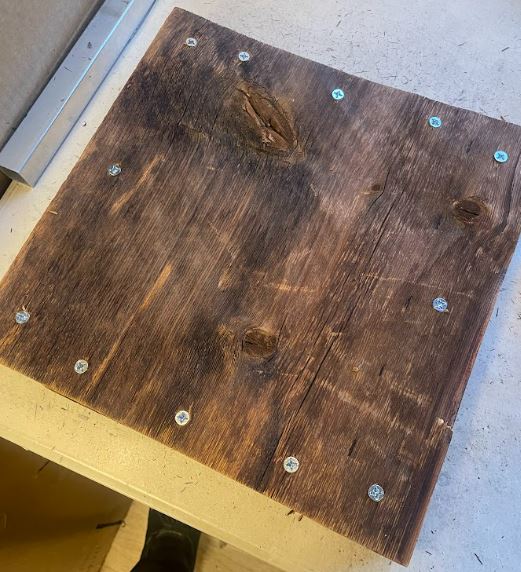
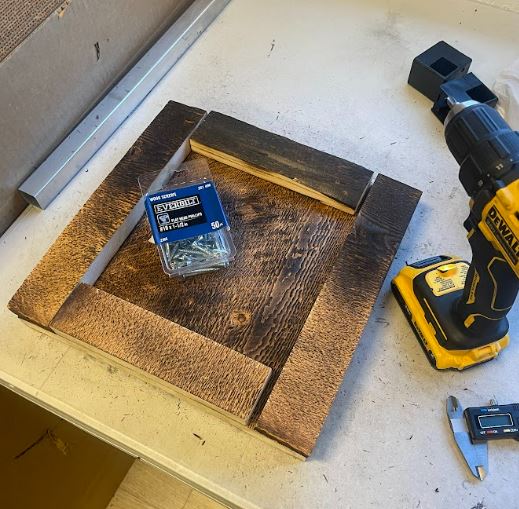
After all the components were appropriately charred, I then went over to my workplace, Lever Movement, to use their drills and mallets with my wood components and wood screws. I first used calipers to mark out two inch rows on the edges of the back side of the board, and then lined up one border at a time with supports underneath the base board, and screwed each border piece in with three screws. I had dimensioned these pieces earlier to border an exact twelve inch square, and something I found out after the fact is that the bow in the base board makes my base surface longer than twelve inches. While this does add to the rustic aesthetic, I do feel that I could have fixed this by measuring the base board surface, rather than assuming it was twelve inches, and then cut the smaller borders to length. Once the borders had been screwed in, I then worked to place 64 checkered squares in the space in the middle. These squares ended up being a very nice press fit, and I was able to secure the board construction completely without glue or screws, which honors the rugged simplicity of the rustic aesthetic. An added touch to this is that I made sure that the grains of the white and dark squares were perpendicular to each other, which helps to differentiate them from each other. I had extra wood screws and a polyurethane finish prepared to secure the squares and finish the wood surface, but I felt that these additions would detract from the simplicity of my design.
For future improvements for this project, I first could make the board bigger and up to my original specifications by making it foldable so that the pieces could be cut from the provided barn wood. However, I personally think that the coolest possible addition to this project would be to go look for antler pieces or natural components on a hike in the mountains that could be attached to the borders of the chess board. This would give the build a much more decorative and natural element, while maintaining the simple, rustic aesthetic. Lastly, I want to buy unfinished wood pieces for this board specifically, and char them in a similar fashion to the board to complete this as a usable, decorative chess board that I can keep and use for years to come!
Thank you so much for reading! Please leave comments below!
This is a link to a video of my charring process!
Sources
All pictures included are my own and were taken by me.
https://shousugiban.com/
6 Reasons Why Shou Sugi Ban is the Hottest Trend in Architecture
https://www.homedepot.com/
2 Comments. Leave new
Very cool project Jace! I originally was going to make a project which required a chessboard-like pattern, but ultimately decided against it due to the complexity. It is really cool that it all ended up working out for you. What kind of method did you use to cut out all of your squares to the right size? Were there any challenges that presented themselves during this process? I am also curious, do you have a set of chess pieces that would match the aesthetic? If not, would you consider making or at least styling an existing set similar to the chessboard? Overall, I love the project. Keep up the good work.
Great work on this project Jace! It is very clear that a lot of time and planning went into this project and I think it was well worth it. Did you consider sanding or having any sort of finishing coat on the wood to protect it? I could see this either helping or hurting the rustic aesthetic but I was curious if you thought about it. I really appreciate that you showed us the process of creating this piece. I also had never heard of this aesthetic and I am glad that you used it.