
My picture frame upcycle project is based on the mid century modern aesthetic. The reason I chose this aesthetic was to explore a new style that I am unfamiliar with, and more importantly, one that I enjoy. I found this style looking through Charlotte and Peter Fiell’s book 1000 Chairs. While skimming through all the different styles of chair, I happened to notice the 512 chair by Wegner. I was not only intrigued with the simple yet beautiful look, I liked the focus on the functionality of being able to store it.
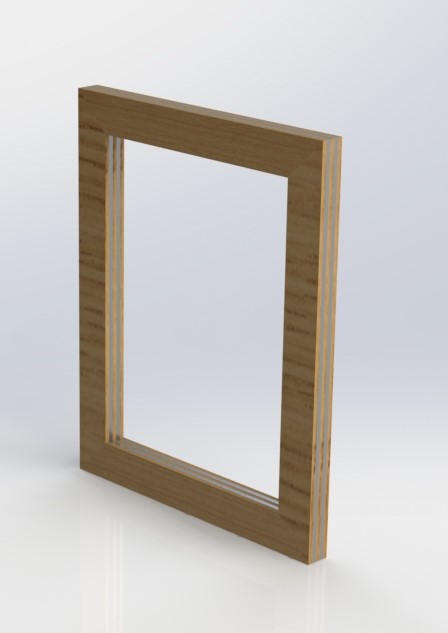
For the design, I planned on making a picture frame with layers of wood and metal. The stack of materials will build up to create the depth of the frame as shown in the drawing below. I am hoping that this design will follow the mid century modern characteristics of using materials such as wood, metal, and glass; yet still remaining simple and functional. At the same time, I would like it to be aesthetically pleasing, but not too ornate, as that would contradict the style. This is the reason I decided to layer the materials depth-wise so it would only be slightly visible from a front facing angle, rather than having the layers exposed to the front of the frame.
Initially, I looked around various workshops and maker spaces located on campus to find materials to upcycle. I eventually found out that the sizes of wood and metal I was looking for were typically too large to be scrap, they were still usable material for the shop. I still had plenty of time at this point so I looked around Facebook Marketplace and Craigslist to find random listings. I contacted a few sellers, but nothing worked out. Running out of time, I had to revise my plan and design.
To solve my metal problem, I remembered I had a broken table laying around that was built with long 0.8” square tubes. I held onto them because I planned on using it for a future project; and I was able to reuse three of them. Another problem would arise that I will go into later.
The overall design also changed dramatically based on another material constraint. The wood that I was able to find was wider and thicker than I planned for. I thought I would be able to cut it down to size, but due to equipment limitations at the woodshop on campus, I was very limited to how much wood I could cut off. So I decided to settle on a two-layer picture frame, the front wood and the back metal, and it was also thicker than I planned for.
I was originally concerned with finding a glass sheet, but that ended up being the easiest part. I thought that I’d find a large sheet of glass and cut it down to size, something I have never done before. Fortunately, I had a picture frame that was only broken on the frame portion, it still had perfectly functional hardware and glass. So I decided to finally throw the frame away and reuse everything else for this project. When I was first planning and designing the picture frame, the only material I had was the glass, so I decided to design the entire frame off it.
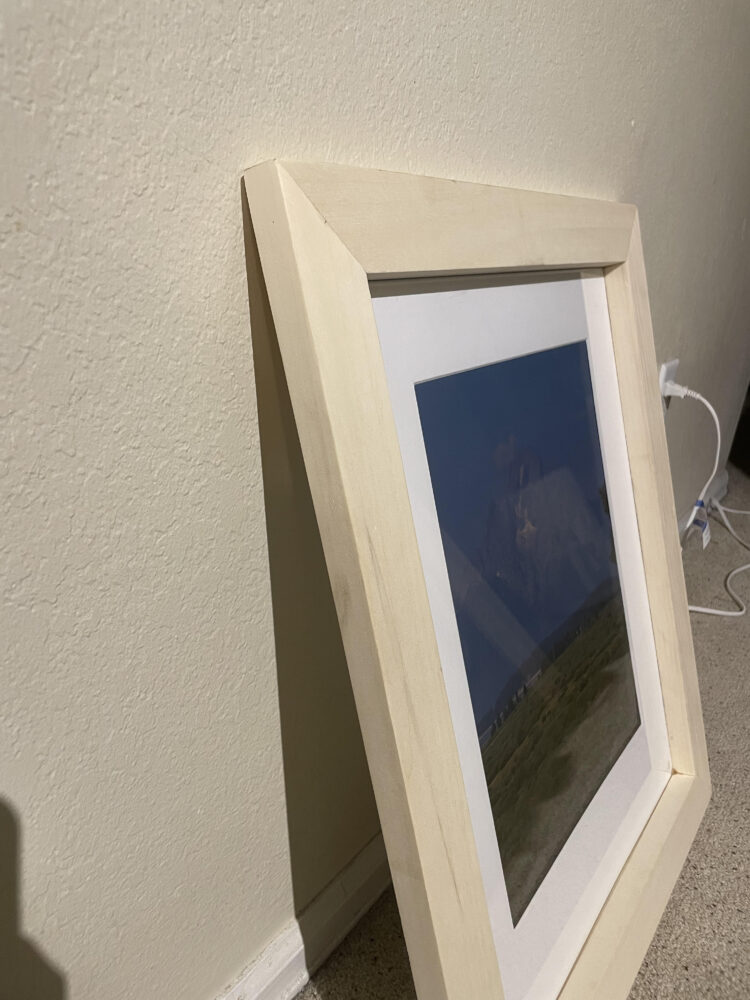
Once I finally found everything I needed, I started to work on the wood frame first. I worked out of the idea forge as they had both a wood shop and metal shop. My first step was cleaning and flattening the wood that was recycled there. The wood I got was a little rough on the surface, so I was taught how to use the planer at the wood shop. Planing the wood down ended up with nice, almost-perfect rectangles of wood. I cut the wood down to length while also miter cutting the ends. Because the picture frame had to be square, the corners had to be as close to 45 degrees as possible, which was easy with the shop’s nicely calibrated saws. Once I got to this point all I had to do was sand and assemble. Sanding wasn’t fun, only hard work, but the surface finish ended up being incredibly smooth.
To assemble the frame together, I learned to use a biscuit cutter and how much stronger those joints are compared to nails. I used a combination of biscuits and wood glue to hold the frame together. Using various clamps and straps, I was able to get a nearly perfect squared frame. It was quite stressful ensuring that each corner was exactly 90 degrees, but with help and advice of the wood shop staff, it worked out.
I had originally planned to use a black stain I had from a previous project, but I could not find it anywhere. I thought about going to the hardware store to buy some more, but I realized that it defeated the purpose of upcycling, so I decided to keep it bare. In the future, I would like to add some color or stain to the wood.
With the wooden frame complete, I moved on to the metal shop to work on the metal frame. The square tube I had had some powder coating on it, so I had to remove it with a sandblaster. This is where I learned how difficult powder coating is to remove with a sandblaster. Eventually I got it down to bare metal and moved on to cutting. I used bandsaws before, but I never cut angles with it, fortunately I was able to learn how from the shop staff. Once I learned, I realized here that my cut would have to be eye-balled, not a precise cut as I did with the wood. This may have ended up being a problem, which I will go into later, but I doubt it as I double checked the lengths and they were within tolerance.
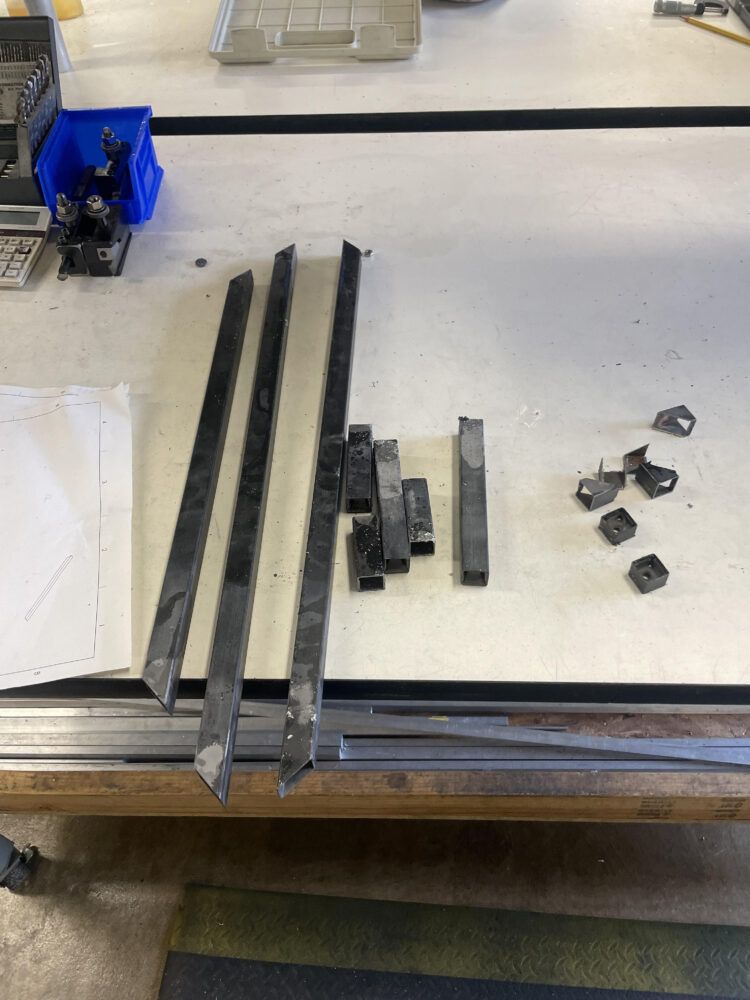
Once I set up all my metal tubes, I was ready to weld them together. Another problem arose at this point due to the thickness of the metal. I only know how to roughly MIG weld, and TIG welding is needed for thin gauge metal, which is what I had. I couldn’t take a TIG welding workshop so I gambled on tack welding with the MIG welder. I had hoped that the small welds would not transfer too much heat to the metal, causing it to melt. I was partially right, but also very wrong as I melted some small holes into my frame. Not the biggest concern, and constrained on time, I continued on.
At this point I was working separately in the woodshop and metal shop to construct the two frames. Individually, the frames appeared to be correct in size and squareness, but I was very wrong. When I went to attach the two frames, they did not align. The sides of the metal frame were off an angle, creating a distracting overhang.

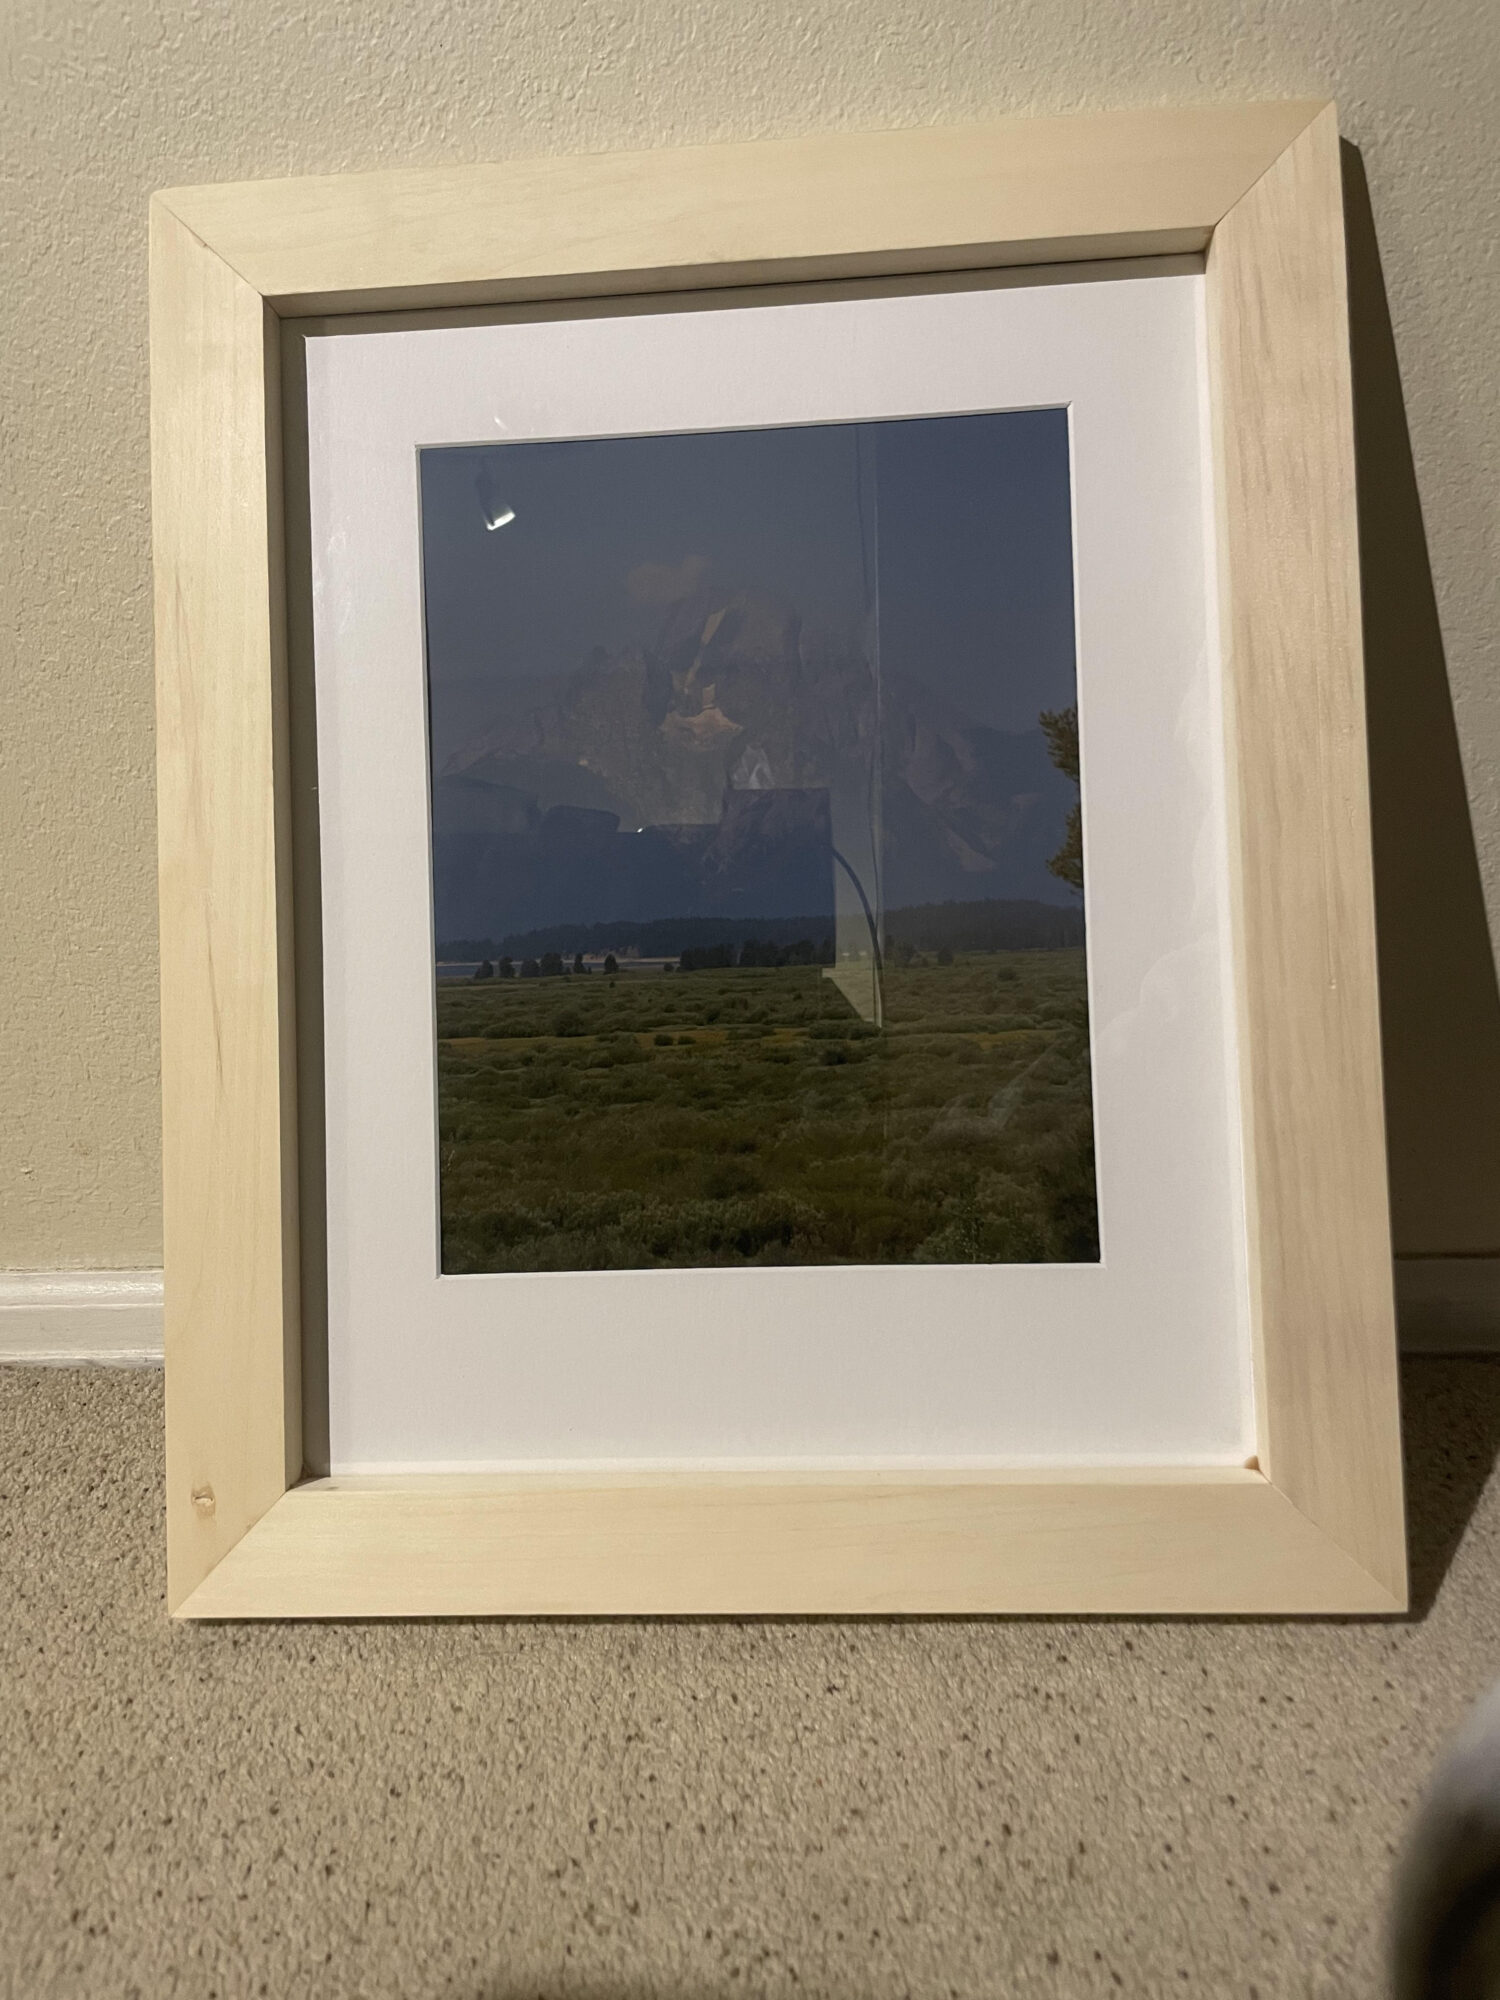
I contemplated what to do here, should I slap it together and complete the project, or should I just continue with one frame only. I decided to only continue on with the wooden frame, planning on fixing the metal frame in the future. I still would like to have the design of the wood and metal layering, but that will have to hold for a later day. From here I had a simple time putting on the various hardware to hold the actual picture and glass.

I was very proud of my first hand made picture frame, and I learned many new skills throughout the project. But, I do think I could have improved on matching the aesthetics of mid century modern with my design. The original design I created using five layers is something I believe would fall into the aesthetic, but due to all the design revisions, I deviated from it heavily. The end product, as much as I like it, ended up being extremely plain and does not have too much character in it.
At the same time, mid century modern had an emphasis on function, and my picture frame holds pictures and frames it. A simple item, a picture frame’s only function is to frame a picture, and I want the focus to be on my pictures, not the frame. So in a way, I accomplished both tasks of form and function, if not, I have a picture frame I handmade.
4 Comments. Leave new
[…] still adhering to the Mid Century Modern aesthetic. Find inspiration for such projects from an upcycling project post dedicated to crafting Mid Century Modern picture […]
[…] Heres a link to this project: https://www.aesdes.org/2024/02/21/picture-frame/ […]
Hey Kevin,
I think the project came out pretty well despite all the setbacks and I like how you described each setback and how you worked around it. I also completely relate to your worries about the melting of thin material with welding as I have had some projects where my inexperience resulted in some holes in my beams. If you were to finish this project, how would you plan around the five layers to more accurately get all of them to fit?
Hi Kevin, I really enjoyed seeing the effort that was responsible for making such a finished project! Specifically I appreciate your description on the inclusion/covering of the metal frame, and why it ultimately is hidden from the front facing view. You put a lot effort into the metal frame of the project, even welding which is not an easy process, but ultimately it is hidden and I 100% encourage your ideas to work on it in the future to bring out the metal aspect, it will give an already cool frame some more depth.