

Pioneer Primitive Newton’s Cradle
Scroll to end of presentation for a video!!
Vision:
For this project, I wanted to make a design with some sort of utility or that could be interacted with. At the very least, I wanted the design to be able to stand on its own and stay together. Most of all, I just wanted something I thought was ‘cool’. If others and I thought it was neat, and people could understand what it was supposed to be, I would be happy. I also wanted an aesthetic that I could design it in well, which was not a common aesthetic for that object or design. Finally, I wanted to be able to make it out of materials I could source relatively easily, and which would work well for the design. When my idea received positive reception from my peers, and I thought more about how I would accomplish it, I knew I found my project.
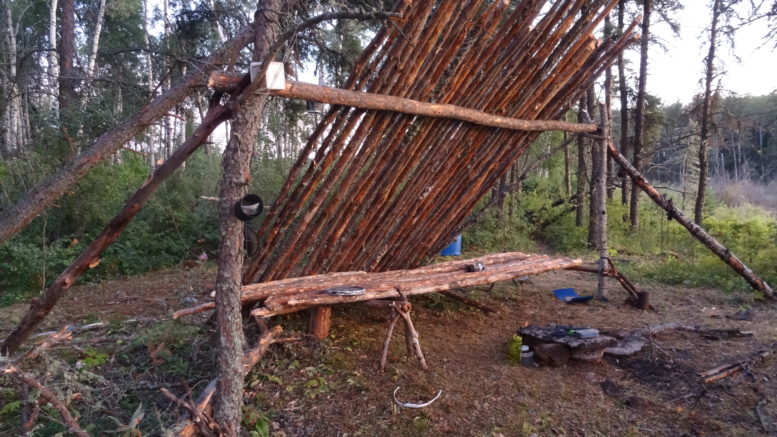
One of the big reasons I landed on the pioneer-primitive aesthetic was because it reminds me of my time in boy scouts, playing in the woods at scout camp building stick forts like the one below. I also thought this aesthetic was unique as well as personally attractive. Finally, the aesthetic was also irregular and uncommon for newtons cradle designs.
For function, while I wanted the cradle to function like a real cradle I knew this was going to be unlikely. Regardless, I designed and built it to the best of my ability in order to try to achieve this. I was hopeful that the rocks would be hard enough to provide collisions similar to the metal balls used in regular newtons cradles, and if the balls rested in contact rock to rock that they would at least perform a few ‘knock cycles’.
Fabrication Process
The fabrication process started with sourcing the necessary materials, like all projects. While I knew which knots to tie the structure with, sourcing the materials was something I was a bit more unsure of on how to do. There were significant considerations I had to keep in mind while gathering materials.
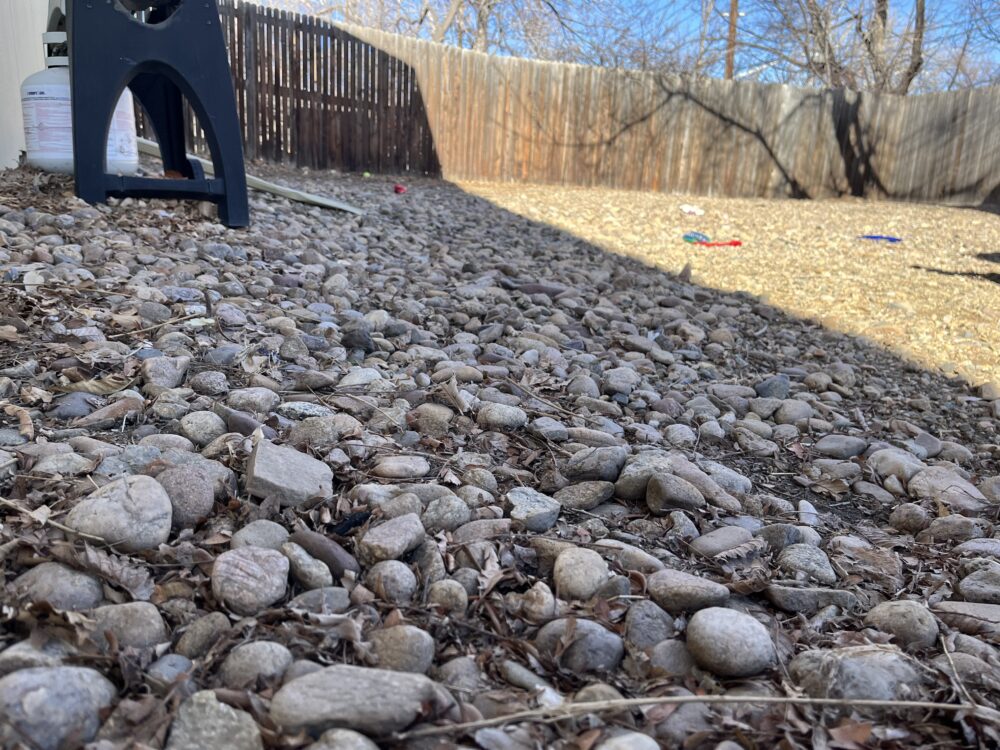
Each material has criteria that samples must meet in order to be used. Sticks need to be large enough in diameter to not snap but small enough to be bound together with twine, stiff enough to not bend but not so brittle they snap, and long enough to be of use. Rocks (like shown below in my backyard) must be large enough to have cradles tied but small enough to be held by simple sticks, spherical enough to produce consistent collision dynamics but not so spherical that none qualify, and approximately the same density. Twine must be strong enough to hold connections but still be cut to size and able to be knotted around small sticks, and it must be able to hold knots.
I began by searching my back yard for these materials, and was ultimately successful after some time. While I had spare paracord laying around shown below, I had to do some searching for the sticks and stones.

To utilize the paracord, it had to be cut at both ends in order to reveal the inner fibers. Then the outer ‘sheath’ could be slowly wrinkled and pulled until it was removed, fully revealing all the different inner strands shown below.
<PARACORD FIBER IMG>
These could then be separated and used to tie knots in the project. While my back yard has plenty of rocks as shown, it was challenging to find enough stones of adequate sphericality as well as similar relative size.
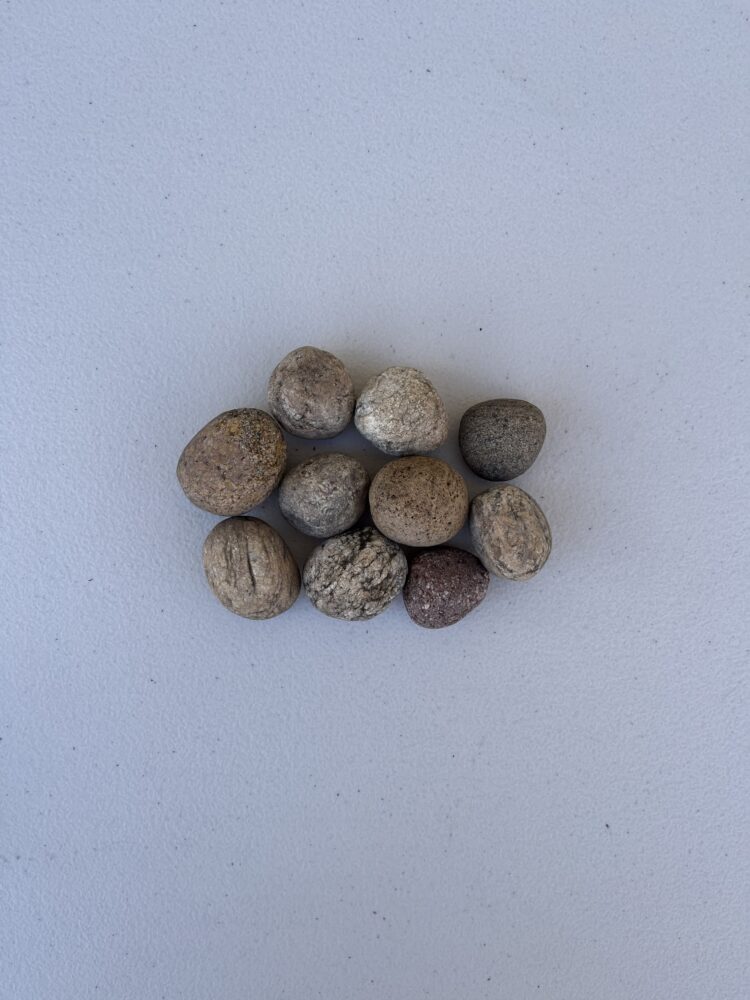
This took a decent amount of time to slowly pick over individual rocks, choosing the ones that appeared the most spherical in order to choose from later. The initial rock selection is shown below.
There were also plenty of sticks in my back yard, but a similar issue was ran into with finding usable sticks as the rocks. While some sticks fit one or two requirements, they would frequently miss the mark on others. This significantly prolonged the process and made it feel somewhat tedious.
The first thing I began with in the actual material processing was the stripping of the paracord. This was a fairly simple task, with the most challenging being to cut a sufficiently long section of cord while not wasting rope by cutting it too long. Ultimately I simply had to use my intuition, and remember the fact that rope too long can always be shortened, but not the other way around (unless two strands of rope are knotted back together).
Since the rocks needed no actual processing, I began with the stick processing next. I felt as if the bark and ‘rough’ natural qualities of the sticks contributed to the overall aesthetic of the project, so I did not bother with debarking any of the sticks. I began by arranging the sticks of smallest usable length in rectangles, so that I could see what lengths of sticks I needed to make from the longer, uncut sticks as shown below.
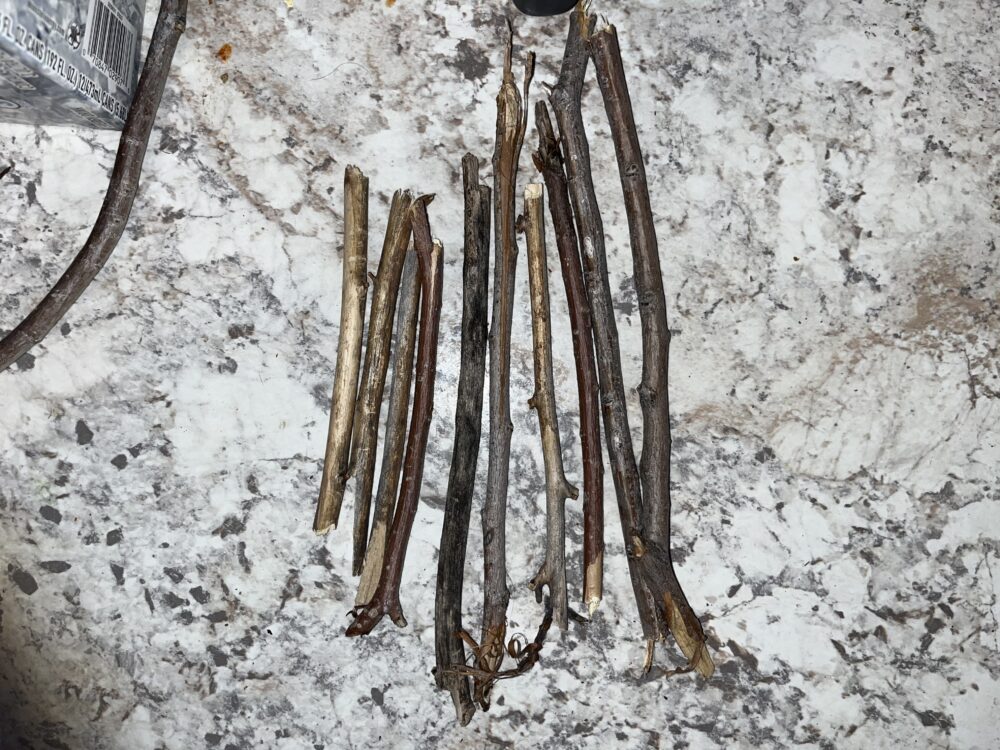
I then snapped these longer sticks into whichever lengths of structural sticks I was missing, and once again laid all the sticks out in rectangles so that I could visualize which individual sticks should be used with others. I laid aside any longer segments that were too curved for primary construction, in the case that I still wanted to utilize them later for cross bracing.
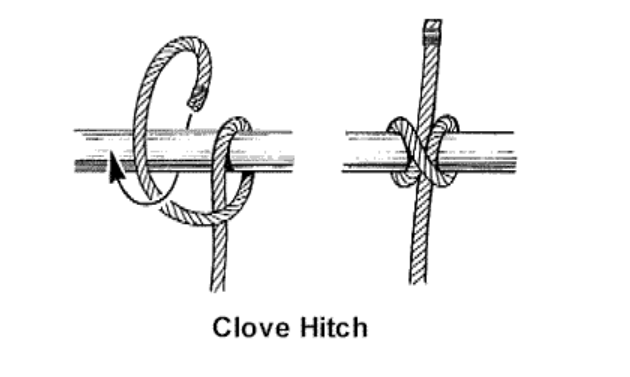
Next began the main part: tying knots. I began with a clove hitch (shown below) around one of the sticks to be perpendicular, which is the standard method of starting most lashings.
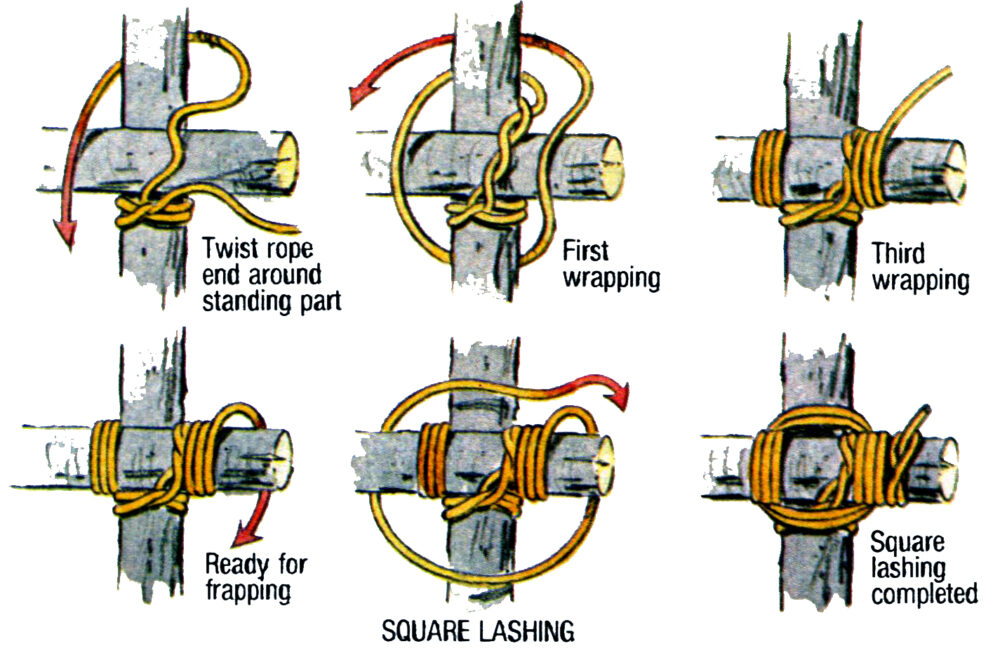
I then began the square lashing, a standard lashing type which I learned from my time in Boy Scouts as the standard method of joining two sticks securely at a 90 degree angle to each other. While this knot is fundamentally fairly easy and mostly just repetitive, the most challenging aspect is just maintaining tension in the previous rounds while continuing the knot. Example instructions are shown below:
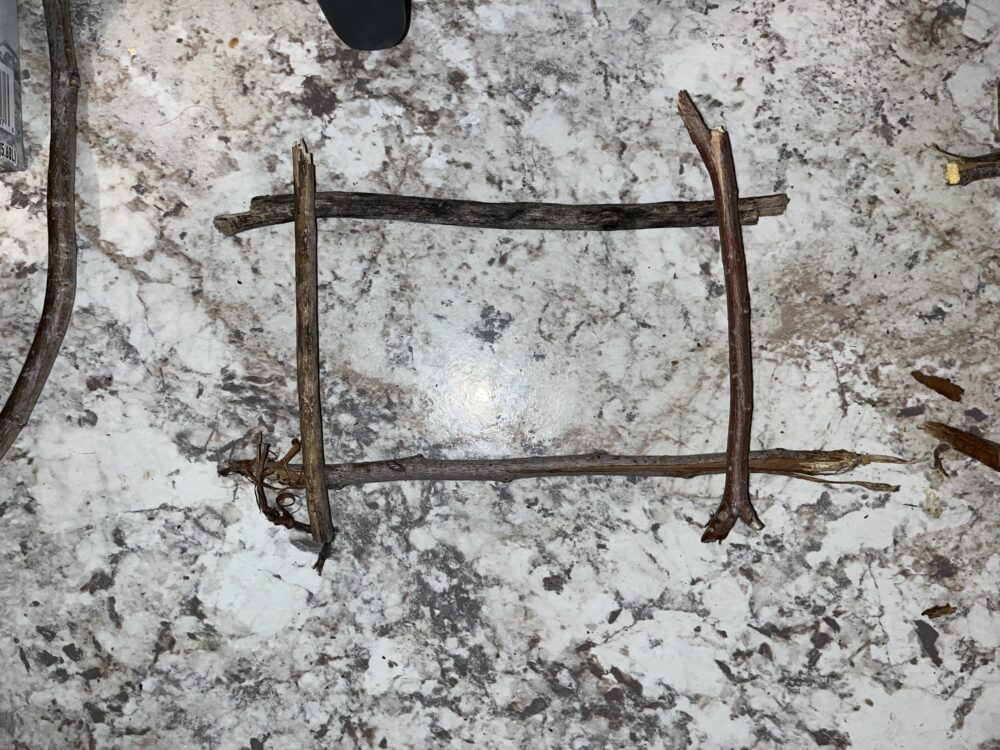
I proceeded to do this eight times in order to make a rectangle, which I would use as the ‘walls’ of the cradle, one of which is shown below.
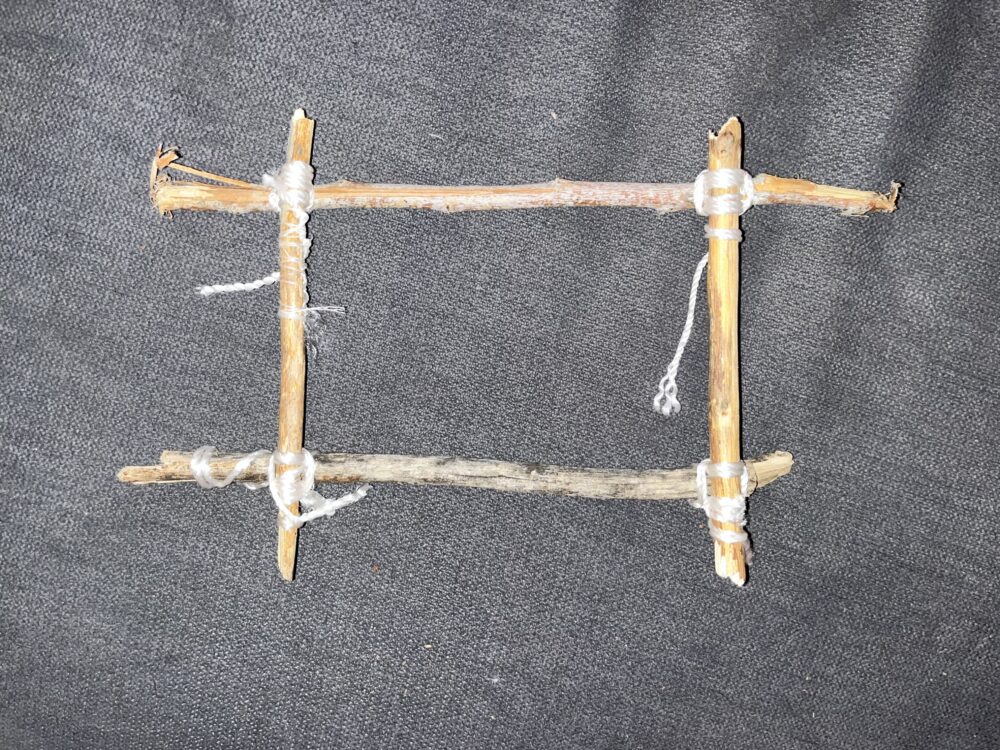
After these were assembled, I began tying four more short sticks between these side walls in order to make the main frame. This was a bit more challenging due to the fact that there were already many knoits on the frame, and routing the rope through all the sticks began to get challenging. I had to ensure that I was tying the knots tight without warping or even snapping the frame I already made. Eventually, I connected these four last sticks to all the necessary corners, and my frame was complete as below.
At this point, some of the initial knots had began to loosen, so I went over them with thinner twine from the paracord and tied those off in an effort to prevent unplanned disassembly.
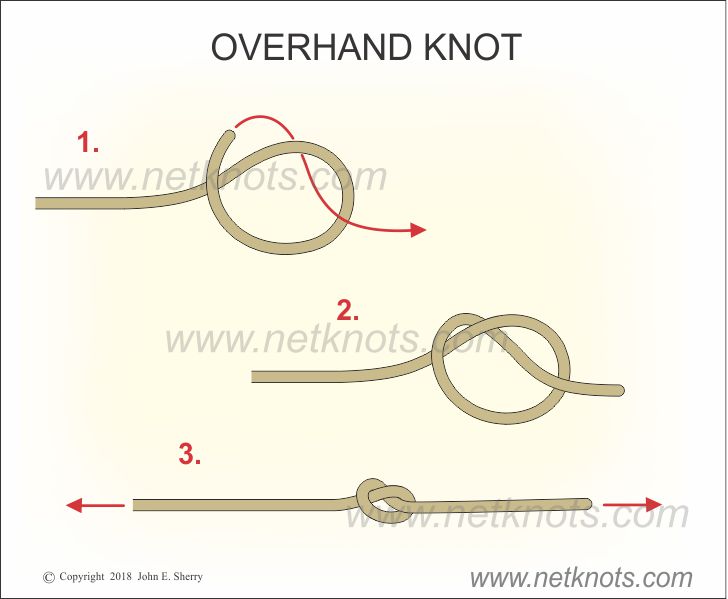
The next step was to cradle the rocks, which I as well as others had identified as a likely major challenge. While I attempted many times to fashion a cradle around the rock with the thin twine, I was unable to do it as the twine continued to slip off and I was forced to restart. I made the call that it made more sense to stop wasting time and effort and simply super glue the rocks to the twine. Once this was complete, I had to let the super glue dry over night because it was applied so thick late at night. The last step to assembly was hanging the rocks from the frame. I did this with a simple overhand knot (illustrated below) on both the upper and lower horizontal members. While this was a loose knot, it held the rocks and allowed for the height of each individual rock to be quickly adjusted.
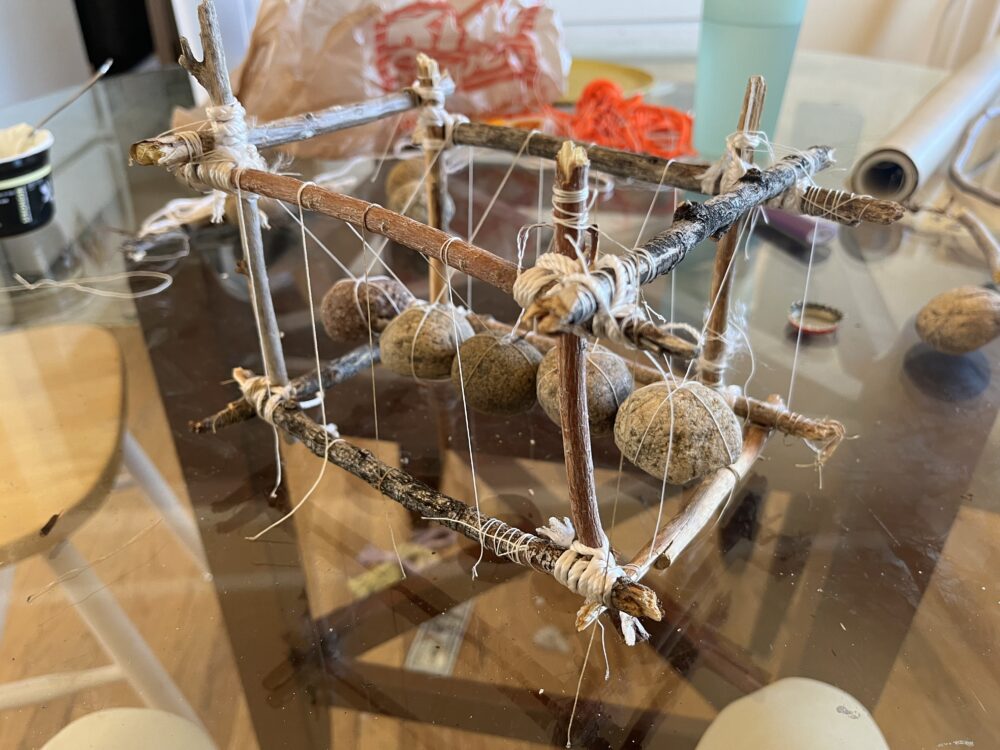
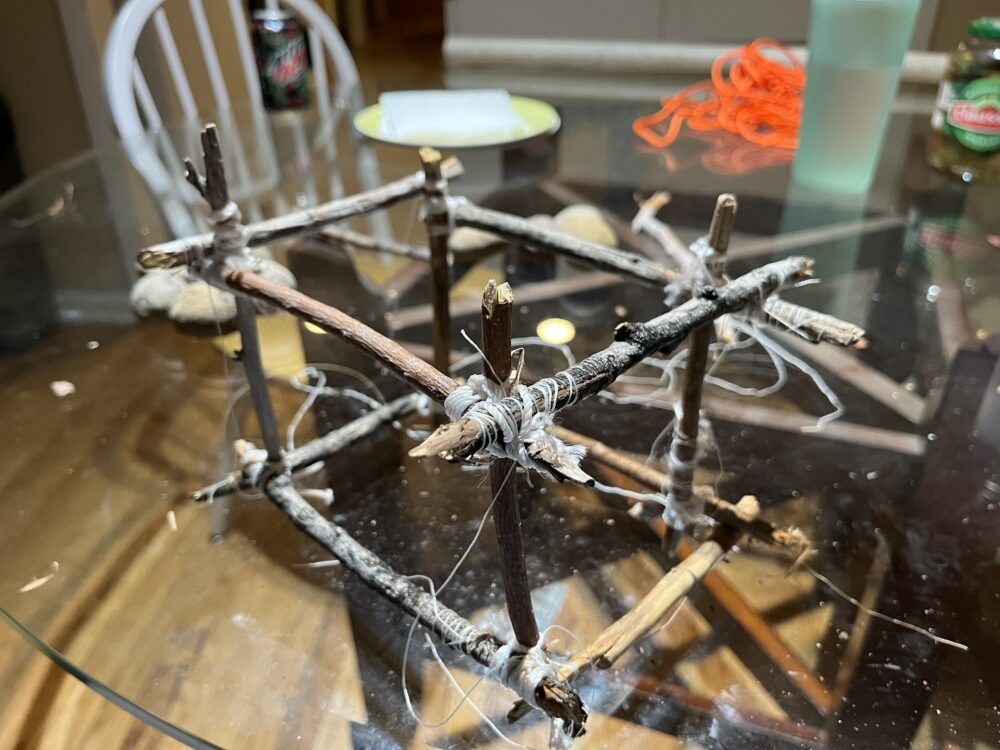
At this point, the entire fabrication process was complete, with the result shown below.
Artifact Description
I am very pleased with this final product. It stands on its own, soundly, and is able to be interacted with. It is surprisingly sturdy, and is still standing after a few days of being in my living room being constantly touched by my roommates. To me, it evokes the emotions, time period, thoughts, and aesthetic that I was shooting for.
Comparison to Goals: Functional
While I met my expectations, I only partially met my goals. The design is sturdy and structurally sound, dynamic, and able to be interacted with (gently) without fear of collapse using primarily true to aesthetic materials and methods. However, while the rocks will swing and collide, they do not transfer collisions well enough to produce the signature newtons cradle repeated knocking. While this is dissapointing, it is not surprising to me. I had the thought that, as rocks do not bounce when dropped on concrete, whereas metal balls bounce seemingly forever when dropped on metal plates, that the rocks would likely not bounce in my design.
Comparison to Goals: Artistic
I accomplished all of my artistic goals. I kept the design true to my pioneer primitive aesthetic, with simple construction yet clean complex knots, eluding to a wilderness survival shelter on a tiny scale. The sticks fit the ‘unfinished’ and raw materials, and the rope, despite being synthetic, appeared as if it could be natural fiber. I was also able to hide my use of materials not adhering to the aesthetic such as superglue.
Future Work
The major problem that I see with my design is the fact that my rocks do not properly collide, and the onl way I see potentially fixing this is to purchase metal balls and color them to appear stone. However, even this I am unsure if it could work, and I am not willing to riskj the price of materials on that. The only work I could see happening would be to add cross bracing if I felt I needed to, although I believe the structure is strong enough for how.
2 Comments. Leave new
Hi Peter, great job on the project and nice job describing the fabrication process in detail. I think it is cool that you were able to use some of the skills you learned during boy scouts in order to lash the sticks together. I also like how it looks, it is sort of a bizarre combination of ideas. I think you should keep the rocks rather than using metal balls, I think it is visually interesting that the rocks are not perfectly spherical. What do you think would happed if you tried to scale this up? Maybe the rocks are too light to carry enough inertia to continue the bounce cycle and heavier rocks would work better? I am not sure!
This blog post is very insightful and detailed, offering a really cool glimpse into your creative process, primitive aesthetic and the challenges you faced while bringing your vision to life. I admire your dedication to achieving both functional and artistic goals, even when faced with unexpected obstacles like the behavior of the rocks in your design.Your mention of the pioneer-primitive aesthetic and its connection to your experiences in the Boy Scouts adds a personal touch to the project and a nostalgic charm. I’m curious, though, if you’ve considered any alternative materials or approaches that could potentially enhance the functionality of the design without compromising its aesthetic? Perhaps experimenting with different types of rocks or exploring alternative methods of securing them could cause interesting results.