

Post 5: Rustic Wall Art – Hailey Usher
Initial Inspiration
Before starting out this project, I first considered what materials I had available to me to upcycle.
In doing so, I came across some wood in the BTU’s scrap material section, and thought that I could use the wood scraps and the laser cutter at my disposal to create a wall art piece for my room.
My main inspiration for a wooden art piece came from my experience last semester, where I learned how to use wood in creating a foldable chessboard and chess piece set. I really enjoyed the challenge of learning how to laser cut, sand, and stain wood, and wanted to continue building on these skills through this project.
Artistic Vision
For my upcycling project, I aimed to mimic a rustic aesthetic. I was inspired by this aesthetic because wood is the primary material that I worked with.
I feel that the rustic aesthetic is broad and can be thought of in a few different ways, so I want to specify what aspects of this aesthetic I aimed to emulate in my wooden art piece. Rustic, as an aesthetic, references a natural and organic look, which is perfect to emulate through a wood-based design. In rustic designs, only natural, neutral colors are used, including warm tints of beige, white, brown, and green. This is something I considered for my wood staining. Thankfully, I had some leftover oak wood stains from a project last semester which I can upcycle as well.

Zoey Louise Design – Rustic Color Palette
Finally, rustic design implies a rough, imperfect texture, as well as a visually handmade and heavy quality, two key factors that I considered in my woodworking design.
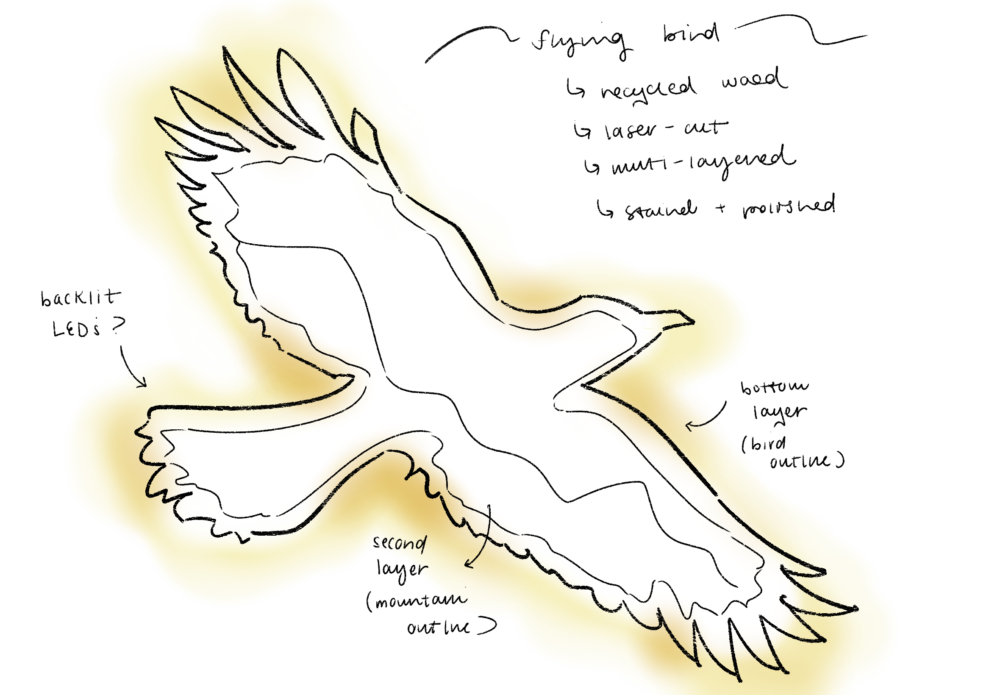
Moving on, I’ll discuss my vision for this project. As I spent time sketching out some ideas, I ultimately decided I wanted to do a multi-layered nature landscape contained within some sort of silhouette; I visualized a crow or buffalo to be a good outline to utilize.
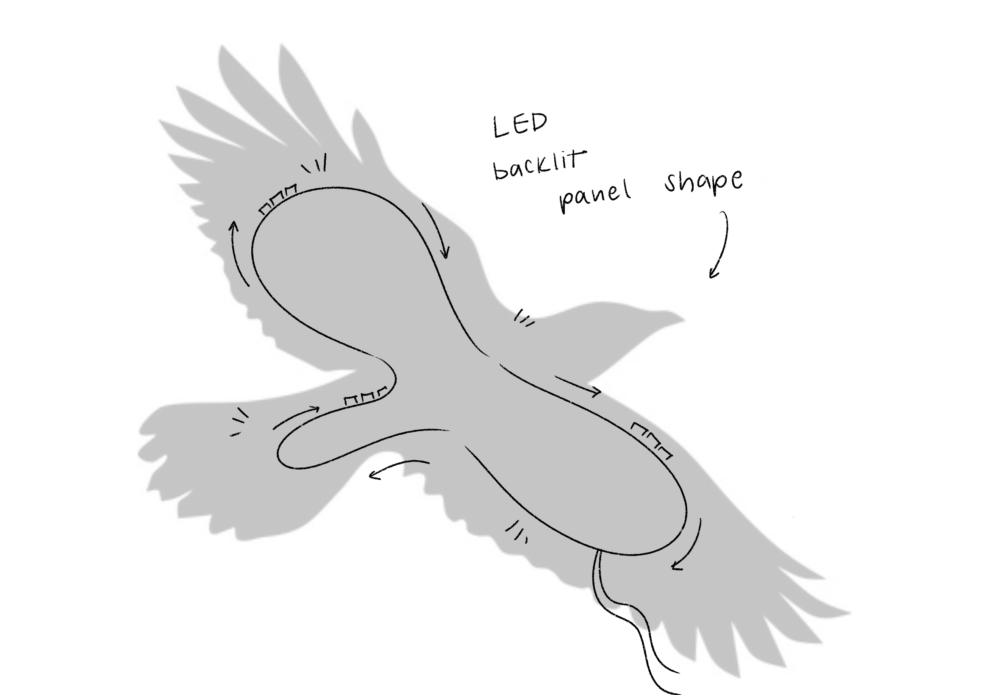
My sketch for how a LED backlighting panel could be designed.
For my nature landscape, I was in between trees or an outline of the Flatirons – I went with the Flatirons for my sketch because I thought they’d offer me the best look if I’d be layering wooden pieces on top of each other for a 3D effect.
Fabrication Process
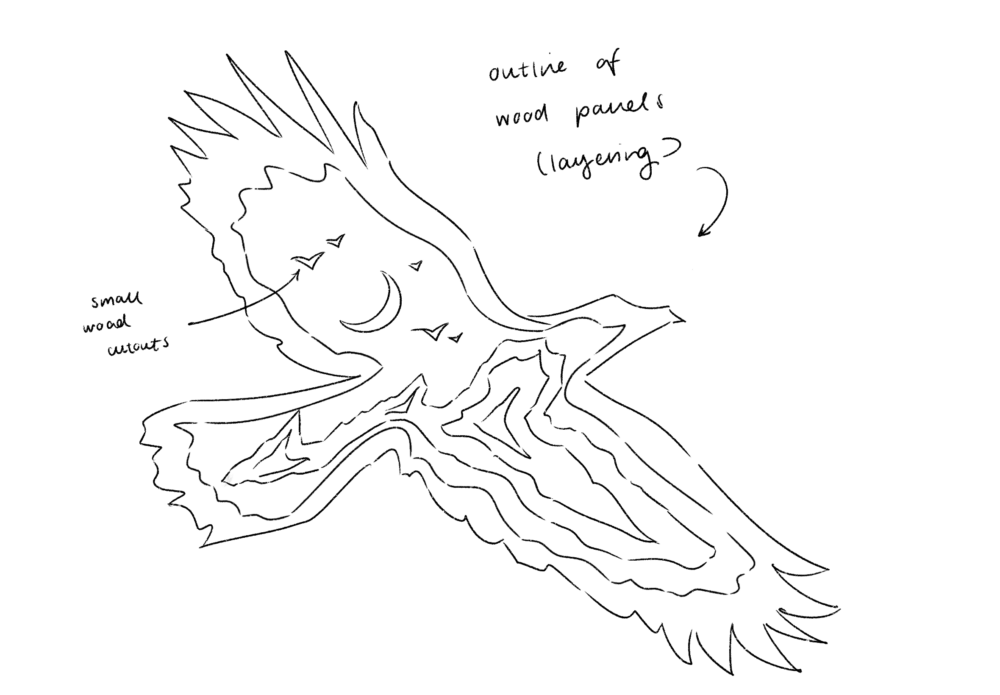
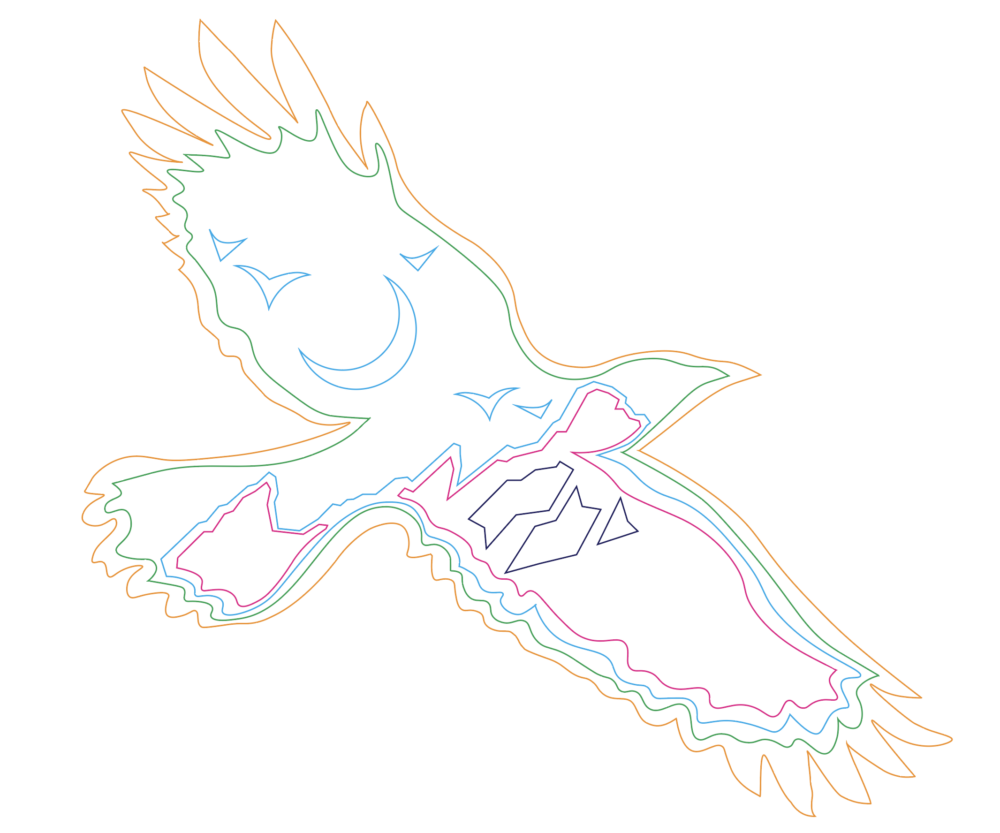
My first step in the fabrication process was to create an outline for the wood cuts in Illustrator, using the Pen tool.
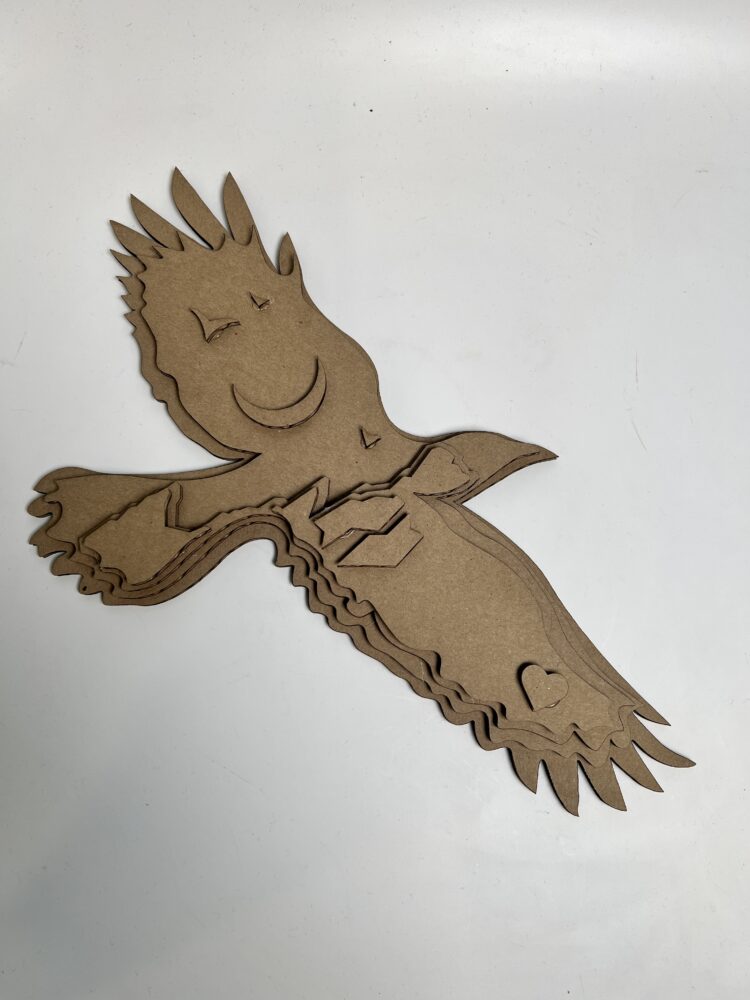
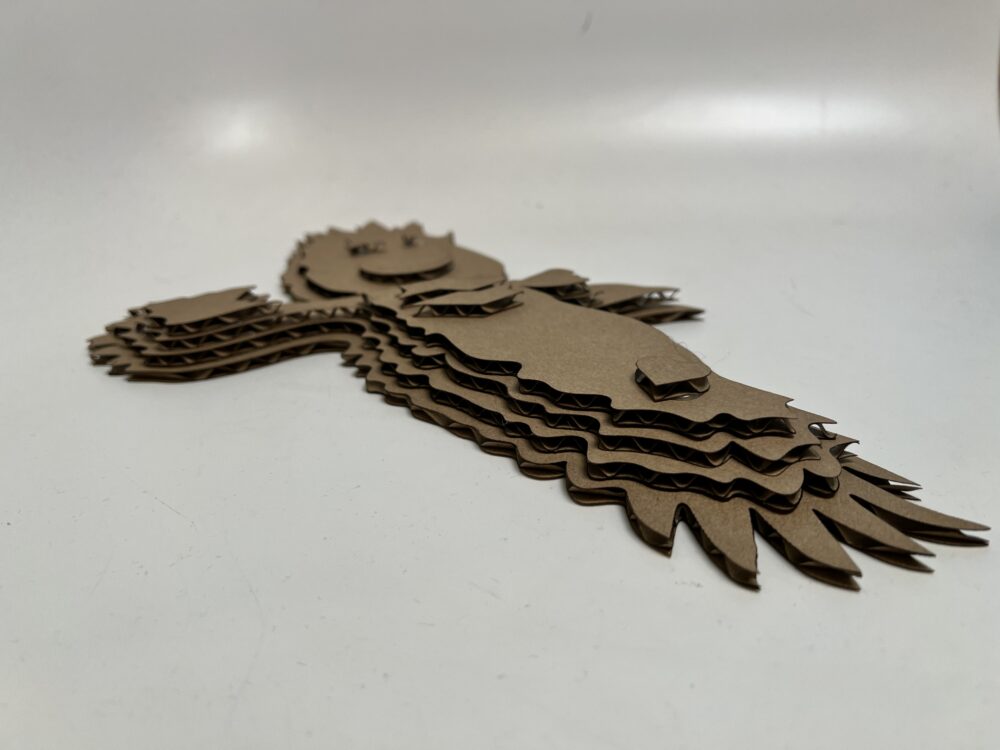
With the outline made, I then moved onto laser cutting a miniature cardboard prototype so I could consider the real-life look and feel of the wood piece.
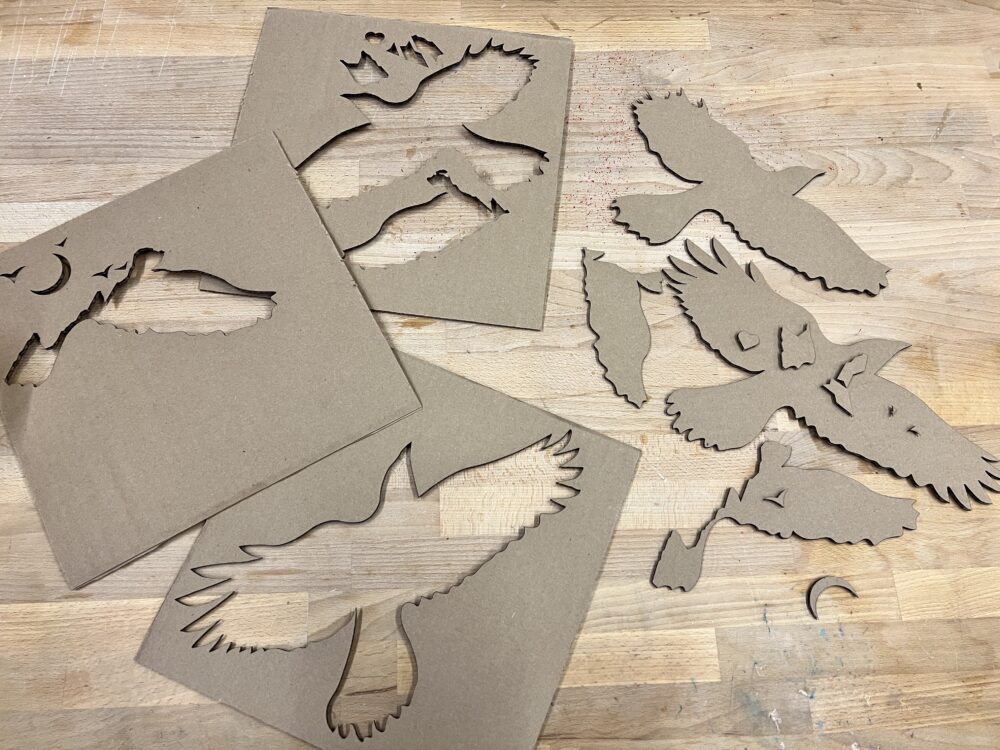
One issue I ran into during this process was that some of the small pieces, like a few birds and one of the top outlines of the Flatirons, fell through the bottom of the machine, and I was not able to retrieve these pieces. This informed me that my final wood version must be a bigger scale so this issue doesn’t occur.
To assemble the layers, I used hot glue, which worked well for the cardboard; in my wood cut version, I planned to use a stronger adhesive: wood glue.
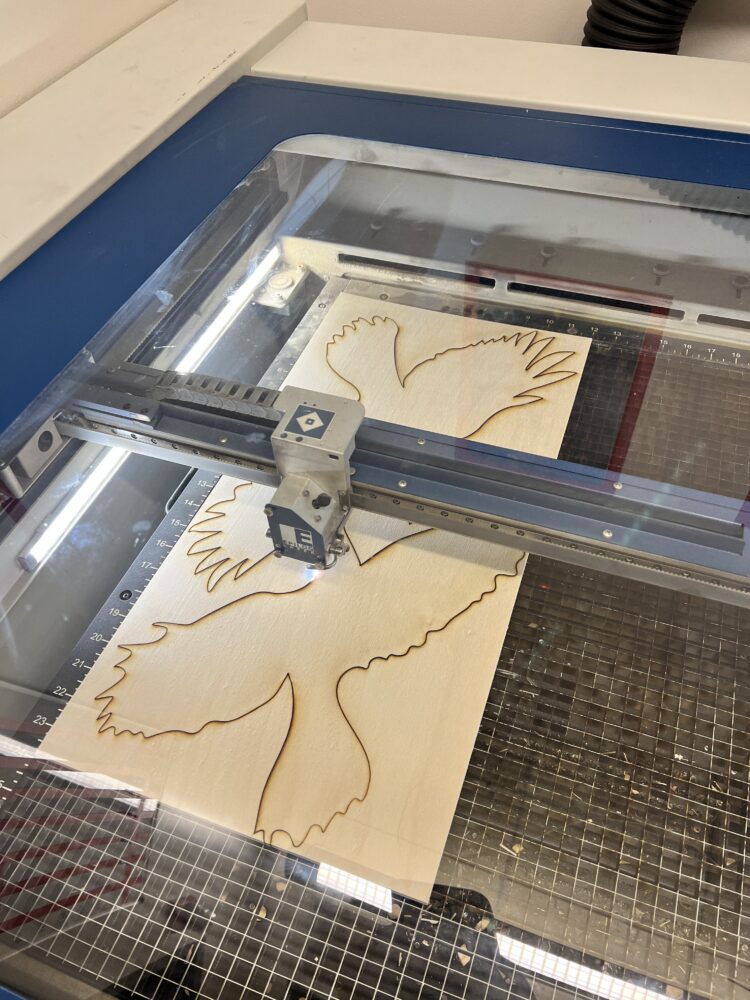
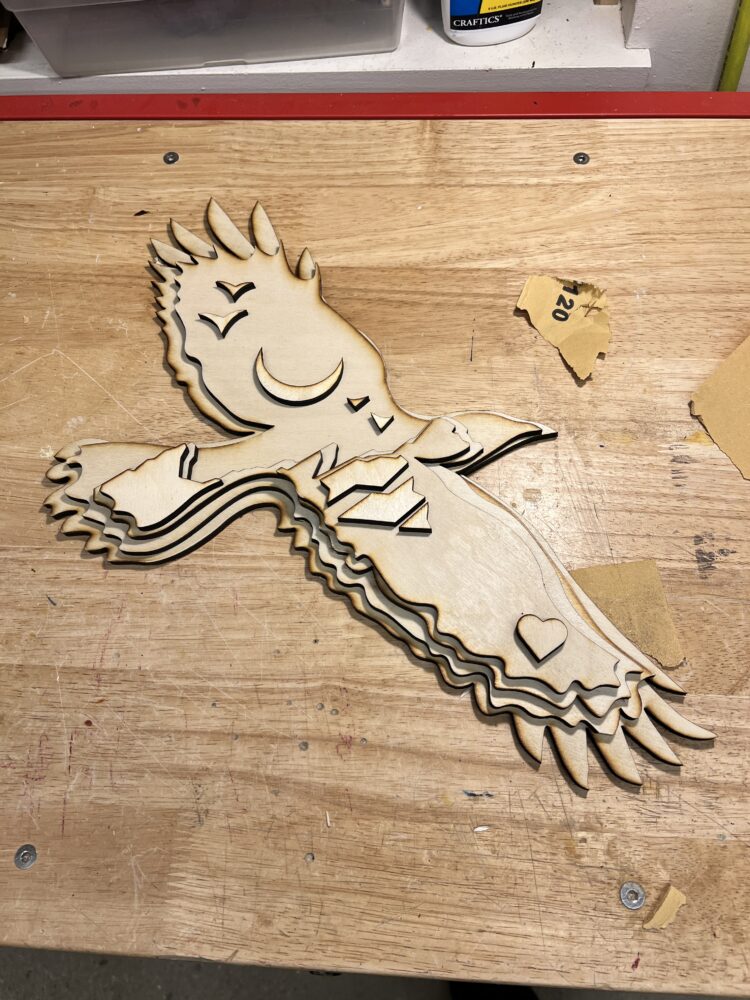
The following week, I gathered a couple of bigger wood scrap pieces from the BTU and stored them in my locker for the final laser cut. I then laid out my layers Illustrator to cut them using the least amount of space possible according to the two woodscrap dimensions. Afterward, I transferred these lines into Rhino to begin laser cutting.

Unfortunately, I had a brief hiccup with the laser cutting process as I originally didn’t set my speed to the correct setting, which meant that my first round of cuts didn’t go through the wood all the way. I quickly found a workaround with this issue, where I ran the same cut again, and the pieces ended up coming out fine.
Once I had my wood pieces cut out, I then worked on layering them with wood glue. I let them dry for an hour or two with clamps holding them together.
Then, I added two separate layers of a combined wood stain and polish to my piece, making sure to coat all the grooves and small compartments with my brush so there’s as even of coloring as possible.
Final Artifact
And now, for my final product reveal! Drumroll please…
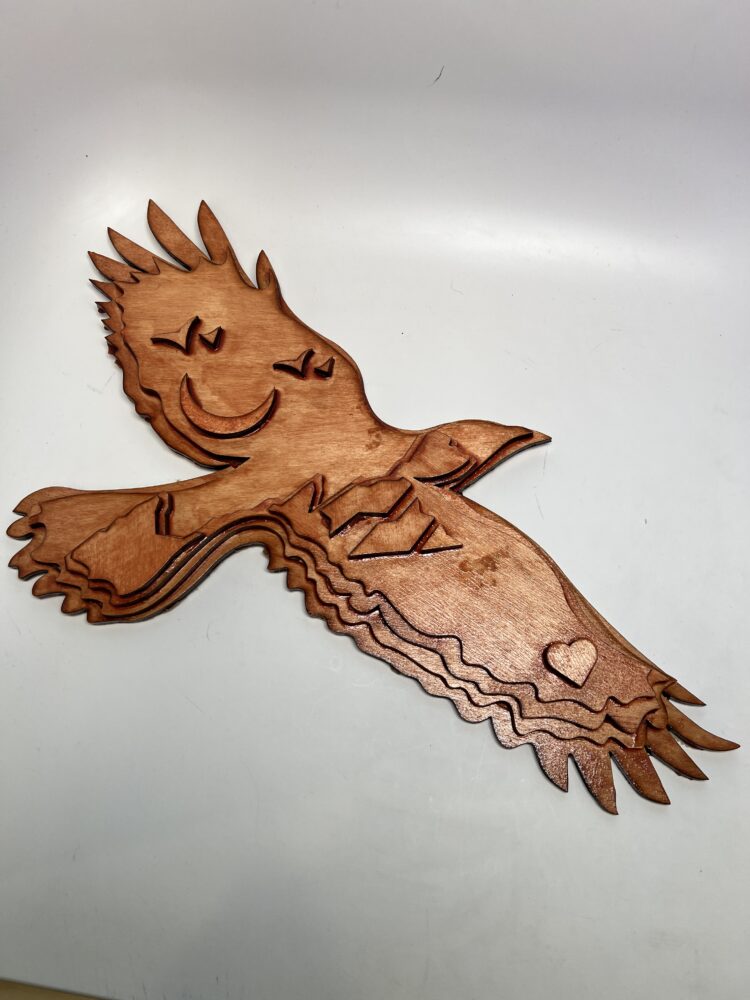
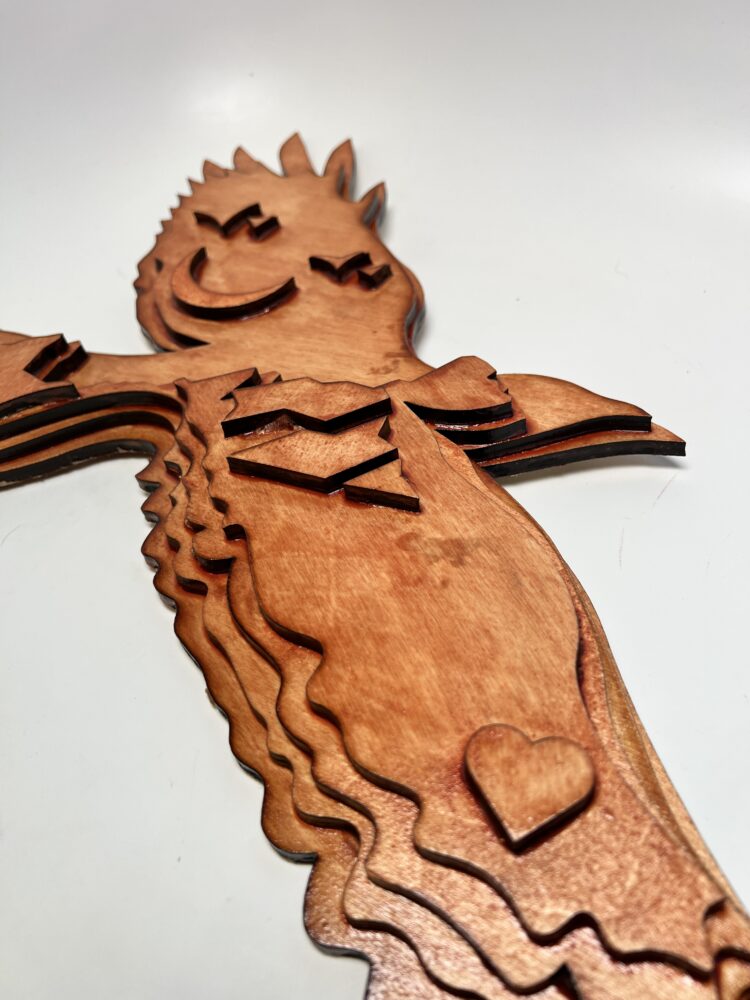
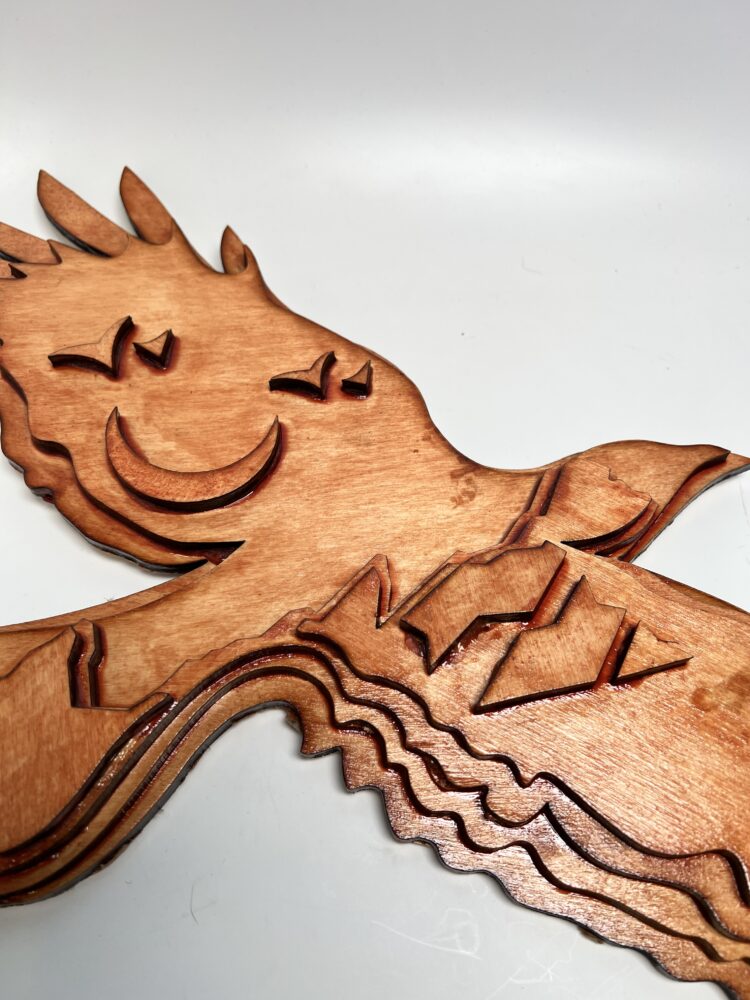
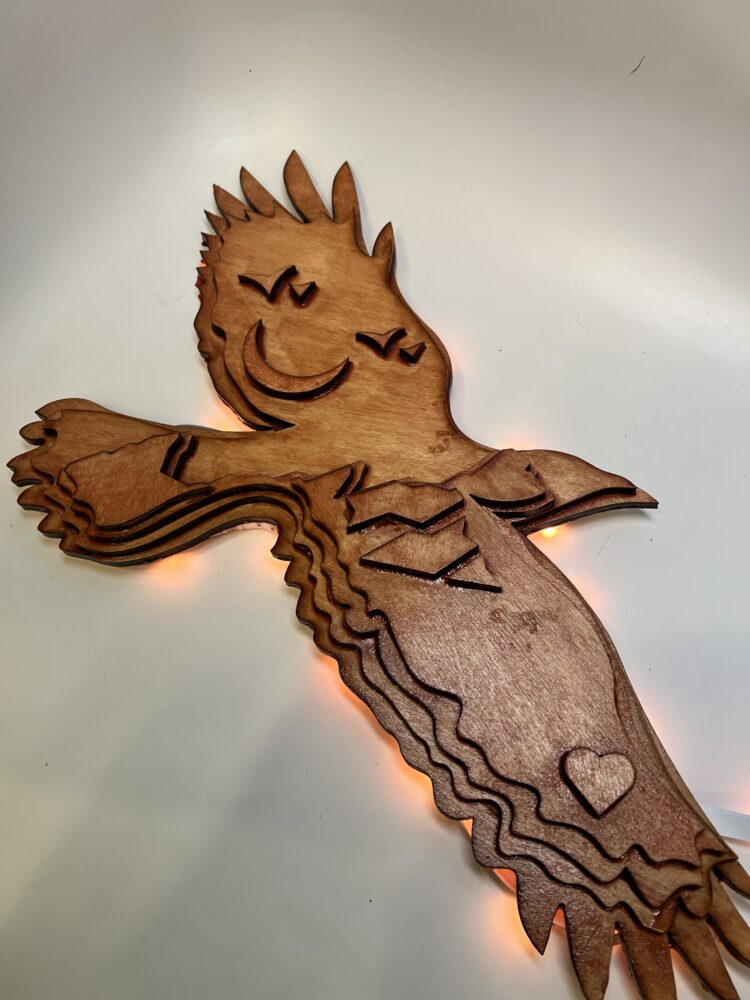
My final wood piece is _ in size from wing to wing, and looks great with the backlighting. I love the outcome of the stain – I think it adds a lot to the overall rustic aesthetic.
Looking Back: Successes and Struggles
Overall, I’m extremely proud of this piece as it represents my second woodworking project ever. I felt super prepared and confident throughout the process and I’m so happy with where my ideation and creative vision brought me in the end.
Here’s my overall achievements in the functional and artistic areas…
Functional:
- I plan for this piece to be hung on the wall of my boyfriend’s bedroom. However, his birthday isn’t for a week after the project is due and I wanted to wait until the day of to give this gift to him. Once he has it in his hands, I was hoping we could figure out together how to hang this piece. I think it’ll hang great with either a couple nails or command strips. So, I’d say the functionality of this piece is planned out to be fully complete.
- Also, I’m happy to say that the layers all glued together nicely and the piece is very sturdy, so this functional goal was also achieved.
Artistic:
- I feel that yes, I achieved my artistic goal for this piece. It turned out exactly like what I had in mind with its design, color, feel, and aesthetic merit.
Looking Forward: Reiteration
This artifact is definitely being put to good use, being a wall decoration for my boyfriend’s room. I might consider making this artifact again someday, just to be slightly bigger. I think it would look great in my room back home in Boise, Idaho!
Overall, I’m really proud of the effort I put into this project, and the final product itself! I’m excited to take on another challenge for this class!
2 Comments. Leave new
[…] here’s the blog post link with more information […]
Hi Hailey, I was very eager to see how your project would turn out based on your impressive sketches and woodworking abilities, and I think it is amazing! The stain that you have added to the piece makes it look professional and very nice. I really like how it looks with the backlighting. My only piece of advice would be for you to add built-in backlighting to the project if your boyfriend would like that. Beautiful work!