
Throughout the design and manufacturing process of my upcycle project, I was inspired by the Scandinavian aesthetic. I have always enjoyed the minimalist style and the use of natural materials that are often found in Scandinavian designs. Despite knowing that I wanted to emulate the Scandinavian style, I was unsure of what object to create. My choice to use recycled hockey sticks for my material helped to inspire my decision to create a small pot for succulents. The simple geometric shape of hockey stick shafts meant that it would be simple to construct a geometric piece that also fit into the minimalism of my aesthetic. The wood used in old sticks gave a neutral tone and natural color to the piece and I found it fitting to use recycled wood to contain plants. Succulent plants are common in Scandinavian designs and therefore I thought they would fit well alongside my intended aesthetic. Ultimately, I wanted to make a simple planter for some of the succulent plants that I had in my apartment that utilized the simple geometry of hockey sticks combined with the light, airy, and minimalistic style of the Scandinavian aesthetic. I go into greater detail describing the Scandinavian style in some of my previous posts.
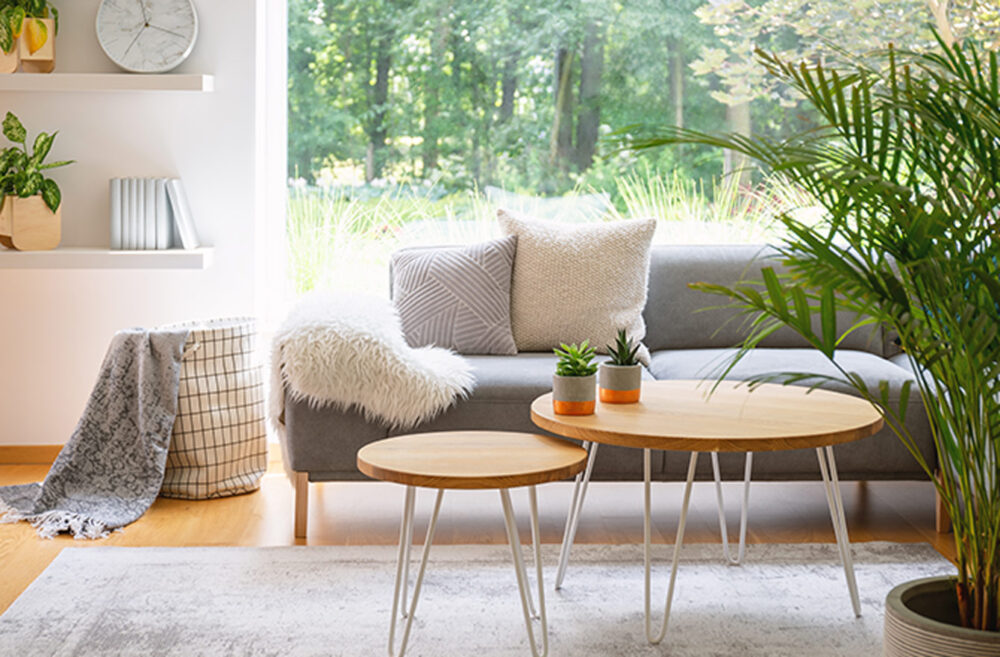
Scandinavian Aesthetic Example (1)
I have seen and been inspired by other artwork and furniture made from hockey sticks. However, many works that have used hockey sticks clearly display the paint and brand logos that are present. I did not think these designs would work well with my vision and I knew that I would have to effectively remove the logos from my sticks. During my research, I discovered an installment in the Montreal Botanical Gardens by Stephen Lindsay using recycled hockey sticks to create snowflake structures in the gardens. The paint from the hockey sticks had been removed to reveal the natural colors of the wood to blend into a natural setting which gave me inspiration for my project.
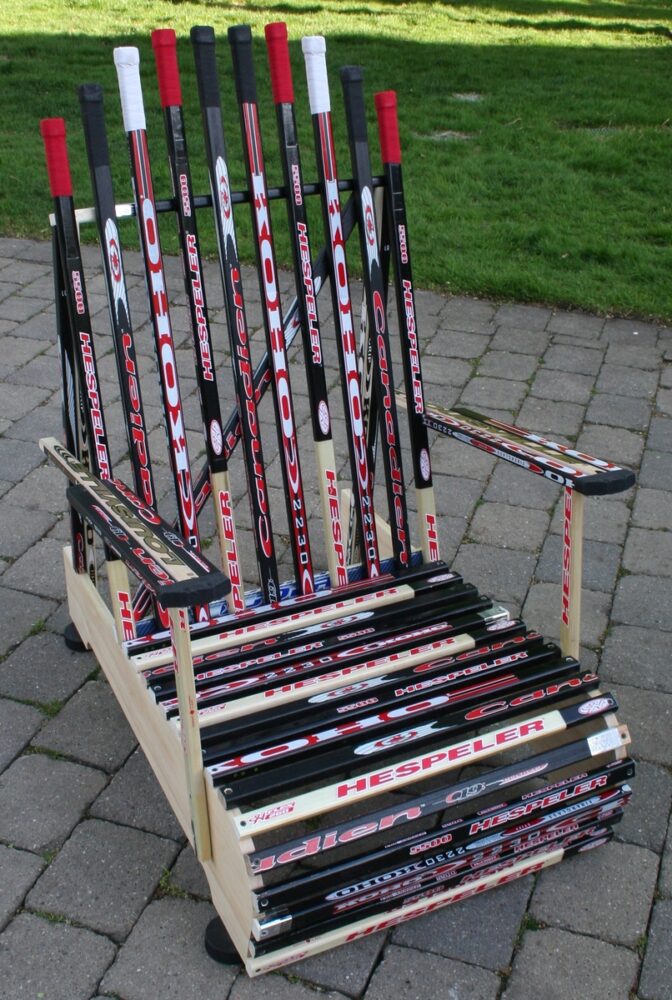
Hockey Stick Adirondack Chair (2)
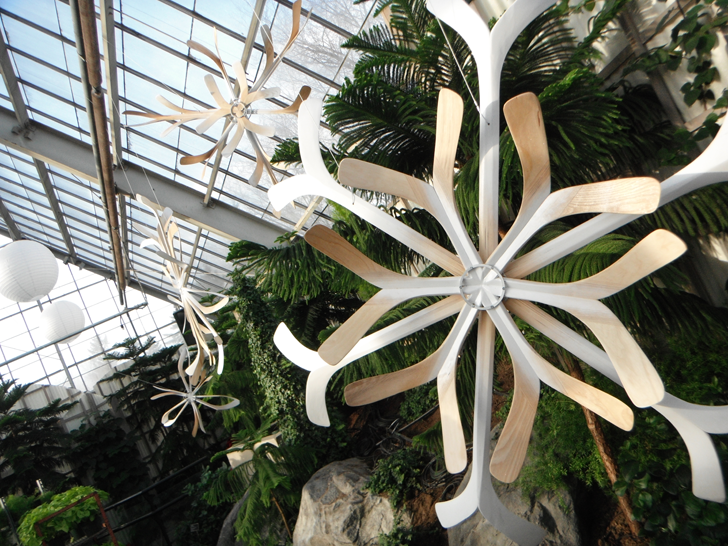
Stephen Lindsay Schtick Snowflake Collection (3)
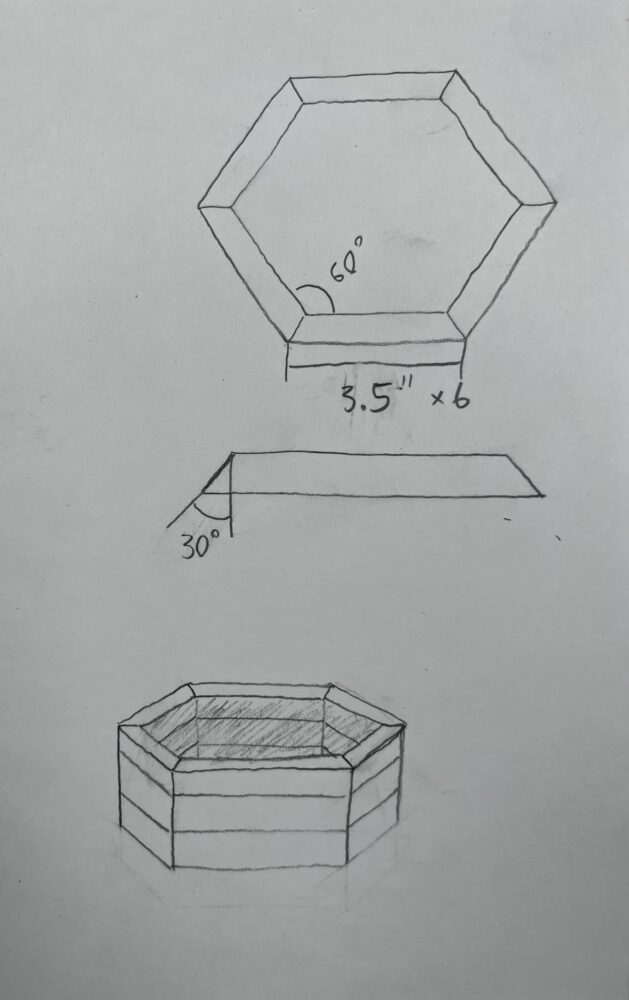
The initial stages of my manufacturing process involved determining how much material I had available from the two hockey sticks I had to use. Ultimately, I decided to arrange segments of the stick shafts in a hexagon to then be stacked on top of each other in three layers to create depth for the plant’s soil. Before cutting the segments, I needed a way to easily remove the paint from the stick shafts. I used a wood planer and table saw to remove the paint from each of the sticks and I was able to get the shafts down to the same height and width. Initially, the sticks were not the same size. Following the removal of the paint, I used a miter saw to cut the segments down to the same major length of 3.5 inches and a 30-degree angle on either side to form a hexagon. I was able to easily create a stop at the end of the miter saw and turn the saw to 30 degrees to consistently cut each segment before assembly. In total, 18 segments were needed to make three hexagonal layers.
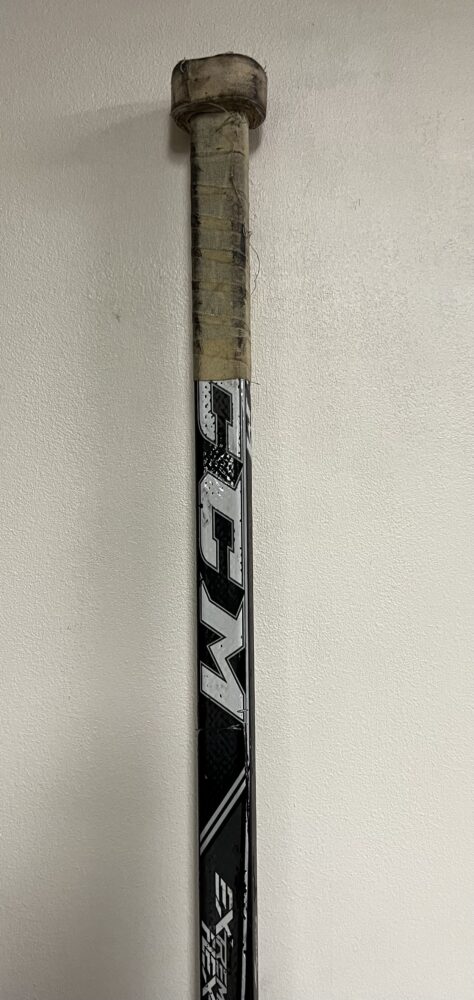
Hockey Stick Before Paint Removal

Hockey Stick Segments Following Cutting and Initial Design Sketch (Note that there are 4 layers and different dimensions in the sketch. I made revisions to the dimensions after reevaluating how much material I had)
Finalized
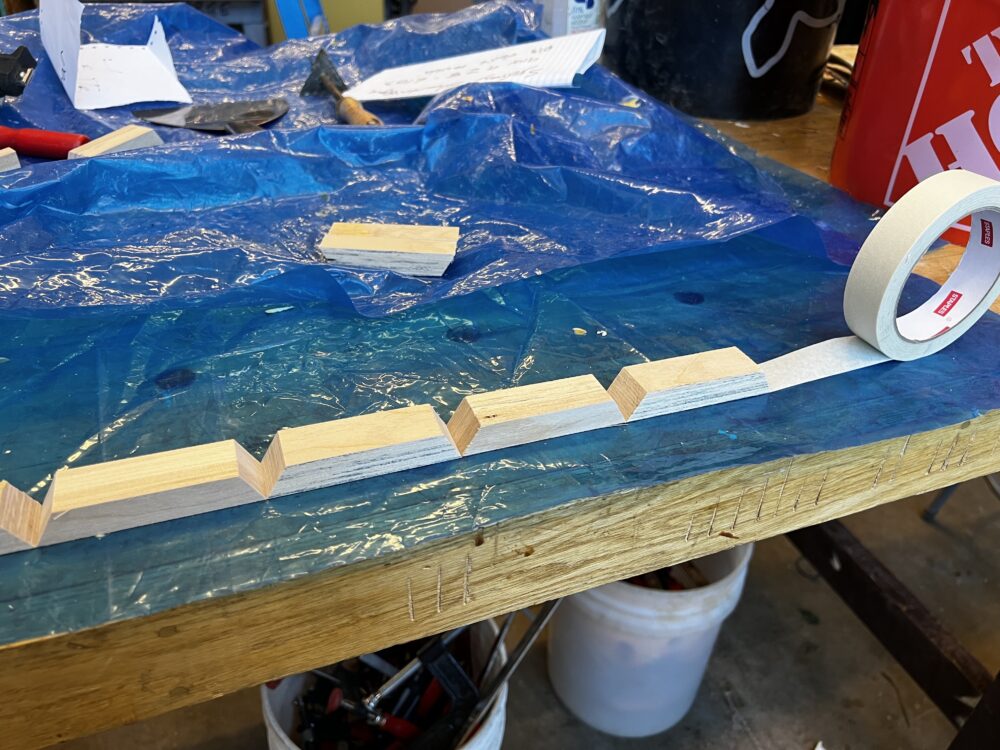
With each of the stick segments cut to equal dimensions, I then needed to glue the pieces together. It was important to line up the segments equally during the bonding process. I learned that an effective method to align segmented wood pieces is to lay them flat on a piece of tape and then roll them together until they meet at opposing ends. This meant that the outer edges of the segments would remain tightly connected during the bonding process. After the segments were bonded together, I sanded them down to be flat before stacking them on top of each other to be glued and clamped once again in a hexagonal pattern. Furthermore, I used a piece of scrap plywood to close off the bottom of the pot to contain the soil. This hexagonal piece at the base was initially oversized so it would be easy to glue to the bottom knowing that the whole piece would need to be sanded down any way. Following the gluing process, the planter required sanding. Sanding allowed me to achieve the surface finish and final appearance that I wanted while also removing excess glue and tape. I used a belt sander to remove the excess glue and sharp edges in the wood. This also allowed me to square off all the sides of the planter and round off the corners to a similar radius to achieve the appearance that I wanted. I found this to be faster and more straightforward than using a router even though a router would have been more precise. The finishing touches were achieved using sandpaper to remove any rough edges.
Hockey Stick Segments Aligned with Tape for Gluing
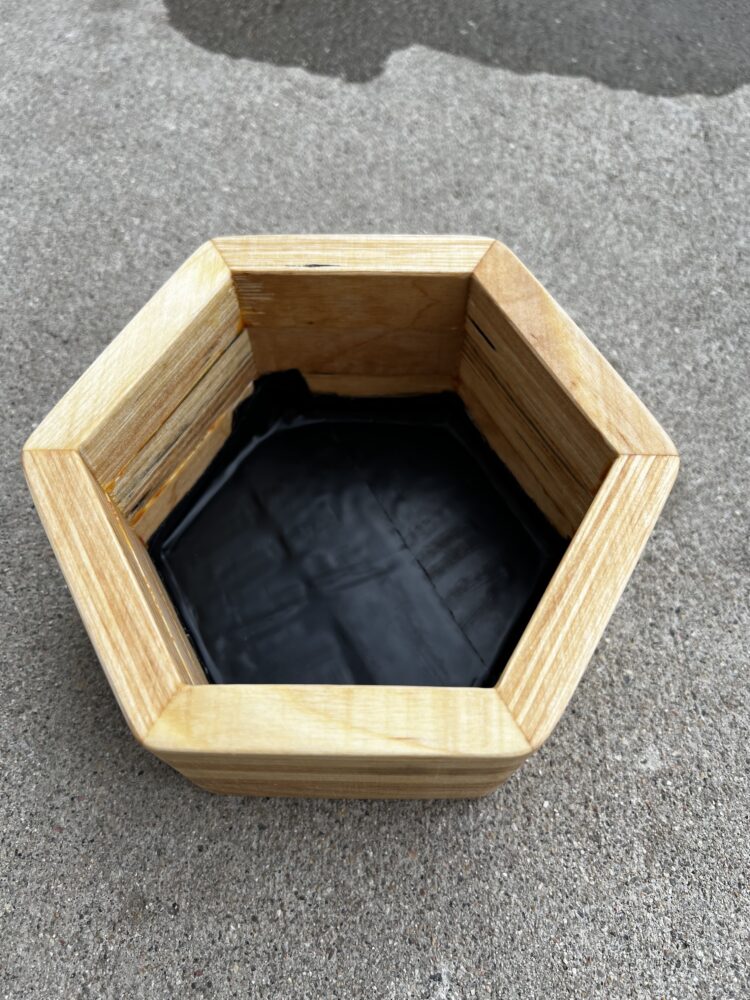
With the general shape and sanding complete, I wanted to enhance the color of the wood and improve the finish. I chose to brush linseed oil directly onto the wood which helped to make the color of the wood deeper and darker. I was very pleased with the tones that I was able to achieve in the piece by using the linseed oil. During my design process and while I was creating my initial blog posts about this project, some students made comments on the ability of the pot to drain water from the soil. This was not something that I had thought of initially and I needed to address it as it is important to the pot’s functionality and the plant’s health. I chose to use a recycled plastic plant pot to fit inside the hockey stick structure to contain the soil, allow for water to drain, and isolate the soil from the exposed wood. The plastic pot was round and therefore did not fit properly in the hexagonal shape of the pot. I decided to heat the pot with a hair dryer so the plastic became playable. Melting the plastic made it possible to shape the pot into a hexagon to fit inside the wooden structure to where it was nearly out of sight. Using the plastic pot means that water drains into the bottom of the wooden structure and I needed to make sure that the moisture wouldn’t penetrate the bottom of the planter. To solve this problem, I lined the wood inside with Flex Tape to create a waterproof layer. Although it may not have been the most aesthetically pleasing solution, it is inside the pot and cannot normally be seen from the outside.
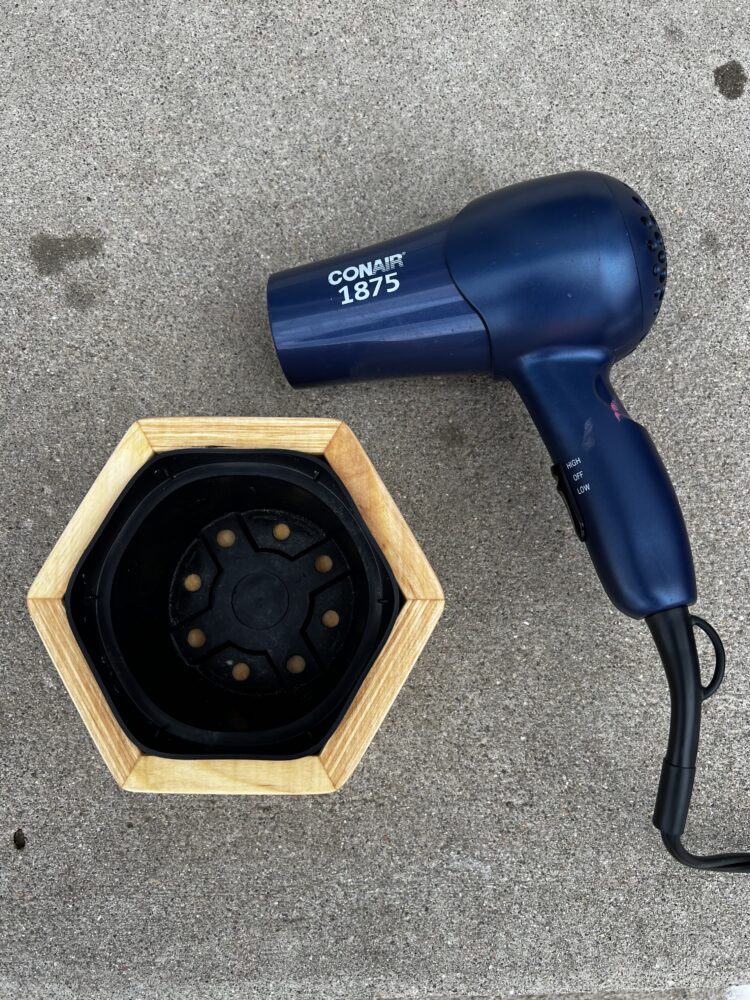
Blow Dryer Used to Re-shape My Recycled Pot
Recycled Plastic Pot Molded to Fit Within The Puck Pot
Wood Sealed with Flex Tape
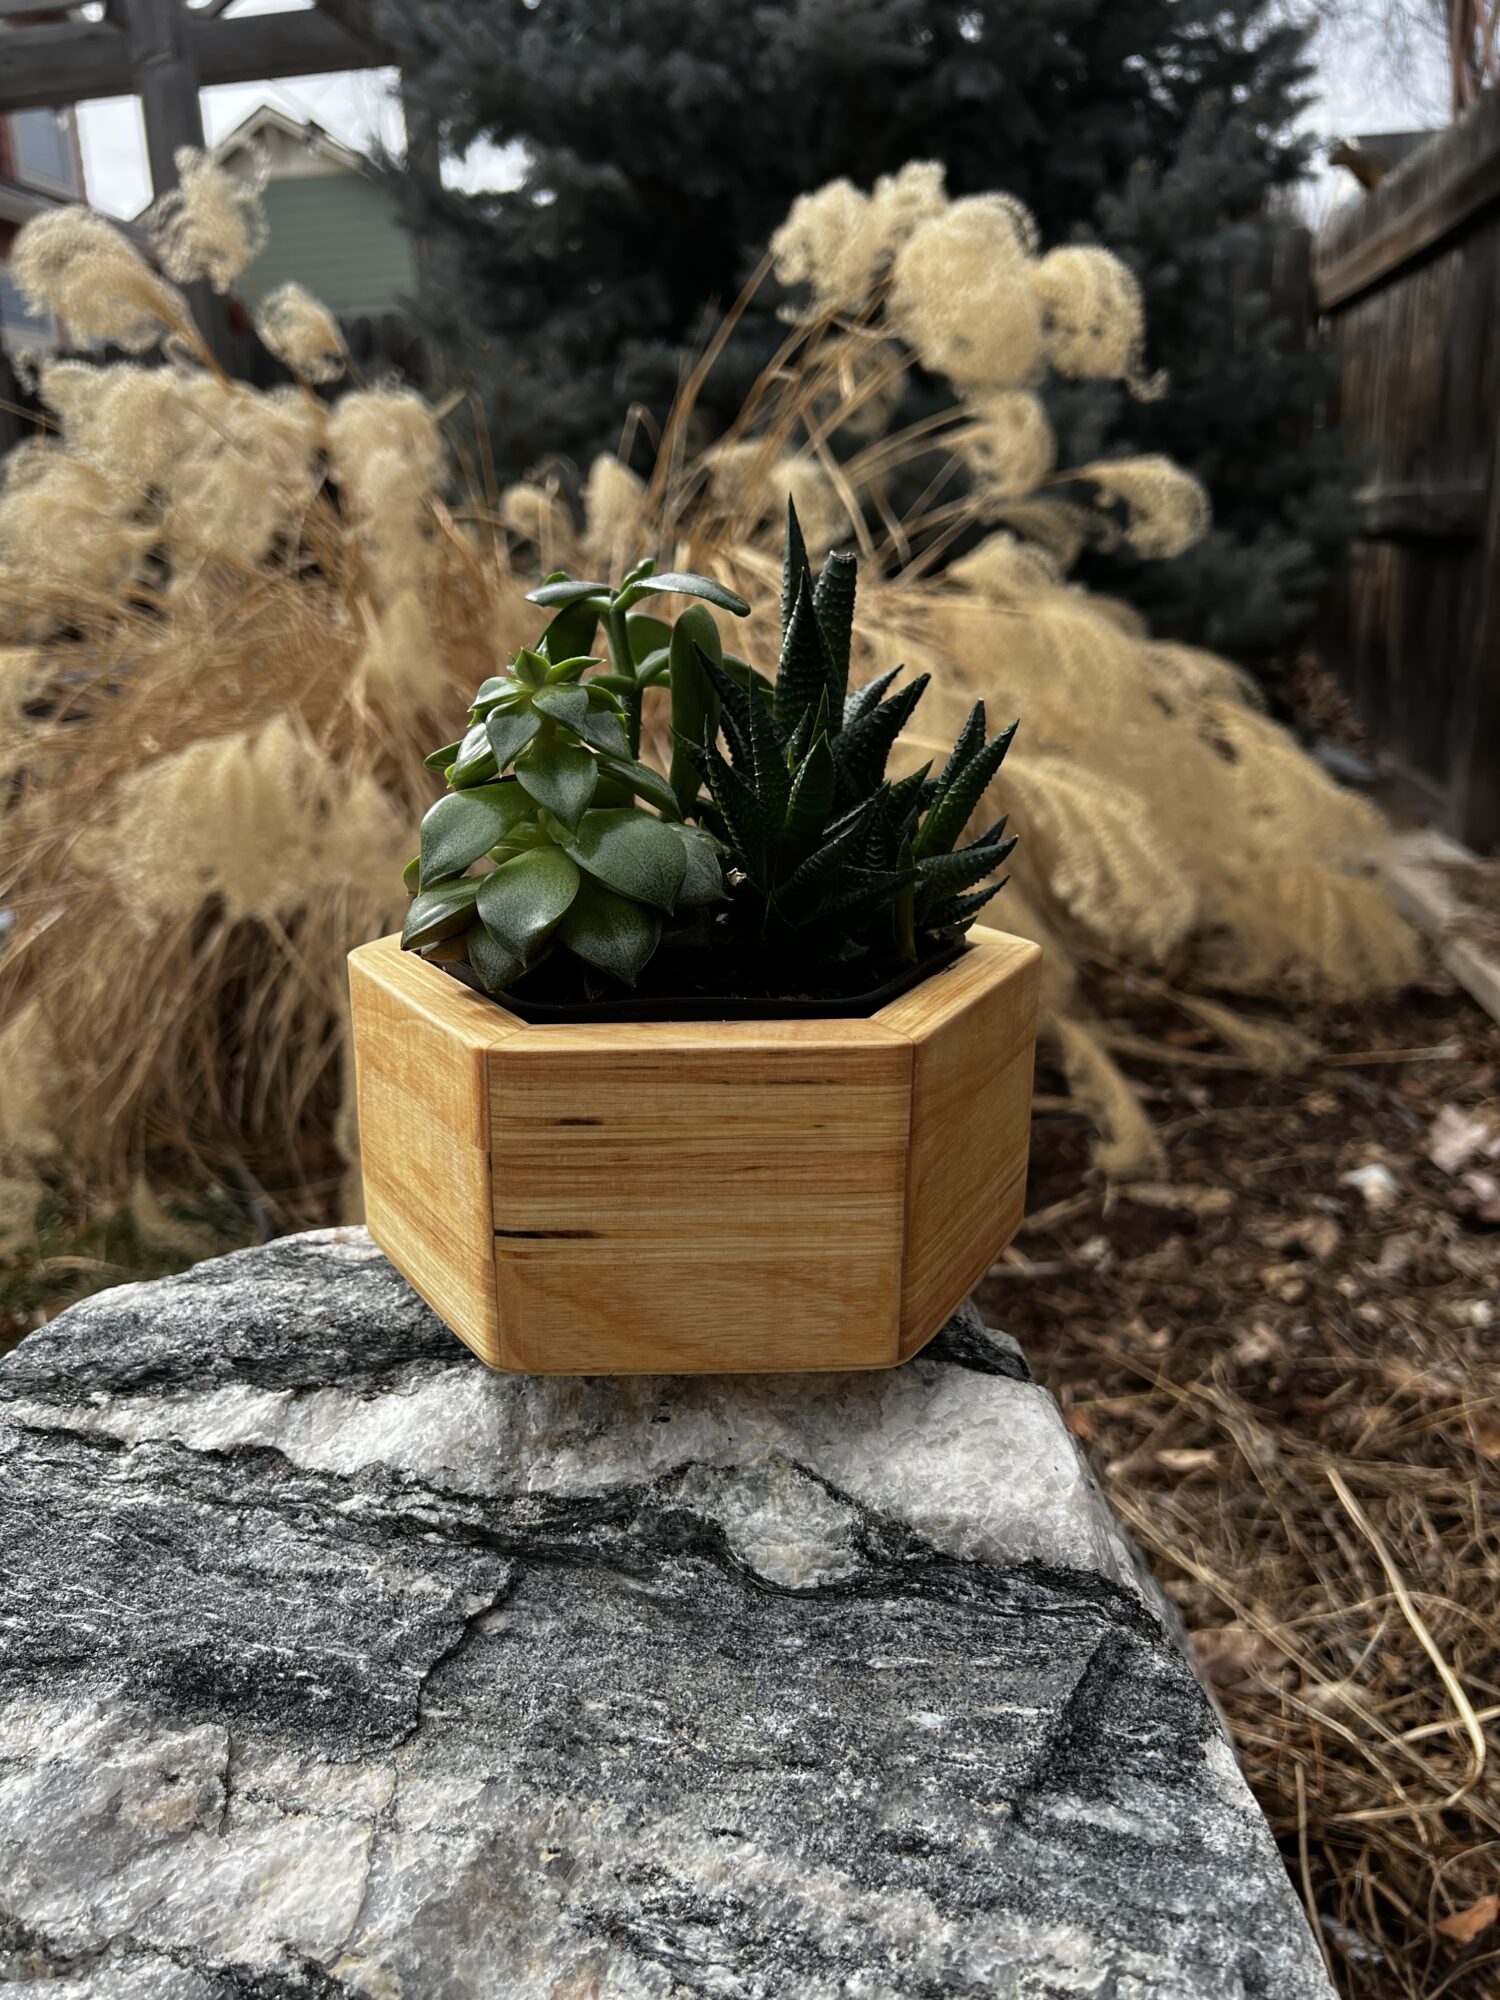
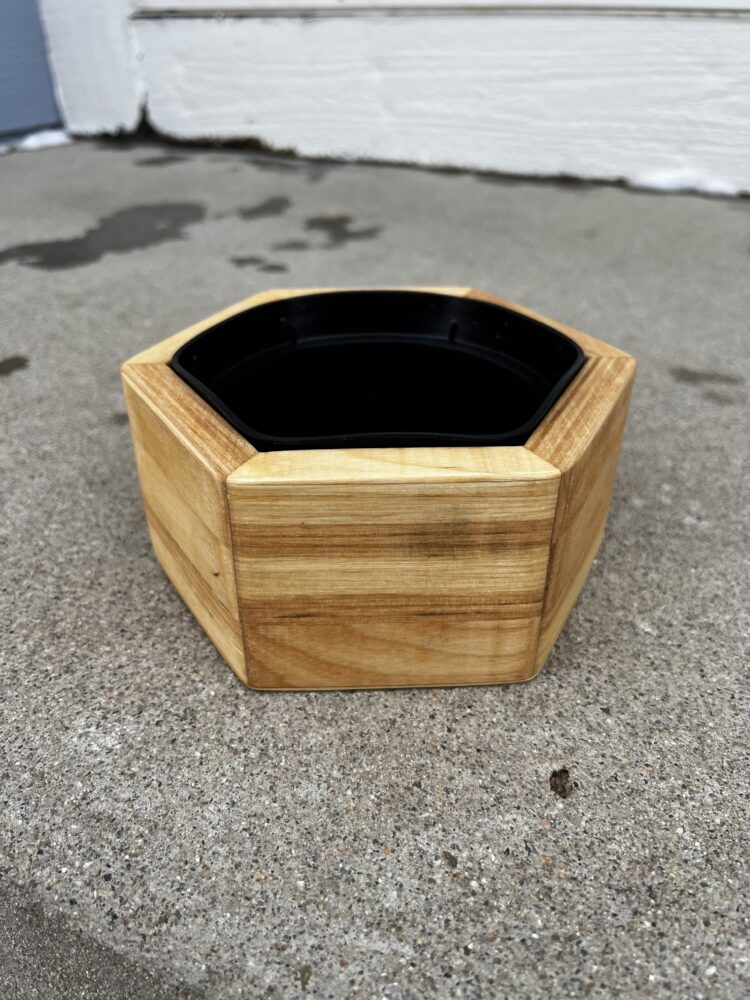
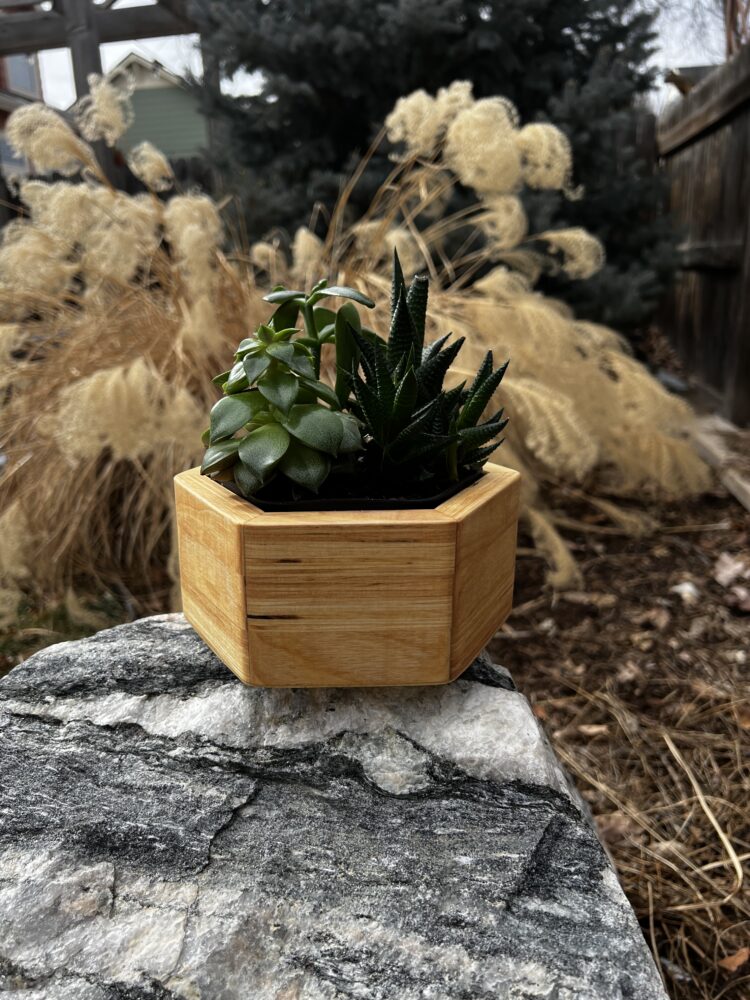
This concluded my work to design, manufacture, assemble, and finish my upcycling project. The Puck Pot, made from recycled hockey stick shafts, in its final form is shown below.
![]()
The Puck Pot
I want to start by saying that I am extremely pleased with how my project turned out! I think in many ways it has exceeded my expectations and I am very happy to have it on display in my room. It effectively contains the plants that I selected for the project and provides a home for them in my room. The functionality of this piece was of course a key component; however, I focussed more of my time on the appearance of the final product. From an artistic standpoint, I had set out to emulate the Scandinavian aesthetic with this project, utilizing natural materials to achieve a minimalist design that would have the versatility to be used in an interior setting. I am very happy with how the hexagonal shape turned out. I was skeptical that I would be able to achieve a precise and constant geometry throughout the construction of the 18 segments used but I believe the final design achieved a high level of symmetry and precision. I wanted to filet some of the edges on the pot to eliminate sharp edges and create a more natural flow to the piece that I thought was more appealing to my artistic goals within the project. The final appearance focuses on the raw, exposed wood used from the stick shafts. Light color and neutral tones are apparent in the presentation and the linseed oil helped to amplify those traits. The grain of the wood can be clearly seen and this is where my only complaint lies within the completion of this project. When removing the paint from the hockey sticks, I noticed that the layup and ply of the wood were different between the two sticks that I used. Therefore it can be seen that some segments of the sticks on the planter show layered wood on the exterior with others showing natural grains in the photos above. I tried to work around this by alternating the patterns to create a checkerboard layout for the different segments. Although I did remember to do this in the initial layup of the hexagonal layers, I did not keep this consistent when gluing the layers together so you can see two layers of the same pattern stacked on top of the other which was an oversight on my part. This was my only disappointment and oversight design of my project that could have been avoided. Furthermore, despite removing the logos from the sticks that I used, I wish that I had made an effort in some way to maintain some of the original characteristics of the hockey sticks to hark back to the project origin and make it more obvious what material the pot is made from. Perhaps I could have placed several small logos in places along the exterior or even stenciled in small hockey illustrations. Perhaps this is something that I will modify later or keep in mind if I want to make another. Then again, it was necessary to remove the logos to effectively emulate the Scandinavian style. Despite this, I believe that the appearance of the Puck Pot fits well within my goal of creating an object that resembles the Scandinavian aesthetic. In the future, I will keep the Puck Pot in my room and I am very pleased with how it has fit into my living space. I am very proud of the work that I have done and enjoyed the experience of transforming a recycled material that otherwise would have gone unused. This project has certainly inspired me to work with recycled materials in the future and think of other creative ways to use hockey sticks outside of their intended purpose and use them to create artwork. In the future, I would like to make other similar planters that are for larger plants. I wanted this one to be bigger but I found out that I was limited in the amount of materials that I had. In conclusion, I thoroughly enjoyed this project and the design process to move outside of my comfort zone and be creative to take one of my lifelong passions, ice hockey, and use its equipment to create functional artwork in the form of my upcycling project, The Puck Pot.
Sources:
- https://www.invaluable.com/blog/scandinavian-design/
- https://www.custommade.com/blog/for-the-hockey-fan-custom-furniture-and-accessories-made-from-reclaimed-sticks-pucks-and-shirts/
- https://inhabitat.com/recycled-hockey-sticks-transformed-into-incredible-snowflakes-at-the-montreal-botanic-gardens/
4 Comments. Leave new
hey Ian, This is a really cool project and a good concept. I have seen many things like chairs and benches made out of hockey sticks but never a flower pot. I like the fact that you sanded it down which gives the pot its own scananavian aesthetic rather than “advertising” CCM.
Thank you for the feedback, Ethan. I agree that sanding down the sticks contributed to the Scandinavian aesthetic. However, between you and me, I would have liked to see a few CCM logos here and there!
Hi Ian! I really love your final project. It looks great and professionally made and you can really tell that you stuck to the Scandinavian aesthetic. Do you think in the future you would make more of them that are different sizes to put different plants in?
Hello, Kyra! Thank you for the feedback and I am glad you enjoyed reading about my project. I would certainly be interested in making more in the future and I would like to make a larger one. I had initially intended for the pot to be larger in the first place but I was somewhat limited with the materials that I had. Thanks for the question!