
Project Background
Project Change
If you recall from my previous posts, I originally intended to create a hangboard following a patchwork aesthetic. Unfortunately, however, the method of fabrication I intended did not align with the materials I selected. In order to create a “chessboard style” appearance, it is generally required to begin with two slabs of wood which are half of the minimum size of the final product. However, I chose to use pieces of wood which were already in smaller sections which would have made the gluing process significantly more difficult. Due to this difficulty, I chose to pivot the direction in which my project would go.
Inspiration
I was asked by a fellow pod member a question along the lines of: “Which came first, the aesthetic or the materials?” and the answer is really both, in addition to external design inspiration. I break down the different sources of inspiration throughout this section.
The Materials
From MCEN 3025: Component Design, I kept my team’s drill powered vehicle shown below:
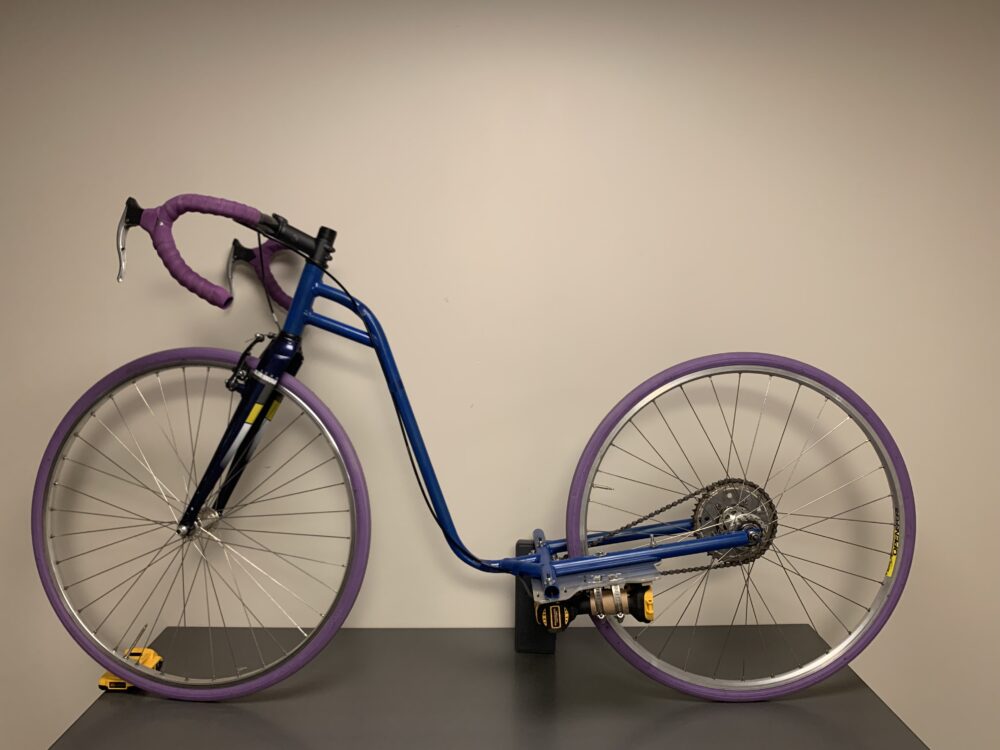
I kept the drill powered vehicle hoping to repurpose its components eventually and this project was the perfect opportunity. I ended up utilizing bike spokes and the chain as the materials which I used for the project.
Design Inspiration
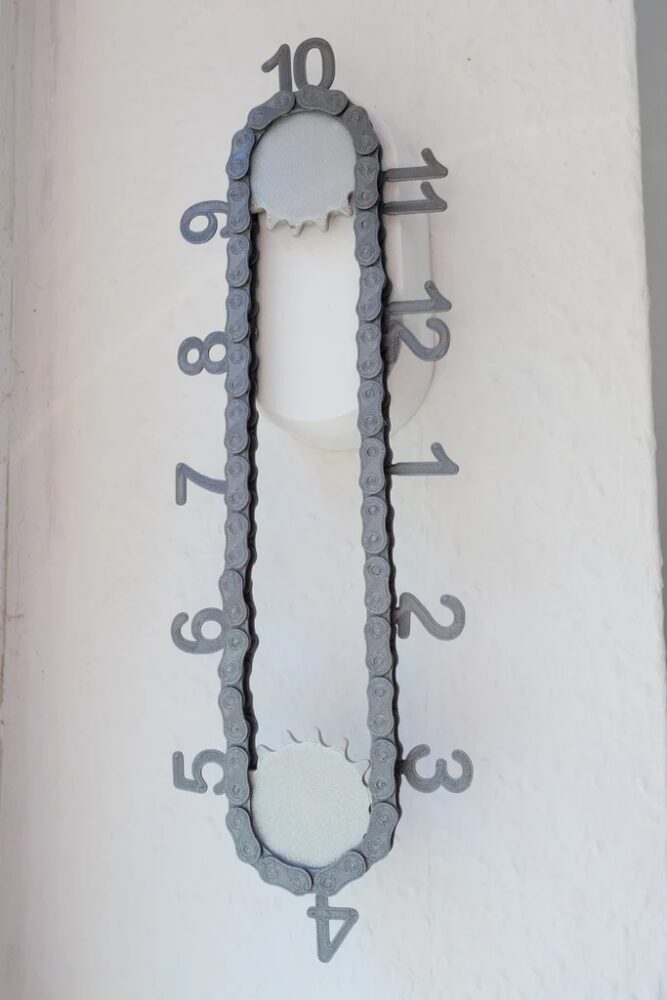
The first clock I came across while searching for inspiration was the following from Clock9Nine.com:

The Aesthetic
This project’s aesthetic is industrial steampunk. There are multiple reasons for selecting steampunk as the aesthetic including the material selection and design idea. My design idea, before even selecting the materials, was to design some sort of clock. There are many variations of clocks which can fall under any aesthetic, however, steampunk was what I aimed for with this project.
How One Led the Other
As I mentioned prior, there was no single driving factor for materials, aesthetic, or the design. They all helped guide one another. Originally, I decided I wanted to make a clock, but a clock itself has no aesthetic. Clocks can be created to follow nearly any aesthetic imaginable with the right design choices. I also knew I had old bicycle parts which I wanted to use for the project. Initially, these two distinctions did not originally combine into one cohesive idea for a clock. It was after I stumbled across David Kingsman’s clock design that the materials, aesthetic, and design were all able to merge together. The chain clock design made with bike components to conform to the steampunk aesthetic was the perfect combination for my project.
The Clock
Clock Overview
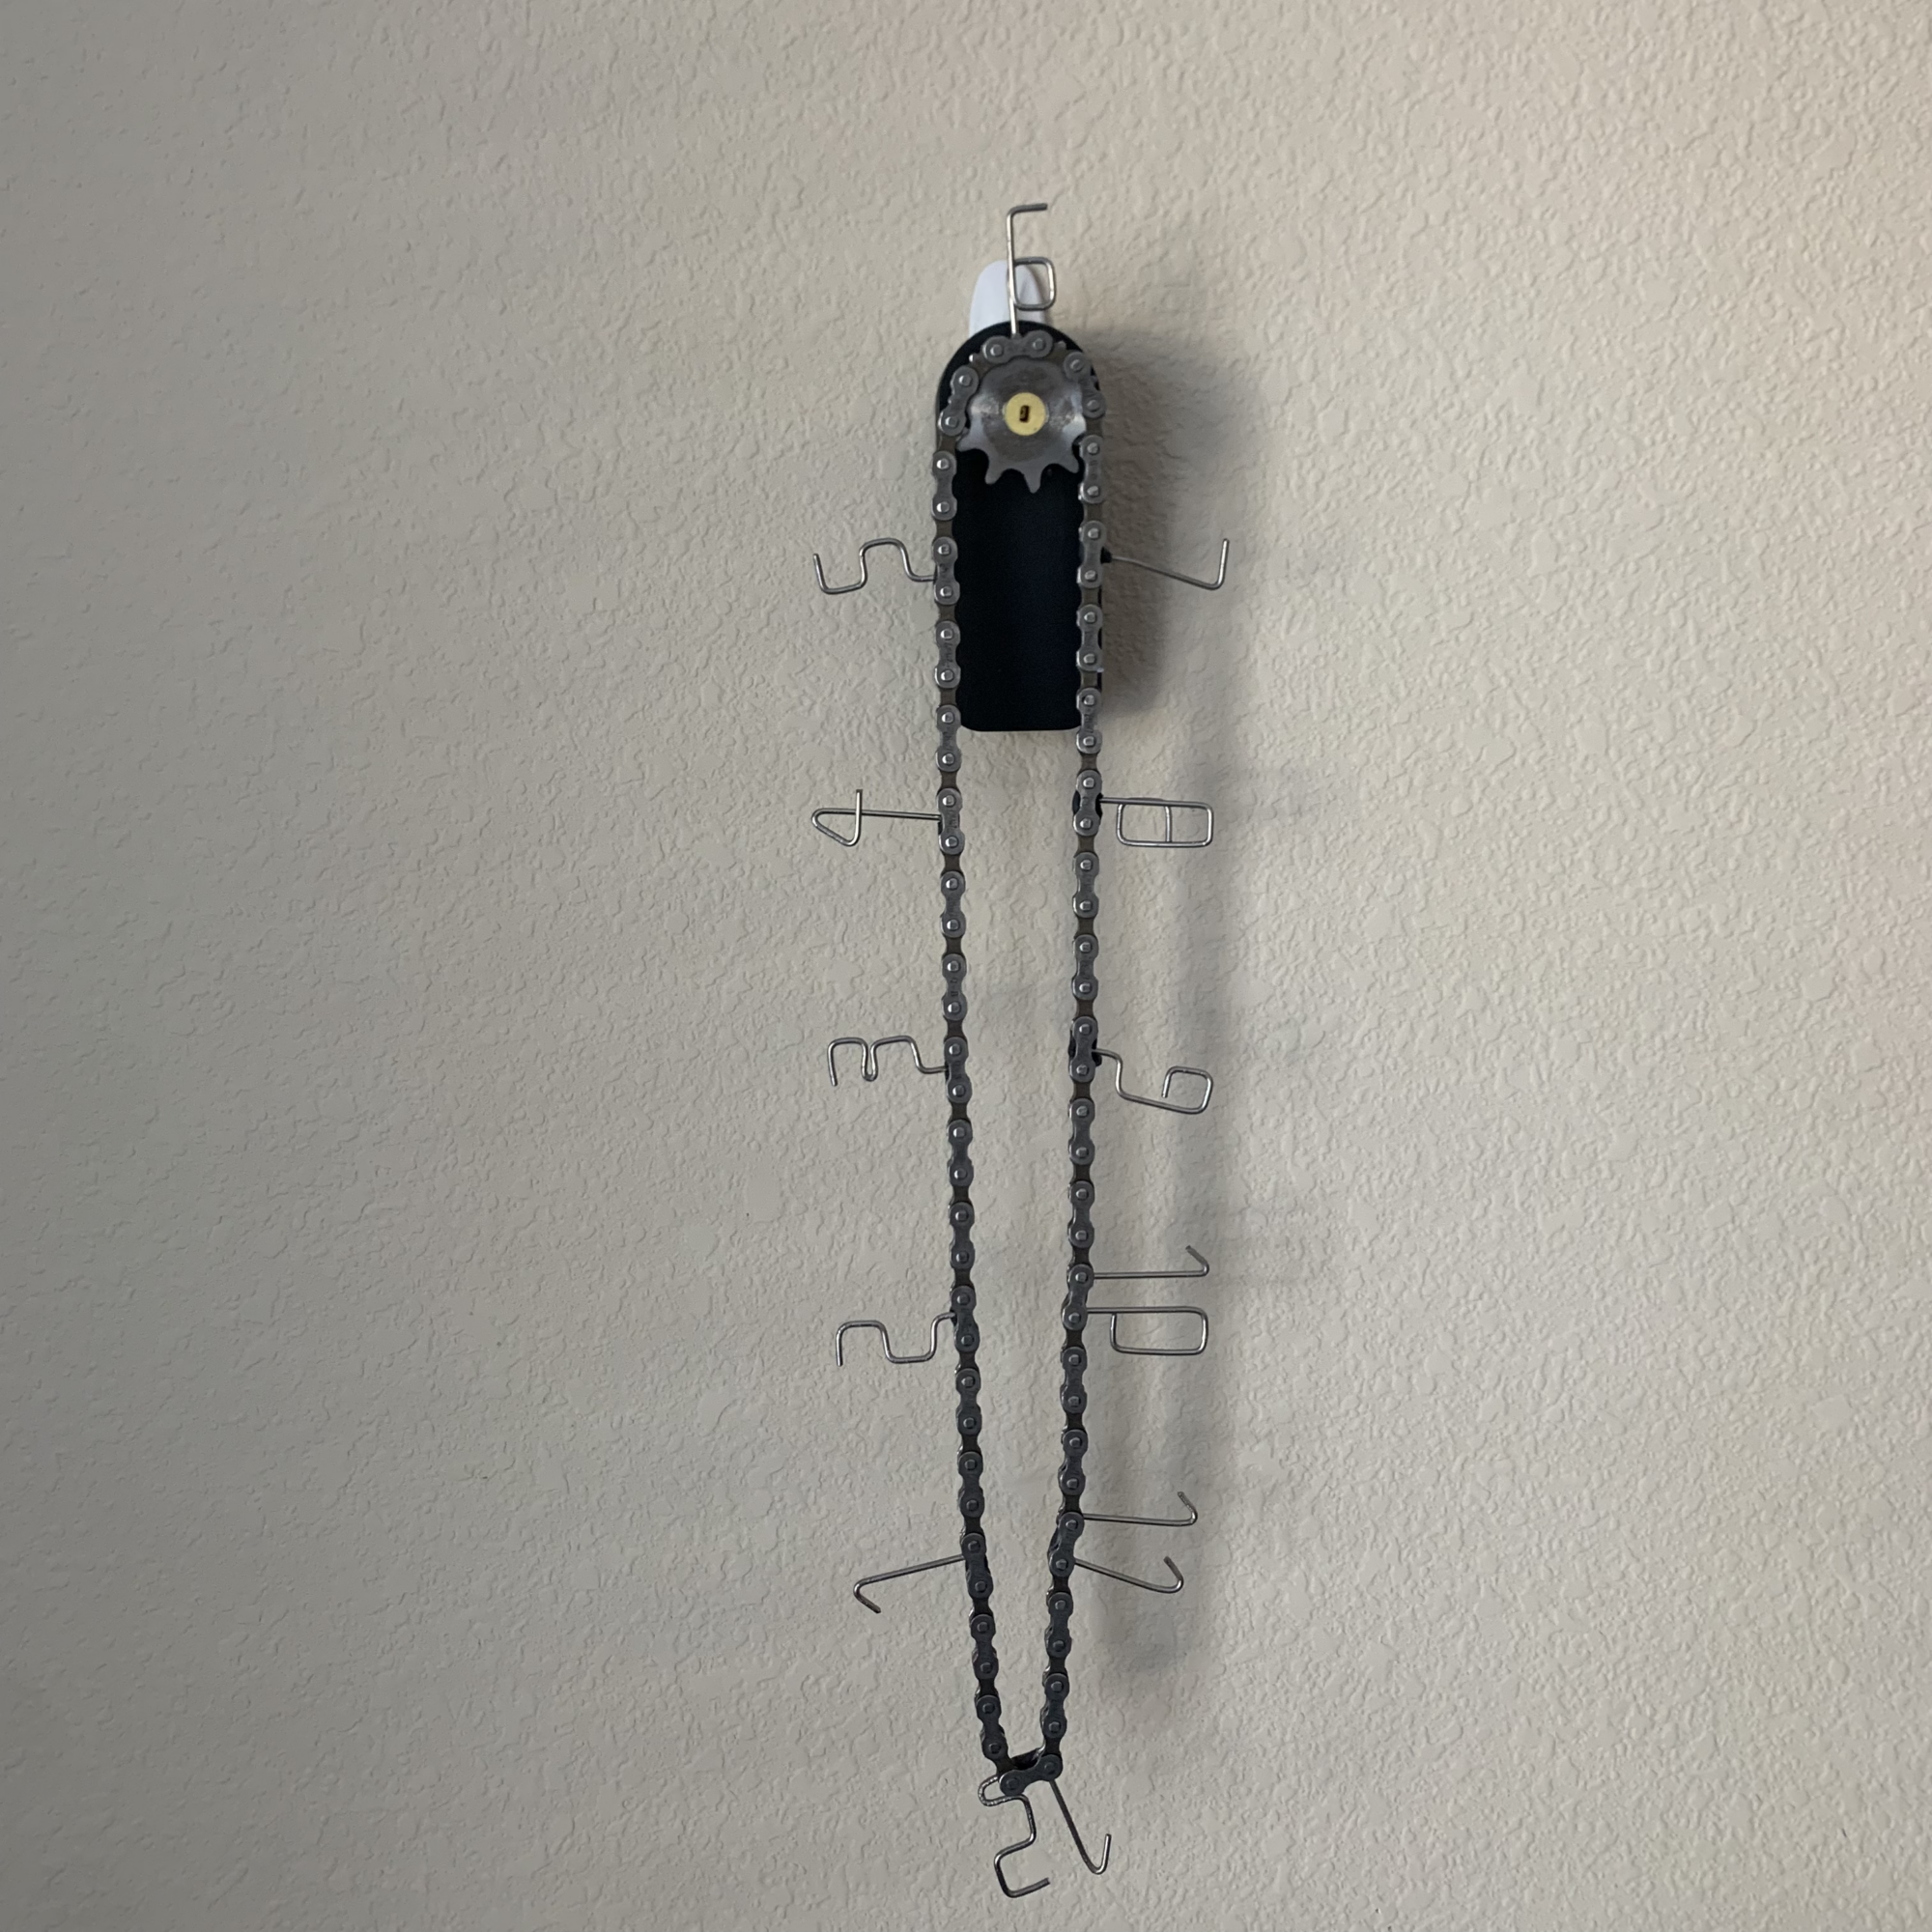
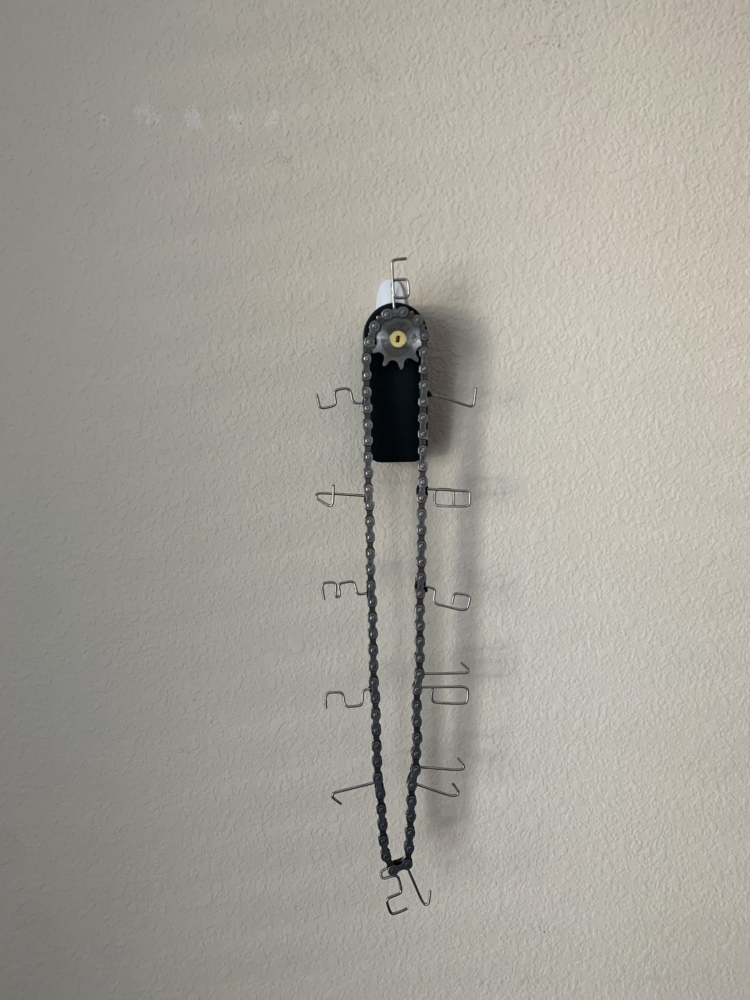
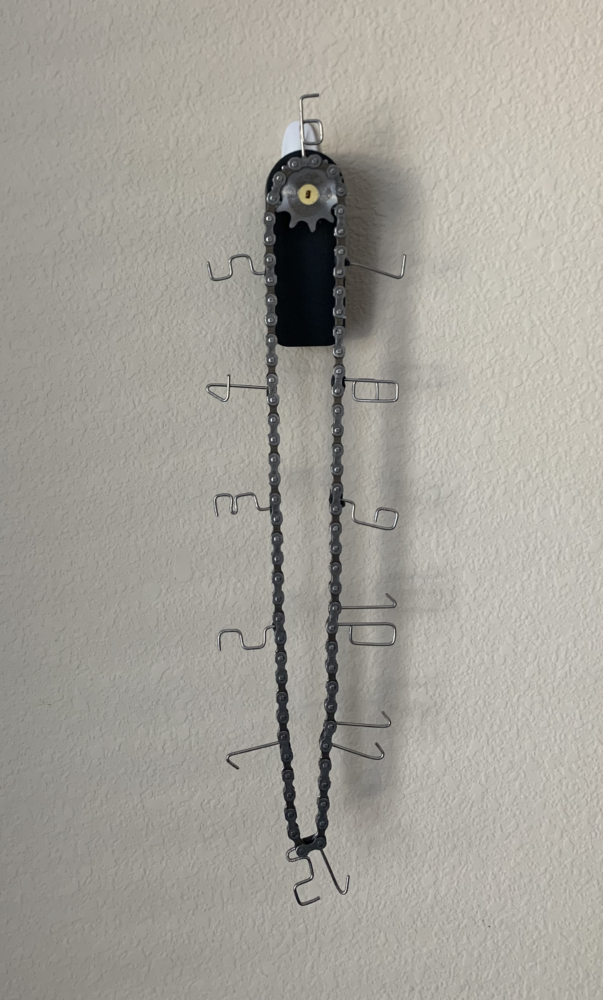
The final clock came out looking great! There are some slight modifications I would like to make to the design and the electronics, but they are quite minor in comparison to the rest of the design.
Upcycled Materials
For this project, nearly all materials were upcycled in one way or another. From MCEN 3025: Component Design, I kept the final drill bike project. From this, I chose to reuse the chain and some bike spokes to create the numbers. Additionally from the bike, I used the sprocket in order to drive the clock around. Due to the nature of being on a bicycle, these parts were all quite greasy and require significant cleaning before I would consider using them in a project. In order to remove all of the chain lube from these components I soaked the chain and the sprocket in a jar of degreaser and then scrubbed them clean with a toothbrush.
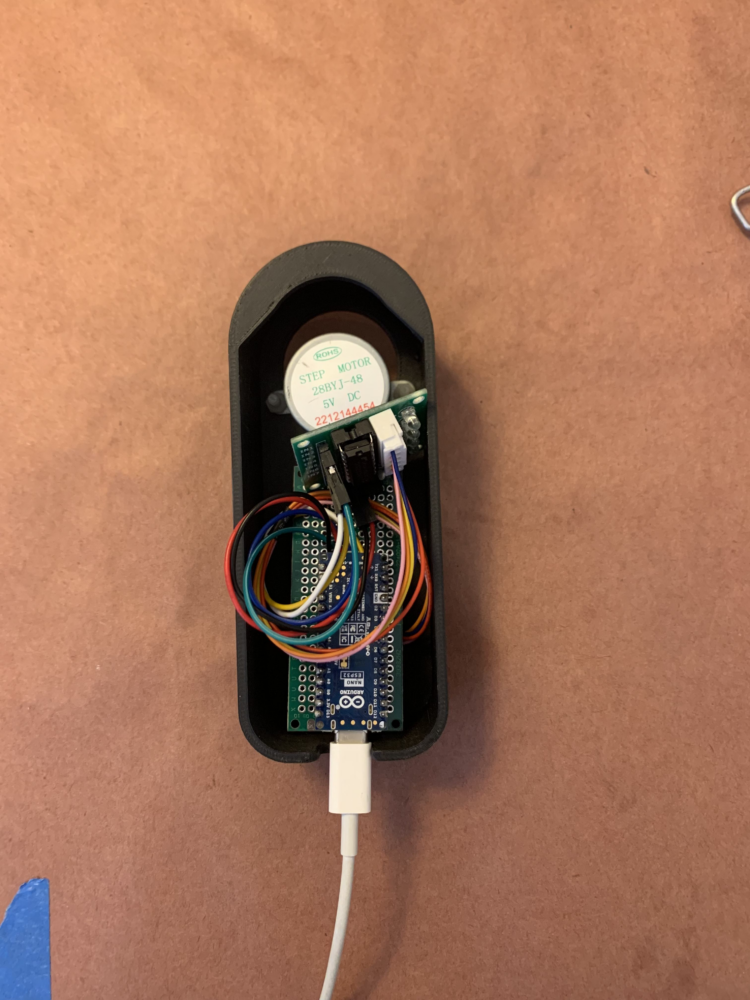
In addition to the recycled bicycle components, all of the electronics are components from old classes which I have taken. The Arduino was from a kit in GEEN 1400, and the rest of the electronics are from the kit we received in MCEN 4115: Mechatronics 1. This allowed costs to remain at almost $0.
Fabrication Process
When I began fabricating the components, I knew bending all of the numbers would end up being the most difficult aspect. I tried multiple different methods but ultimately settled on using the vice and a hammer. I taped cardboard onto each of the vices jaws in order to minimize any scratching which might have occurred from its rough teeth otherwise. The next step was to insert only the amount of wire which was intended to be bent into the jaws and with the hammer I was able to bend the wire by 90 degrees. Some of the numbers, the 1, 4, and 7 specifically, required bends at angles other than 90 degrees. In order to achieve this, I bent it to 90 degrees like the rest and would come in with vice grip pliers in order to bend it the rest of the way. Some numbers were simpler than others, but overall it was a straightforward process once I figured out the best method.
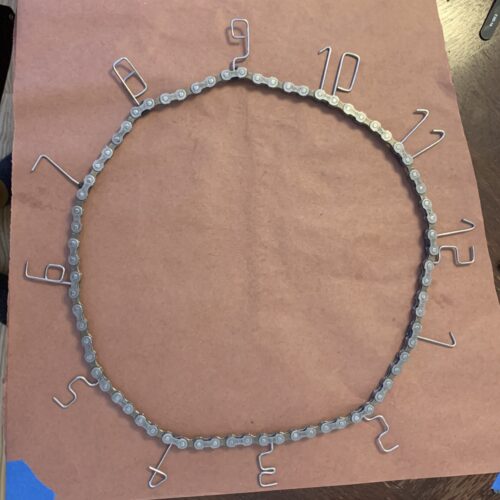
Upon completion of the numbers, I used J-B Weld’s SteelStik to bond the spokes to the bike chain as shown below:
All that was left was to mount all of the components to the 3D printed housing. Upon mounting, the final clock was finished!
Electronics
The electronics within this project are relatively simple. It consists of an Arduino Nano, stepper motor, and stepper motor driver. A stepper motor was selected due to its ability to step discrete amounts. This leads to relatively easy programming where the motor is told to step once then wait a set amount of time. The electronics assembly can be seen below:
Future of the Project
Where is it going?
Currently I have the clock mounted on a wall in my room. I intend to keep it there and also intend to transport it when I change my living locations. I enjoy looking at the time on devices where that is their sole intention (eg. not a phone). This is additionally quite a creative design which I am using to keep track of the time.
Current Problems
While the clock functions as intended in its current state, it does have a few problems which need to be fixed prior to it becoming a permanent installation. The first problem is to do with the sprocket. The current sprocket has no taper or chamfer on its teeth. This means that it functions perfectly when the chain is perfectly in line, however, the lack of a taper means there is no “funnelling” of the teeth towards the sprocked in the event that the chain becomes slightly offset. This issue is shown in the images below where the chain is no longer seated in the sprocket.
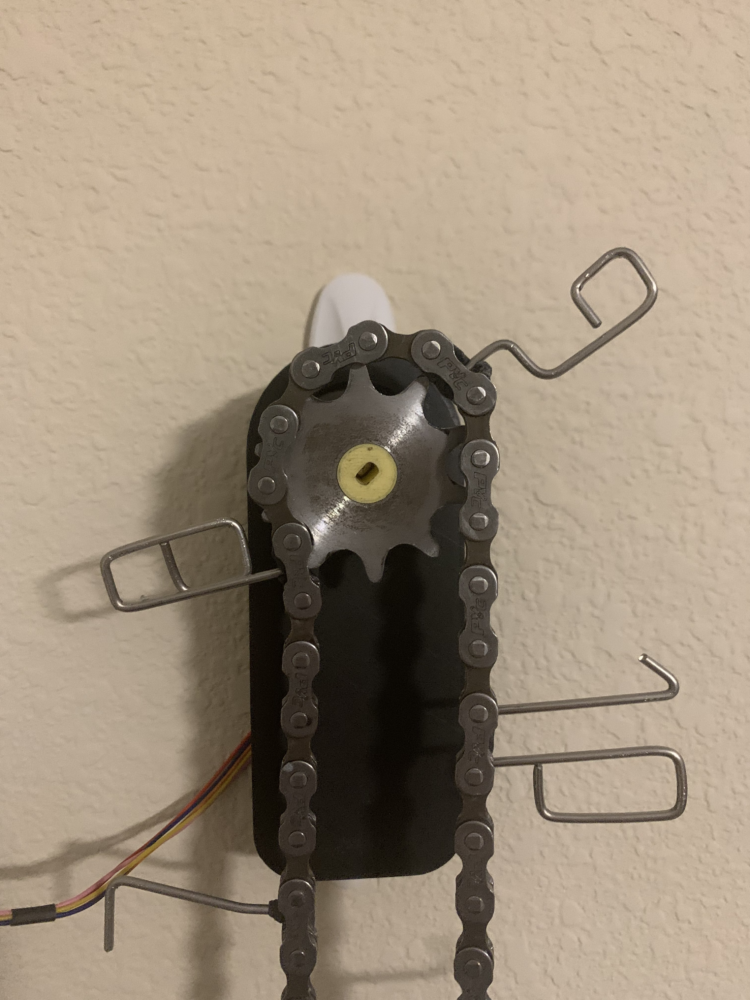

Additionally, the current wall mounting method uses a command hook to hold the clock on the wall, however, this causes the clock to not be perfectly parallel to the wall. This slight angle offset causes problems with the chain rotation and causes it to constantly de-chain itself.
Intended Improvements
As mentioned above, I intend to come up with a solution to the sprocket issue, but this also ties into a separate improvement which I intend to pursue. In the current operation, I think that the driving sprocket is too small. I would like to utilize a sprocket which is significantly larger than the one currently in use to allow for a more gradual angle change of all of the time pieces.
Number two is to improve the wall mounting solution. The current thought for improvement is to 3D print a separate component with a custom interface to the clock. This would allow the clock to be passively held against the wall eliminating any non-vertical aspect of the clock. This will also help the chain problem noted earlier.
The third intended improvement is to minimize the footprint of the clock body. This drives a number of improvements with it too. One is to make it battery powered, therefore, removing any necessary wires. A second is to create a custom PCB for the design, and if I really want to try something new, it would be an all in one board without an external processor such as an Arduino. This would also help to reduce the power it consumes and allow the use of a smaller battery. The final improvement it drives is a change in motor choice. Currently it uses a stepper motor which draws 200 mA at 5V for 100% of the time it is running. In reality, it does not need to use nearly this much power to simply spin a clock. A much smaller motor could be used to power the clock rotations, and therefore, save a lot of power as well.
6 Comments. Leave new
[…] here: [https://www.aesdes.org/2024/02/24/chain-clock/] is the link to my upcycle project where I designed the following […]
Hey Max,
I just finished reading your latest blog post detailing your journey with the clock project, and I’m thoroughly impressed by your dedication and ingenuity!
It’s fascinating to see how your project evolved from the initial intention of a patchwork aesthetic for a hangboard to the intricate creation of an industrial steampunk clock. Your ability to adapt and pivot your project direction based on the materials and design inspiration you encountered along the way is truly commendable.
Using upcycled materials, such as bike spokes and chains from previous projects, not only adds a unique character to your clock but also showcases your commitment to sustainability. The fabrication process you described, from bending the numbers to bonding the components, highlights your attention to detail and craftsmanship.
The finished clock looks fantastic, but I appreciate your transparency about the current problems you’re facing, like the sprocket issue and wall mounting solution. Your planned improvements, such as using a larger sprocket and developing a custom wall mounting component, demonstrate your commitment to refining and perfecting your creation.
I’m excited to see how your clock project continues to evolve and improve over time. Your innovative approach and determination are truly inspiring, and I look forward to following your future endeavors!
Best regards,
Jon
Hey Ian,
This is an awesome idea paired with a great aesthetic. I really like how simplistic it is, yet still being such a unique rendition of a common home object. The attachment method of the numbers was very creative too! My one question is – how much effort did it take to calibrate the step motor rotations with the distance between numbers on the chain to get accurate time readings? Will you need to re-calibrate in the future?
Hi Jace, thanks! The calibration of the motor itself wasn’t too difficult. Due to the nature of a stepper motor, it can move in very precise steps. By utilizing this and calculating the timing required between each step, calibration is relatively easy. Unfortunately, the Arduino does not have an accurate clock so it does require adjustment every now and then. In the future I plan to improve upon this by integrating an RTC (Real time clock) chip which is significantly more accurate.
Hey Ian, this was a super cool project and it turned out great!
Thanks Alex!