

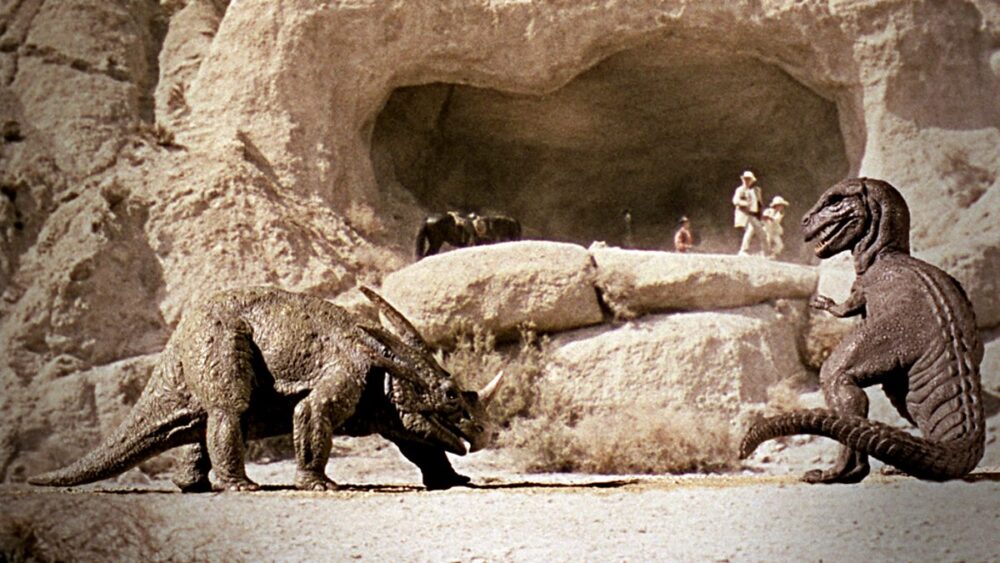
To recap: for my final project, I’m going to be making a stop motion dinosaur puppet in the style of classic special effects films, as popularized by filmmakers like Willis O’Brien and Ray Harryhausen. By extension, this project will channel the aesthetic of vintage 1900s paleoart, which is defined by reptilian depictions of dinosaurs no longer considered scientifically accurate.
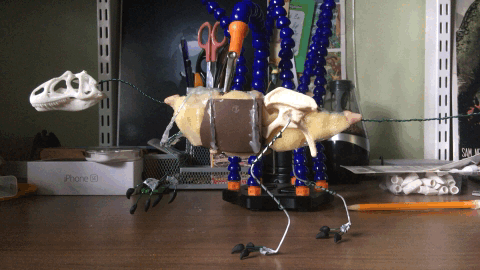
I knew that this was the project I wanted to do almost from the very start of the semester. I’ve been a fan of stop motion for a long time, having grown up watching lots of classic monster movies from the 50s. And as a kid, my usual response to falling in love with an art form was to immediately try and do myself. Over the years, I’ve built several of my own slapdash stop motion armatures, some of which are even still in one piece:
(flashing lights warning for this next one)
The thing you’ll notice about these puppets is that most of them never really made it past the armature stage (with the exception of the clay one, but claymation is kind of its own thing that’s outside the scope of what I’m focusing on here). I wasn’t using materials that were really optimized for stop motion work, just what I had laying around the house or could get ahold of at Michaels. Because of this, I never had the confidence in any of these armatures to take the irreversible next step and lock them inside an outer body, worried that they’d break immediately and I’d have wasted the actual valuable components, like the 3D printed Allosaurus skull I had to order online.
This project is my attempt to break this cycle, and finally build a stop motion puppet start to finish. I’m going to order actual machined armature parts, use the same grade of wire as professionals, the whole nine yards.
I’m going to be getting most of the armature parts I’ll be using from animationsupplies.net; this website sells both complete armature kits and individual components made from stainless steel. I’ve gone ahead and ordered their Professional Armature kit, which has 12 joints:
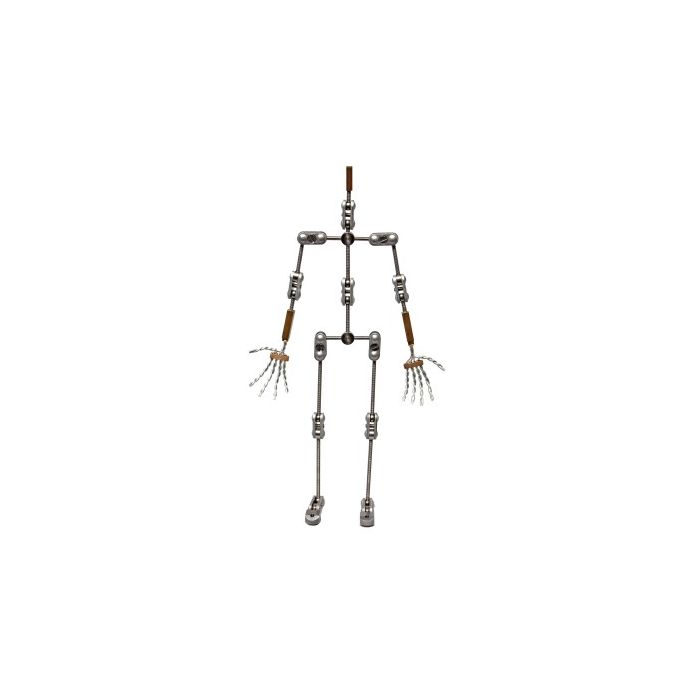
Of course, this armature is designed for a human character, so I’ll need to make some tweaks to make it suitable for my project. Fortunately, animationsupplies.net provides detailed scale diagrams for all of their projects, so I was able to make a sketch planning out all the extra parts I would need to make these changes.
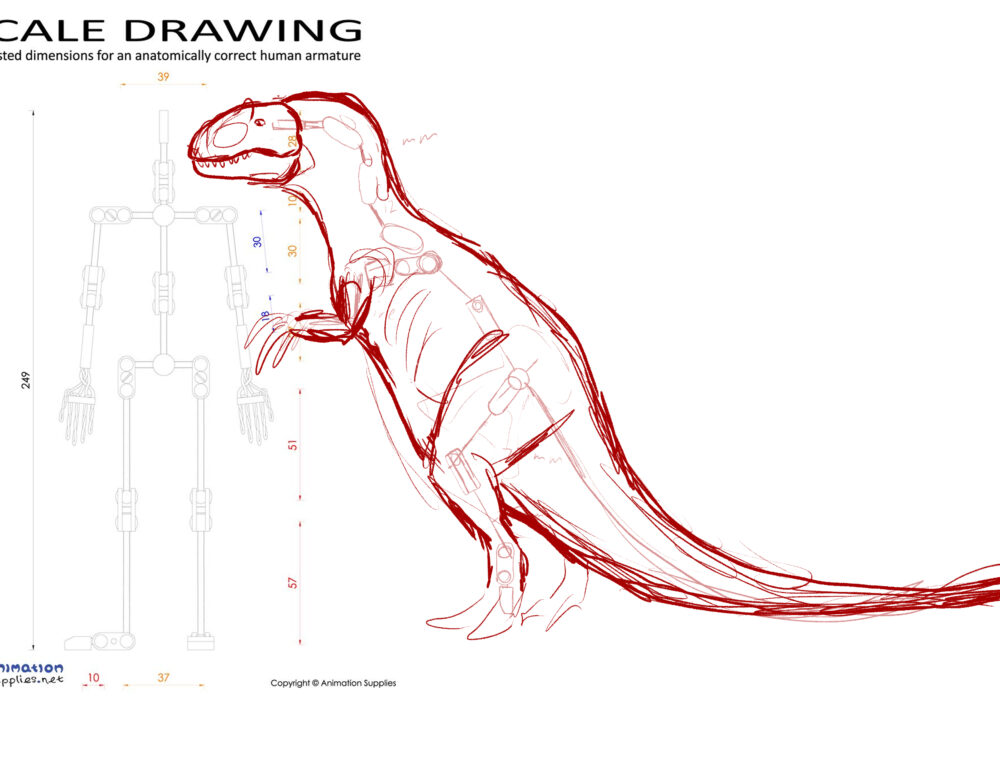
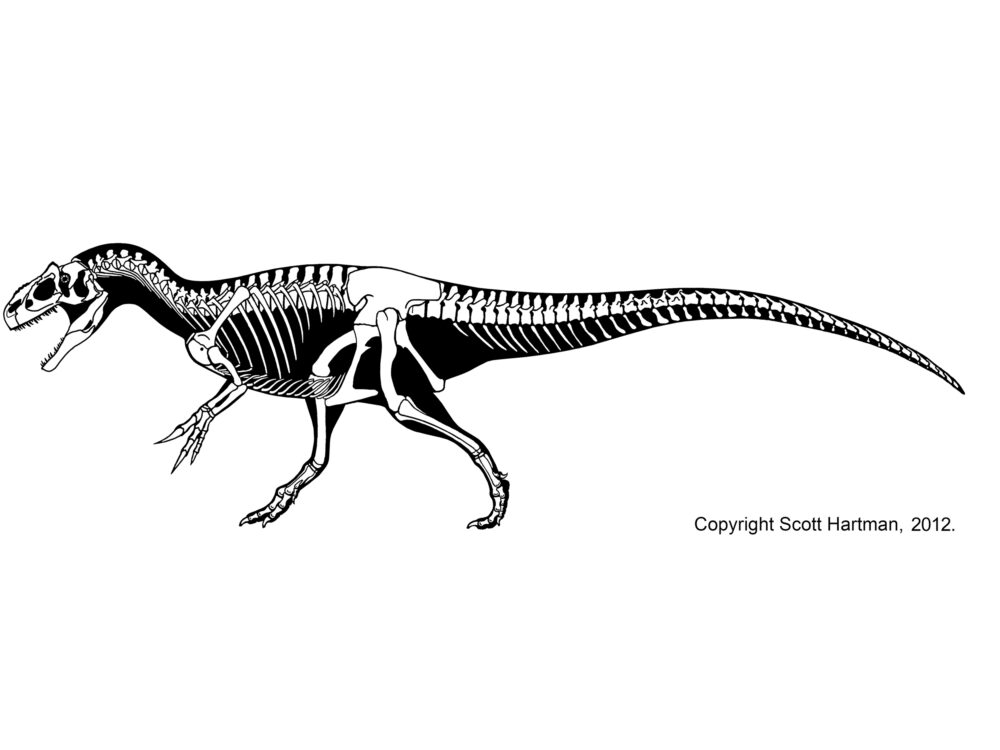
The major alterations include using shorter rods for the legs, replacing the arm joints with wire, and adding two extra joints in the neck. I used anatomical diagrams created by paleontologist Dr. Scott Hartman for proportional reference, as well as screenshots from The Valley of Gwangi (1969), a film that features an animated Allosaurus created by Ray Harryhausen. My hope with the general design is to strike something of a balance between the classic paleoart style and more accurate interpretations; I’ve used the upright stance from the 1900s but tried to make the design of the head more accurate to Allosaurus’ actual skull than most older models. I’m still debating certain aspects, like how big the head and neck should be (a lot of older stop motion models have pretty big heads on their dinosaurs).
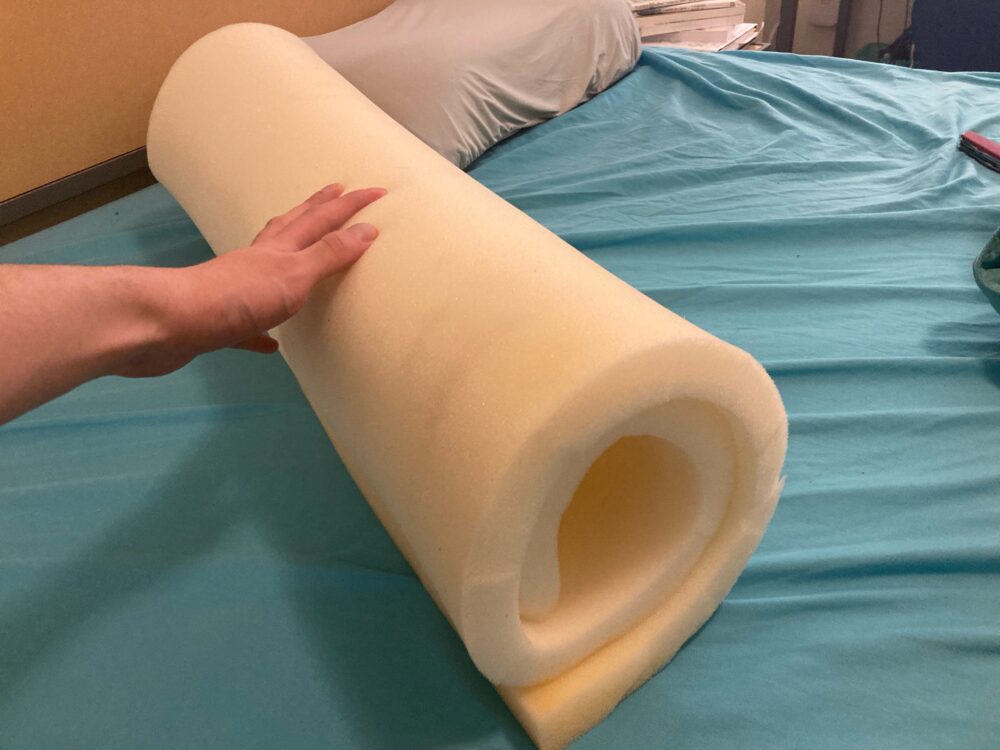
I’ve also started collecting the materials I’ll need after the armature. There are two main methods for creating stop motion puppets; the mold casting method and the foam build-up method. The former involves sculpting the entire model beforehand, turning that model into a mold, and filling it with a liquid silicone or foam latex. This is a bit outside my capabilities, so I’ve decided to go with the latter method. Foam build-up models involve layering pieces of foam on top of an armature to build up the model’s musculature; usually this musculature is then covered by a layer of liquid latex ‘skin’, so to speak. I’ve gone ahead and bought a sheet of foam I’ll be using for this:
There are also some parts of the model, like the head and claws, that will need to be sculpted in a material like clay in order to hold their shape. I spent a lot of time debating exactly what material I wanted to use for this. In my old armatures, I mostly used Sculpey brand polymer clay, which gave me a lot of issues; when hardened, this clay was often pretty brittle and the wire I used for the joints would often make it crumble.
Because of this, I was wary of using Sculpey clay again, but after some research I found that they produce more durable clay variants. I narrowed my choices down to two options: Sculpey Premo, which is the hardest drying Sculpey clay, and Das brand air-drying clay, which is also supposed to be rather durable.
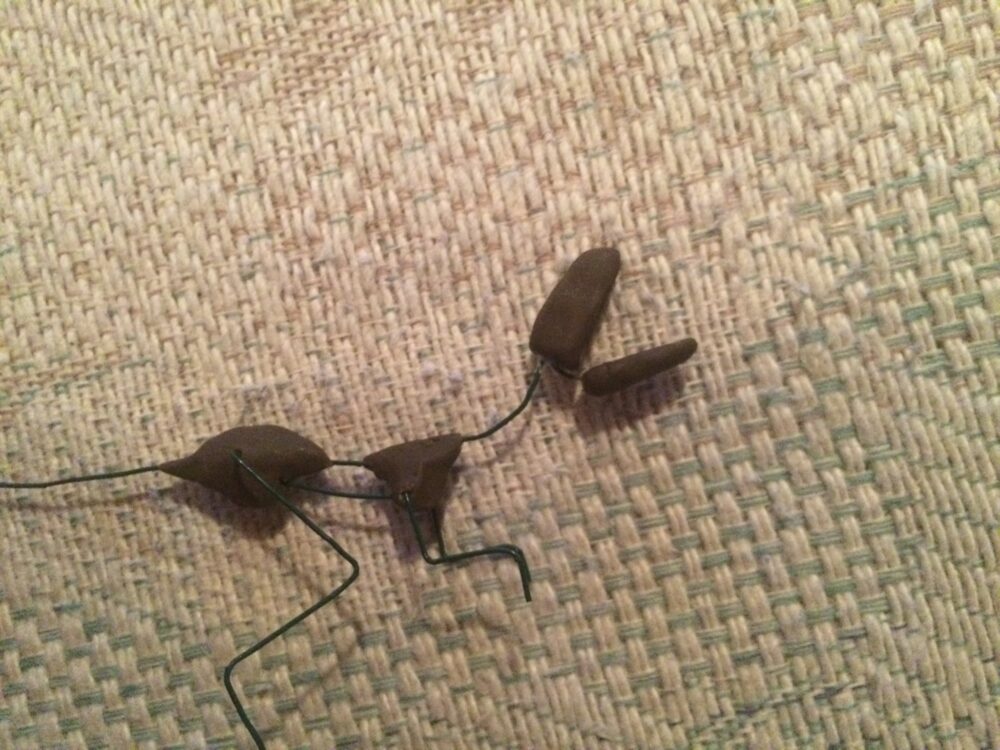
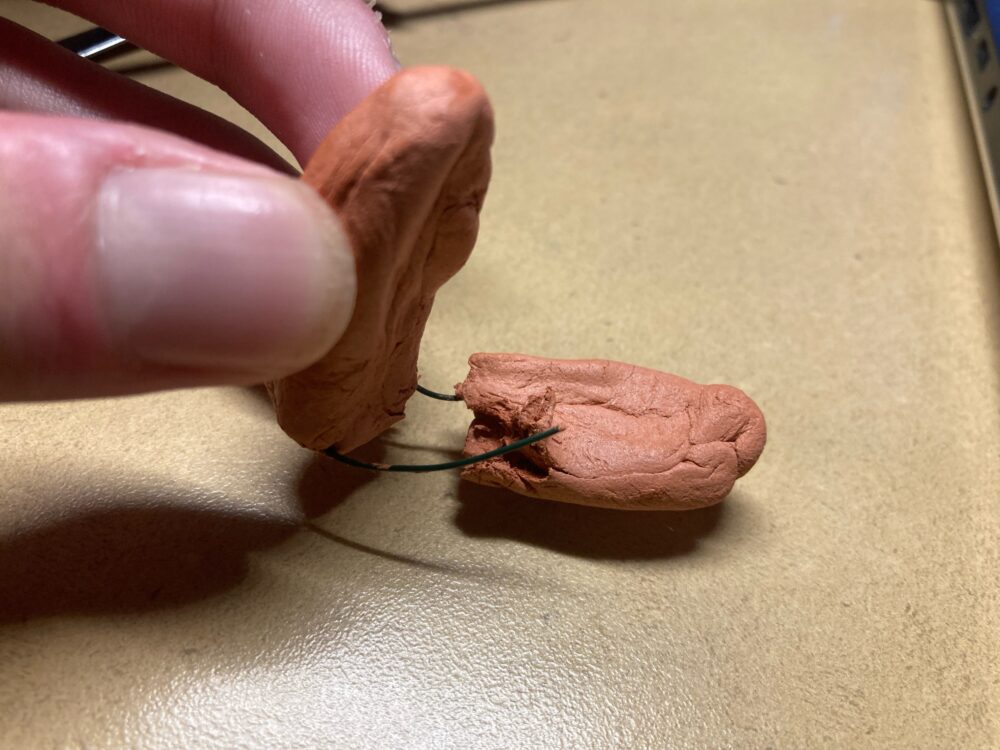
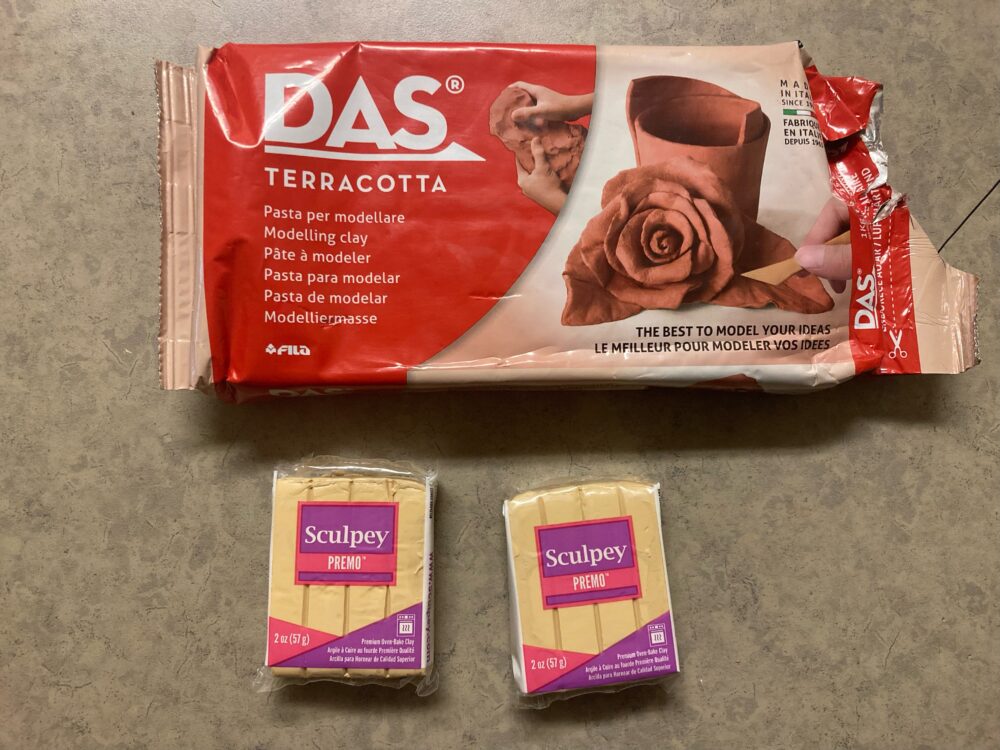 With both of these options in hand, I conducted a durability test to see which option I want to move forward with. I modeled two simple jaw mockups with a wire hinge two see if either type of clay would end up breaking.

Ultimately, Sculpey Premo ended up being the winner; I tried as hard as I could to rip the wire through the clay, and I barely made a dent. In fact, I ended up breaking the wire before I could break the clay. The Das air-dry clay, on the other hand, didn’t fare so well. It actually did end up drying pretty solid, but it took so long to dry and was so crumbly while it did that it couldn’t really stick to the wire.
This is about all I’ve managed to get done on this project so far. I’m not anticipating to get all the armature parts in hand until around April, so until then I want to try and perform some more material viability tests: in particular, I want to figure out what kind of adhesive will be best for affixing the foam to the armature. I’m also looking into ways to create skin texture; since I won’t be mold casting, I’m not aiming for super detailed scales or anything, but I’m considering ways of maybe embedding pieces of hard clay into the liquid latex skin in order to give it a little bit of texture. The final step will be painting the model; painting is something I have a lot of experience with, and I have access to plenty of materials, so this step shouldn’t be too complicated. I do want to look into how well acrylic works with liquid latex as part of my upcoming materials testing.
Here is my tentative production timeline for the rest of the semester: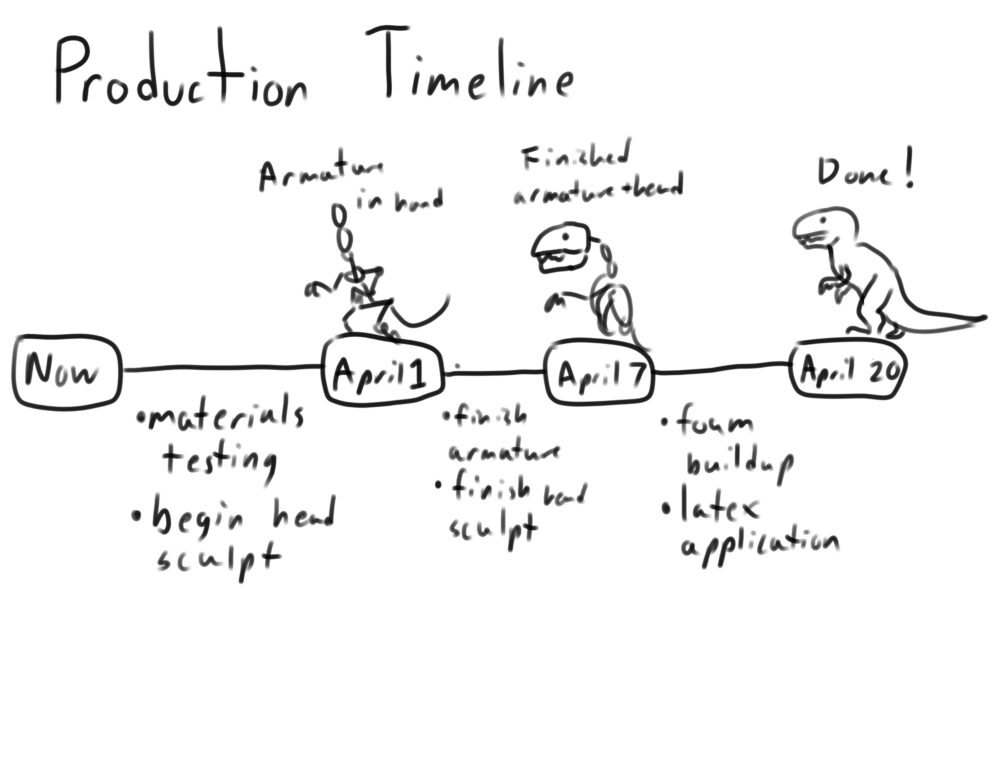
I’m expecting the armature parts to start coming in within the next week or so; at the latest they should be here by the start of April. I’m going to spend the time until then working on materials testing and starting on the head sculpt. Once the armature parts arrive, assembling them will be one of the simpler parts of the process. I want to be finished with that in the first week of April so that I can spend the rest of the semester working on the foam build-up, latex skin, and painting.
I’ll also touch on my alternate aesthetic sketches a little bit here. The first idea I wanted to approach was a sort of sci-fi or even cyberpunk twist on the idea:
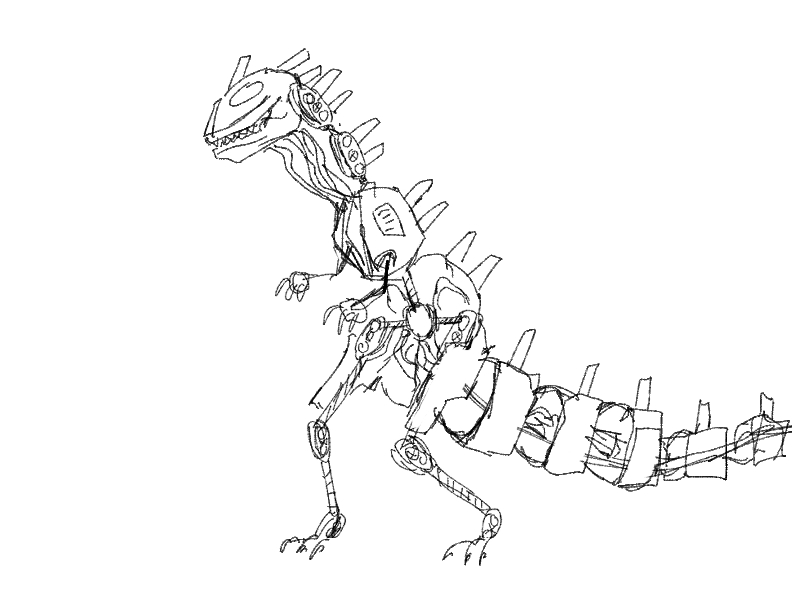
I thought it would be an interesting idea to incorporate the metal armature itself into the design, since in normal stop motion models the armature is completely covered up. With the steel joints exposed this could be a kind of robot dinosaur, with a sleek chassis and lots of wires and cables. I don’t think this will end up influencing my project plans, but I suppose if there were some catastrophe that destroyed all of my foam at the last minute I could pivot to this idea as a backup.
For the second alternative aesthetic, I tried to figure out what the furthest style from my current idea would be. I ended up going with cottagecore:
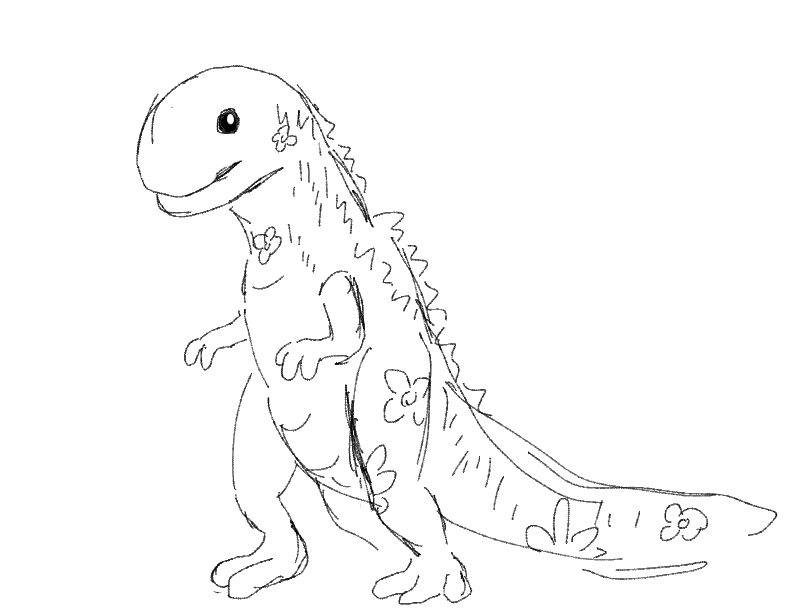
For this I imagined that the process wouldn’t be very difficult until towards the end, where I would use some kind of floral print fabric for the skin rather than latex. I’ve actually seen a lot of very cool dinosaur art dolls that have a similar construction process to this idea; I wouldn’t be opposed to trying to make something like that someday. But for this project, I think I’m sticking to the traditional stop motion style.
So that’s where I’m at! This is a project I’m really excited to be working on; finishing a stop motion model is something I’ve really wanted to knock off my bucket list for a while, and this class has been the perfect kick in the pants to get over my uncertainty and just do the darn thing. Thanks for reading!
Sources:
- Professional Armature Kit. https://animationsupplies.net/professionalarmature.html
- Allosaurus fragilis skeletal, Scott Hartman, 2012. https://www.skeletaldrawing.com/theropods/allosaurus-fragilis
- The Valley of Gwangi (1969), dir. Jim O’Connolly, animation by Ray Harryhausen
4 Comments. Leave new
Wow! This project looks amazing and very entertaining! I love how much documentation and thought has gone into this project already. I’m wondering how the foam and buildup around the joints might affect the maneuverability of the armature skeleton once it’s been fully constructed. Maybe thinning out the foam around the joints from the inside to allow for more pliability?
Hi Juliette, thanks for your comment! You’ve brought up a really good point about how the foam might affect the way the armature moves. I’ll plan to do some material tests to see how that ends up working in practice. One thing I did read is that some people cover the armature joints in some kind of flexible tape to prevent the foam or silicon from getting caught in the joints; I’ll have to look into what kind of tape that is.
Hey Sean, this idea is awesome, and I love that you’re, in a sense, completing those childhood projects! I like the idea of using the hard clay pieces to give the liquid latex a more scaly texture, I wonder if theres any “scaley” patterned products that you could use to imprint the scales on the liquid latex, something like the alligator skin patterned purses. On the armature kit you ordered, what the process for changing from a human to a dinosaur figure, the most noticeable one I see is how do you shrink the arms on the figure?
Brandon, thanks for your comment. The idea of using some kind of stamp to imprint a scaly texture is a really good one; I’ve actually made a stamp like that for previous sculpting projects, so I might try that out to see how well it works with latex. As for changing the proportions of the limbs, there’s a few things I’ll be doing. The arms I’m going to be replacing completely with armature wire, which I can cut to any length I want. I’ve ordered a hinge piece that has a little peg hole where I can insert the wire and attach it to the rest of the skeleton. For the legs, the way the armature is built is with metal rods that connect the different joints, basically acting as bones. So I can just replace those rods with shorter ones in order to get the proportions I need.