Design Preview Report: Apartment Bike Storage

I am an avid cyclist and as a result of this, I have a lot of bikes. I enjoy having the opportunity to have different types of bikes for different styles of riding which means that I have accumulated quite a few bikes. Unfortunately, I live in a small apartment in Boulder, and storing multiple bikes in my room can be a challenge and not aesthetically pleasing. For the purposes of this project, I wanted to create a means of storing at least two of my bikes while also incorporating a decorative element into the project.

I went about researching different approaches to storing bicycles in an apartment to gain inspiration. What I found was that it is possible to incorporate a bike stand or rack into furniture. I thought that this was an interesting concept that would satisfy my needs. Two designs in particular piqued my interest. First, was a set of shelves or cubbies, similar to what you would have at your front door for storing shoes, that also had slots cut in the top for tires to fit in. These slots allow for bike tires to fit in and hold the bike upright.

Slotted Bike Shelf (1)

Second, I found a design for a shelf that had slots cut in its sides to fit the top tube of a bike frame. I thought this was also a great multi-use solution as it was capable of storing a bike on the wall but also provided shelf storage space. I wanted to incorporate these two designs in some way to store multiple bikes because I enjoyed aspects of both.

Slotted Top Tube Shelf (2)

Both of these designs follow a minimalist aesthetic which is also what I have chosen for this project. In this way, the form of my project will follow its function since this project ultimately serves a functional purpose. For my final design, I wanted to incorporate both of these designs in some way, utilizing the use of mounting the bikes from the top tube and the tires. Therefore, my final design will include a main base for the stand that will have three storage cubbies below and two slots to fit tires for support. This base will serve as the support for the upper rack. This will stand behind the base and sit above the lower bike stand and base to support another bike by the top tube. I will effectively be able to store two bikes in the same structure and allow for extra storage space as well. Both of these elements are fairly static so I came up with a separate feature to satisfy the dynamic aspect of this project. sitting within the backing of the upper rack, I plan on integrating a fold-out work stand to accommodate bike maintenance. The stand will fold out to a 90-degree angle and be supported by cables when it is being loaded. By having this feature I will also have a useful workspace to perform repairs and general maintenance when I need it. When I don’t need it, it will simply fold back up to be flush with the back support. I went about sketching my original ideas on paper and compared two other aesthetics that would take a different approach. I explored some designs that would draw from industrial and organic styles to experiment with contrasting aesthetics.

Initial Sketch with Minimalism Aesthetic

Industrial Aesthetic

Organic Aesthetic

Ultimately, I found that I still wanted to go in the direction of minimalism for the sake of simplicity, and cost of materials, and given that the majority of my furniture and decor is fairly simple. My initial CAD design of the project is shown below in the following images.

General Structure

Head on View

Side View

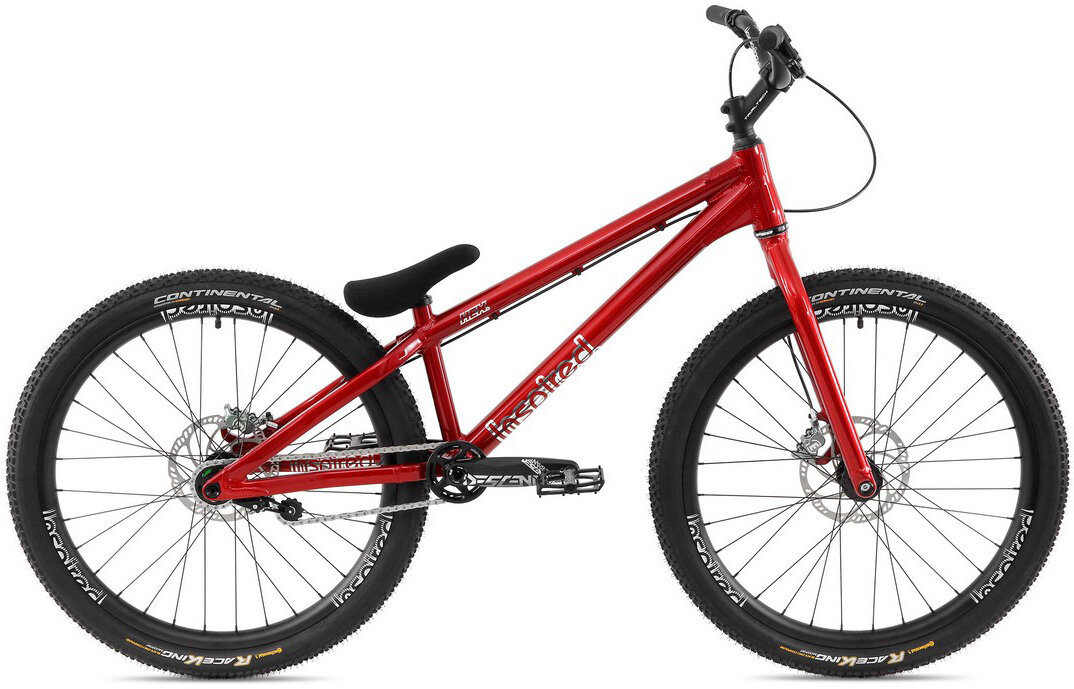
These are my initial thoughts on what my final project will look like. They may be subject to change based on what materials I am able to obtain but for the most part this is what I will base my design off of. The base will be constructed from 1″ x 12″ planks to make the general frame and platform support the bottom bike. The critical features of this structure are the slots cut in place to hold the bike tires. I intend for about 10-15% of the tire to be covered with these slots to ensure a secure fit for the bike. The slots are 20 in length and spaced 20 in apart. This should cradle the bike tires and hold the bike upright. These dimensions for the slots are based on the wheelbase of my trials bicycle which is what I intend to have on the bottom. The base will be 22 in deep with the slots being 15 in away from the wall. This dimension was driven by the width of my handlebars so there is space between them and the wall. The structure as a whole with the back support for the upper rack will be about 8 ft tall to stack both bikes on top of each other. For the top rack, I have designed two hooks to hold another bike by its top tube. The hooks protrude out from the wall by 17 inches, once again, to give space for the handlebars of my bike. Each hook will be  8 in apart to provide support across the bike’s top tube. One consideration that I may need to take into account is the fact that I mostly have mountain and trials bikes. Unlike the road bikes used in the example pictures above, these bikes rarely have a horizontal top tube. This is not a concern in terms of mounting the bike it will mean that the bike will be tilted significantly when it is hung by the hooks if they are perfectly horizontal. Therefore, I intend to give the hooks adjustable height so that the bike will appear to be in its normal riding position when it is hanging on the wall. In the future, this will also give me the flexibility to hang different bikes in a visually appealing manner. I think this can be easily achieved by incorporating slots into the sides of the rear support and fixing the upper rack in place using nut and bolt fasteners. I am confident that the majority of my manufacturing with the wood that I have chosen can be accomplished with a table saw, miter saw, band saw, and potentially a mill. Most of the parts will be bonded together with wood glue to mitigate the need for fasteners that would detract from the minimalist aesthetic; however, I do believe there will be some necessary fasteners.

Another critical component of my design is the incorporation of a foldable work stand to satisfy the dynamic element of this project. The stand itself will be fairly simple and simple fold out from the back support as shown in the images below.

Overall Layout with Extended Work Stand

Side View

Detail View of the Work Stand

The stand will fold out to 90 degrees using a pivot integrated into the rear support. Once extended, the stand will be supported by cables to restrict any further movement. The functionality of the stand is similar to other bicycle work stands where the bike will be supported by its seat post above the ground to allow for the wheels to spin and access components easily. The stand will sit 60 in above the ground and when fully extended it will come 26 in away from the wall. These dimensions are important to allow for the bike to be completely suspended off of the ground and have it supported away from the lower base to allow for the wheels to freely spin. However, this does mean that both bikes must be removed from their respective positions to access the work stand. I am not terribly concerned by this because the bikes will lie dormant far more than I will be working on them (HOPEFULLY) so I am willing to compromise the small inconvenience for the functionality. There will be a slot cut into the arm of the work stand to support the bike. In this way, the seat will be the primary means of support where there will be material on either side of the nose and the tail of the saddle. This is similar to other bike stands on the market, utilizing the seat for stability.

These statements summarize my initial thoughts and intentions with this project. I think that these initial designs will be very similar if not the same as what my final design will look like. However, I think some concerns and design considerations may change in my manufacturing process moving forward. From an aesthetic standpoint, I would still like to incorporate a shelf above the top rack potentially, similar to one of the designs that inspired me. This could be complex and given the height of the structure, it may become redundant. Furthermore, there are ways that I think I could design the upper hooks in a different way so that they look sleeker. To support the upper hooks of the rack I will need to provide sufficient support to prevent the structure from bending. I may need to change the orientation of the back support to be stronger or incorporate more structural supports. Another potential option would be to support the back with steel if it proves to be necessary.

These are my initial plans for the design and they will give a direction to head in with my fabrication process. Up to this point, I have done no manufacturing outside of designing the structure in SolidWorks for visualization. Moving forward, I hope to adhere to a rough manufacturing schedule shown below.

Week 1 (March 18-22): Research materials and cost for the project to begin buying materials.

Week 2 (March 25-29): I will be unable to work on the project over spring break

Week 3 (April 1-5): Begin initial measuring and cutting of materials. This will include work on the band saw, table saw, and miter saw. I want to have all of the members cut and pieced together to ensure that they will all fit prior to bonding and assembly. The base will require cutting on a miter saw and a band saw and will be glued together. For the back support, the arm for the stand will be cut out with a jig saw and the piece that remains will then serve as the service stand arm. I believe that the top rack hooks may require a mill to achieve curvature if I choose to go that route.

Week 4 (April 8-12): Assemble the structure and bond the members together with wood glue and fasteners if need be. Construct the entire structure prior to finishing.

Week 5 (April 15-19): Finishing touches. Begin sanding the structure down and remove any unwanted edges or glue. This will also involve staining the wood or painting it depending on what appearance I decide on.


Sources:

  1. https://www.pinterest.com/pin/225039312613866799/
  2. https://storables.com/articles/how-to-store-a-bike-in-a-small-apartment/
Previous Post
Post 8 – Gear Wall Art Design Preview
Next Post
Design Preview Report: Western Camping Table

2 Comments. Leave new

  • Hi Sophie!
    Thanks for your response. I have definitely considered making the back out of steel as it could be more structurally sound. I even considered an industrial aesthetic for this project where the main structure would be steel instead of wood. Ultimately, I think that it may become more expensive for me to go in that direction but I am not opposed to having some steel elements in my minimalist design for structural integrity. Thank you for the feedback!

    Reply
  • Sophie Berry
    March 15, 2024 8:05 pm

    Hi Ian,
    I really like the idea of furniture that also acts as a bike stand/ storage space as someone that also has limited space and a bike to store. Something that I was wondering while reading was if you had considered making the back stand piece out of steel (or other metal) square hollowed out support bars. I think the combination of metal and wood could go quite nicely and fit into the minimal aesthetic. I also would help from a structural standpoint if you are going to be trying to mount heavier kinds of bikes like mountain and trail bikes you mentioned.

    Reply

Leave a Reply

Your email address will not be published. Required fields are marked *

Fill out this field
Fill out this field
Please enter a valid email address.