
For my final project I have decided to take the dramatic landscape of the flat iron mountain range as inspiration to create a piece of wall art that will dynamically change to match the outside light that a photoresistor will be detecting. I have chosen this as my final project due to the fact that it involves multiple layers of my engineering skills into a singular piece that I will be able to enjoy for years to come. To accomplish this project I have decided to use four critical components that are to make up my finalized design. First is an acrylic laser cut piece that will resemble that of the flat iron mountain range, second is a strip of individually addressable LED lights, third is an RedBoard which will handle the coding and controls necessary to accomplish the dynamic aspect of my project, and finally a photo resistor that will detect the amount of light outside to send vital information to my RedBoard that controls the light settings that creates a backdrop to my flat iron mountain range.
As the end of the semester closes in I believe I have made a good amount of progress on my project over this past week. My first objective for completing this project was centered around procuring all the necessary materials needed. To accomplish this, I first wanted to obtain the acrylic sheet from the ITLL support desk that I needed to laser cut out my flat iron mountain range. This was really convenient as I was able to make one trip to not only get the acrylic but also go down stairs thereafter to do the actual laser cutting.
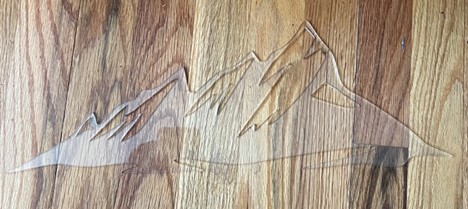
Although I still need to paint this cut out matte black, the above image is the result of the laser cut flat iron mountain ranges that will be the focal point of my project.
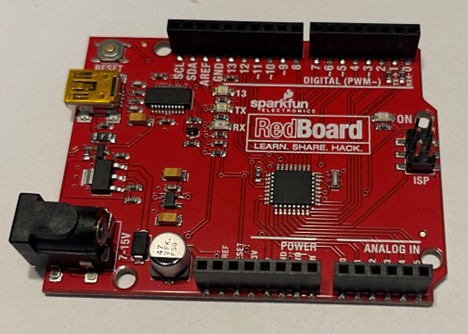
With my mountains cut and ready to paint, I then moved forward to acquire the rest of the materials needed. With some research I found that in order to properly code my individually addressable LEDs I needed to buy a very specific WS2812B type LED strip. Luckily this strip was readily available and has been purchased and delivered to my house. With the cut out and LEDs taken care of, I then moved to the electrical components needed to wire this all together. I had originally planned on using an Arduino Uno, but after talking with my Electromechanical Engineer from senior design I was informed that a RedBoard uses the same coding logic which worked out great as we had an extra RedBoard sitting in our locker.
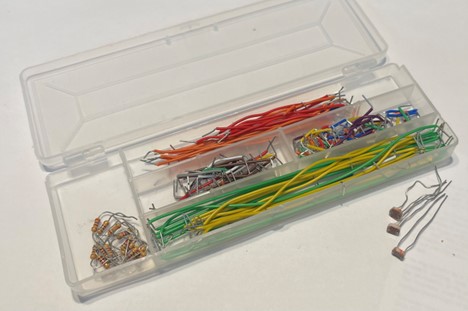
Finally I needed to obtain a photoresistor and subsequent wiring components to hook up to my RedBoard. Luckily, the ITLL has a free stock of photoresistors and I have a few electronics kits that I have left over from my circuits and mechatronics classes. Now that I have all of my materials, my plan for the coming week is to get the LEDs and subsequent code up and running so I can begin tuning in specific color tones for my final design.
4 Comments. Leave new
Hi Jace, to attach everything together I plan to make a shelf for the lights and a printed out PCB box for the electronics. This tied with some soldering should put me in the right spot at the end of assembly.
Hello John. This is turning out great! I love how you chose to engrave the acrylic in some areas rather than to cut it out. I was curious how you were feeling about the electric/lighting component of your project. I was also curious if you were considering a potential interchangeable base, allowing you to add a multitude of acrylic artworks to the piece.
Hi Adlai, I have been been thinking of the lighting component a lot and I think that will be the main fit and finish aspect to tackle.
Hi John,
This sounds awesome! I feel like I’ve seen products like this sell online for hundreds of dollars! I was wondering from an aesthetic perspective, how will you attach the LED’s and RedBoard to the acrylic? With the clear layer it feels like there is little room to hide electronics. I’m excited to see where this goes!