
Kinetic Seven Segment Display Clock: Progress so far.
Starting off, I wanted to give a brief update on my project. My original idea was to build a flap clock, as outlined in post number 8. However, as I was doin research into that design, I found something that I liked better: a kinetic seven segment display clock. The idea behind this clock is that instead of functioning as a traditional seven-segment display clock, where individual segments light up to display numbers, each segment is going to be servo driven so that it can move in and out of the clock face. Here is my CAD rendering:

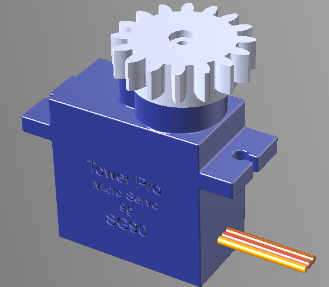
I still want to follow the same overall aesthetic, going for a dark Scandinavian inspired look. My progress so far is as follows. I have started ordering parts and electronics for this build. The each individual segment is driven by an individual servo with a rack and pinion setup, and so I need 28 servos total. I was hoping to be able to get at least some of these from the ITLL, but after an initial discussion, it seems like I will likely need to purchase the majority of these myself. This won’t be an issue, as they are cheap are easy to get, and the ITLL seems like a good backup in case I need a few extra at the last minute. I also have an Arduino that I am trying to figure out whether or not it will be capable enough to run the whole design, The other main parts are an RTC module (real time clock) and a servo shield to distribute power. I have also started to print a bunch of the internals. There are a ton of small internal parts which are each really easy to print, but represent a significant amount of time all together.
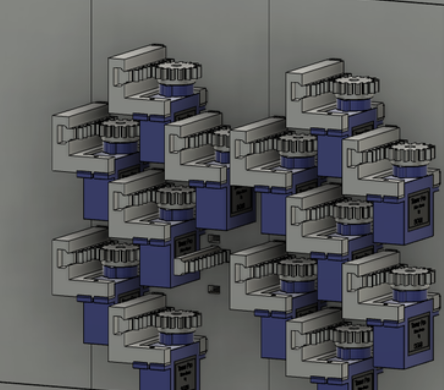
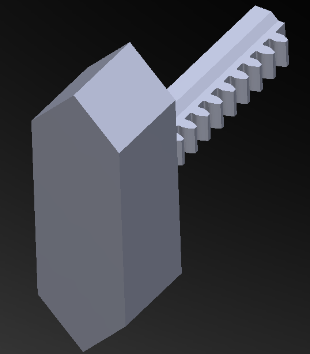
Here are several of the small components that I have started printing, as well as a look at the assembly of two of the digit displays, as seen from the back or internals of the clock.
The goal for the week is to have all the parts ordered as well as a finalized design for the exterior. This way, I can get the wood for the face purchased and laser cut next week and begin assembling all the 3D printed parts with all of the electronics. The coding portion of the project I am not too worried about, as there seems to be a lot of documentation on similar projects, as well as just with these parts in general. Once I have all the electronics in hand and the laser cut pieces done, the rest is mostly just 3D printing and assembly, which should be straightforward. I am excited for the next phase of this project, and looking forward to seeing this clock take shape.
2 Comments. Leave new
I’ve never seen a clock like that and think it is a cool concept! I was wondering what parts you are 3D printing and what is being laser cut. Also do you have a plan for wire management? The spaces for wiring seem small with lots of connections.
Hi! I’m super excited to hear about your progress on the flap clock! I love hearing about how you’re problem-solving to get the inner mechanism built! How are you going to add to the color scheme in the future, if at all? Are you going to buy custom 3D print filament?