

Post 10: Progress
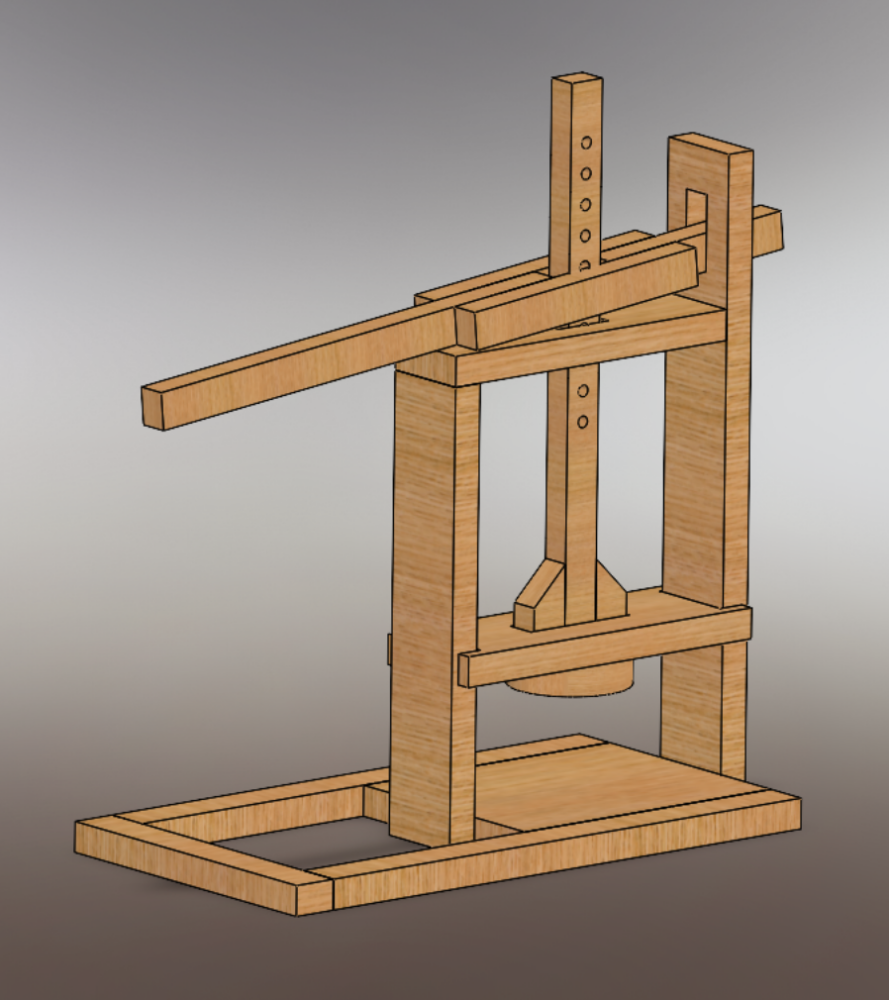
This past week I worked on the CAD files for the cheese press to be able to set the dimensions of all of the parts for the cheese press. I ended up slightly changing the design as well. The new design uses less parts and bolts. I got inspiration for the new design from the channel “Ozark Mountain Goats” on YouTube (Link). I put together all of the files into an assembly using SOLIDWORKS.
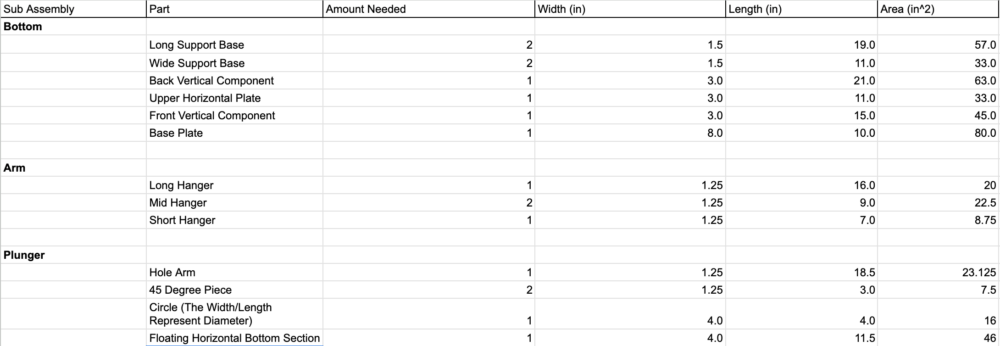
After making the assembly, I calculated the amount of wood needed using an excel spreadsheet. I first wrote down the dimensions for each part and then separated the sections by widths. I connected each section to the widths available at Home Depot. Then I figured out the lengths I needed for each width that I could buy. I added in a bit of safety room in case I made a mistake. I estimated the cost would come out to $58.42 not including tax.

I purchased the wood at Home Depot. The sales tax ended up being $5.28. The total cost was $63.70.

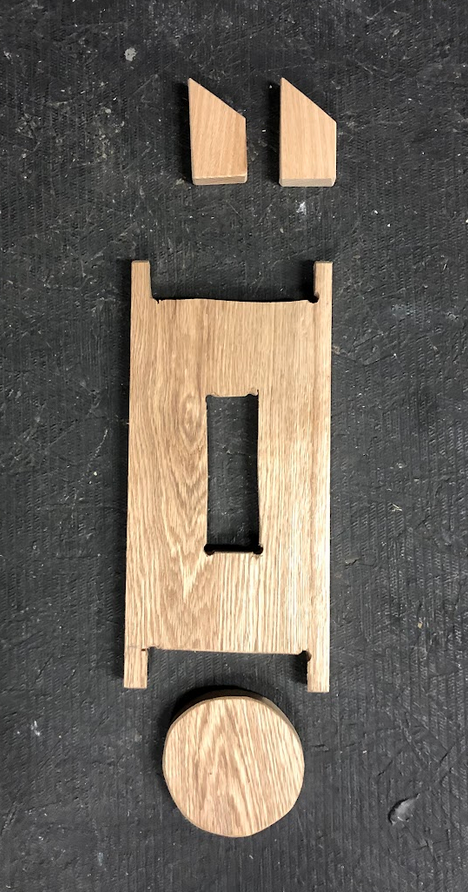
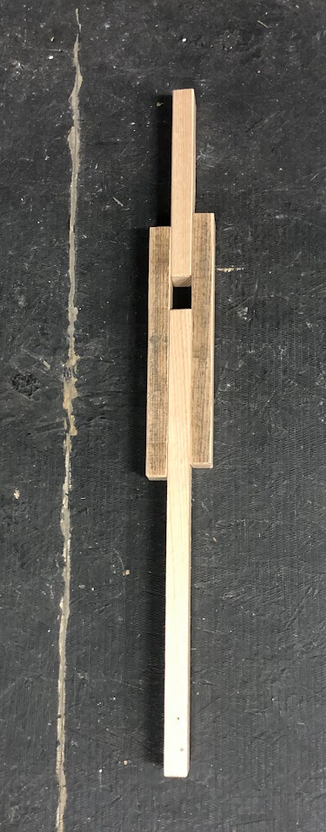
I took the wood to the wood shop in the ITLL. I first cut the wood to the appropriate lengths needed using the table saw. After this was done I used the band saw to take vertical cuts of pieces that were too wide. I also used the band saw to make the cylinder section for the press “plunger”. To make the rectangular cut outs that are used in the of pieces, I drilled 4 holes that represented the outside corners of the holes and used the jigsaw to cut out the sections. This was difficult to get used to and my holes did not come out as straight as I would have liked them to.
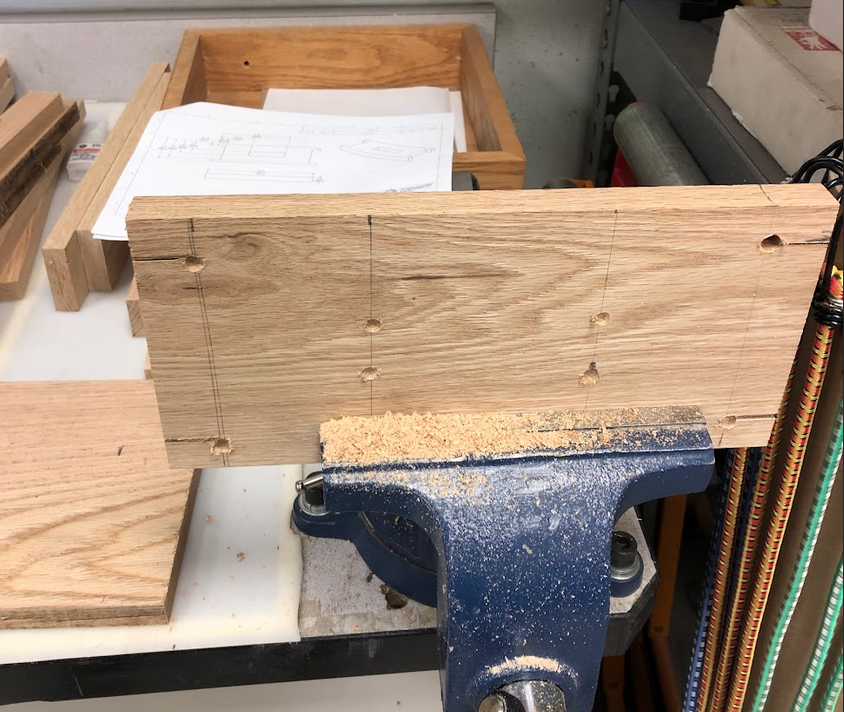
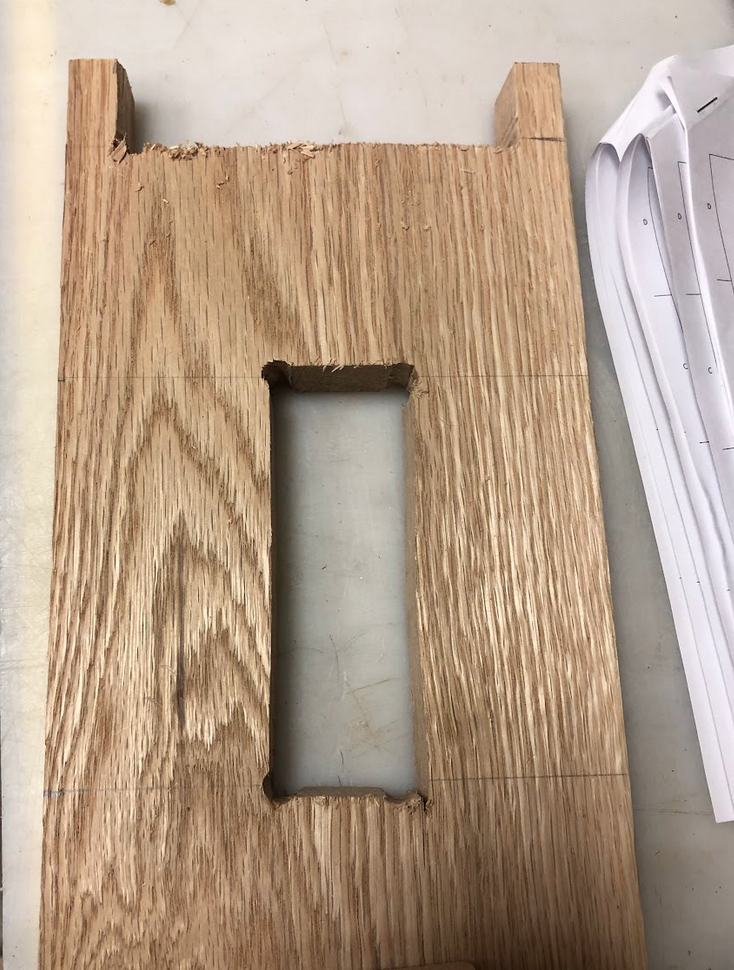
I cleaned out the interior of each hole using a dremel tool. After the holes were cut I used the vertical sander to sand the outside corner of each piece. This has been my progress for this week.
4 Comments. Leave new
Hi Ben! This is a really well detailed progress point. I am curious, how many more parts do you have to work on and how long do you project this will take?
Hey Sophia! Thank you very much. I have 4 more parts to drill holes in. I also need to sand everything and apply the finish. I expect to spend about 6-8 more hours on this project.
Hi Ben, I like the progress! I like how the project is well planned out. Could you tell us more about how you decided which method you will use for joining all the parts together?
Hi Kyle, thank you! I will be using wood screws to put most of the pieces together, except for the arm assembly I will be using 4 long bolts with wing nuts to hold the pieces together. One of the sets of bolts and wing nuts will connect the arm to the “plunger piece”.