
Inspiration
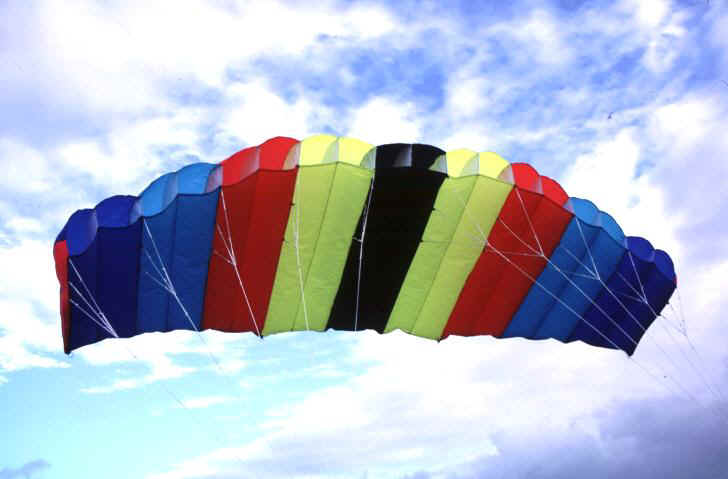
A big sewing project was something I was excited for and was also outside my comfort zone so most of my initial ideas were sewing related. While the sewing process was something I was looking for, a piece of clothing or quilt were not very interesting to me. After trying to pay attention to what was sewn around me that could be fun to design I was finally inspired by a stunt kite. I had a lovely experience flying my friend’s parafoil stunt kite on one of the first warm days this spring. It was my first time flying a kite that had two strings and after a bit of a learning curve I had a lot of fun. I had only ever flown single string kites, but with two you can control which way the kite flies and spins. Flying that kite also reminded me of a really wonderful afternoon flying kites with Pop (my grandfather), sister and cousins. I left the park excited and determined to make my own stunt kite so that is what I did. Stunt kites are more professional/intermediate kites meant for maneuvering in the sky by pulling on the strings.
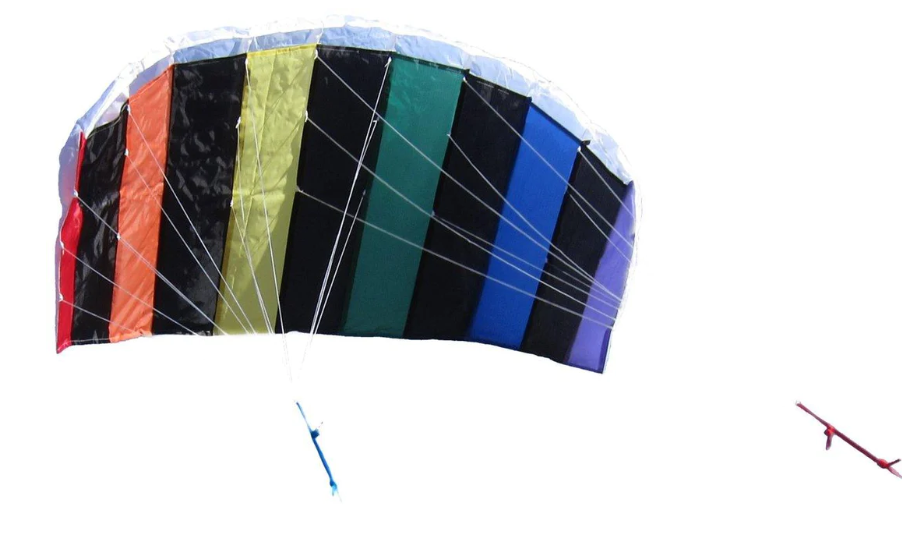
Once I had decided on making a stunt kite I started learning more about stunt kites and I discovered that there are many different types of kites however they mostly fall into two categories, rigid and flexible kites. The parafoil kite I had initially flown falls into the flexible category. I had never flown a rigid stunt kite but I was curious to know what it was like before deciding what type of kite I want to make. I decided the easiest way to compare the two types of kites was to see of there was a cheap kite I could buy or a kite I could borrow. After a quick search on Facebook Marketplace I found a good deal for two rigid stunt kites and bought them. When I took them to a field to fly I discovered that unlike the flexible kites that can hit the ground and be dragged without much attention to damage, the rigid kites have rods that can be broken. I also had more trouble with take off for the rigid kite than I had with the flexible kite. So I set out making plans for my flexible kite.
Aesthetic Vision
Since stunt kites are generally meant to be showy and easy to see in the sky, I wanted a kite with very vibrant colors. This worked out well because my color options for the lightweight ripstop nylon fabric were predominantly brightly colored. Next, I wanted to make a kite that was unique and not a typical rainbow or single colored kite. I decided a combination of bright colors and a simple pattern would be executed well with a pop art aesthetic.
Beyond choosing colors for a kite I also chose a sewing pattern to follow. After exploring a few different types of kites and trying to read various patterns I settled on a kite pattern that had relatively clear measurements and seemed similar to the kite I had flown. The kite pattern was the Sceptre by David Holt [2]. I found the plans through a mirrored site on Kite Plan Base but don’t think the original website is still live. I also borrowed my friend’s kite so between the pattern and physically inspecting how a kite was made I could make my own plan.
After choosing a kite pattern I started thinking about what the kite could look like through the use of color and additional patterns. Since the Pop Art movement frequently features dots I started thinking about how I could implement polka dots. After considering that I wanted a pattern thar could be seem from far away I thought bigger dots would work better than smaller ones. Based on how the main fabric of the kite was sewn together I also decided that I would keep the color changes in spaces that made sense based on where I was going to put seams. Adding more colors would substantially increase the amount of work needed to put together the kite and I was also worried that if I made the pattern too complicated I would not be able to do a very good job with the time I was willing to put into the kite. This lead to a decision to add one big dot onto each panel of the kite.
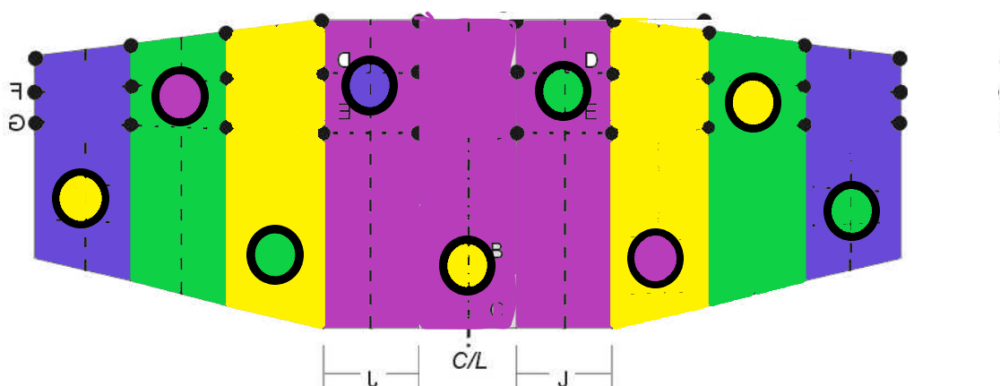
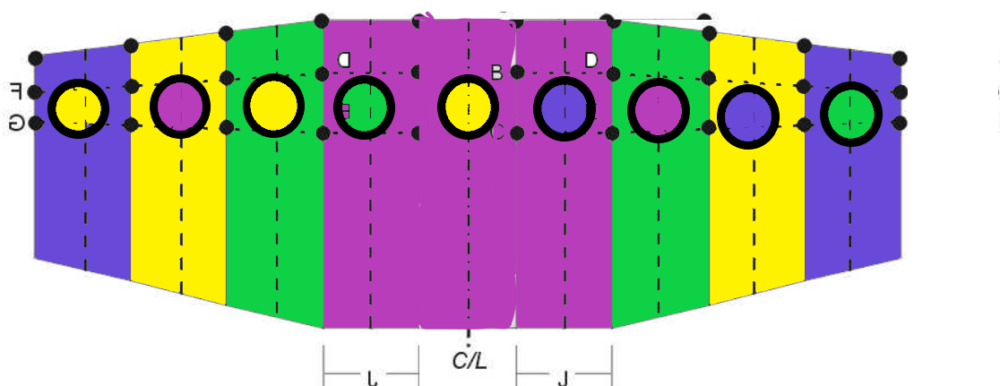
I used the Sceptre kite pattern graphic and Microsoft Paint to see what colors and patterns I liked the best. The options for the order of stripes and color of dots I liked the best is shown below. I ended up with the colors blocked out in this way because having the darker purple on the outside nicely framed the kite green ended up next to the purple because I really like how purple and green look next to each other. This was also influenced by not wanted to put yellow and purple and then green and pink next to each other because having the sets of nearly complimentary colors next to each other made the kite feel less cohesive when looked at. After choosing the background colors I started placing the dots. My rules were that the dot had to be a different color form the based color it was on and that the dost on neighboring panels could not be the same color either.
In the end it did not matter that I had planned out my polka dots because once I started cutting and sewing everything I realized that learning the applique sewing technique and 36 additional piece of fabric onto my kite was going to be far too big of a task. I changed my mind on the dots once I had finished sewing the base colors together. Since I had spend so much time cut, aligning and then sewing strips together, if something went wrong that ruined the good start I had I was going to be unhappy. The bold stripes still looked good and still fell in the pop art aesthetic. So even though I had taken the time to cut a bunch of circles, I decided my kite would be finished without them. Since I now have a bunch of ripstop nylon circles, a project for another day could be to do applique for a bag to hold my kite.

I am happy with the finished product. I was able to achieve a brightly colored kite that is not in a pattern I could find to purchase. While there are no dots the kite took a considerable amount of time so I am glad that I prioritized having a kite instead of having most of a kite with dots too. Another limitation to the final looks of the kite are my sewing skills. This is definitely the most complicated sewing project I have tried. The pattern had many parts and seams that needed to curve. The fabric was also difficult to work with. All factors considered if someone were to look really close there are some squiggly stitches and wrinkled fabric but in the sky where it is intended to be seen, those small details should not be noticed.
Additional Sketches and Planning
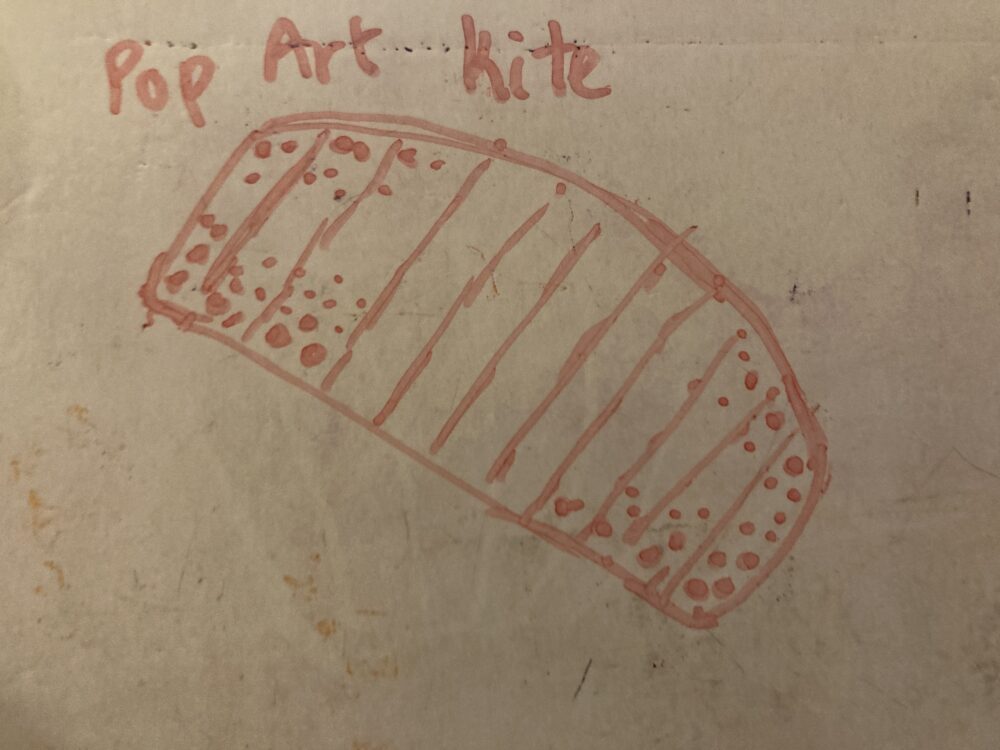
In the whiteboard sketch above I was trying to incorporate dots like those used in early pop art cartoons. While this definitely has a pop art aesthetic the small dots are really better for printing than they are for sewing. From far away it whould probably end up looking like I had a kite with the corners shaded.
I discarded the idea shown above and decided to alternate the dots being at the leading edge and trailing edge of the kite because in this version there was not a good balance of positive and negative space. Spreading out the dots makes the kite look more aesthetically pleasing, I was also worried that while sewing I would manage to have one dot out of line so a pattern that has a less obvious alignment would be more forgiving.
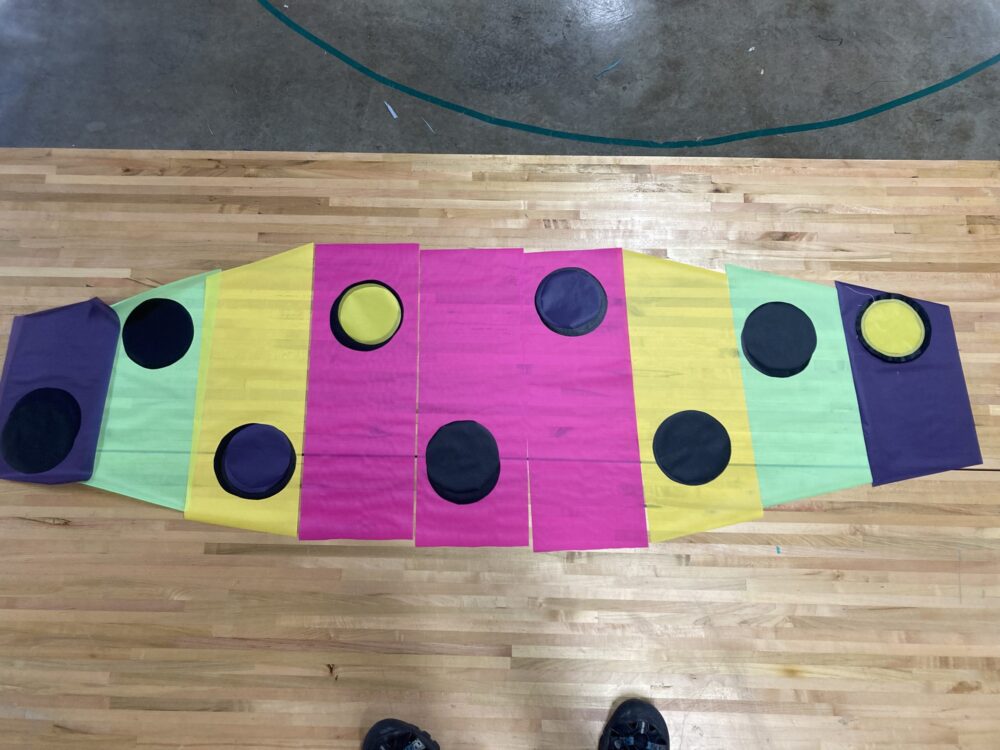
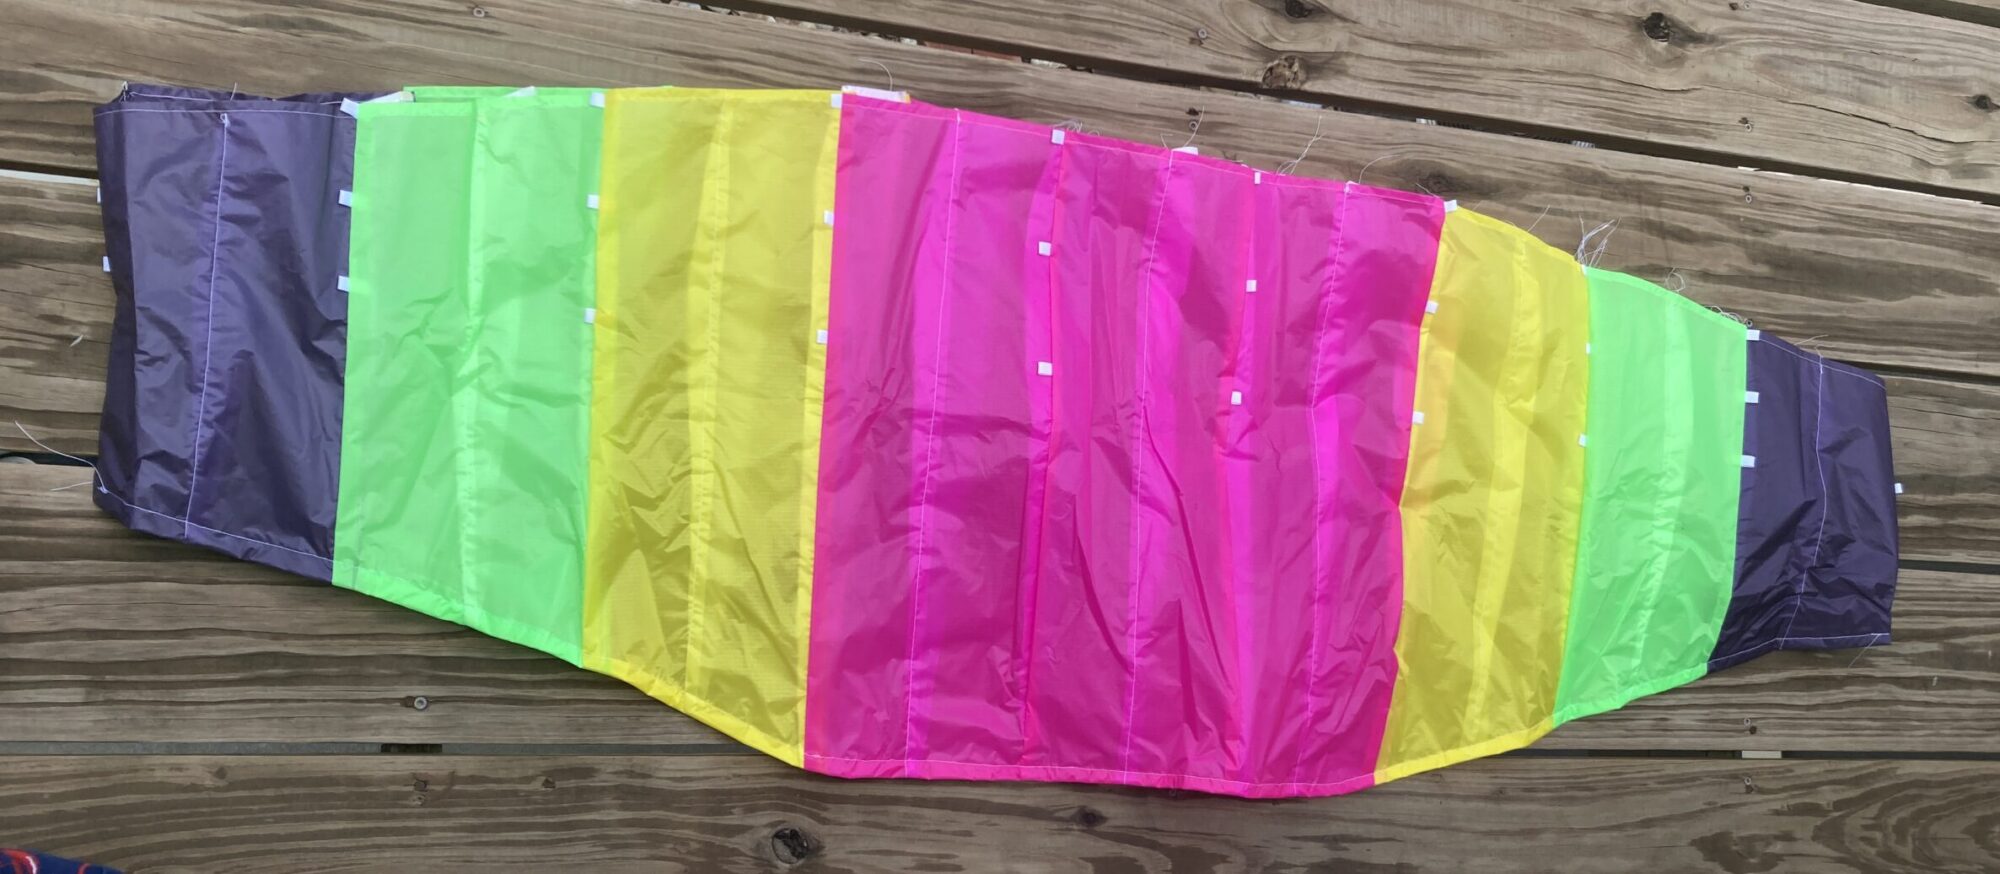
After digitally visualizing my design I was excited to see what it looked like when the fabric was cut. As describe above even though I ultimately chose to forgo the dots, I hadn’t decided this until I had already cut many of them.
[1] https://prokitesusa.com/products/50-airfoil-stunt-kite?_pos=6&_sid=9cf635290&_ss=r [2] “Sceptre bridle.” Accessed: Apr. 23, 2024. [Online]. Available: https://www.kiteplans.org/planos/sceptre/bridle.html [3] “Sceptre Image 1.” Accessed: Apr. 23, 2024. [Online]. Available: https://www.kiteplans.org/planos/sceptre/image1.html
4 Comments. Leave new
Abigail, I love the sewing project idea. I’m curious to see how big you ended up making the final model. I was thinking off adding patches to my sewing projects and I ended up settling on gear tape that I could adhere to the fabric. You could potentially look into make colored stickers that you could add without needing to cutup and sew more….
Either way congrats on the project. It looks super cool! I love your color choice.
Tape/and adhesive to add a pattern is an idea I considered. I would probably make the dots smaller if I were to do that, the ones I had stencils out were 14 cm in diameter.
Nicely done Abigail! This looks like a great project with awesome inspiration. Is there a consideration for attaching the kite’s strings that you had to take in your design? This will be awesome to see at Expo!
Where the lines were attached was planned for, I didn’t have to put much thought into it though since I was following a pattern.