
INTRODUCTION
My vision for this project was to combine modern and natural aspects with organic abstract aesthetics to create a wavy mirror. The modern elements would be displayed through neutral color pallets and materials and the organic aesthetic would be carried through with textured and layered designs within the frame. Overall, I was not able to make the mirror in the original scale of the mirror I purchased but I was still able to keep it in the largest size possible for my fabrication process. As for the design, I feel as though I kept to my original vision with it being organic modern and creating a functional piece of furniture that also acts as an interior design piece.
INSPIRATIONS
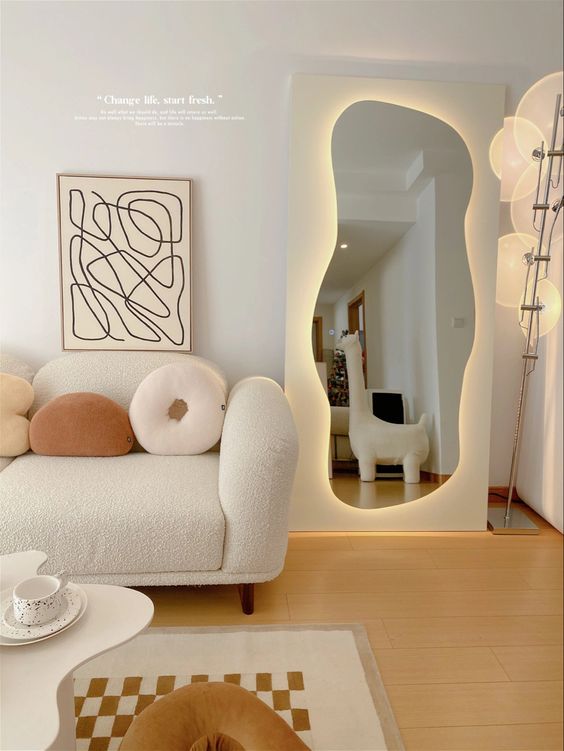
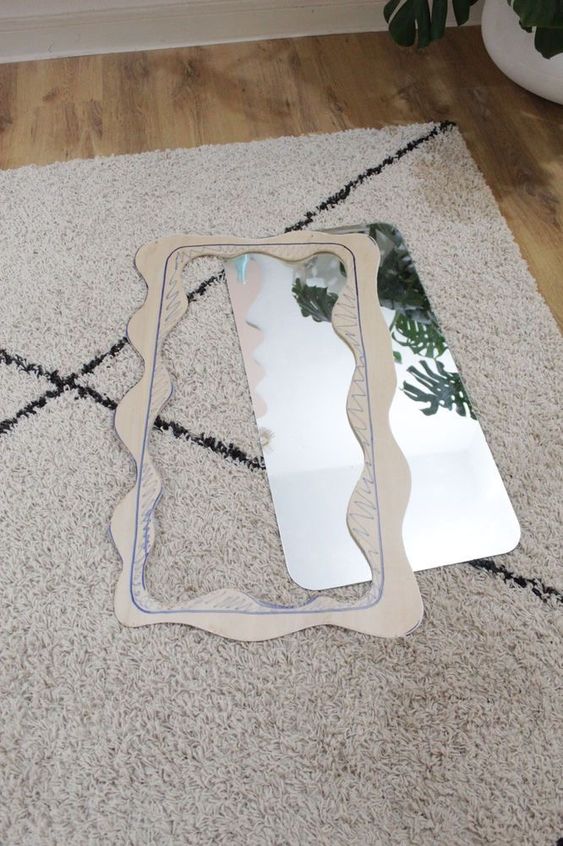
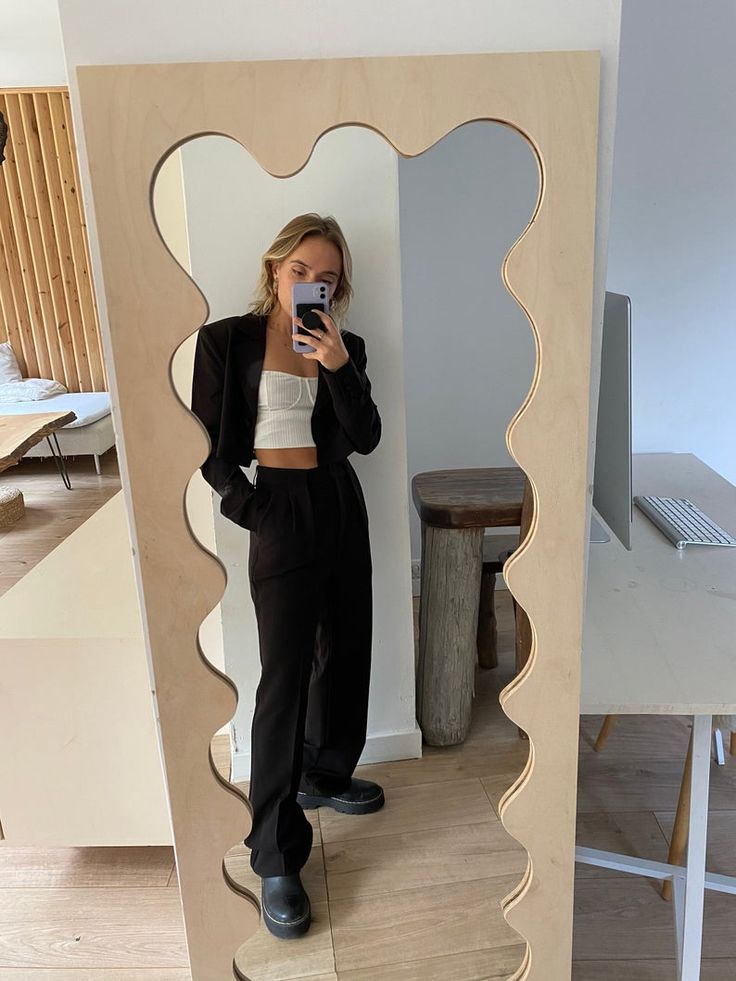
For this project, I was inspired by wavy framed mirrors. There are many great examples of this online. This style of mirror can fall within many differences and use various materials. The mirrors range from sizes, neutral colors to pastels, and wavy designs cut out from wood to 3D formed frames. Here are a few examples that I took inspiration from:
 Pic 1: https://www.pinterest.com/pin/417920040441156601/
 Pic 2: https://www.pinterest.com/pin/417920040441156371/
 Pic 3: https://www.pinterest.com/pin/417920040441156365/
 Pic 4: https://www.wayfair.com/Rosdorf-Park–Kalilah-Wavy-Floor-Mirror-X211710983-L41-K~W100609872.html?refid=PSD49-w100609872_105091577&costid=PSD49&pin_campaign=626745370110&pin
_adgroup=2680075078849&pin_productgroup=4260608120351&device=desktop
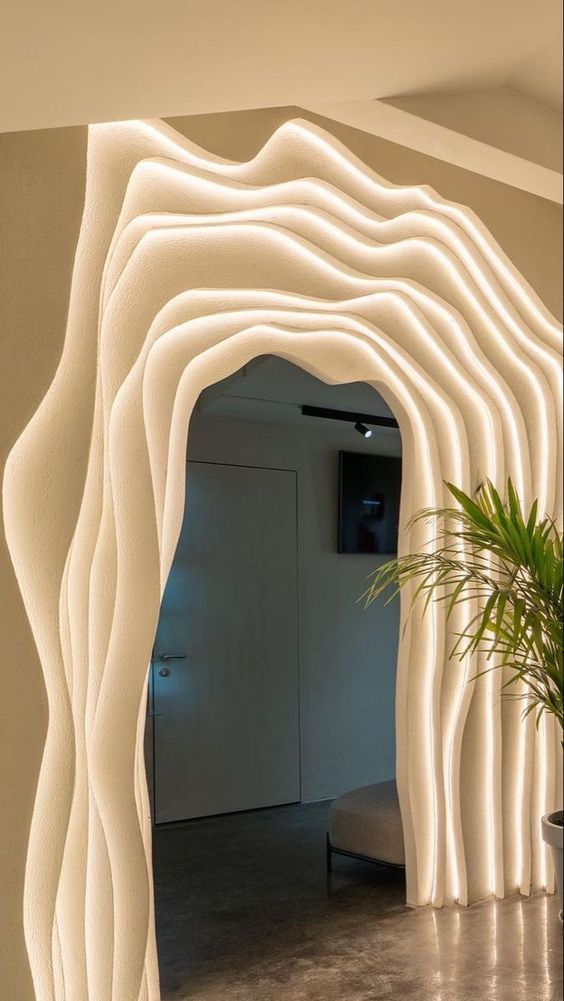
I loved the idea of incorporating a modern aesthetic with an organic natural take to create a piece of furniture that is unique but can be used in many different spaces. Once I decided on the type of project and aesthetic I wanted to create, I decided to do a wavy framed mirror with a dynamic lighting feature. In order to stay within the organic modern aesthetic I looked to use neutral colored materials and incorporate wood into the project. I started to find inspiration and research on these types of mirrors and also learn more about woodworking since I have little to no experience. I did plan to use the laser cutter to do the wavy design itself since I know how to use the laser cutter and I felt like this would be the most consistent for the design since it is complex. I then needed to decide how I would cut and assemble the rest of the mirror and the wiring of the led lights. The design I ended up creating was a little more complex than the ones I took inspiration from because I decided to create two “frames” out of wood and then enclose the led lights with foggy acrylic to let the light shine through. I was overall inspired by the organic modern aesthetic and the curvy nature of the interior design, from abstract shaped furniture to neutral and beige color schemes.
 Pic 5: https://www.pinterest.com/pin/659777414188135252/
 Pic 6: https://www.pinterest.com/pin/281543723361147/
INITIAL DESIGN
As I started to sketch and plan my design, I tried to incorporate many of these elements into my piece. I made many different iterations of my design and once I found a sketch I was happy with I began to dive deeper into the measurements and fabrication.
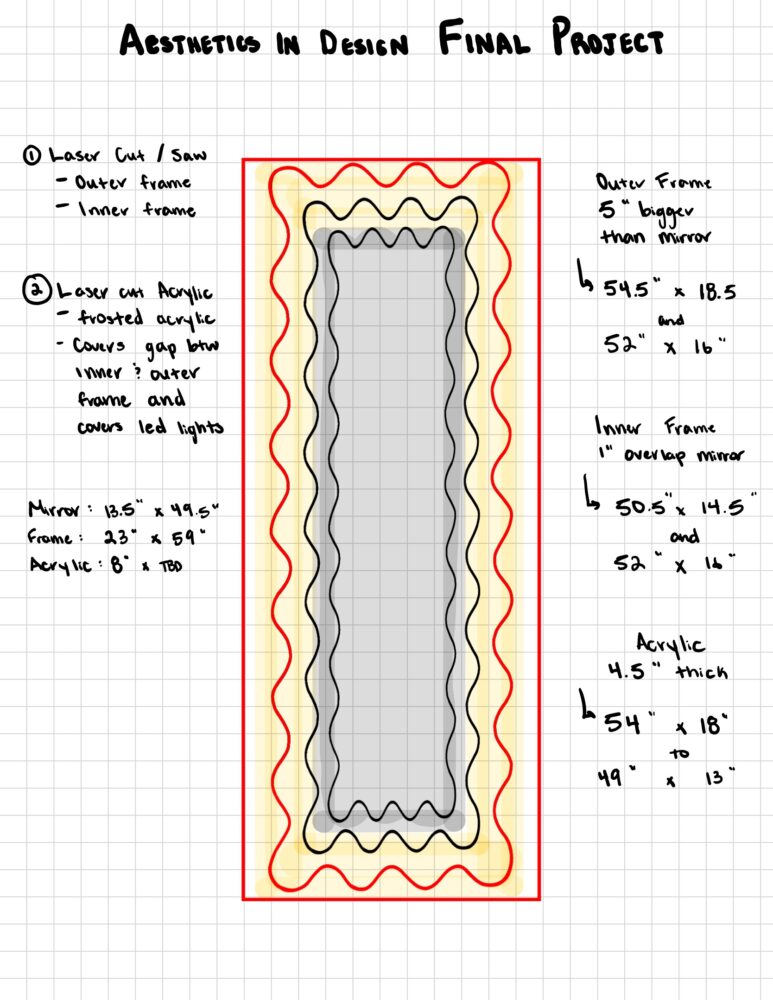
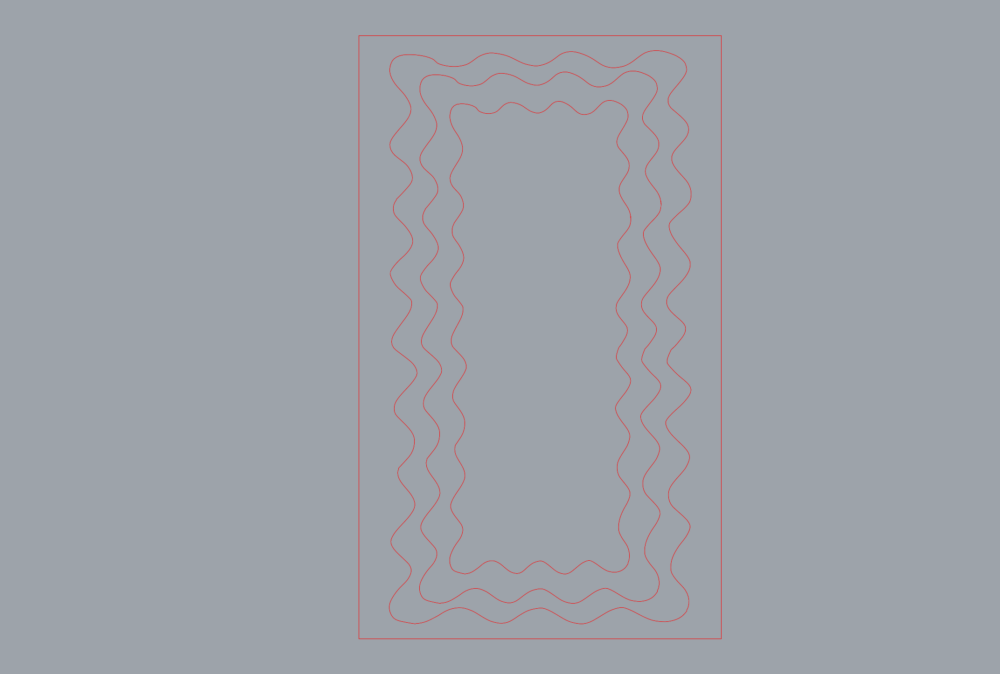
I then created a laser cut CAD design in Rhino that I will then use to laser cut. In order to make the wavy design I decided to use my iPad to hand draw the wavy lines which I then imported onto my computer and uploaded them into Rhino. My final CAD design decreased in height due to the limit of the length of the laser cut bed and my specification of cutting the frame in one piece.
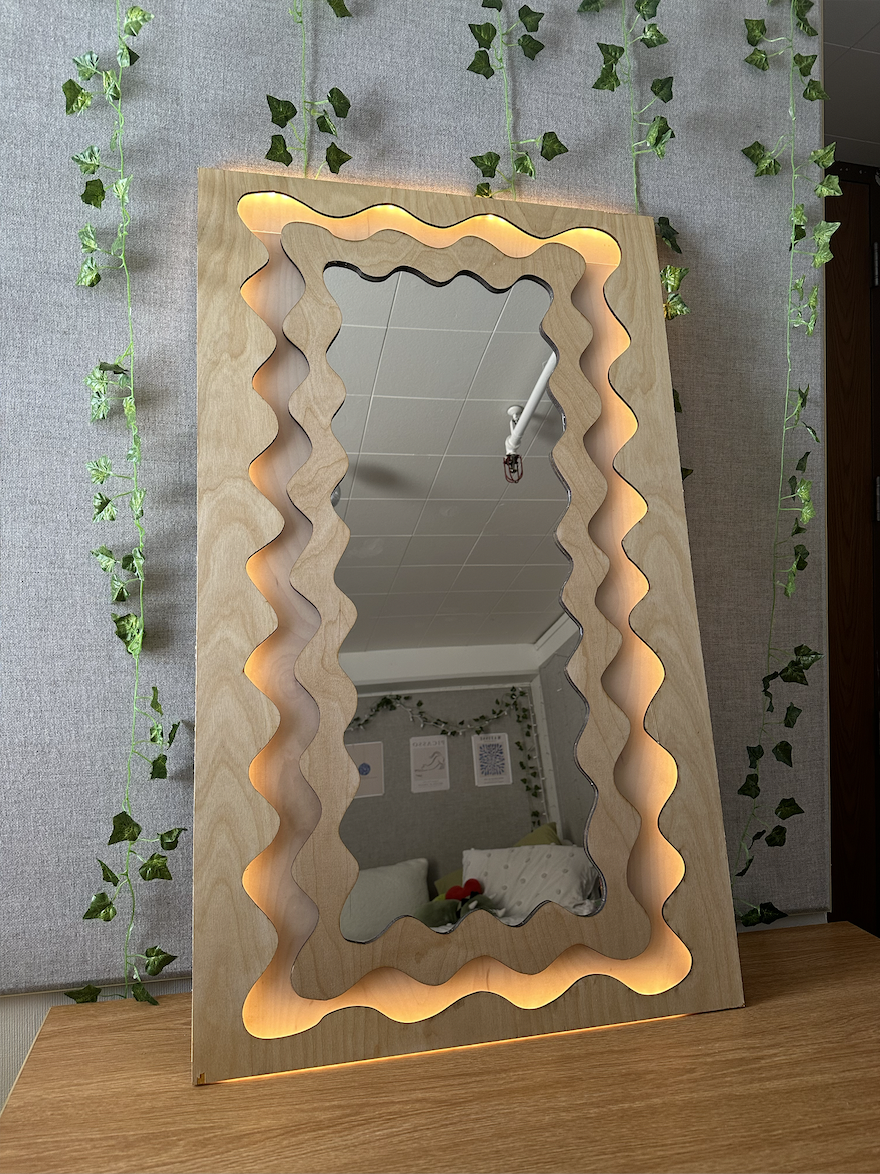
FINAL PRODUCT
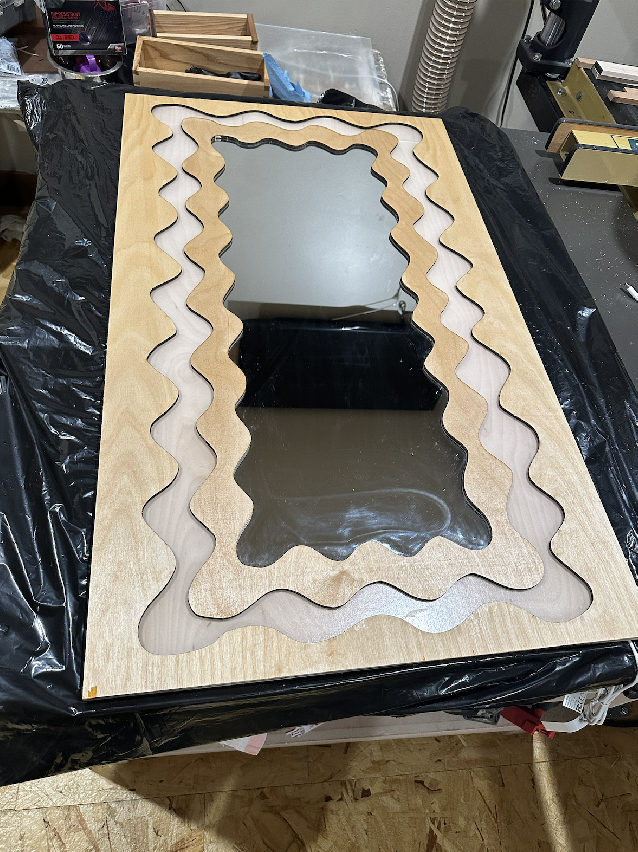
While I was not able to make the size as big as the original mirror I bought for this project, I still believe that this project covered all of my other goals and specifications. It works as a fully functional mirror and has many lighting and design elements to fit the organic modern aesthetic. I love how this piece turned out and I can definitely see myself using this in my living spaces in the future. I also ended up putting a Polyx-Oil stain on top of the wooden frame to give the birch plywood a more finished and professional look. Overall, I am happy with the outcome of my project and I think I met my original goal and vision as well as being a fully functional interior design piece.

3 Comments. Leave new
[…] Main Final Report Pt. 1 […]
Amazing work, I remember seeing some posts in the idea development stages and it turned out so well! The lighting is an awesome touch. Is there any particular reason you chose to draw the shapes by hand and then import them to CAD rather than make them on Rhino to begin with?
Hi thank you for your feedback! I decided to hand draw the shapes because I am not the best with creating a consistent line in Rhino on my computer trackpad and I also wanted to create a more natural and unique type of wave instead of using a shape tool within the CAD application. If I were to go for a more symmetrical and basic design I would definitely try to just use the trackpad on my computer but I like being able to create the exact shape I imagined.