

Now to talk about the experience of making the scale model space craft! This entire process was on the larger side of volume of projects I have singlehandedly undertaken, especially in this small of a time frame. But the entire time it was a labor of love, and it will continue on that way since I am enjoying this project so much that I want keep adding more detail and content to it even after class. One of my favorite part of scale models is looking really close and still seeing the insane amount of attention to detail, getting to really see all the effort put into it. That is where I also really think the fun is, putting on the finishing touches that really being the piece to life: coloring buttons and interfaces to bring in some color, adding wear and fatigue to the model to convey the subject of the model has history and has been lived in.
I knew that time was going to be my main enemy for this project, so I got started almost as soon as we finished the first project, this approximately gave me a little more than two months from start to finish.
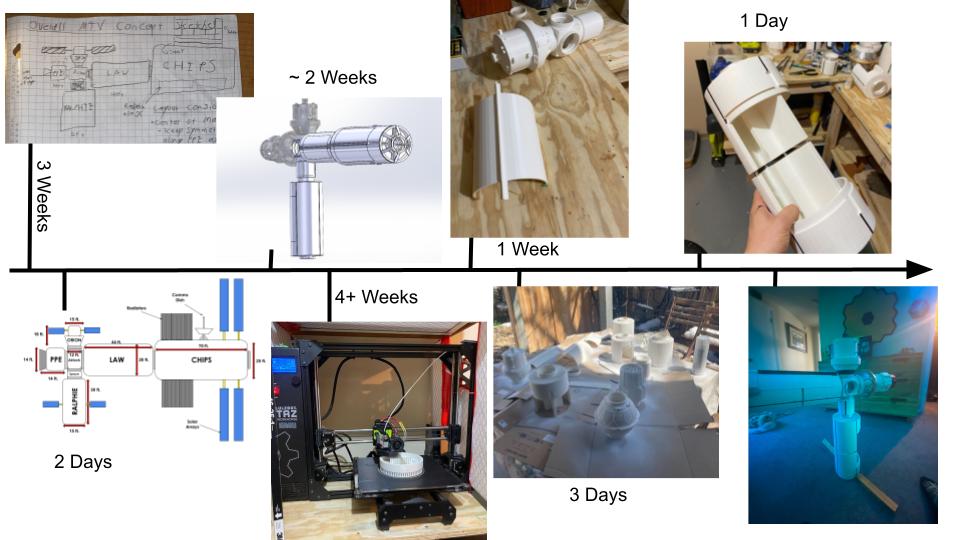
The exact amount of time dedicated to each portion is approximate as I was able to leverage one huge advantage for myself in the project: 3D printing is autonomous! Therefore many of the portions I was able to stack on top of eachother at the same time, explaining why the above timeline doesn’t quite add up to two months.
Chronologically the fabrication of the project goes like this:
Before I even started to imagine what this project might look like, I had to research what goes into a spacecraft since the whole idea of NASA pragmatism is that the design goes hand in hand with function. Additionally, a human faring spacecraft that would go beyond Earth goes doesn’t exist yet, and I want my design to be realistic, therefore I had to find out what it looked like by making it ‘real’, more like plausible. After a long period of research, I finally arrived at my preliminary sketches that gave the basic layout of the spacecraft.
From the hand sketch I initially attempted to jump straight into CAD modeling it, but realized that it was very difficult to try to get all the dimensions figured when my pencil and paper rendition was far from consistent. Therefore I decided to remake my hand sketches as digital drawings with better straight lines, areas, and ultimately, predictable dimensions that actually served as a blue print.
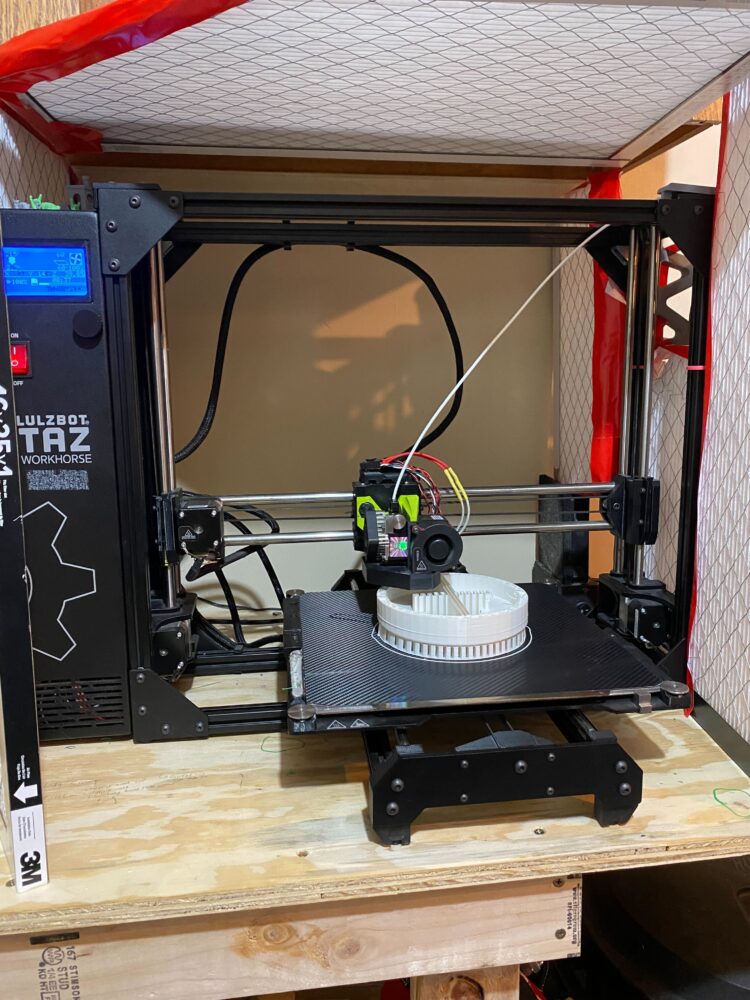
After this came the CAD modeling, which I used Solidworks to help me achieve. This was probably the stage that took the most brainpower and planning, but not just because Solidworks is a complicated tool, I realized I had a few technical challenges to overcome at this stage. First off was how I wanted to attach each module together, and planning the rotating, angled slide lock was actually quite the headache to get right, it took some tests. Next was designing the removable ceilings that I wanted each of the larger modules to have, but doing it in such a way that I am not just removing the ceiling; I still needed to retain that part to print. If you use Solidworks regularly you will know what I am referring to. Finally, was realizing that while my Lulzbot Workhorse is one of the larger print volumes for desktop 3D printers, at a cubic foot, my individual parts where still going to exceed that. I was able to slice the individual modules into multiple parts small enough for printing, and then connect them via quarter inch steel rods. I designed these rod holes on the cut parts in order to match up when I was all ready to put it together.
Then came the 3D printing, which I can thankfully say was not one of the more complicated parts thankfully. With the sheer size of this project, I knew I would be absolutely slaving this printer day and night, and it performed admirably, with only a few malfunctions. I mainly attribute this to the choice of filament, it is the most easy-printing and reliable filament I have found so far.
After printing the parts, I cleaned up each of them by removing the supports, clipping off any artifacts and sending them. What was the most important was sanding down the interfacing surfaces such that the interaction wasn’t too difficult, and it felt smooth and easy to connect the pieces.
After this step came painting. First I hit everything with a white primer coat using pray paint, as almost everything in this project is white. After the primer, I used hand brushing with acrylic to apply different detail colors, mostly using metal tones like black, silver and gold.
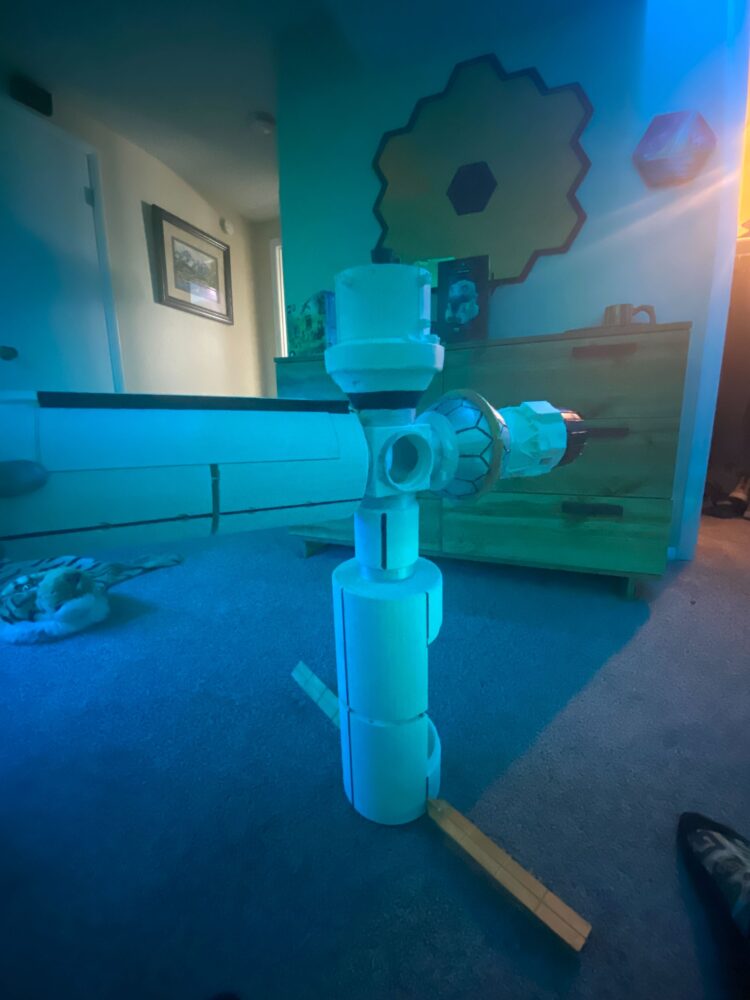
Second to last, I inserted the metal support rods and connected the individual pieces to make larger modules. This was that moment I had really been waiting for, the project finally came alive. I’m sure you can relate to working on a project for so long, seeing it in your head, but not really being satisfied with the in progress result, and then suddenly it clicks. Trust the process!
I am vary satisfied with this project, but by no means am I setting it down forever! I don’t think I will be able to complete the interior contents of the spacecraft like I wanted to with the time I have left, at least not in a way that looks good. I figured I could either rush it and be dissatisfied with the result, or I could redirect my effort to making the exterior awesome and saving interior for later. I really do plan to add a bunch of little furniture and details to each module to complete the vision, but I will not only need to print them, I will need to CAD model them as well.
I hope you enjoyed seeing the project and hope you get the chance to see it in person!
1 Comment. Leave new
Hey Barrett! The spaceship looks great! That spherical module looks neat I’m excited to see it at the expo.