
This second portion of my Final Project Report will discuss how I made my custom bicycle frame and what will become of it in the future. My previous post went into the details behind the design process and component selection for the frame. Now, I would like to discuss the manufacturing process that led me to completing a functional street trials bicycle frame. Here is a rough timeline of my work over the course of this semester.
January: Initial research into geometry specs and frame component selection
February: Creating a CAD model using selected frame materials with chosen geometry. I also ordered frame materials and steel tubing.
March: I began the manufacturing process by cutting, bending, and coping tubes to be jigged together.
April: At the beginning of April, I completed the manufacturing of the frame members and was able to finish welding the frame. Following welding, I coated the frame in linseed oil to protect it from rusting and give it a clear coat.
Manufacturing began with preparing the tubes used on the frame. Initially, I cut the tubes down to a length where they could be bent and mitered to fit on the frame. To bend the tubes I used 80mm bending dies to bend the chain and seat stays for the rear of the frame to allow for rear tire and crank clearance. These consisted of several compound bends to properly fit around these components. Following bending the tubes, I moved on to mitering the tubes so that they would properly interface with their mating frame members and components. I used a vertical and horizontal mill with angle adjust vices to miter the tubes. Each of the tubes was mitered using a drill bit that matched the diameter of the frame member that the part interfaced with. An adjustable vice was necessary because many of the frame members were joined at various angles. At that point, once the proper angle was selected for the miter, it was possible to plunge the tool into the material to make a cut where I was then able to fit the tubes to the frame jigging system.
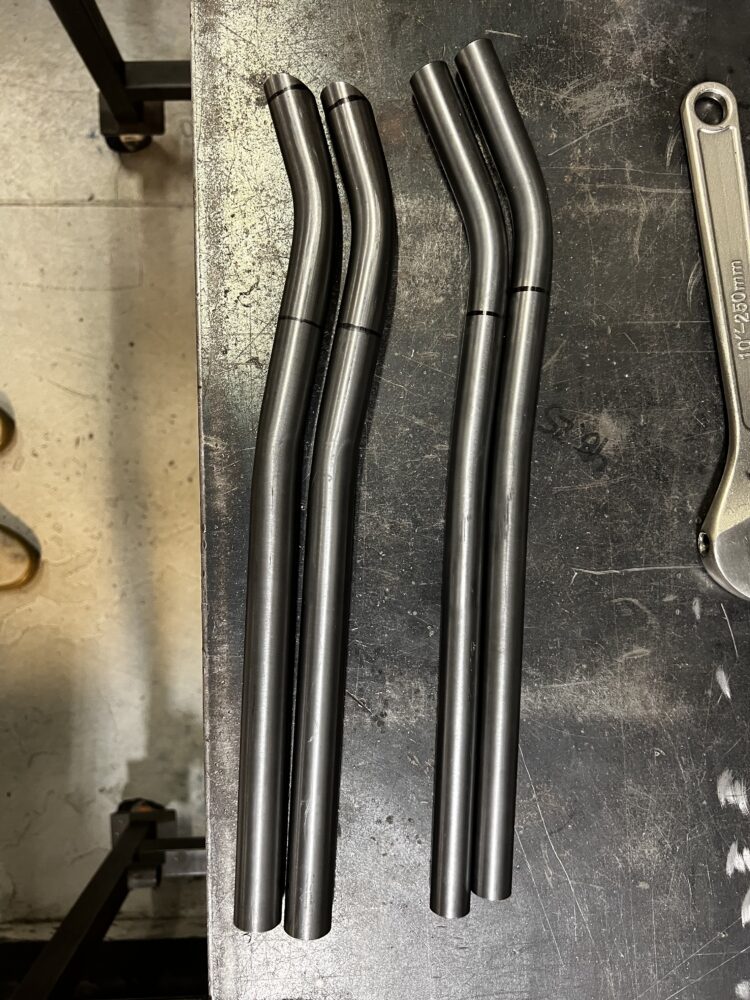
Bent chain and seat stays
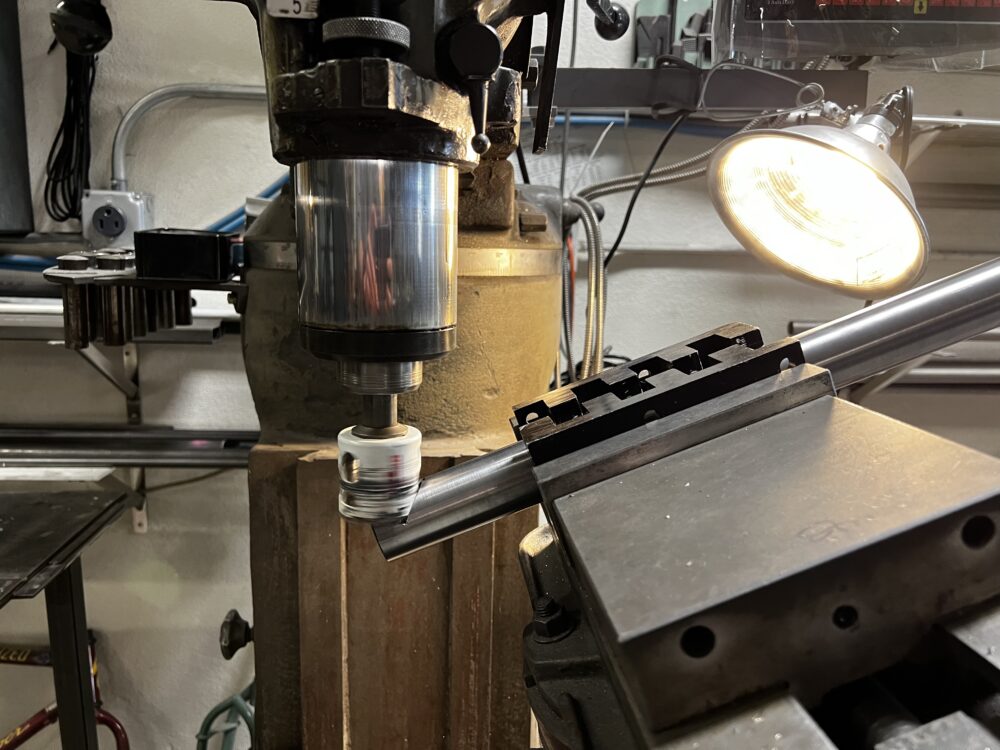
Mitering the downtube of the frame
Perhaps the most critical component of the manufacturing process for the frame was the ability to use a frame jigging system. Frame jigs hold the tubes, rear dropouts, bottom bracket, and head tube in place to preserve the desired geometry of the frame ahead of welding it together. These jigs can move frame components around to adjust for the desired geometry and hold them still during frame tacking. After tacking the frame I was able to remove the frame from the jigs to then finish weld all of the joints.
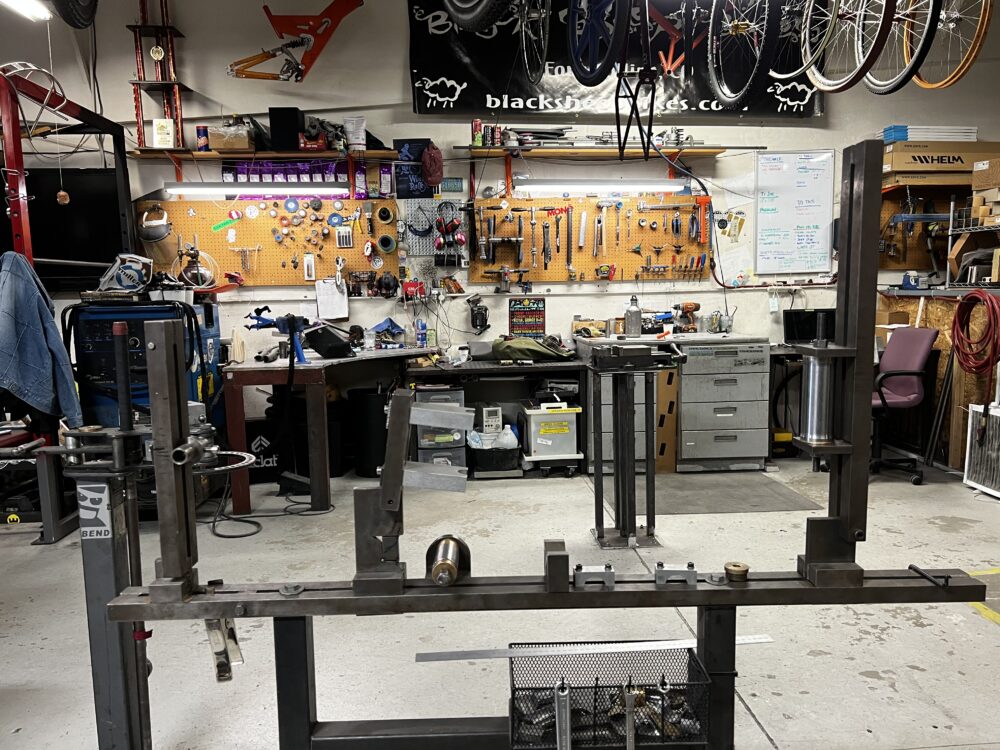
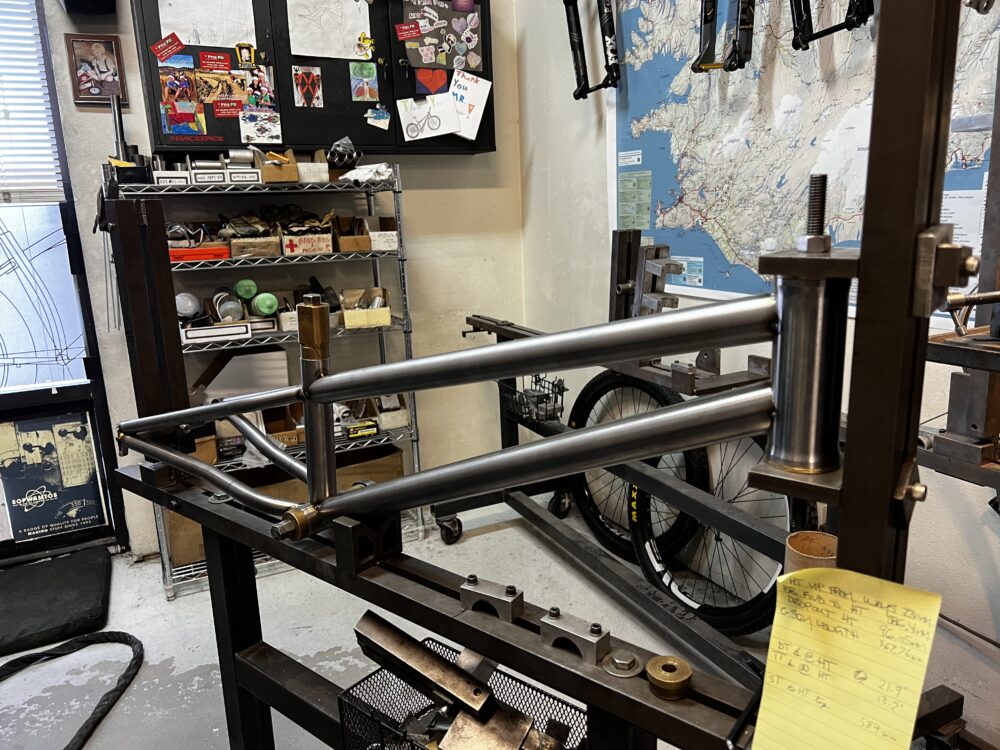
Frame jig system with headtube, bottom bracket, and rear dropouts
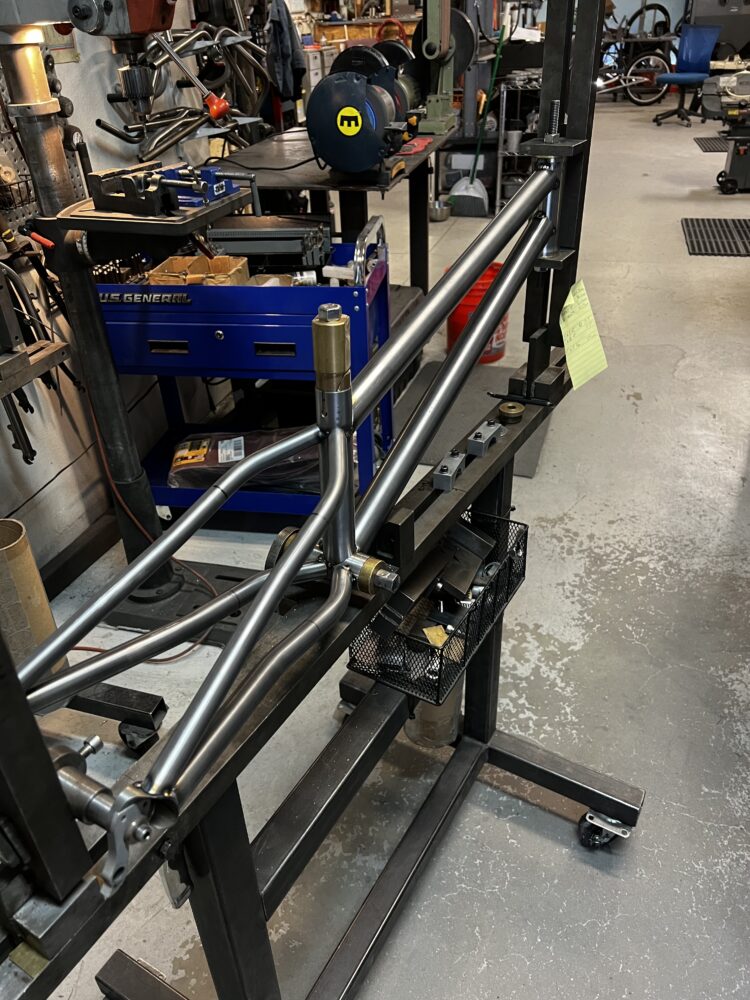
Tack welded frame in the frame jigs with heat sinks around the headtube, bottom bracket, and seat tube
To weld the frame, I used a TIG welder to complete the frame. TIG welding is beneficial for this application because it has the capability to carefully adjust how much heat is applied to the metal which can help when welding the thin-walled material I used. In total, I spent about 6 hours finish welding the frame in the Idea Forge welding room and at Black Sheep Bicycles. This time was mostly spent welding the tubing together but I also needed to weld on head tube gussets, brake line routing, and the rear brake caliper mounts. I got the head tube gussets cut using the waterjet in the Idea Forge machine shop to fit the angles between the headtube, top tube, and down tube.
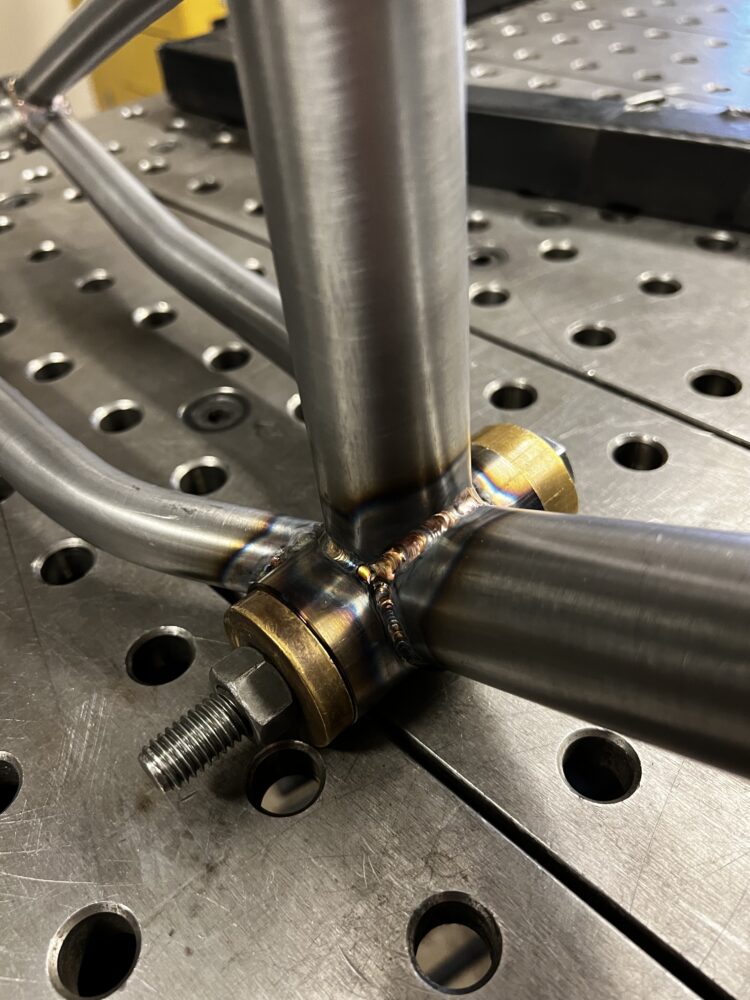
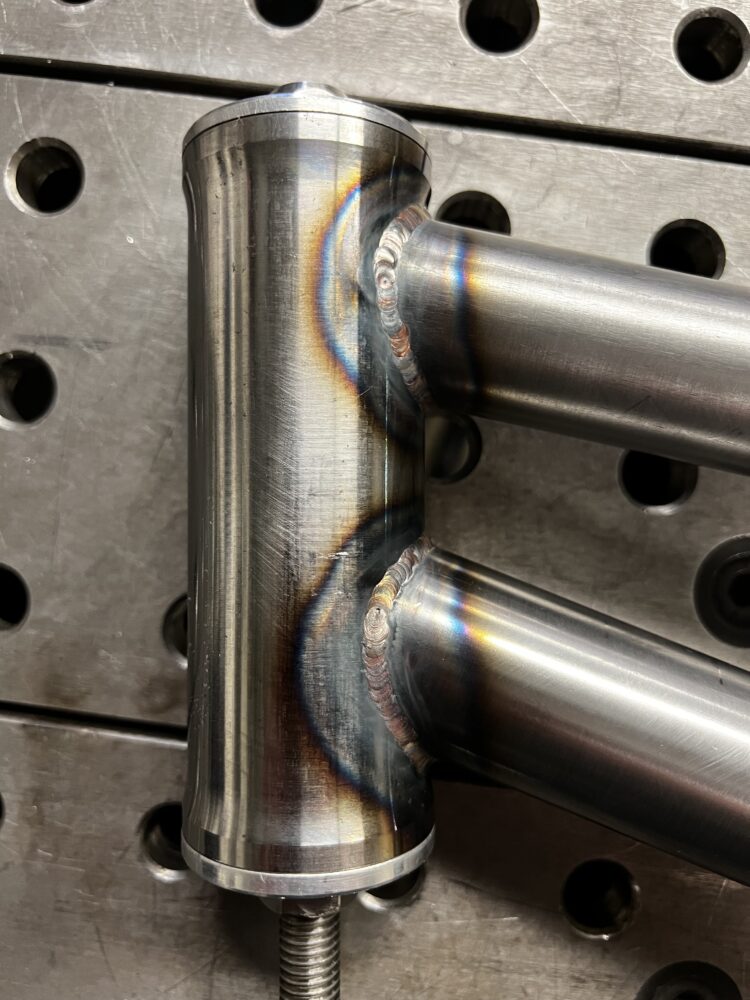
Finish welded bottom bracket with heat sink
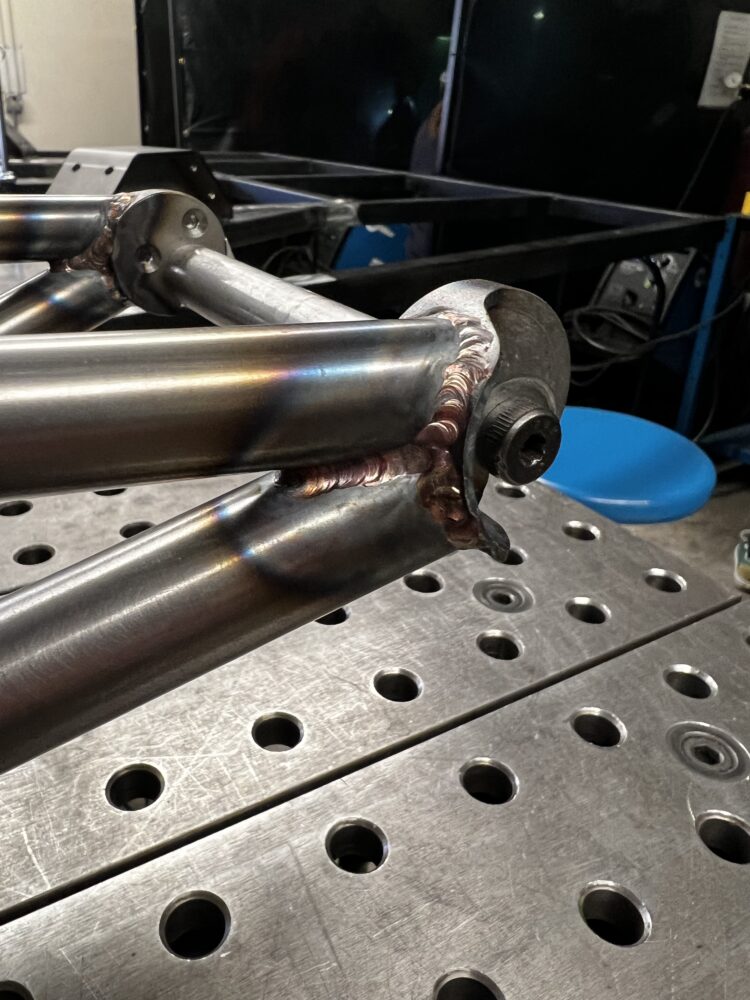
Finish welded rear dropouts
Finish welded head tube before the addition of head tube gussets
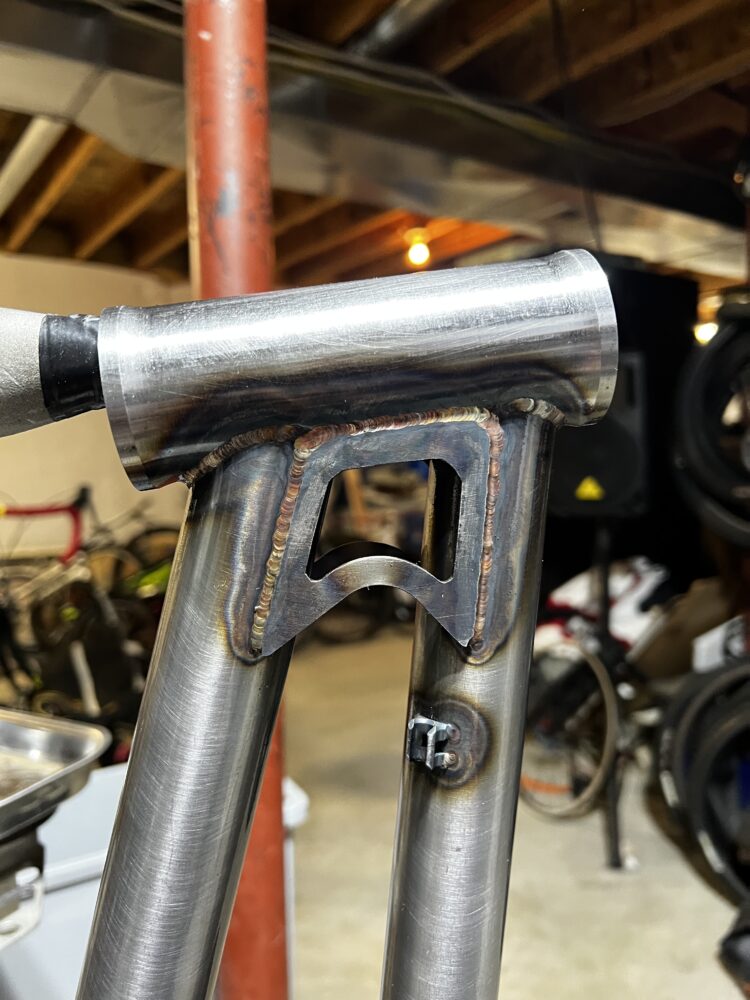
Fully welded head tube gussets
After welding the frame, there were several steps that I still needed to take before coating the frame in linseed oil. I proceeded to face both my bottom bracket shell and my headtube. These are both high-tolerance areas where the surfaces need to be flat in order to accommodate a press-fit headset and a threaded bottom bracket. This was fairly simple using a facing tool that used rotary teeth to shave away the top layer of metal on the frame to make sure that these areas were flat and even for the accompanying parts.
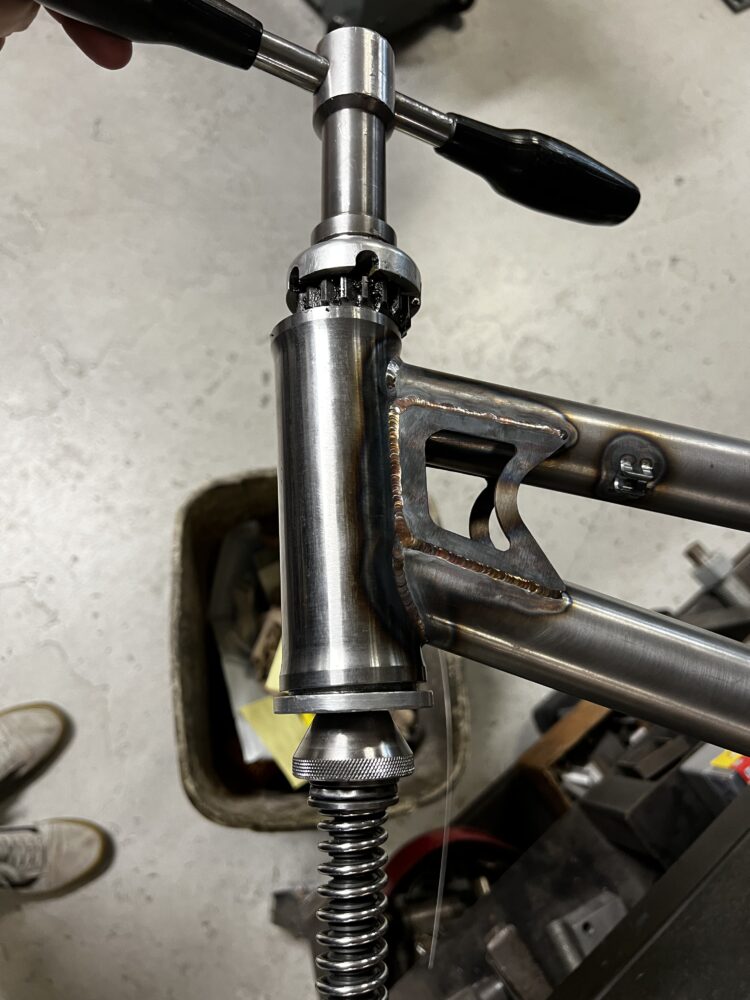
Head tube facing tool
Finally, it was time to clear-coat the frame and protect it from rust so that it would be ready to ride! Initially, I thought I would need to powder coat the frame or paint it to prevent it from rust. However, James at Black Sheep, told me that I could use linseed oil instead to create a clear barrier to prevent rusting. This proved to be the simplest and cheapest option for me. Furthermore, the linseed oil can be removed and reapplied easily if rust begins to show or if I do choose to paint it in the future. I was pleased with the results as the coating went on clear and even added more shine to the frame. I thought that this clear coat, showing the raw metal, would fit well into my industrial aesthetic.
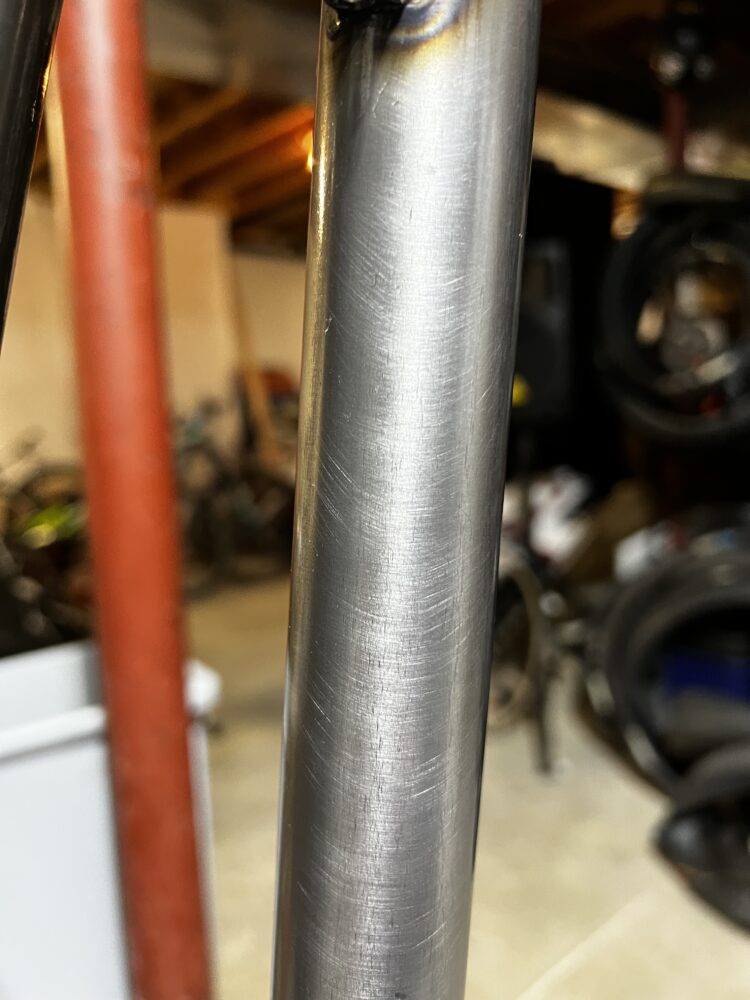
Steel frame member after adding linseed oil
That concluded my work on my frame and I am extremely pleased with my results. Now, I am waiting for parts to arrive to have the bike fully built and hopefully ready to be shown at Expo! In the future, I may try to paint the frame or brush off the heat-affected zones of the welds to make the frame one uniform color. We shall see. One thing is for sure: I want to use this thing and put it through its paces to see how good of a welder I really am!

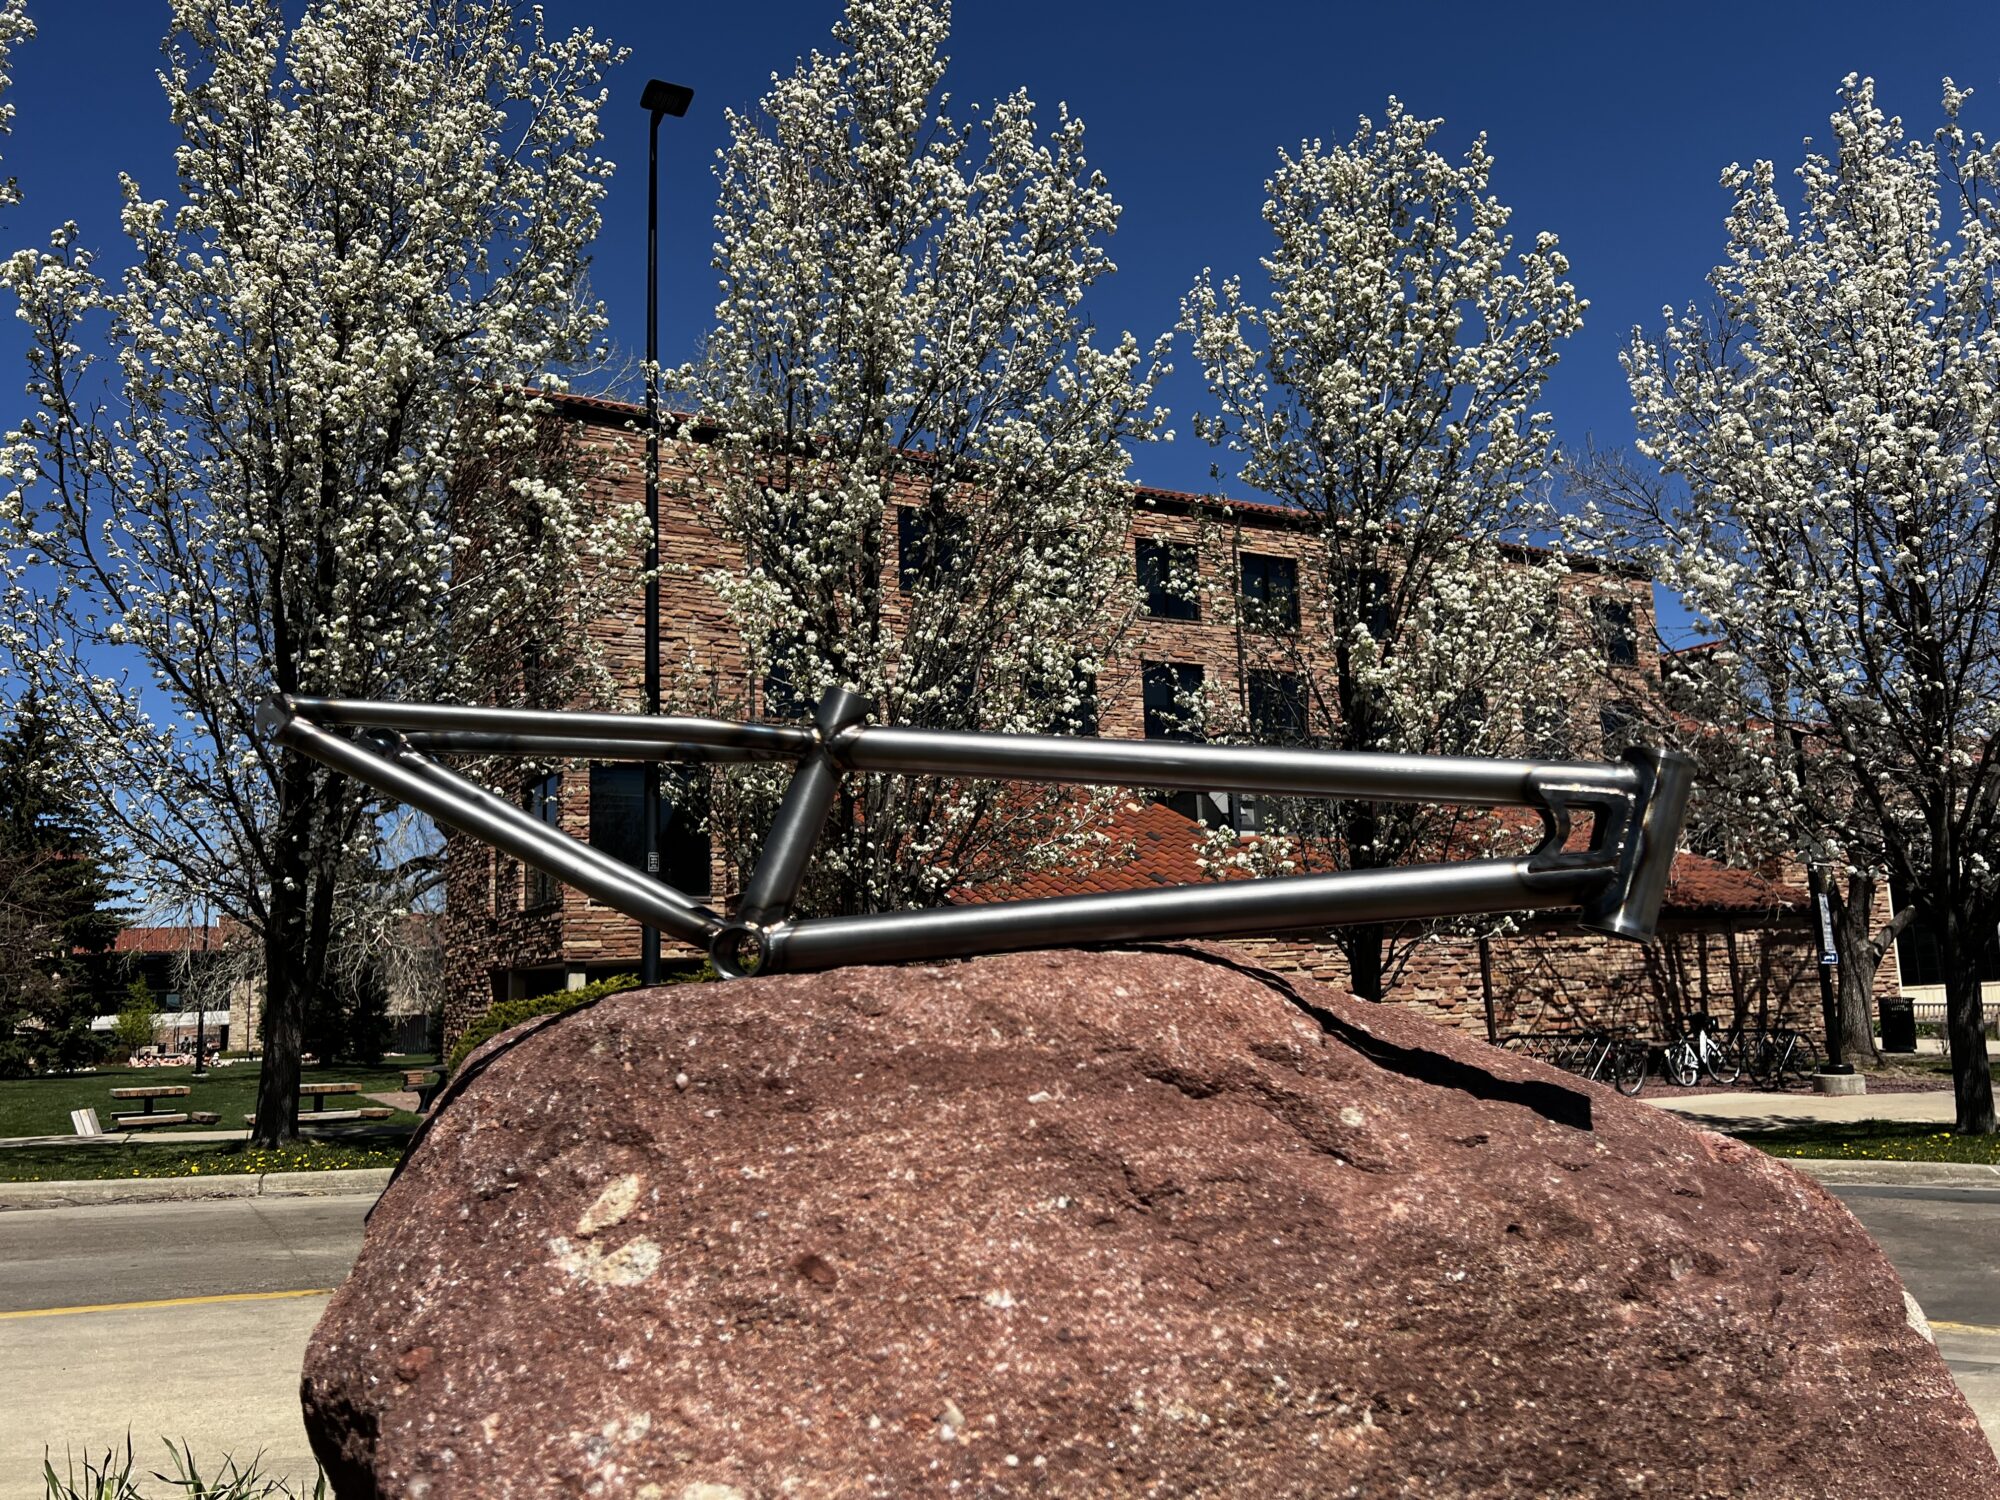
The finished frame!
Big thanks to Professor Knutsen for helping me with this independent study, James Bleakley for sharing his time, resources, and knowledge with me, and Professor Hertzberg for letting me document this process. I hope you all enjoy my project!
For all of you bike nerds, here are some of the key geometry specs:
Head Tube Angle: 75 degrees
Bottom Bracket Height: +30 mm
Chainstay Length: 360 mm
Reach: 475 mm
4 Comments. Leave new
Hi Ian, this is awesome! I heard you talk about it a little bit earlier in the year and I’m glad to see it was able to be completed! I’m curious, do you have much welding experience beyond this project and component design? This seems like a pretty advanced project and looks very well done. Additionally, if you do end up painting it, what color(s) would it be? Awesome job and can’t wait to see it at expo!
Hi Ian,
I now have about 100 hours of TIG welding experience with steel from welding on the Formula SAE team on campus. I would probably do a black or red frame if I were to paint it.
This bike frame looks awesome! I haven’t spent too much time with trial bikes but it was cool to see the geometry and how the bike varies. Your welds look super clean and I hope the bike comes together well, looks great!
Thank you, Nicholas!