
Hello everyone, this is the final post of the semester and will cover the “how” of how I made my Minimalist Catan Board. First off I made a timeline to explain the general order in which the Board was created. You can see that it all started with an initial CAD sketch and ended with the finished product.

CAD Design:
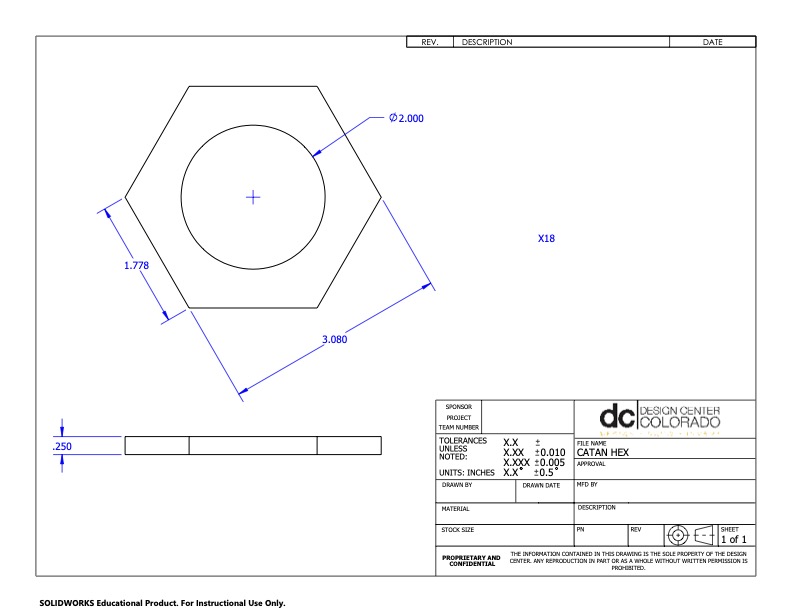
When I switched to this project from my earlier idea of a wireless charging station I wanted to make sure that it was possible and would work well so I decided to CAD up the entire project before moving forward with it. I used my calipers and ruler to get the exact dimensions of the original game and mocked it all up in Solidworks. This was an important step as these CAD files were necessary for the water cutting.

Purchasing Materials:
With a good CAD model and an idea of the amount of material needed I moved on to purchasing the required materials. I ordered 3 sheets of quarter inch aluminum for the raw material to be cut. I also ordered materials for the epoxy process such as Micah powders, Caulk, Tyvek paper, and dixie cups.

Tolerancing:
With the CAD and materials complete I just needed to finalize the design so that Chase in the machine shop would let me Water-jet the parts. This was an area where I wasn’t completely confident. I had dimensioned my parts with a very minimal tolerance of around 5 thou so that there would be minimal gaps between the hexes. Chase didn’t like these tolerances because the water jet had been unreliable lately so he recommended pushing the tolerances up to 20 thou per part or 40 thou at the borders. Chase also refused to use the material I had bought and offered 1/8th inch aluminum as a material trade. With all of the changes made I created a .zip file with the CAD files, .dxf files and drawings for the manufacturing of the parts.
Manufacturing:
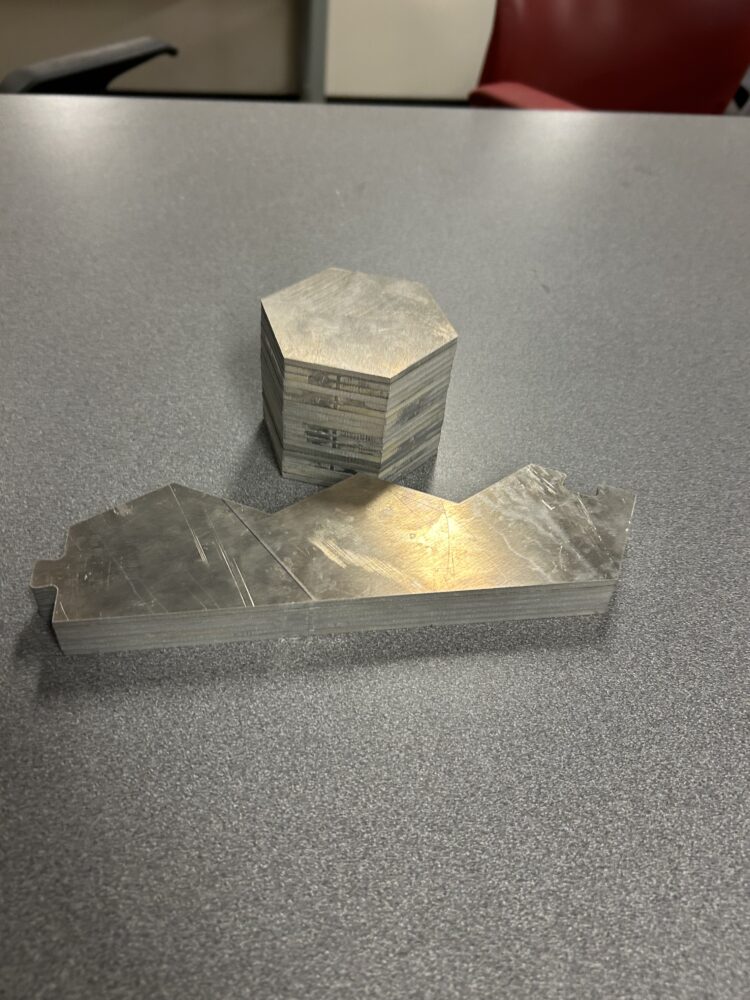
I was expecting to operate the water jet as I had done in my internship the previous summer but to my surprise Chase had the operation run and complete by the time I came back the next day. The aluminum that the shop traded me for was not up to my standards for a minimalist aesthetic so I knew I would have a lot of work to do. Apart from the Garnett rash on parts of the aluminum there were a few massive gashes that would later need to be sanded down and out.

De-burring:
The program that Chase coded made it so the pieces would be held on by two tabs and could be easily twisted out of the stencil. This was great for an easy removal but left some massive burrs on the edges that would stop the pieces from fitting together. I spent a few hours with a file and Dremmel attacking these burs until the pieces sat flat against one another.
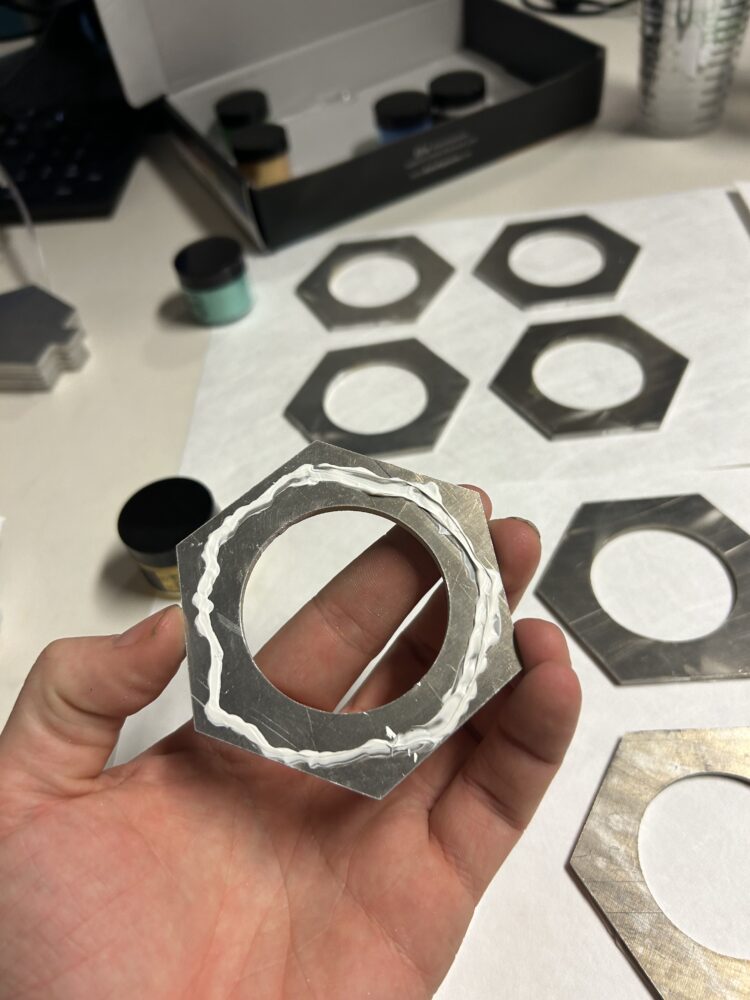
Epoxy Setup:
With the pieces manufactured and demurred I was ready to prepare for the epoxy stage. This meant preparing a work area and setting up the amount and colors of epoxy I would use. I ended up spitting the hexes into 5 pages of my paper and using caulk to secure them down. I also decided upon a color theme and artistic direction.
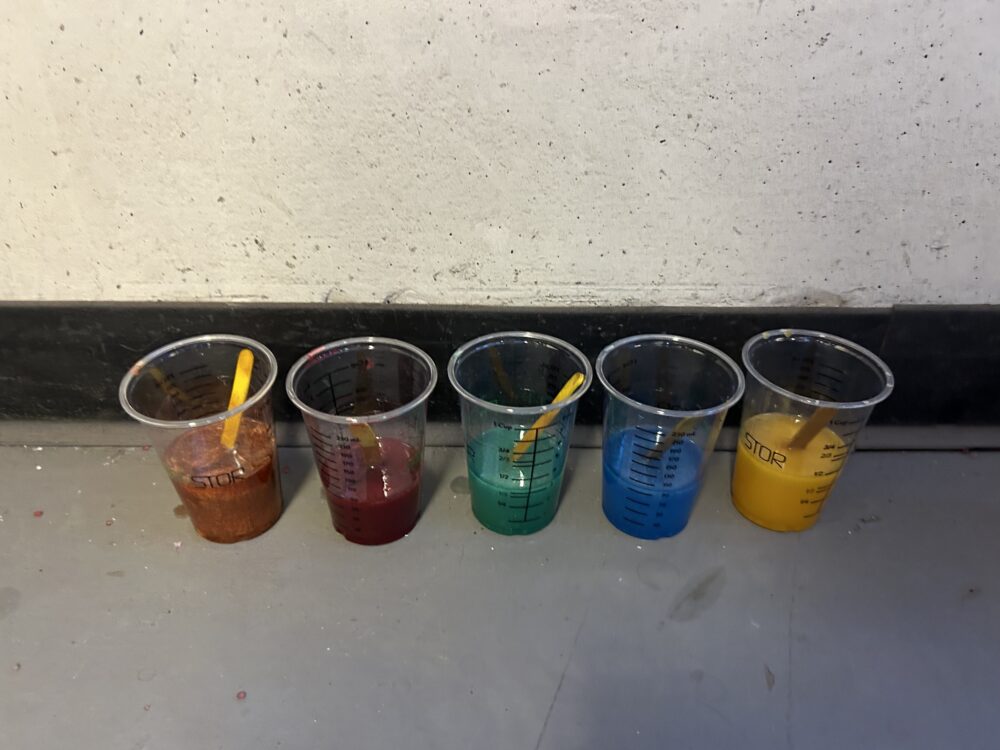
Epoxy Pour:
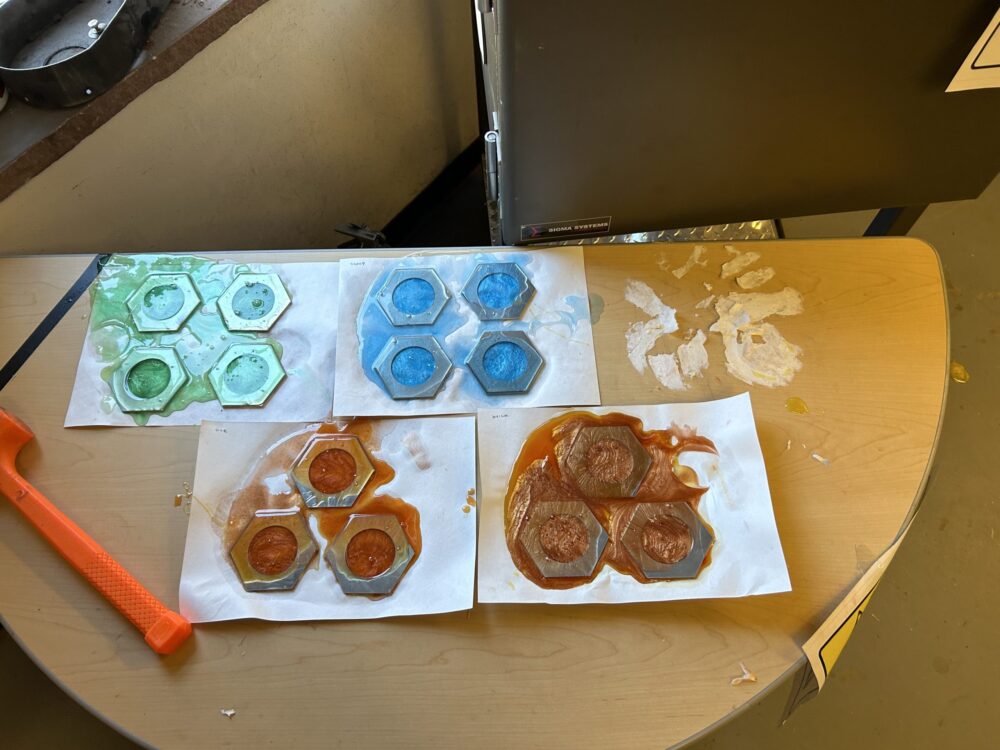
I got all of my materials and pieces set up in the finishing room and did some quick research into how to mix and cure epoxy resin. Pat in the electronics shop helped me a lot with the setup and even provided the two part resin for the project. With all set up I put on my PPE and poured the 5 colors into the molds. All seemed well until I came back 24 hours later to find that the paper lost its waterproof properties and the epoxy had leaked out right through it. I decided to refill the pieces with the now viscous resin to salvage the project.

Epoxy Removal:
Another 24 hours later and the epoxy had fully cured. This meant I now had to remove the hardened resin from the table and clean up each individual Hex. This was difficult as the paper had dried in the puddle of epoxy and was practically glued to the table. I ended up using a hammer and chisel to remove the paper and a tin snip to cut out the hexes.
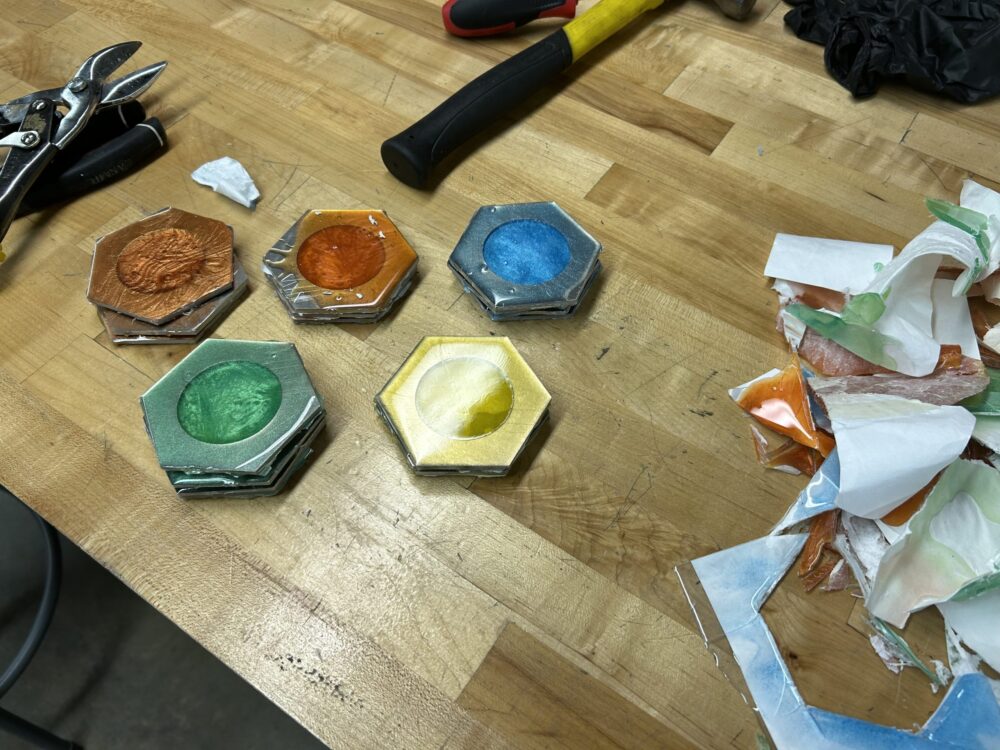
Sanding:
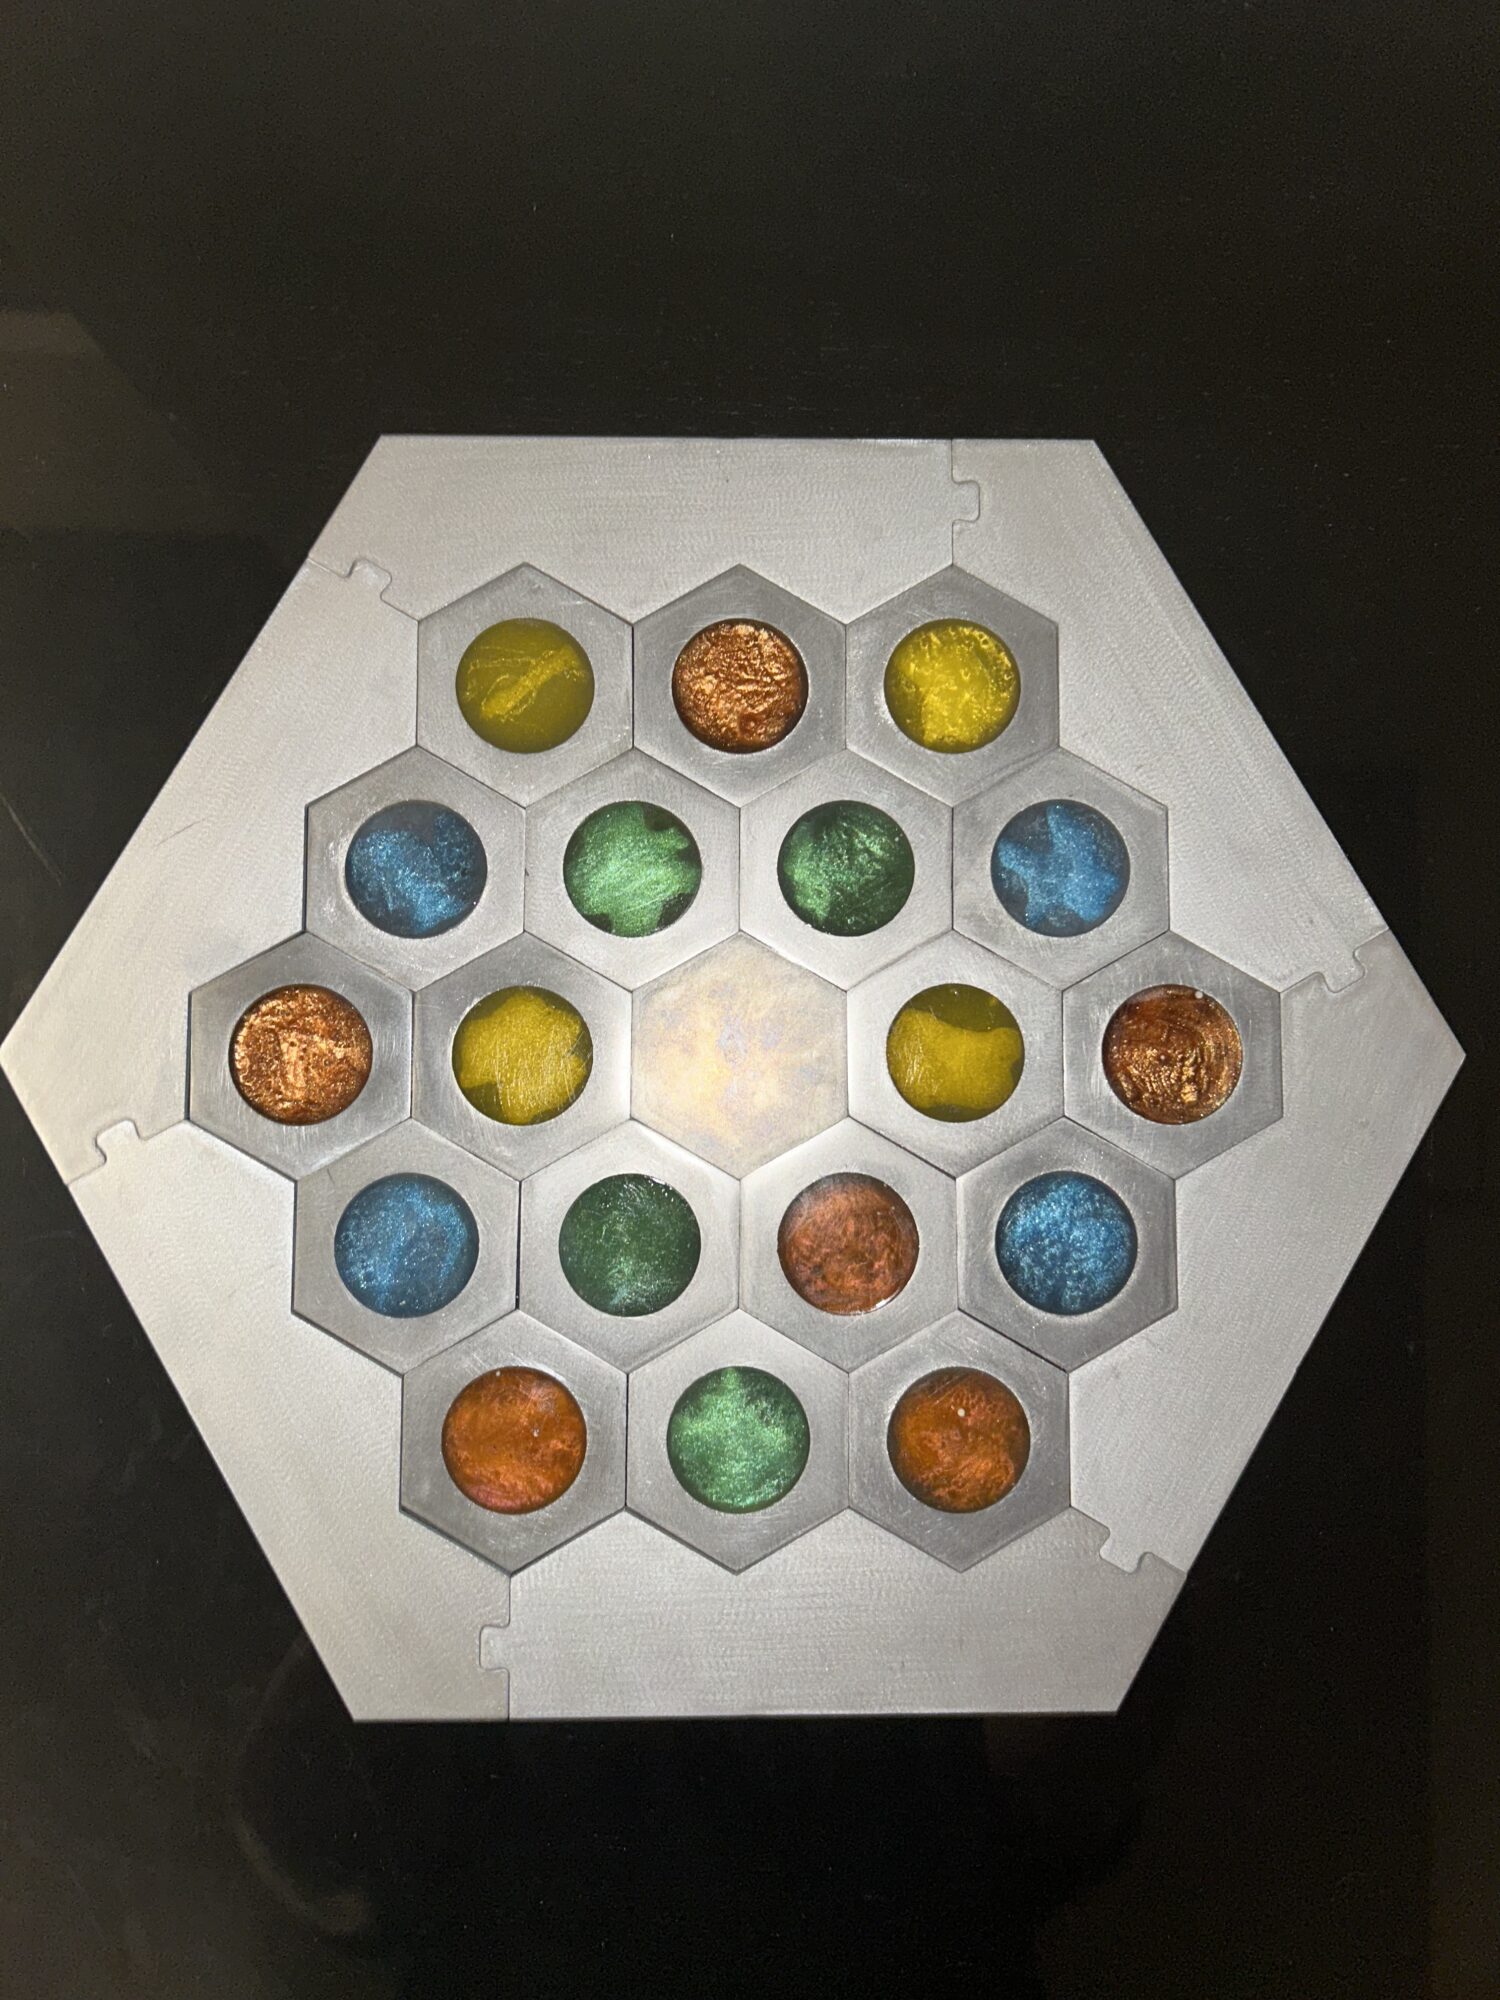
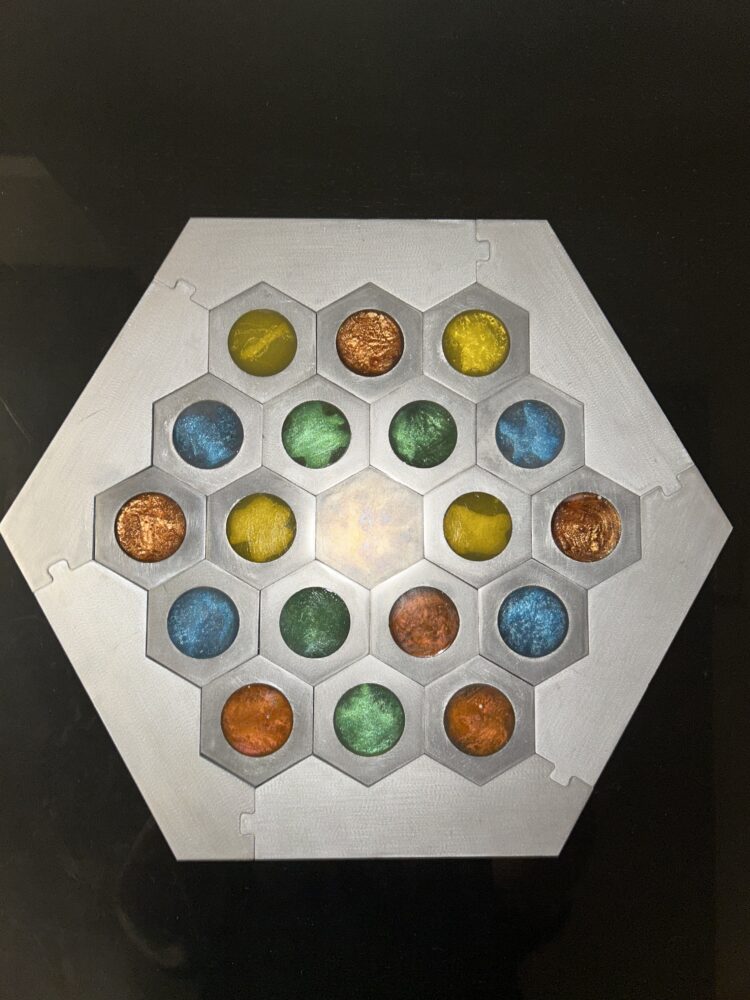
This step was by far the most difficult and time consuming. Because of the botched pour there was a massive amount of cured epoxy on both sides of the hexes. I asked Josh in the woodworking shop how to go about sanding and he set me up with a vibrating sander and 8 rolls of sandpaper grits. He guessed that it would take a good 15 hours to get a mirror like finish and he was about right. I spent over a week sanding, starting with the highest grit to remove the epoxy and then increasing the grit over and over to smooth the surface. After a lot of time and hard work however I was left with flush hexes of epoxy and brushed aluminium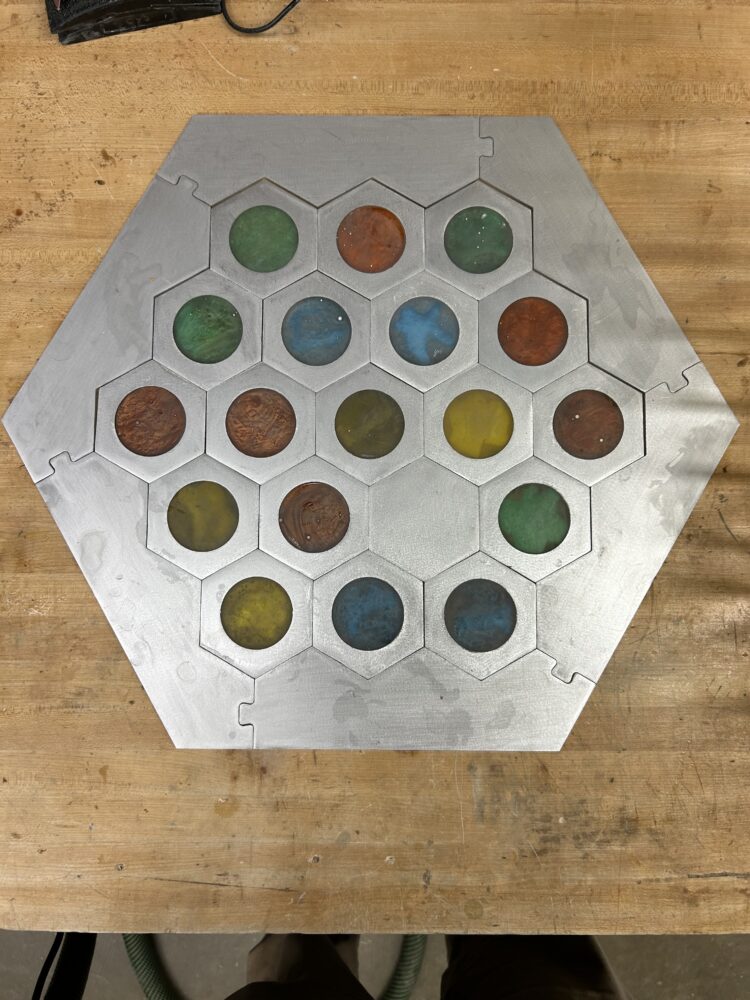 .
.
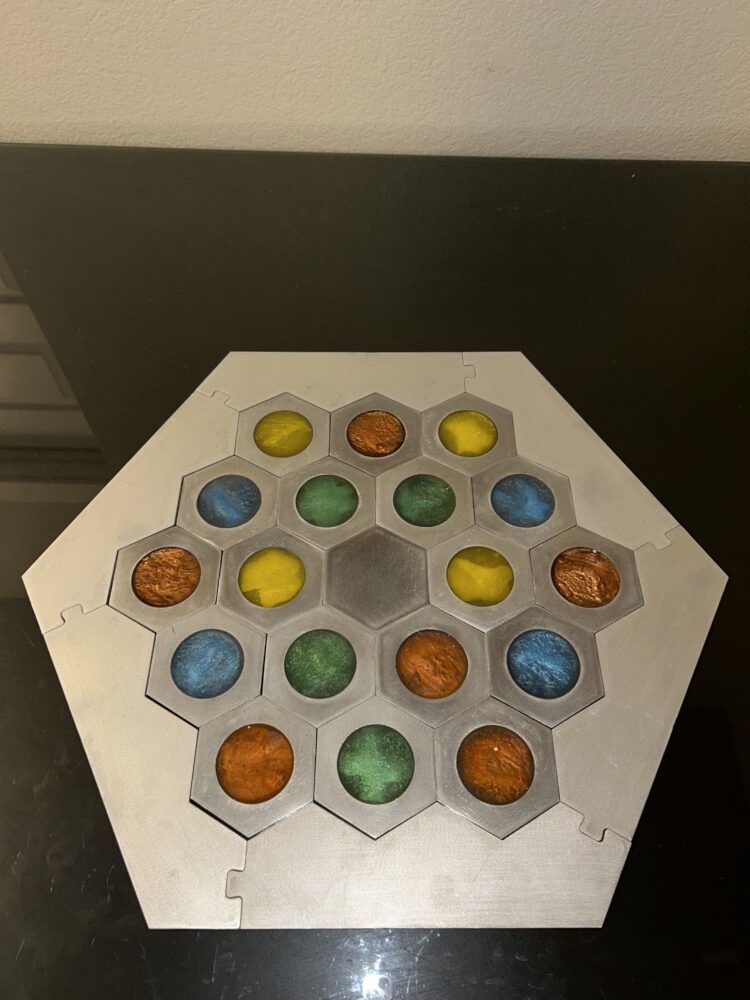
Finish:
To finish off the project I washed all of the dust and grit off the pieces and applied a ceramic clear coat to contain the shine of the epoxy. I also made sure ti sand the edge pieces in a uniform brushed aluminum pattern to really hammer in the minimalist aesthetic.
Conclusion:
Overall I am happy with the end results. I think that after the chaos of the epoxy pour I was able to recover to a point where it still feels like a minimalist art piece. There are many imperfections such as the paper stuck in the bottom of some of the pieces and sloppy tolerances but in person the epoxy shines bright. If I had a redo I would add more Micah powder for more vibrant and less translucent pieces and stay with my original tolerances.
Video Link:
2 Comments. Leave new
Epoxy is a very difficult adhesive to work with and even more so when you care that it looks good! I am really impressed with the final result, especially how well the pieces fit together. I wonder, do you have any plans to etch in ‘port’ graphics into the side pieces or create small number tiles?
Fin – even with all the epoxy troubles, the final product looks fantastic. I like how the texture and depth of the epoxy contrast with the more simple look of the aluminum. Is this the end of your project or do you plan to do any more finishing touches/tweaks?