
Materials
For the project, I sourced most of my materials from Lowe’s and Amazon. Because I was going to be building my project at home, I was able to save some costs when using my stepdad’s tools and leftover materials from our home projects. The bulk of the costs came from the wood panels.
| Cost Breakdown | ||
| Materials | Supplier | Cost |
| 11 1” x 12” x 36” Panels | Lowe’s | $98.78 |
| Wood Glue | Lowe’s | $8.48 |
| Bracket Set | Amazon | $11.98 |
| Wooden Dowels | Amazon | $6.99 |
| Twine | Amazon | $4.99 |
| Eye Pins | Amazon | $5.79 |
| $137.02 | ||
Step 1: Outline and Cut
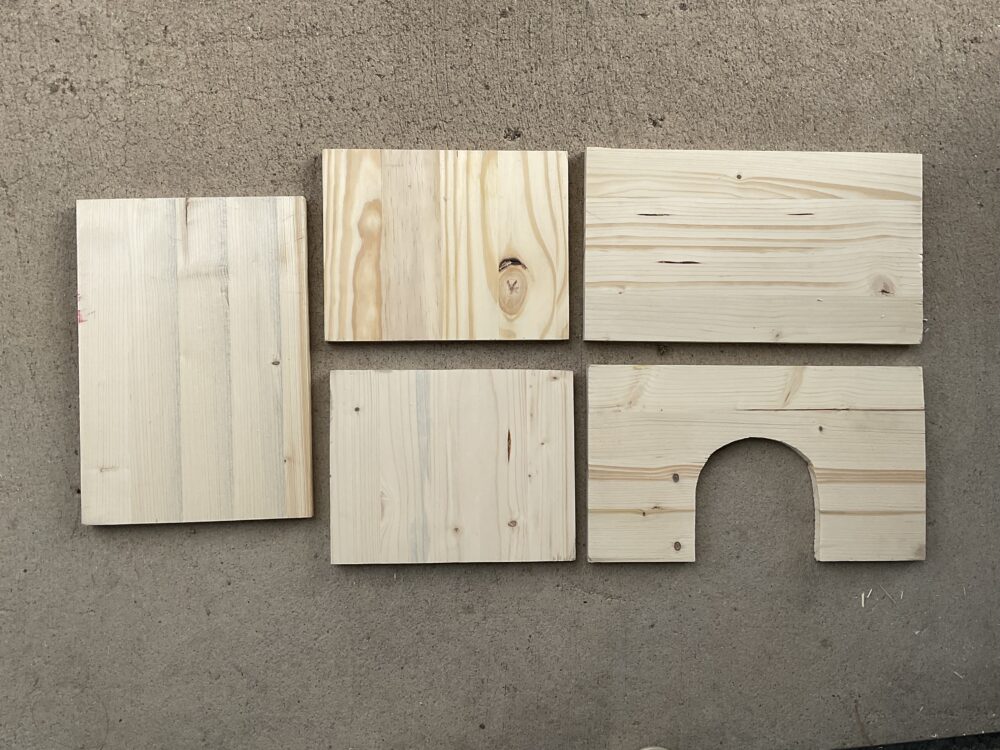
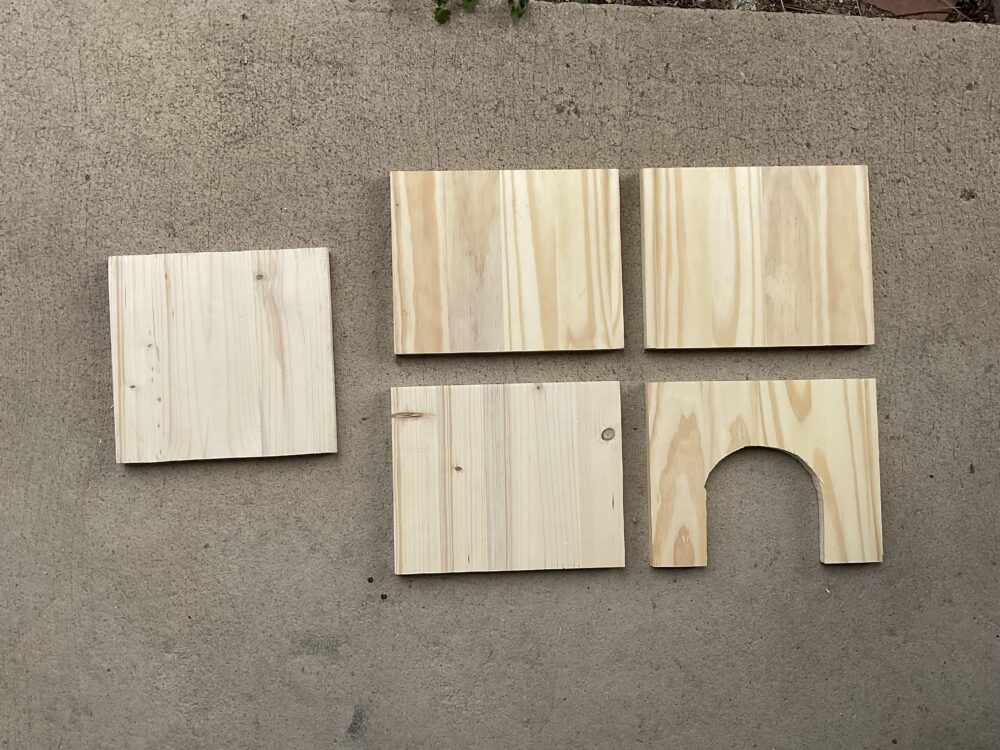
In order to find out how many wood panels I would need to use and buy, I laid out all the pieces in my CAD model to lay flat on 1 by 3 foot sheets. I then used this layout to then trace out all the cuts on each of the panels with a red sharpie.
Next came time to cut each of the sections. During this part of the project, I got a lot of help from my stepdad. We were using his tools at home, and as an independent contractor, he did not use a lot of or any safety guards on his equipment. As a result, he had to walk me through using his equipment and also helped me cut a lot of tricker pieces.
The wood I purchased was pretty soft, and so there was some splitting. I tried my best to sand down the rough surfaces or fix parts with wood glue. It was not very clean looking, but overall I was still happy.
Major Mistake: Wrong Material Thickness
When I was modeling my design, I was using a material thickness of 1 inch. However, when it came time to buy the wood panels from Lowe’s, the actual thickness was closer to of an inch.
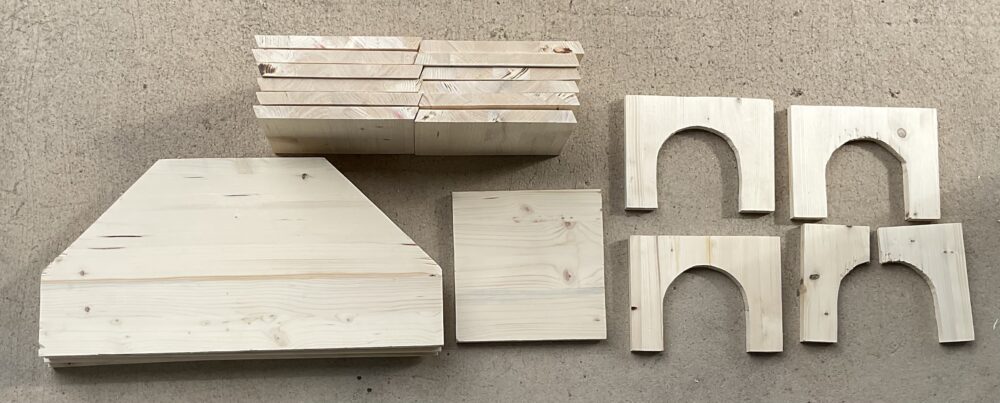
For most of my designs, this caused some excess materials or gapping, which was not a major issue for me. However, the biggest issue was that the design for the spire was not right, and I had only discovered this after the panels had all been cut.
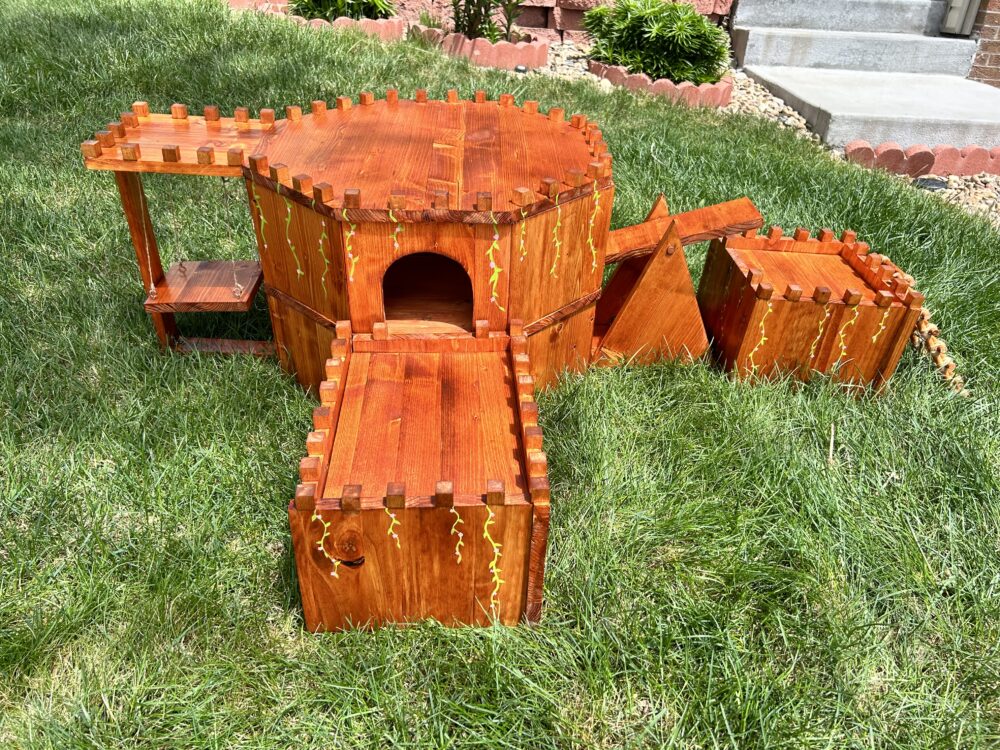
Therefore, I scrapped the spire idea and went with a flat roof. I repurposed two of the spire panels to create a teeter-totter bridge (a suggestion that was given to me to replace a static bridge during the project progress presentation).
Step 2: Assembly
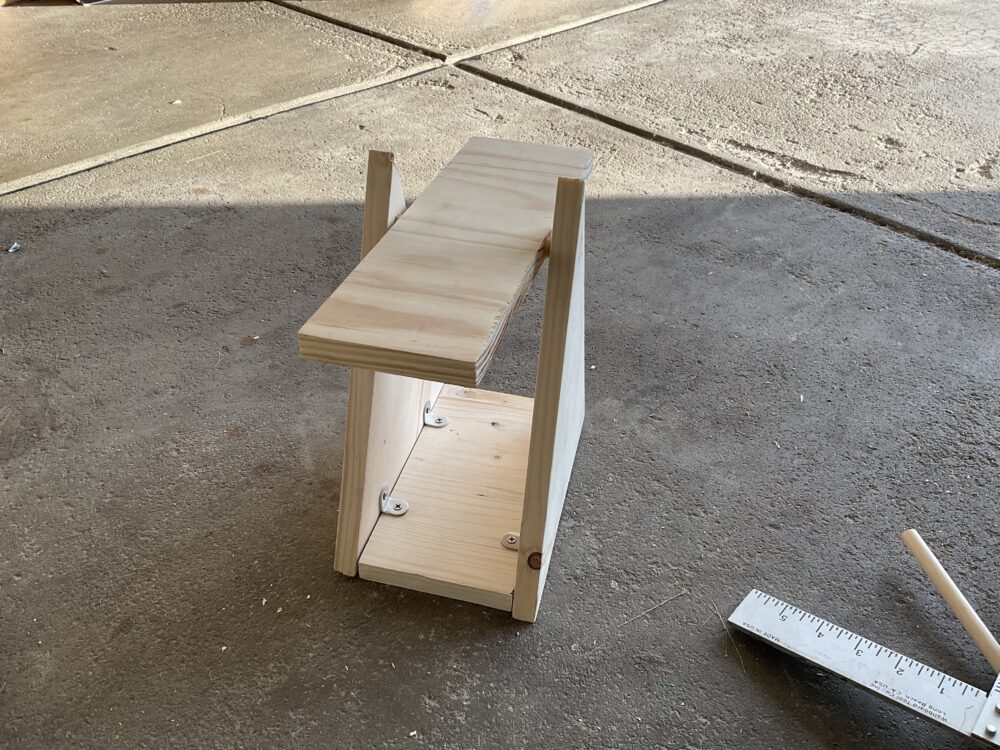
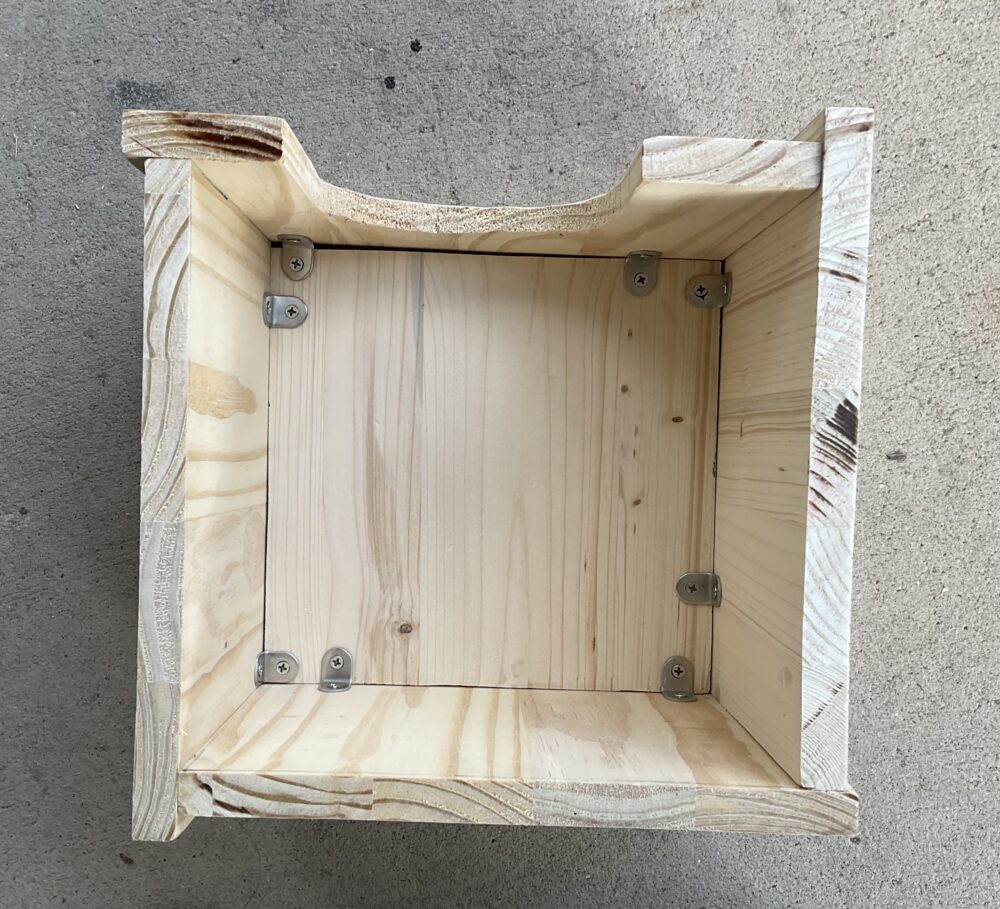
I originally wanted to assemble my pieces with wood glue, but after realizing that I would need a lot of clamps, and at odd angles for the watchtower, it would be easier and more stable to use L-brackets.
I first aligned the pieces to approximately how I wanted them, and marked the spots where I needed to drill with a sharpie. After drilling out holes, I would then install everything with screws and adjust the fit of the panels. An unexpected benefit to this method was that I could adjust the position where I would place the brackets and how tight the screws were to adjust the fit of the panels, and reduce some gaps.
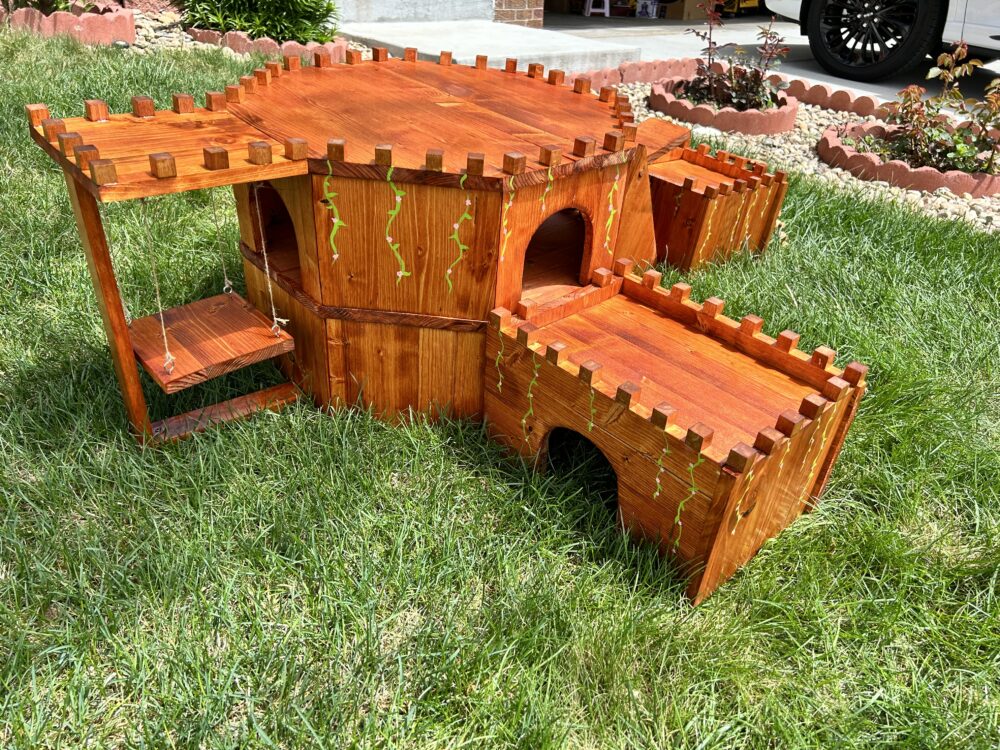
Finally, I purchased some wooden cubes and glues them to the edge to create railings but also add further to the castle shape.

Size Check
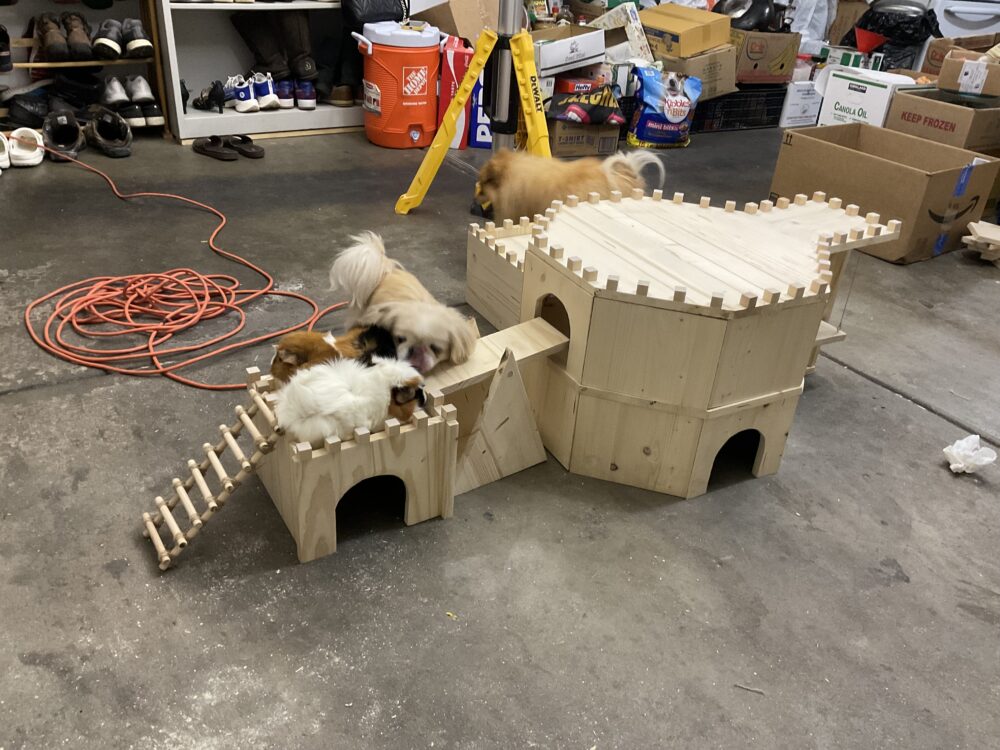
Upon seeing my completed build, my family raised concerns about whether the guinea pigs would fit or not. I originally had the castle much larger, but reduced the size to fit the available woodstock available at hardware stores. However, my guinea pigs are pretty large, so I became concerned that I had made it too small.
Thankfully, they were able to fit in the hideaways, but only one of the guinea pigs could fit on the swing or on the barbican comfortably.
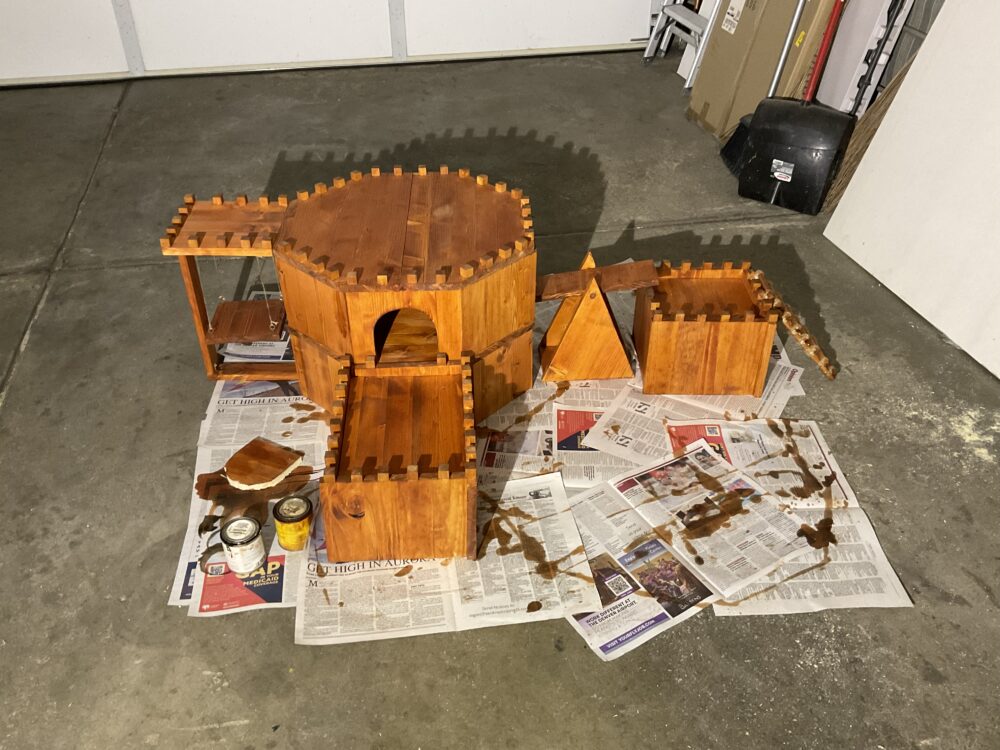
Step 3: Stain Wood
To achieve the castle aesthetic, I wanted to paint stonework on the sides. However, the assembly process was much more tedious than anticipated, so I ran out of time. My brother suggested that I stain the wood, as it would bring in that more natural aesthetic I originally wanted and that the forms and shape of the design was enough to tie to that castle look.
I mixed a dark oak and cherry red color stain that my family used to refurbish our kitchen table, and was able to achieve a deep, reddish brown.
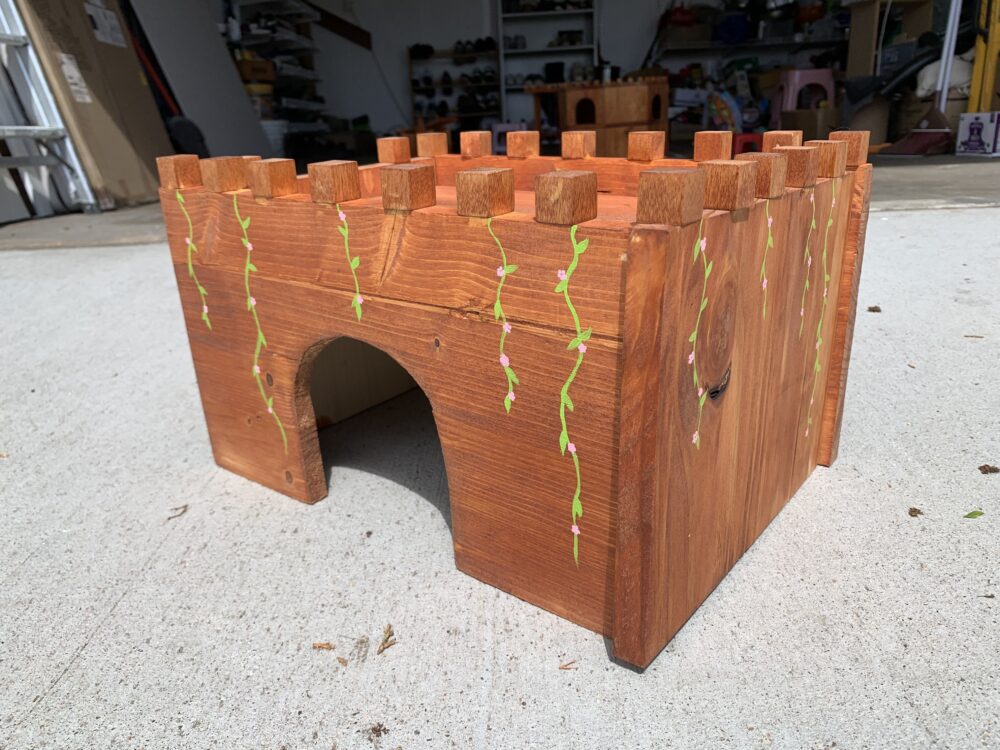
Step 4: Paint and Finish
After letting the stain air-dry for a week, I came back to add the flower and vine details. This was hand painted with some acrylic paint I had laying around. Finally, I coated the exterior surface with a waterproofing material for wood, the same coating that was used for my family’s kitchen table. I thought this created a really nice shine and made the stain look even nicer.
Future Improvements
The first improvement would be to find a way to make these projects a lot cheaper. Because I have 8 pets total, I would like to begin DIYing more toys and furniture for them. However, my total cost for supplies was $137, and it was also very time-consuming. Reducing the cost would make the effort more worthwhile. I am thinking of asking my stepdad for save scrap wood for me in the future or finding cheaper, local hardware stores to source wood from.
Second, while the waterproof coating created a nice shine, the surface is almost stubbly and quite rough. I am also concerned about the chemical in the coating. I purchased a water-based, non-toxic outdoor Mod-Podge that I am planning to do a second-coat with as a barrier from waterproof wood coating.
Lastly, I want to install a few extra eye hooks to hang chew toys for. If I provide things that are intended for chewing, I hope this will deter my guinea pigs from chewing their castle. This will not only extend the longevity of this castle, but also prevent them from getting sick.
Final Thoughts
Although there were a lot of changes during the duration of this project, I think it turned out for the better. Although I did not end up including a spire, the roof can serve as a third floor if I can include another climbing component. It also led me to shift from a static to dynamic bridge design, which I hope my guinea pigs find more engaging. I am also glad I decided to stain the wood and the wood grain patterns are still exposed.
1 Comment. Leave new
Hi Helen, I love your final project, the fact you made a castle for your guineapigs is such a great idea! I really like the stain you used which really adds to your overall aesthetic. I’m sure your guineapigs love running around your final project.